Kenwood KR-V8090 Instruction Manual
Audio video surround receiver kr-v9090 kr-v8090 instruction manual
Hide thumbs
Also See for KR-V8090:
- Service manual (5 pages) ,
- Service manual (48 pages) ,
- Service manual (48 pages)
Table of Contents
Advertisement
Quick Links
AUDIO VIDEO SURROUND RECEIVER
KR-V9090
KR-V8090
INSTRUCTION MANUAL
KENWOOD CORPORATION
This manual contains instructions for two models.
Model availability and features (functions) may differ depending on country and sales
area.
About the supplied remote control . . .
Compared to standard remote controls, the remote control supplied with this receiver has several
operation modes. These modes enable the remote control to control other audio/video components. In
order to effectively use the remote control it is important to read the operating instructions and obtain
a proper understanding of the remote control and how to switch its operation modes (etc.).
Using the remote control without completely understanding its design and how to switch the operation
modes may result in incorrect operations.
B60-3032-10 CH (T) WS
98/12 11 10 9 8 7 6 5 4 3 2 1 97/12 11 10 9 8 7 6 5 4 3
KR-V9090/8090 (En/T)
1
Advertisement
Table of Contents

Related Manuals for Kenwood KR-V8090


Summary of Contents for Kenwood KR-V8090
- Page 1 AUDIO VIDEO SURROUND RECEIVER KR-V9090 KR-V8090 INSTRUCTION MANUAL KENWOOD CORPORATION This manual contains instructions for two models. Model availability and features (functions) may differ depending on country and sales area. About the supplied remote control . . . Compared to standard remote controls, the remote control supplied with this receiver has several operation modes.
-
Page 2: Getting Started
Getting started Before applying the power Units are designed for operation as follows. U.K. and Europe ... AC 230 V only For the United Kingdom Factory fitted moulded mains plug 1.The mains plug contains a fuse. For replacement, use only a 13-Amp ASTA-approved (BS1362) fuse. -
Page 3: Table Of Contents
Contents Getting started Special features Names and functions of parts Setting up the system Preparations Preparing for surround sound Normal playback Recording Listening to radio broadcasts Operations Ambience effects Getting the most from your remote control Remote Control Set up code chart In case of difficulty Other Specifications... -
Page 4: Special Features
When the broadcast ends, the receiver returns to the original station. When listening to Kenwood source components connected with system control cords, the input selector on the receiver automatically switches to the tuner when a program you desire is broadcast. -
Page 5: How To Use This Manual
New TRAITR transistor adopted in the final stage A new TRAITR transistor which features superior temperature tracking characteristics has been adopted in the final stage of the power amplifier block. This new TRAITR transistor combines a temperature compensation resistor with an emitter resistor and final transistor to provide ideal temperature compensation characteristics and minimize distortion caused by temperature variations. -
Page 6: Names And Functions Of Parts
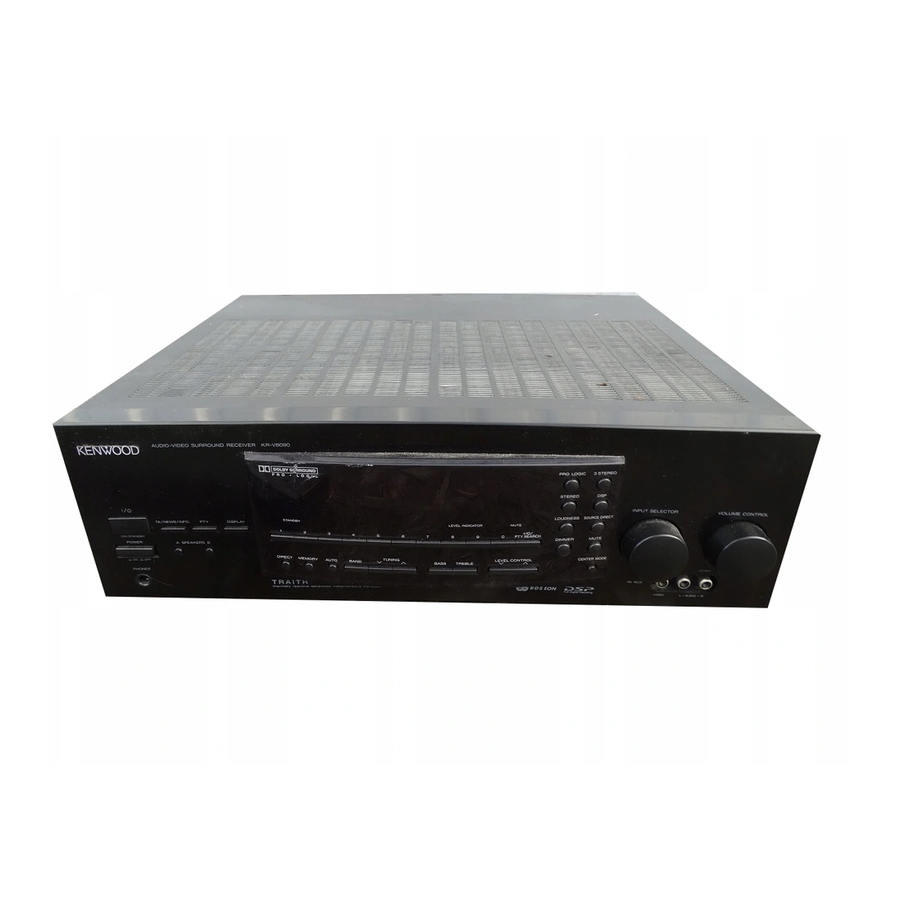
Names and functions of parts RDS indicators NEWS INFO. AUDIO VIDEO SURROUND RECEIVER KR-V9090 TA/NEWS/INFO ON/STANDBY POWER SPEAKERS -ON –OFF PHONES 1 POWER key Use to turn the main power ON/OFF. 2 ON/STANDBY ( ) key Use to switch the power ON/STANDBY when the POWER is turned ON. - Page 7 KENWOOD audio component. If you connect audio components from KENWOOD and other makers to the TAPE/ MD or CD jacks, you can set the remote to operate these components by registering the appropriate setup code at the respec- tive input.
-
Page 8: Setting Up The System
Setting up the system Connecting the antennas Make connections as shown below. Do not connect the power cord to a wall outlet until all connections are completed. Antenna terminal connections 2 Insert cord. 1 Push lever. AM loop antenna The supplied loop antenna is for use indoors. Place it as far as possible from the receiver, TV set, speaker cords and power cord, and adjust the direction for best reception. -
Page 9: Connecting Audio Components
If operation is not possible or an erroneous display appears, even though all connections have been made properly, reset the microcomputer referring to “In case of difficulty”. SYSTEM CONTROL jacks AUX.6CH.INPUT For SYSTEM CONTROL connections to CENTER KENWOOD components SYSTEM CONTROL SURROUND WOOFER AUDIO PHONO TAPE/MD... -
Page 10: Connecting Video Components
Connecting video components Make connections as shown below. When connecting the related system components, be sure to also refer to the instruction manuals supplied with the components you are connecting. Do not connect the power cord to a wall outlet until all connections are completed. Yellow RCA pin cord VIDEO IN... -
Page 11: Connecting The System Control
• Once you finish making the system connections, be sure to register the appropriate setup code for each component. • If you own remote controllable KENWOOD audio components that are not compatible with system control (or cannot be combined with your other system control components), registering the setup code enables you to control those components using the remote control supplied with this unit (without connecting system control cords). -
Page 12: Connecting The Speakers
8 may cause malfunction of the receiver. Front speaker impedance: KR-V9090: (A OR B: 4–16 , A AND B: 8–16 KR-V8090: (A OR B: 4–16 , A AND B: 8–16 Center Speaker ª ·... -
Page 13: Preparing The Remote Control
5 times when you push a key. The remote control is designed to retain set up codes in memory while you change batteries. Failure to change batteries after receiving the 5 blink battery warning signal may cause all the memory to be lost (KR-V8090 only). -
Page 14: Preparing For Surround Sound
Preparing for surround sound To enhance the surround modes, various parameters can be set up to accomodate the speaker system used and the environment of the listening room. The following procedure let you set the parameters of the surround modes (DOLBY PRO LOGIC, DOLBY 3 STEREO and DSP). - Page 15 4 "TEST RS" : Surround speaker (right). 5 "TEST LS" : Surround speaker (left). • For KR-V8090 the “TEST RS” and “TEST LS” displays are replaced by “TEST S” and the test sound is emitted from the right and left surround speakers simultaneously.
-
Page 16: Dsp Mode Setup
DSP mode setup Select a DSP mode. Adjust the EFFECT level. 1 Press to select EFFECT. 2 Use the TUNING/SKIP +/– keys on the remote to select the level you desire. Adjust the WALL type. 1 Press to select WALL. 2 Use the TUNING/SKIP +/–... -
Page 17: Input Level Adjustment
Adjust the ROOM size. 1 Press to select ROOM. 2 Use the TUNING/SKIP +/– keys on the remote to select the size you desire. TUNING/SKIP 3 Press SETUP again to quit. 4 Press VIDEO once to return the remote to its original operating mode. -
Page 18: Normal Playback
Normal playback Preparations • Turn on the power to the related compo- nents. • Set the POWER key to the ON position. Listening to a source component Turn on the receiver. Select a speaker system. PHONO The indicator for the speakers you want to use should be lit. Select the source you desire. -
Page 19: Adjusting The Tone
To adjust the balance Use the test tone feature. Adjusting the sound Adjusting the tone 1 Press the BASS or TREBLE key to select the tone mode to be adjusted. BASS 2 Adjust the tone. LEVEL CONTROL To de-emphasize 3 Press again to quit. BASS Emphasizing deep bass (LOUDNESS) LOUDNESS lets you emphasize the sound of frequencies that... -
Page 20: Listening With Headphones
SOURCE DIRECT playback Use this function to pass the source material direct to the amplifier, bypassing any audio processing. 1 Select a playback source. 2 Press the SOURCE DIRECT key. 3 Start playback . Listening with headphones 1 Turn OFF both speaker switches. 2 Connect headphones. - Page 21 6CH.INPUT playback (KR-V9090 only) This function allows you to pair the video signal input to the VIDEO 2 VIDEO jack with audio signals input to the 6CH.INPUT jacks. 1 Set the INPUT SELECTOR to VIDEO 2. INPUT SELECTOR 2 Hold down the AUTO key for more than 2 seconds.
-
Page 22: Recording
Recording Recording audio Recording a music source 1 Select the source you want to record. Select a source other than TAPE 2 Set the cassette deck to record. 3 Start playback, then start recording. Recording video 1 Select the source you want to record. Select a source other than VIDEO 1 2 Set the video deck to record. -
Page 23: Listening To Radio Broadcasts
Listening to radio broadcasts Radio stations can be classified into RDS (Radio Data Sys- tem) stations and other stations. To listen to or store RDS stations in the preset memory, see the section entitled, "Using RDS". Tuning radio stations (non-RDS) Set the input to tuner. -
Page 24: Tuning Radio Stations By Frequency (Direct Tuning)
Tuning radio stations by frequency Set the input to tuner. Select a broadcast band. Enter the frequency. 1 Press the DIRECT key. 2 Enter the frequency. INPUT SELECTOR Each press switches the band as follows: BAND TUNING Press the numeric keys according to the frequency to be tuned as shown below: DIRECT •... -
Page 25: Using Rds (Radio Data System)
Using RDS (Radio Data System) RDS is a system that transmits useful information (in the form of digital data) for FM broadcasts along with the broadcast signal. Tuners and receivers designed for RDS reception can extract the information from the broadcast signal for use with various functions, such as automatic display of the station name. -
Page 26: Presetting Rds Stations (Rds Auto Memory)
Before listening to an RDS broadcast, follow the instructions below to store the RDS stations in the preset memory. Up to 40 stations can be preset, and then receivied with the touch of a single button. This receiver uses the Radio Data System (RDS) to provide convenient tuning functions like PTY search and EON reser- vation. -
Page 27: Presetting Radio Stations Manually
The RDS auto memory function assigns preset numbers to RDS stations starting from preset number "1". Therefore, be sure to execute the RDS auto memory function before using the following operations to manually store AM stations and other FM stations, and RDS stations. “Presetting RDS stations (RDS AUTO MEMORY)”. -
Page 28: Tuning By Program Type (Pty Search)
This function lets you set the tuner to automatically search for stations which are currently broadcasting the type of program (genre) you want to listen to. Under certain receiving conditions, it may take more than 1 minute to complete the search. Preparations •... - Page 29 Start the search. To select another program type Repeat steps 1, 2 and 3 EXAMPLE: Searching for a Rock Music broadcast. Display while searching +10/ PTY SEARCH Display when a station is received. • No sound is heard while “PTY” is blinking. •...
-
Page 30: Reserving The Desired Information
When the receiver is tuned to an RDS EON station (a station at which the EON indicator lights up), this function lets you set the receiver to automatically switch stations to receive news, traffic, or information programs as they are broad- cast. -
Page 31: To Cancel Eon Reservation
Wait for the information you selected while listening to the current station. The receiver will wait for the desired information to start as long as the tuner is set to a preset RDS station that displays both the "EON" and "RDS" indicators, and the power is turned ON. -
Page 32: Ambience Effects
Ambience effects This receiver incorporates 3 different sound modes to let you enjoy surround sound with a wide variety of program sources. The Dolby Pro Logic surround sound let you enjoy theater- like surround effects when you play Dolby Pro Logic pro- gram sources (like Laserdiscs). -
Page 33: Surround Play
DOLBY PRO LOGIC and DOLBY 3 STEREO can be used when playing video or LD software bearing the mark. DSP modes can be used with any source. Be sure to complete "Preparing for surround sound" before using any of these surround modes. Preparations •... - Page 34 SOURCE DIRECT key Lets you pass the source material direct to the amplifier, bypassing any audio processing. When SOURCE DIRECT is ON, surround sound is turned off and the tone controls are bypassed. LISTEN MODE key The LISTEN MODE key on the remote control lets you switch the sound mode directly from the remote control.
-
Page 35: Getting The Most From Your Remote Control
Refer to "Remote operation of other components" for details about the operations available for each component. * When registering setup codes for KENWOOD audio components which are connected to this unit by system control cords, use the following codes to insure proper system control operation: Cassette: 7000, CD: 8099, MD: 9000. - Page 36 Note Note • Example: Press 5258 to register a LD player made by KENWOOD. THEME • The backlight flashes once each time a number is entered.
-
Page 37: Operating Other Components
3 Press the operation keys you desire. Be sure to point the remote control at the remote sensor on the receiver when you want to operate KENWOOD components connected by system control cords. Otherwise, point the remote control at the component you want to operate. -
Page 38: Changing (Confirming) The Operation Mode
This operation lets you change the remote control operation mode without changing the input selector. You may find this useful when you want to control one component while using another. (For example, if you want to rewind the tape deck while listening to a CD.) This operation is also useful if you don't know the which mode the remote control is set to. -
Page 39: Preparing For Automatic Operations (Macro Play)
The macro play function allows you to set the remote to control several components in succession. After completing this setup, you can perform a series of operations automati- cally. Enter the setup codes for the components you want to control beforehand. Preparing for automatic operations (MACRO play) Make a plan of the macro play you want to set up. - Page 40 Select where the macro should be stored. Press the VIDEO, AUDIO, or TV key to select the macro location. (MACRO1, 2, and 3 respectively) VIDEO Press the keys to be operated in order. 1 Press TV > SHIFT > POWER to EXAMPLE: turn on the TV.
-
Page 41: Executing An Automatic Operation
Executing an automatic operation Press the MACRO key. Execute the macro play. Press the VIDEO, AUDIO, or TV key to execute the correspond- ing macro play. VIDEO Getting the most from your remote control POWER MACRO SHIFT AUDIO VIDEO P. CALL BAND ¢... -
Page 42: Setup Code Correlation
Setup code correlation Deleting a setup code 1 Hold down the ENT key until the backlight flashes twice. 2 Select the component to be deleted. Press the VIDEO, AUDIO, or TV key repeatedly to select the desired component. 3 Enter the 3 digit code "991". 4 Hold down the ENT key until the backlight flashes twice. -
Page 43: Futureset Upgrade Option (Kr-V9090 Only)
• The free phone upgrade service is not available in countries other than listed above. • For customers outside the U.K., please contact your Kenwood dealer who will be able to assist you. • This number is designed specifically for Future Set upgrades, questions about system operation should be first addressed to your place of purchase. - Page 44 Hold your remote to the speaker portion of your telephone. Code selection after mode download After successful completion of the download, step 5 above, the remote control automatically enters a special set-up mode which works as described below. Select the component for which you want to register the information downloaded above.
-
Page 45: Set Up Code Chart
Phono 0900 The set up codes for the remote control supplied with KR-V9090 start below. The set up codes for the remote control supplied with KR-V8090 start on page 50. p VCR Set up codes (KR-V9090) Maker Set up codes... - Page 46 VCR Set up codes (KR-V9090) (continued) Maker Set up codes Memorex 4000, 4035, 4037, 4039, 4046, 4047, 4048, 4104, 4240, 4307 Memphis 4072 Metz 4162, 4454 4043 MGN Technology 4240 Minolta 4042 Mitsubishi 4043, 4067, 4081, 4173 Motorola 4035, 4048 4000, 4240 Multitech 4000, 4072...
- Page 47 Hitachi 1056, 1145, 1151 Hypson 1282 Infinity 1054 Janeil 1046 1054 1000 1053 Kaisui 1282 1180 Kenwood 1019, 1030 Kloss 1024, 1046 1030, 1039, 1180, 1280 Logik 1016 Luxman 1056 1047, 1054, 1154, 1156, 1178 Magnavox 1024, 1030, 1054, 1186, 1187...
- Page 48 1060, 1154, 1156 Totevision 1039 LD player Set up codes (KR-V9090) Maker Set up codes Carver 5194 Disco Vision 5023 Hitatchi 5023 Kenwood 5258 Magnavox 5194 Marantz 5194 DSS Set up codes (KR-V9090) Maker Set up codes Alphastar 3772 Echostar...
- Page 49 8305 Fisher 8048, 8088, 8179 Garrard 8393 Genexxa 8032, 8305 Goodmans 8305 Grundig 8157 Hitachi 8032 8072, 8655 Kenwood 8028, 8037, 8048, 8099, 8190, 8858, 8859 Maker Set up codes Hitachi 0011 Hytex 0007 Jasco 0153 Jerrold 0003, 0011, 0012,...
- Page 50 Set up codes Jerrold 8459, 8520 The set up codes for the remote control supplied with KR-V8090 start below. The set up codes for the remote control supplied with KR-V9090 start on page 45. t VCR Set up codes (KR-V8090)
- Page 51 VCR Set up codes (KR-V8090) (continued) Maker Set up codes Nesco 4072 Nokia 4041, 4046, 4048, 4104, 4106, 4240 Nordmende 4041, 4320, 4321, 4384 Oceanic 4000, 4041 Okano 4315, 4348 Orion 4004, 4209, 4348 Osaki 4000, 4037, 4072 Otto Versand...
- Page 52 TV Set up codes (KR-V8090) (continued) Maker Set up codes Firstline 1009, 1216, 1217, 1247, 1294, 1321 Fisher 1208, 1217, 1370 Flint 1455 Formenti 1037, 1087, 1320 Frontech 1163, 1247, 1264 Fujitsu 1072, 1206 Funai 1264, 1294 1037, 1072, 1217...
- Page 53 TV Set up codes (continued) (KR-V8090) Maker Set up codes Teleton 1206, 1217, 1349 Tensai 1218, 1294, 1317, 1320 Texet 1216 Thomson 1109, 1287, 1343, 1349, 1399 Thorn 1035, 1037, 1072, 1361, 1512 Thorn-Ferguson 1343 Tomashi 1282 Satellite Set up codes (KR-V8090)
- Page 54 CD Player Set up codes (KR-V8090) Maker Set up codes Akai 8156 Alba 8603, 8615 Amstrad 8603 Arcam 8157 AudioTon 8157 Bush 8615 California Audio Lab 8029 Condor 8134 Cyrus 8157 Denon 8003, 8034 Fisher 8048 Grundig 8157 8072 Kenwood...
-
Page 55: Resetting The Microcomputer
In case of difficulty Resetting the Microcomputer If the microcomputer may malfunction (unit cannot be operated, or shows an erroneous display) if the power cord is unplugged while the power is ON, or due to some other external factor. If this happens, execute the following procedure to reset the microcomputer and return the unit to its normal operating condition. -
Page 56: Remote Control Unit
Remote control unit Symptom The backlight flashes five times during nor- mal operation. Subwoofer volume cannot be adjusted. Certain inputs cannot be selected using the remote control. Remote control operation is not possible. Do not use contact cleaning agents because they could cause a malfunction. Be specifically careful against using contact cleaning agents Note Note containing oil, since they may deform the plastic components. -
Page 57: Specifications
VIDEO inputs / outputs VIDEO (composite) ... 1 Vp-p / 75 KENWOOD follows a policy of continuous advancements in development. For this reason specifications may be changed without notice. Note Note Caution : Read this page carefully to ensure safe operation. -
Page 58: Tuner Operations
Remote operation of other components Refer to the following for the type of remote control operations available for each component. The setup code for each component must be entered beforehand. 1 Use the AUDIO, VIDEO, or TV keys to select the component you want to control. -
Page 59: Vcr Operations
TV operations TUNING/SKIP P. CALL P. CALL BAND ¢ 6 (Mute) + (Channel +) 8 (Volume +) – (Channel –) 7 (Volume –) VCR operations TUNING/SKIP P. CALL P. CALL BAND ¢ 6 (3 Play) + (Channel +) 8 (Pause) –... -
Page 60: Dvd Player Operations
Cable tuner operations TUNING/SKIP P. CALL BAND 6 (Select) + (Channel +) 8 (») – (Channel –) 7 («) 4 (|) ¢ (\) DVD player operations TUNING/SKIP P. CALL BAND 6 (3 Play) + (Disc skip +) 8 (Pause) – (Disc skip –) 7 (Stop) 4 (Skip back) ¢...
Need help?
Do you have a question about the KR-V8090 and is the answer not in the manual?
Questions and answers
Namještanje radio stanica
To set radio stations on the Kenwood KR-V8090:
1. Select the tuner as the input source.
2. Set the broadcast band to FM or AM as needed.
3. Use the TUNING control to manually tune to the desired station frequency.
4. Press the MEMORY button.
5. Press a numeric key (0–9) to assign the station to a preset number.
To preset RDS stations automatically, use the "RDS AUTO MEMORY" function after selecting the FM band.
This answer is automatically generated