Table of Contents
Advertisement
Installation and Service
Instructions
for use by heating contractor
Vitotronic 300, Type GW6B
Weather-compensated boiler and heating circuit control unit
in single boiler or multi boiler systems
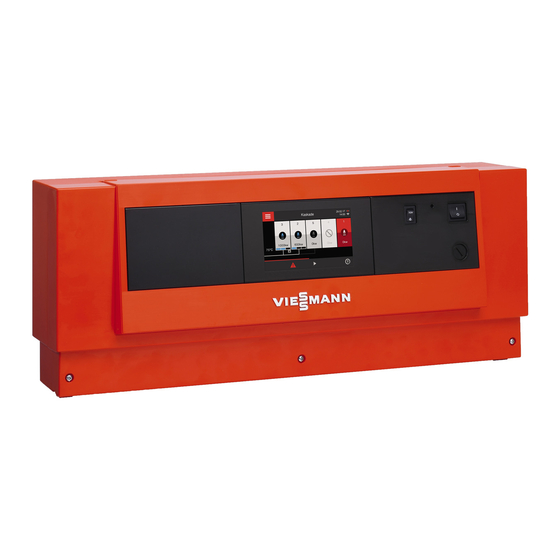
VITOTRONIC 300, GW6B
Certified as a component
part for Viessmann boilers
5513 463 - 06 03/2015
Product may not be exactly as shown
IMPORTANT
Read and save these instructions
for future reference.
Please file in Service Binder
Advertisement
Table of Contents

Subscribe to Our Youtube Channel
Related Manuals for Viessmann Vitotronic 300 GW6B


Summary of Contents for Viessmann Vitotronic 300 GW6B
- Page 1 VITOTRONIC 300, GW6B Product may not be exactly as shown IMPORTANT Read and save these instructions Certified as a component part for Viessmann boilers for future reference. Please file in Service Binder 5513 463 - 06 03/2015...
-
Page 2: Safety, Installation And Warranty Requirements
Failure to do so renders the warranty null and void. Product Information Vitotronic 300, Type GW6B For installation in or mounting on Viessmann boilers only. Applicable to the following control units Order No. Z013557 Serial No. 7542124... -
Page 3: Table Of Contents
Table of Contents Vitotronic 300, GW6B Installation and Service Page General Safety, Installation and Warranty Requirements....2 Product Information............2 Safety About these Instructions..........5 For your Safety............6 Preparing for Installation Overview of System Example........7 Designations in the Example.........7 System Examples............8 Single boiler system...........8 Multi boiler system..........12 Electrical Connections Overview of Electrical Connections......21... - Page 4 Table of Contents Vitotronic 300, GW6B Installation and Service Page Troubleshooting Fault Display ............62 Boiler System Fault Codes .........63 Burner Fault Codes ............69 Function Description Boiler Water Temperature Control.......72 Cascade Control Unit..........72 Heating Circuit Control Unit ........77 DHW Tank Temperature Control .........81 Coding Levels Calling up Coding Levels ..........85 Resetting Coding to their Factory Set Condition ....85...
-
Page 5: About These Instructions
Safety Vitotronic 300, GW6B Installation and Service About these Instructions Take note of all symbols and notations intended to draw attention to potential hazards or important product information. These include “WARNING”, “CAUTION”, and “IMPORTANT”. See below. Warnings draw your attention to the presence of WARNING potential hazards or important product information. -
Page 6: For Your Safety
Safety Vitotronic 300, GW6B Installation and Service For your Safety If you smell gas CAUTION H Don’t smoke! Don’t use naked flames or cause sparks (e.g. by switching lights or electrical appliances on Follow these safety instructions closely to avoid the risk and off) of injury and damage to property. -
Page 7: Overview Of System Example
Preparing for Installation Vitotronic 300, GW6B Installation and Service Overview of System Example This system example is merely a GENERIC LAYOUT and must therefore be checked on site for completeness and function. The heating circuits must be regulated by an external control unit. -
Page 8: System Examples
Preparing for Installation Vitotronic 300, GW6B Installation and Service System Examples ID: 4800078_1407_01 Single boiler system Note: This schematic is a general example without shutoff valves or safety equipment. This does not replace the need for local engineering. - Page 9 System Examples (continued) Required Devices ID: 4800078_1407_01 Position Equipment Boiler Vitotronic 300 GW6B Outdoor temperature sensor ATS Boiler temperature sensor KTS (connection to burner control) Neutralization system Junction box Burner base Power switch DHW tank temperature sensor STS delivered with Vitotronic 300...
- Page 10 Preparing for Installation Vitotronic 300, GW6B Installation and Service System Examples (continued)
- Page 11 Preparing for Installation Vitotronic 300, GW6B Installation and Service System Examples (continued) ID: 4800078_1407_01 Group Coding address Function General 00:8 Two heating circuits with mixing valve M2 (heating circuit 2) and M3 (circuit 3) DHW heating...
-
Page 12: Multi Boiler System
Preparing for Installation Vitotronic 300, GW6B Installation and Service System Examples (continued) ID: 4800061_1407_01 Multi boiler system Note: This schematic is a general example without shutoff valves or safety equipment. This does not replace the need for local engineering. - Page 13 Boiler 1 Flue gas damper (for boiler I) Isolation valve Boiler temperature sensor KTS (connection to burner control) Common supply temperature sensor Outdoor temperature sensor ATS Vitotronic 300 GW6B Neutralization system Power switch Junction box Burner base Mixing valve adapter 24V...
-
Page 14: Components
Required Devices ID: 4800061_1407_01 Position Equipment Outdoor temperature sensor ATS (ATS-value can be taken from Vitotronic 300 GW6B master and cascade Heating circuit III (underfloor heating) Supply temperature sensor M1 (circuit III) delivery Pos. 35 Mixing valve M1 (heating circuit III) - Page 15 Preparing for Installation Vitotronic 300, GW6B Installation and Service System Examples (continued)
- Page 16 Preparing for Installation Vitotronic 300, GW6B Installation and Service System Examples (continued)
- Page 17 Preparing for Installation Vitotronic 300, GW6B Installation and Service System Examples (continued)
- Page 18 Preparing for Installation Vitotronic 300, GW6B Installation and Service System Examples (continued)
- Page 19 Preparing for Installation Vitotronic 300, GW6B Installation and Service System Examples (continued)
- Page 20 Preparing for Installation Vitotronic 300, GW6B Installation and Service System Examples (continued) ID: 4800061_1407_01 coding addresses Vitotronic 300, type GW6B; Lead boiler / Pos. 8 Group Coding address Function General 00:8 Two heating circuits with mixing valve M2 (heating System Layout circuit 2) and M3 (circuit 3) DHW heating Cascade 35:2...
-
Page 21: Overview Of Electrical Connections
Electrical Connections Vitotronic 300, GW6B Installation and Service Overview of Electrical Connections H Route low voltage leads and line voltage cables WARNING separately. H Strip the insulation from the cables as close to the Incorrect wiring can lead to serious injury from electrical terminals as possible, and bundle tightly to the current and result in appliance damage. - Page 22 Electrical Connections Vitotronic 300, GW6B Installation and Service Overview of Electrical Connections (continued) Connections on the low voltage PCB (continued) Plug Component Single boiler system Multi boiler system Single boiler control unit Cascade control unit Lag boiler control unit External operating program aVD.1/aVD.2 changeover External “mixing valve open”...
- Page 23 Electrical Connections Vitotronic 300, GW6B Installation and Service Overview of Electrical Connections (continued) Legend Vitotronic control Rated pump and compile fault output 2A~ Burner base DIN rail (located in junction box) Note: Maximum output 6FLA shared between all mixing gSM2 Mixing valve heating circuit M2 valve, pump and compile fault outputs.
- Page 24 Electrical Connections Vitotronic 300, GW6B Installation and Service Overview of Electrical Connections (continued) The junction box terminals include a L, N terminal Note: The DIN terminals can be used with solid, stranded connection orientated at the top of the junction box or stranded with ferrule termination.
- Page 25 Electrical Connections Vitotronic 300, GW6B Installation and Service Overview of Electrical Connections (continued) Accessing the DIN rail mounted fuse F3 A DIN rail mounted fuse block provides protection to the 120V line out connections as shown on page 23. When fuse F3 requires replacement, the fuse can be accessed as shown.
-
Page 26: Boiler Control And Junction Box
Electrical Connections Vitotronic 300, GW6B Installation and Service Boiler Control and Junction Box 1. Install the junction box to the rear panel either right or left. Secure the junction box with four 4.8 mm metal screws. 2. Route cables from control through the opening in the control panel. -
Page 27: Opening The Control Unit
Electrical Connections Vitotronic 300, GW6B Installation and Service Opening the Control Unit Plugging in the Boiler Coding Card Only use the boiler coding card supplied with the boiler junction box. Insert the boiler coding card into slot “X7”, through the recess in the cover. -
Page 28: Inserting Cables And Applying Strain Relief
Electrical Connections Vitotronic 300, GW6B Installation and Service Inserting Cables and Applying Strain Relief H Control unit fitted on the boiler: Route cables from below through the front panel of the boiler into the wiring chamber of the control unit. Legend A Cables with moulded strain relief B On-site cables;... -
Page 29: Control Power Supply
Electrical Connections Vitotronic 300, GW6B Installation and Service Control Power Supply Connecting the power supply to the Vitotronic control For burner base unit, see boiler service instructions Insert plug 40/156 into the corresponding plug of the burner base. Route beneath the top B rail in a bundle using plug-in cable retainers. -
Page 30: Connecting The Burner
Electrical Connections Vitotronic 300, GW6B Installation and Service Connecting the Burner The burner cables are included in the standard boiler delivery. Max. power consumption 3A. Terminal codes Phase via external safety equipment (if installed) to the burner Ground conductor to burner Neutral conductor to burner T1 120V~ from burner control unit T2 Base load demand... -
Page 31: Connecting Pumps
Electrical Connections Vitotronic 300, GW6B Installation and Service Connecting Pumps Available connections Legend A Pumps Connections on extension for heating circuit with mixing B To the control unit valve HC2/M2, HC3/M3 Plug Terminal Component L, N, G Heating circuit pump sÖ... - Page 32 Electrical Connections Vitotronic 300, GW6B Installation and Service Connecting Pumps (continued) 120V pumps with an amperage draw of <2FLA A Din rail (located in the junction box) B Pump 120V pumps with an amperage draw of >2FLA Contactor specification 120VAC 1A A Din rail (located in the junction box) B Contactor/relay (field supplied) C Pump...
-
Page 33: Specification
Electrical Connections Vitotronic 300, GW6B Installation and Service Connecting Pumps (continued) 240V pumps Contactor specification 120VAC 1A A Din rail (located in the junction box) B Contactor/relay (field supplied) C Pump D Power supply w/disconnect and protection 208/460/575V 3 phase pumps Contactor specification 120VAC 1A A Din rail (located in the junction box) B Contactor/relay (field supplied) -
Page 34: Connecting A Central Fault Massage Facility
Electrical Connections Vitotronic 300, GW6B Installation and Service Connecting a Central Fault Message Facility Plug gÖ (terminal 11 - L, N, G) Note: On lag boilers, output gÖ will only be switched in the case of faults on that boiler. Rated voltage 120V~ Rated current Max. - Page 35 Electrical Connections Vitotronic 300, GW6B Installation and Service Connecting Actuators (continued) Legend A 24V Mixing Valve Adaptor B DIN Rail (in junction box) 1. Disconnect power to control. C 24V Valve Actuator 2. Remove plug connect gS from cables BK1, BK2 and D Valve BK3 of the 24V valve adaptor E 120V power to the mixing valve adaptor...
-
Page 36: Connection Of Low Water Cut-Off Device
Electrical Connections Vitotronic 300, GW6B Installation and Service Connection of Low Water Cut-off Device 1. Remove jumper between terminals 21(L) and 22(L). 2. Make connection for switching contact at terminal (LWCO) 21(L) and 22(L). 3. Power supply for low water cut-off device made at an available terminal 14, 15, 16 or 17 (L, N, G) CAUTION The diagram shown is only a simplified conceptual... -
Page 37: Connecting External Safety Equipment
Electrical Connections Vitotronic 300, GW6B Installation and Service Connecting External Safety Equipment Connection at plug aBÖ. Note: ‘Live’ contacts lead to short circuits or phase failure. The external connection must be potential-free. 1. Remove jumper from terminals 21(L) and 22(L). 2. -
Page 38: Connections To Terminal Aba
Electrical Connections Vitotronic 300, GW6B Installation and Service Connections to Terminal aBA Low gas pressure switch/external shut-off 1. Remove jumper between terminals 26 (L) and 27(L). 2. Connect auxiliary low gas pressure switch or external shut-off (dry contact) to terminals 26 (L) and 27(L). WARNING The terminals should be used for safety switch-off purposes only (e.g. -
Page 39: Provisional Burner Operation
Electrical Connections Vitotronic 300, GW6B Installation and Service Provisional Burner Operation Remove jumper across terminals 23 (L) and 24 (L) (not shown) and connect terminals 23 (L) and 25 (L) external control via dry contact (heat demand on close). Upon heat demand the boiler will maintain low fire until modulation is externally controlled through BMS. -
Page 40: Sequence
Electrical Connections Vitotronic 300, GW6B Installation and Service Blocking the Boiler Externally/Adding to the Boiler Sequence Only for lag boilers Connection on plug aVD Note: ‘Live’ contacts lead to short circuits or phase failure. The external connection must be potential-free. Legend A Blocking the boiler externally B Start the boiler externally as the last one... -
Page 41: External Blocking Via Switching Contact
Electrical Connections Vitotronic 300, GW6B Installation and Service External Blocking via Switching Contact Only for single boiler and cascade control units Plug aVD.2/aVD.3 Connection options: H Plug aVD.2/aVD.3 Note: In the case of cascade control units make the connection on the EA1 extension. H EA1 extension (accessory, see page 122) Contact closed: H Single boiler system... -
Page 42: External Demand Via Switching Contact
Electrical Connections Vitotronic 300, GW6B Installation and Service External Demand via Switching Contact Only for single boiler and cascade control units Plug aVH.2/aVH.3 Connection options: H Plug aVH.2/aVH.3 H EA1 extension (accessory, see page 122) Contact closed: H Single boiler system The burner is switched ON subject to load. -
Page 43: External Demand Via 0 -10V Input
Electrical Connections Vitotronic 300, GW6B Installation and Service External Demand via 0 –10V Input Connection at input 0 – 10V to EA1 extension (accessory, see page 122). Note: Ensure DC separation between the ground conductor and the negative pole of the on-site voltage source. -
Page 44: External Operating Program Changeover
Electrical Connections Vitotronic 300, GW6B Installation and Service External Operating Program Changeover Only for single boiler and cascade control units Plug aVD Connection options: H Plug aVD.1/aVD.2 Note: In the case of cascade control units make the connection on the EA1 extension. H EA1 extension (accessory, see page 122) Connection Note: ‘Live’... -
Page 45: Power Supply
Electrical Connections Vitotronic 300, GW6B Installation and Service Power Supply WARNING If system components are not grounded, serious injury from electric current can result if an electrical fault occurs. Connect the appliance and pipework to the equipotential bonding of the building in question. WARNING Incorrectly executed electrical installations can lead to injuries from electrical current and result in appliance... -
Page 46: Making The Lon Connection
Vitotronic 300, GW6B Installation and Service Making the LON Connection Connection with Viessmann LON cable The Viessmann LON is designed for “Line” BUS topology with a terminator at both ends (accessories). Further information can be found in the “Viessmann LON manual”;... - Page 47 Electrical Connections Vitotronic 300, GW6B Installation and Service Making the LON Connection (continued) Connection with LON cable, on-site cable and LON junction box ≤ 3000 ft. The line may be up to ≤ 3000 ft. (900 m) (with LON junction boxes) Legend A Control unit or Vitocom B LON cable, 23 ft.
-
Page 48: Commissioning The System
Commissioning Vitotronic 300, GW6B Installation and Service Commissioning the System 1. Turn ON the ON/OFF switch on all control units. The commissioning assistant starts automatically. 2. Make required settings: - “Language” - “Date / Time” - “Measuring units” 3. Tap “Application” and select the required application. - ‘single boiler’... -
Page 49: Adjusting Coding
Coding “Connection at plug 20A1” “General” “With LON communication module” “General” (control unit is fault manager) “Viessmann system number” “General” “With LON communication module: “General” Monitoring LON participants” Multi boiler system Check all addresses on Coding level 1 and set if required. -
Page 50: Connecting The Control Unit To The Lon
Coding “7b:1” Set coding “81:3” Control unit sends outdoor Control unit receives outdoor temperature, Coding “97:2” temperature, Set coding “97:1” Viessmann system number, Viessmann system number, Coding “98:1” Coding “98:1” LON participant fault monitoring, LON participant fault monitoring, Coding “9c:20”... - Page 51 Coding “97:2” in the Set coding “97:1” in “General” group the “General” group Viessmann system Viessmann system Viessmann system Viessmann system number, Coding number, Coding number, Coding number, Coding “98:1” in the “98:1”...
-
Page 52: Setting The Boiler Sequence At The Cascade Control Unit
Commissioning Vitotronic 300, GW6B Installation and Service Connecting the Control Unit to the LON (continued) Carrying out a LON participant check The participant check is used to test communication with the system devices connected to the fault manager. Preconditions: H The control unit must be programmed as fault manager (coding “79:1”... -
Page 53: Carrying Out An Actuator Test
Commissioning Vitotronic 300, GW6B Installation and Service Carrying Out an Actuator Test From the home screen tap the following buttons: 1. “Menu” 2. “Service” 3. Enter “viservice” password. 4. “Actuator test” Note: Before an actuator is selected, all actuators are switched to zero volt. -
Page 54: Checking Sensors
Commissioning Vitotronic 300, GW6B Installation and Service Checking Sensors From the home screen tap the following buttons: 1. “Menu” 2. “Service” 3. Enter “viservice” password. 4. “Diagnosis” 5. Select group. 6. Scan actual temperature of the relevant sensor. Adjusting the Heating Curve Only for single boiler and cascade control units The heating curves represent the relationship between the outdoor temperature and the boiler water or supply... - Page 55 Commissioning Vitotronic 300, GW6B Installation and Service Adjusting the Heating Curve (continued) Standard set room temperature Selecting the set room temperature Individually adjustable for each heating circuit. The heating curve is offset along the set room temperature axis. With the heating circuit pump logic function enabled, the curve modifies the starting and stopping characteristics of the heating circuit pump.
- Page 56 Commissioning Vitotronic 300, GW6B Installation and Service Adjusting the Heating Curve (continued) Changing the slope and shift Individually adjustable for each heating circuit. From the home screen tap the following buttons: 1. Tap “Menu”. 2. “Heating circuit 1”, “Heating circuit 2” or “Heating circuit 3”...
-
Page 57: Calling Up The Service Menu
Service Scans Vitotronic 300, GW6B Installation and Service Calling up the Service Menu From the home screen tap the following buttons: 1. “Menu” 2. “Service” 3. Enter “viservice” password. 4. Select the required menu range. Note: In the “Diagnosis” menu area submenus are shown subject to control unit, e.g. -
Page 58: Leaving The Service Menu
9. Tap OK twice Resetting all Passwords to Factory Settings From the home screen tap the following buttons: 1. Request the master password from the Technical Service at the Viessmann Group. 2. “Menu” 3. “Service” 4. Enter “viservice” password. 5. “Change passwords”... -
Page 59: Scanning Operating Data
Service Scans Vitotronic 300, GW6B Installation and Service Scanning Operating Data Operating data can be scanned in various areas (see “Diagnosis” on page 54). Operating data on heating circuits with mixing valves and a solar thermal system can only be scanned if the relevant components are installed in the system. -
Page 60: Brief Scan
Service Scans Vitotronic 300, GW6B Installation and Service Brief Scan From the home screen tap the following buttons: 1. “Menu” 2. “Service” 3. Enter “viservice” password. 4. “Diagnosis” 5. “Short query” 6. “Code” An overview of brief scans appears with 11 lines and 6 fields. -
Page 61: Maintenance Display
Service Scans Vitotronic 300, GW6B Installation and Service Maintenance Display Set limits in coding “21” and “23” in the “Boiler” group. Once these values have been reached, “Service” and symbol appear on the display. Tap the following buttons: 1. “Confirm” The footer shows ... -
Page 62: Fault Display
Troubleshooting Vitotronic 300, GW6B Installation and Service Fault Display In the event of a fault, the red fault display flashes at the control unit. The display shows symbol and “Fault”. Note: If a central fault message facility is connected, this is started. For an explanation of fault messages, see chapter “Fault messages”. -
Page 63: Boiler System Fault Codes
Troubleshooting Vitotronic 300, GW6B Installation and Service Boiler System Fault Codes Displayed System characteristics Cause Measures fault code Control mode. Service “0f” is only displayed in Service required the fault history. Note: After servicing, set code “24:0”. Operates as if the outdoor Short circuit, outdoor Check outdoor temperature temperature was 32°F (0°C). - Page 64 Troubleshooting Vitotronic 300, GW6B Installation and Service Boiler System Fault Codes (continued) Displayed System characteristics Cause Measures fault code Tank loading pump on: Short circuit, tank temperature Check tank temperature DHW temperature target = sensor 1 sensor (see page 121). set supply temperature Priority control is cancelled.
- Page 65 Troubleshooting Vitotronic 300, GW6B Installation and Service Boiler System Fault Codes (continued) Displayed System characteristics Cause Measures fault code Shunt pump constantly ON. Short circuit, temperature Check temperature sensor (see With tank loading system: sensor aJB. page 121). close 3-way mixing valve; no DHW heating Shunt pump constantly ON Lead break, temperature...
- Page 66 Troubleshooting Vitotronic 300, GW6B Installation and Service Boiler System Fault Codes (continued) Displayed System characteristics Cause Measures fault code Control mode Lead break, temperature sensor Check temperature sensor / /, connection at solar control (see separate installation and module, type SM1. service instructions).
- Page 67 Troubleshooting Vitotronic 300, GW6B Installation and Service Boiler System Fault Codes (continued) Displayed System characteristics Cause Measures fault code Control mode Communication error, Check connections, and replace programming unit the programming unit if required. Control mode Internal fault Check PCB is plugged in correctly.
- Page 68 Troubleshooting Vitotronic 300, GW6B Installation and Service Boiler System Fault Codes (continued) Displayed System characteristics Cause Measures fault code Control mode Communication error, AM1 Check connections. extension Without AM1 extension: Set coding “32:0” in the “General” group. Control mode Communication error, control Check LON communication No communication unit...
-
Page 69: Burner Fault Codes
Troubleshooting Vitotronic 300, GW6B Installation and Service Burner Fault Codes Displayed System characteristics Cause Measures fault code Boiler cools down Burner fault Check the burner. Boiler ramps to the electronic No communication between Check communication by maximum boiler water boiler circuit and cascade means of a participant check. - Page 70 Troubleshooting Vitotronic 300, GW6B Installation and Service Burner Fault Codes (continued) Displayed System characteristics Cause Measures fault code No flame formation during safety Ionization electrode incorrectly Insert plug of ionization electrode; time; ionization flame monitor adjusted; ionization electrode not check cables; adjust ionization reports no flame signal.
- Page 71 Troubleshooting Vitotronic 300, GW6B Installation and Service Burner Fault Codes (continued) Displayed System characteristics Cause Measures fault code Fan not running; fan speed not Fan faulty; cables are faulty or Check cables and replace the fan reached. broken. if required Status duration too long, fan Internal fault;...
-
Page 72: Boiler Water Temperature Control
Function Description Vitotronic 300, GW6B Installation and Service Boiler Water Temperature Control Brief description H The boiler water temperature is regulated by modulating the burner. H The set boiler water temperature is determined from the following coding: – Set supply temperature of the heating circuits connected to the control unit and the heating circuits connected via the LON BUS –... - Page 73 Function Description Vitotronic 300, GW6B Installation and Service Cascade Control Unit (continued) Set supply temperature The set supply temperature is determined from the following coding: H Set supply temperature of heating circuit without mixing valve A1 (heating circuit 1) and heating circuits with mixing valve M2 (heating circuit 2) and M3 (heating circuit 3).
- Page 74 Function Description Vitotronic 300, GW6B Installation and Service Cascade Control Unit (continued) Control strategies Condensing strategy Benefit: Optimum utilization of the condensing effect and long burner runtimes Set coding “3c:0” in the “Cascade” group. It is the aim of the condensing strategy to operate as many boilers as possible at the lowest output level.
- Page 75 Function Description Vitotronic 300, GW6B Installation and Service Cascade Control Unit (continued) Control strategies Conventional boiler strategy 1 Benefit: As few boilers as possible are active. Set coding “3c:1” in the“Cascade” group. Conventional boilers are preferably operated at their upper output range, to reliably prevent formation of condensate due to low return temperatures.
- Page 76 Function Description Vitotronic 300, GW6B Installation and Service Cascade Control Unit (continued) Control strategies Conventional boiler strategy 2 Benefit: Long burner runtimes. Coding “3c:2” in the “Cascade” group (factory set condition). An additional boiler will only be started if the maximum output of all currently active burners is insufficient to achieve the set supply temperature.
-
Page 77: Heating Circuit Control Unit
Function Description Vitotronic 300, GW6B Installation and Service Heating Circuit Control Unit Only for single boiler and cascade control units Outdoor temperature Brief description A heating curve must be set for matching the control H The control unit features control circuits for one heating unit to the building and the heating system. - Page 78 Function Description Vitotronic 300, GW6B Installation and Service Heating Circuit Control Unit (continued) DHW temperature System dynamics Priority control The mixing valve control characteristics can be influenced at coding “c4” in the “Heating circuit...” group. H With priority control: (coding address “a2:2” in the “Heating circuit...”...
- Page 79 Function Description Vitotronic 300, GW6B Installation and Service Heating Circuit Control Unit (continued) Supply temperature control single boiler control unit Differential temperature: The differential temperature can be set at coding “9f” in the “General”group, factory set condition: 8 K. The differential temperature is the minimum value by which the boiler water temperature should be higher than the highest currently required supply temperature of the heating circuit with mixing valve.
- Page 80 Function Description Vitotronic 300, GW6B Installation and Service Heating Circuit Control Unit (continued) Raising the reduced room temperature Example using the settings in the factory set condition During operation with reduced room temperature, the reduced set room temperature can be automatically raised subject to the outdoor temperature.
-
Page 81: Dhw Tank Temperature Control
Function Description Vitotronic 300, GW6B Installation and Service DHW Tank Temperature Control Brief description Priority control H The tank temperature control is a constant temperature H With priority control: (coding control function. This is achieved by starting and “a2:2” in the “Heating circuit...” group): stopping the DHW pump. - Page 82 Function Description Vitotronic 300, GW6B Installation and Service DHW Tank Temperature Control (continued) Auxiliary circuits Coding “55:1” in the “DHW” group; DHW heating in conjunction with the heating circuits can adaptive tank heating be disabled or enabled by changing over the operating With adaptive tank heating, the speed of the temperature program (see coding “d5”...
- Page 83 Function Description Vitotronic 300, GW6B Installation and Service DHW Tank Temperature Control (continued) Controlled sequence cascade control Coding “55:3” in the “DHW” group; tank temperature control tank loading system The following coding in the “DHW” group influence the controlled sequence. The DHW tank goes cold (set value −2.5 K;...
- Page 84 Function Description Vitotronic 300, GW6B Installation and Service DHW Tank Temperature Control (continued) Storage tank temperature control with 2 temperature Coding “55:3” in the “DHW” group; sensors (coding “55:2”) tank temperature control tank loading system Tank temperature sensor 1 enables the DHW pump for The DHW tank goes cold (set value –2.5 K, adjustable via tank heating and is evaluated for stop conditions during coding “59”):...
-
Page 85: Calling Up Coding Levels
Coding levels Vitotronic 300, GW6B Installation and Service Calling up Coding Levels H Coding are split into the following groups: – “General” – “Combustion controller” – “DHW” – “Solar” – “Heating circuit 1/2/3” – “Boiler” – “Cascade” – “All coding” In this group, all coding in the coding levels are listed in ascending order (except the coding in the “Solar”... -
Page 86: General" Group
Coding level 1 Vitotronic 300, GW6B Installation and Service “General” Group Coding Coding in the factory set condition Possible change System design 00:1 System version 1: 00:2 For system schemes, see One heating circuit without mixing valve the following table: A1 (heating circuit 1), without DHW 00:10 heating... - Page 87 Coding level 1 Vitotronic 300, GW6B Installation and Service “General” Group (continued) Coding in the factory set condition Possible change “Automatic summer/wintertime changeover” 81:1 Automatic summer/wintertime changeover. 81:0 Manual summer/wintertime changeover 81:2 Do not adjust! 81:3 With LON communication module: The control unit receives the time.
-
Page 88: Combustion Controller" Group
Minimum pause “Boiler” Group Coding in the factory set condition Possible change “Single boiler and multi boiler system” 01:2 Multi-boiler system with Viessmann-cascade 01:1 Single boiler system or LON-cascade 01:3 Do not adjust! “Consecutive boiler number in multi boiler systems”... -
Page 89: Cascade" Group
Coding level 1 Vitotronic 300, GW6B Installation and Service “Cascade” Group Coding in the factory set condition Possible change “Number of boilers connected to the cascade” 35:8 8 boilers 35:1 1 to 8 boilers 35:8 “Minimum system supply temperature limit” 36:0 Electronic minimum system supply 36:1... - Page 90 Coding level 1 Vitotronic 300, GW6B Installation and Service “Cascade” Group (continued) Coding in the factory set condition Possible change “ECO threshold boiler 1” 41:31 No ECO threshold boiler 1 41:−30 Adjustable from -22 to 86°F (−30 to +30°C) 41:+30 “ECO threshold boiler 2”...
-
Page 91: Dhw" Group
Coding level 1 Vitotronic 300, GW6B Installation and Service “DHW” Group Coding in the factory set condition Possible change “Storage tank heating, hysteresis” 55:0 Tank heating hysteresis ± 2.5 K 55:1 Adaptive storage tank heating enabled (see page 82) 55:2 Storage tank temperature control with 2 temperature sensors (see page 82). -
Page 92: Heating Circuit
Coding level 1 Vitotronic 300, GW6B Installation and Service “Heating Circuit ...” Group Coding in the factory set condition Possible change “Storage tank priority” a2:2 Tank priority control for heating circuit a2:0 Without storage tank priority applicable pump and mixing valve to heating circuit pump and mixing valve a2:1 Storage tank priority only applicable to... - Page 93 Coding level 1 Vitotronic 300, GW6B Installation and Service “Heating Circuit ...” Group (continued) Coding in the factory set condition Possible change “Pump idle time” a9:0 Without pump idle time a9:7 With pump idle time (heating circuit pump OFF) Function description page 78 Note: The maximum idle time is 10 h.
- Page 94 Coding level 1 Vitotronic 300, GW6B Installation and Service “Heating Circuit ...” Group (continued) Coding in the factory set condition Possible change “External operating program changeover” d5:0 With external operating program changeover d5:1 Changeover to “Constant operation with (observe setting of coding “5d”, “5e”, “5f” standard room temperature”...
-
Page 95: General" Group
Coding level 2 Vitotronic 300, GW6B Installation and Service “General” Group Coding in the factory set condition Possible change System design 00:1 System version 1: 00:2 For system schemes, One heating circuit without mixing valve see the following table: A1 (heating circuit 1), without DHW 00:10 heating Value address... - Page 96 Coding level 2 Vitotronic 300, GW6B Installation and Service General” Group (continued) Coding in the factory set condition Possible change “Function output A1 at AM1 extension” 34:1 Heating circuit pump, heating circuit 34:0 DHW recirculation pump without mixing valve A1 (heating circuit 1) 34:2 DHW pump “Servomotor runtime”...
- Page 97 Coding level 2 Vitotronic 300, GW6B Installation and Service “General” Group (continued) Coding in the factory set condition Possible change “Function output 157 at EA1 extension” 5c:0 5c:1 Feed pump Function output aBJ at EA1 extension: Central fault message 5c:2 No function 5c:3 Heating circuit pump, heating circuit without...
- Page 98 Coding level 2 Vitotronic 300, GW6B Installation and Service General” Group (continued) Coding in the factory set condition Possible change “Delay off time for circulation pump, neutralizing system at output 1 at extension AM1” 6c:0 Delay off time circulation pump 6c:1 Adjustable from 1 to 255 sec neutralizing system: None...
- Page 99 Coding level 2 Vitotronic 300, GW6B Installation and Service “General” Group (continued) Coding in the factory set condition Possible change “Automatic summer/wintertime changeover” 81:1 Automatic summer/wintertime 81:0 Manual summer/wintertime changeover changeover 81:2 Do not adjust! 81:3 With LON communication module: The control unit receives the time.
- Page 100 97:1 The control unit receives the outdoor temperature from the Vitotronic 200-H. “Viessmann system number” 98:1 Viessmann system number in 98:1 Adjustable from 1 to 5 conjunction with monitoring of several systems within one LON system with 98:5...
- Page 101 Coding level 2 Vitotronic 300, GW6B Installation and Service General” Group (continued) Coding in the factory set condition Possible change “Connection at terminals 2 and 3 in plug 143” 99:0 Connection disabled 99:1 No function 99:2 External “mixing valve close” Heating circuit with mixing valve M2 (heating circuit 2) 99:3...
-
Page 102: Combustion Controller" Group
Coding level 2 Vitotronic 300, GW6B Installation and Service General” Group (continued) Coding in the factory set condition Possible change “With LON communication module: Monitoring LON participants” 9c:20 Monitoring LON participants 9c:0 No monitoring. If there is no response from a participant after 20 min, the values specified inside 9c:5 Time adjustable from 5 to 60 min. -
Page 103: Boiler" Group
Vitotronic 300, GW6B Installation and Service “Boiler” Group Coding in the factory set condition Possible change “Single boiler and multi boiler system” 01:2 Multi-boiler system with Viessmann-cascade 01:1 Single boiler system or LON-cascade 01:3 Do not adjust! “Consecutive boiler number in multi boiler systems”... - Page 104 Coding level 2 Vitotronic 300, GW6B Installation and Service “Cascade” Group (continued) Coding in the factory set condition Possible change “Lead boiler or boiler sequence changeover” 38:0 No lead boiler or boiler sequence 38:1 Lead boiler changeover: changeover; see function description Every first day of the month, the boiler in chapter “Cascade control”...
- Page 105 Coding level 2 Vitotronic 300, GW6B Installation and Service “Cascade” Group (continued) Coding in the factory set condition Possible change “ECO threshold boiler 2” 42:31 No ECO threshold boiler 2 42:−30 Adjustable from -22 to 86°F (−30 to +30°C) 42:+30 “ECO threshold boiler 3”...
-
Page 106: Dhw" Group
Coding level 2 Vitotronic 300, GW6B Installation and Service “DHW” Group Coding in the factory set condition Possible change “Storage tank heating, hysteresis” 55:0 Tank heating, hysteresis ± 2.5 K 55:1 Adaptive storage tank heating enabled (see page 82) 55:2 Storage tank temperature control with 2 tank temperature sensors (see page 82) 55:3... - Page 107 Coding level 2 Vitotronic 300, GW6B Installation and Service “DHW” Group (continued) Coding in the factory set condition Possible change “Input of the set DHW temperature” 66:4 At the programming unit of the control 66:0 At the programming unit of the unit and all installed Vitotrol 300A control unit 66:1...
-
Page 108: Solar" Group
Coding level 2 Vitotronic 300, GW6B Installation and Service “Solar” Group Only in conjunction with solar control module, type SM1. Coding in the factory set condition Possible change “Differential between the actual DHW temperature and the start point for the solar circuit pump” 00:8 Start temperature differential for solar 00:2... - Page 109 Frost protection function for solar circuit 0b:1 Frost protection function for solar switched off circuit switched on (not required with Viessmann heat transfer medium) “Delta T monitoring” 0c:1 Delta T monitoring switched on. No flow 0c:0 Delta T monitoring switched off rate captured in the solar circuit, or flow rate too low.
- Page 110 Coding level 2 Vitotronic 300, GW6B Installation and Service “Solar” Group “Solar” Group (continued) (continued) Coding in the factory set condition Possible change “Extended control function” 20:0 No extended control function enabled 20:1 Additional function for DHW heating 20:2 Differential temperature control 2 20:3 Differential temperature control 2 and auxiliary function...
-
Page 111: Heating Circuit
Coding level 2 Vitotronic 300, GW6B Installation and Service “Heating Circuit ...” Group “Heating Circuit ...” Group (continued) Coding in the factory set condition Possible change “Remote control” a0:0 Without remote control a0:1 With Vitotrol 200, recognized automatically. a0:2 With Vitotrol 300 or Vitohome 300; recognized automatically. - Page 112 Coding level 2 Vitotronic 300, GW6B Installation and Service “Heating Circuit ...” Group (continued) Coding in the factory set condition Possible change “Frost protection” a4:0 With frost protection a4:1 No frost protection; this setting is only possible if code a3:9 has been selected.
- Page 113 Coding level 2 Vitotronic 300, GW6B Installation and Service “Heating Circuit ...” Group (continued) Coding in the factory set condition Possible change “Pump idle time” a9:0 Without pump idle time a9:7 With pump idle time (heating circuit pump OFF) Function description page 78 Note: The maximum idle time is 10 h.
- Page 114 Coding level 2 Vitotronic 300, GW6B Installation and Service “Heating Circuit ...” Group (continued) Coding in the factory set condition Possible change “Quick heat-up/quick setback” b6:0 With remote control:*1 b6:1 With quick heat-up/quick setback Without quick heat-up/quick setback (see function description on page 77) “Start optimization”...
- Page 115 Coding level 2 Vitotronic 300, GW6B Installation and Service “Heating Circuit ...” Group (continued) Coding in the factory set condition Possible change “Minimum supply temperature limit” c5:20 Electronic minimum supply temperature c5:1 Adjustable from 34 to 261°F limit 68°F (20°C) (only when operating (1 to 127°C) with standard room temperature) c5:127...
- Page 116 Coding level 2 Vitotronic 300, GW6B Installation and Service “Heating Circuit ...” Group (continued) Coding in the factory set condition Possible change “Time limit for comfort mode” f2:8 Time limit for comfort mode or external f2:0 No time limit*2 operating program changeover via pushbutton: 8 h*2 Note: Observe setting of coding f2:1...
-
Page 117: Connection And Wiring Diagram
Diagrams Vitotronic 300, GW6B Installation and Service Connection and Wiring Diagram Overview A1 PCB, extension for heating circuits 2 and 3 with mixing valve A2 PCB, low voltage A3 PCB 120 V~ A6 Programming unit connection PCB A7 Optolink PCB/emissions test switch A8 PCB A9 Coding card A10 LON communication module... - Page 118 Diagrams Vitotronic 300, GW6B Installation and Service Connection and Wiring Diagram (continued) PCB 120V~ gÖ Output for central fault message sÖ Heating circuit pump Motor for 3-way mixing valve, primary store system Primary pump, primary store system External connections (remove jumper when aBÖ...
- Page 119 Diagrams Vitotronic 300, GW6B Installation and Service Connection and Wiring Diagram (continued) PCB, low voltage Outdoor temperature sensor aJB Temperature sensor tank loading system Supply temperature sensor common system External connections ?/§ supply temperature KM BUS participants Tank temperature sensor External connections Tank temperature sensor 2 for tank Connecting cable for data exchange (accessories)
-
Page 120: Ea1 Extension
Diagrams Vitotronic 300, GW6B Installation and Service Mixing Valve Extension Circuits 2 & 3 PCB, extension for heating circuits 2 and 3 with mixing valve Supply temperature sensors Heating circuit pumps sÖ fÖ Power supply Mixing valve motors K1-K6 Relay Electrical interfaces... -
Page 121: Sensors
Components Vitotronic 300, GW6B Installation and Service Sensors Tank, supply and room temperature sensor Viessmann NTC 10 kΩ (blue ID label) Note H The supply temperature sensor can be used as a contact or immersion temperature sensor. H The room temperature sensor is connected at terminals 3 and 4 in the Vitotrol 300. -
Page 122: Extension Ea1 Accessory (Optional)
Components Vitotronic 300, GW6B Installation and Service Extension EA1 Accessory (optional) Duration of the heating program changeover H Contact constantly closed: The changeover is active as long as the contact is closed. H Contact only closed briefly via pushbutton: The changeover is enabled for the time selected in coding address “f2”... -
Page 123: Parts List - Programming Module
Parts Vitotronic 300, GW6B Installation and Service Parts List - Programming Module... -
Page 124: Parts List - Connection Module
Parts Vitotronic 300, GW6B Installation and Service Parts List - Connection Module... -
Page 125: Specification Vitotronic 300, Gw6B
Specification Vitotronic 300, GW6B Installation and Service Specification Vitotronic 300, GW6B Rated voltage 120V~ Rated frequency 60 Hz Rated current 12 A~ Power consumption 10 W Safety category Permissible ambient temperature - During operation 32 to 104°F (0 to +40°C) Installation in living spaces or boiler rooms (standard ambient conditions) - During storage and transport -4 to 149°F (−20 to +65°C) - Page 126 Vitotronic 300, GW6B Installation and Service...
- Page 127 Vitotronic 300, Vitotronic 300, GW6B Installation and Service...
- Page 128 Vitotronic 300, GW6B Installation and Service...
Need help?
Do you have a question about the Vitotronic 300 GW6B and is the answer not in the manual?
Questions and answers