
Related Manuals for IBM System Storage EXP2512 Express Storage Enclosure


Summary of Contents for IBM System Storage EXP2512 Express Storage Enclosure
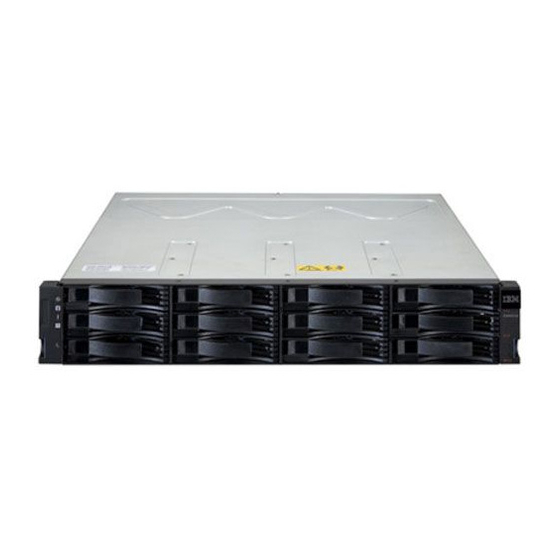
- Page 1 System Storage EXP2512 Express Storage Enclosure and System Storage EXP2524 Express Storage Enclosure Installation, User’s, and Maintenance Guide GA32-0965-01...
- Page 3 System Storage EXP2512 Express Storage Enclosure and System Storage EXP2524 Express Storage Enclosure Installation, User’s, and Maintenance Guide GA32-0965-01...
- Page 4 Note: Before using this information and the product it supports, read the general information in Appendix B, “Notices,” on page 47, the Systems Safety Notices and Environmental Notices and User Guide documents on the IBM Documentation CD, and the Warranty Information document that comes with the product.
- Page 5 Les sikkerhetsinformasjonen (Safety Information) før du installerer dette produktet. Antes de instalar este produto, leia as Informações sobre Segurança. Antes de instalar este producto, lea la información de seguridad. Läs säkerhetsinformationen innan du installerar den här produkten. © Copyright IBM Corp. 2010, 2011...
- Page 6 English-language caution or danger ® statement with translated versions of the caution or danger statement in the IBM Systems Safety Notices document. For example, if a caution statement is labeled “D005a,” translations for that caution statement are in the IBM Systems Safety Notices document under “D005a.”...
- Page 7 DANGER Multiple power cords. The product might be equipped with multiple power cords. To remove all hazardous voltages, disconect all power cords. (L003) Safety...
- Page 8 DANGER When working on or around the system, observe the following precautions: Electrical voltage and current from power, telephone, and communication cables are hazardous. To avoid a shock hazard: v Connect power to this unit only with the provided power cord. Do not use the provided power cord for any other product.
- Page 9 CAUTION: >18 kg (39.7 lb) 18-32 kg (39.7-70.5 lb) The weight of this part or unit is between 18 and 32 kg (39.7 and 70.5 lb). It takes two persons to safely lift this part or unit. (C009) Safety...
- Page 10 viii System Storage EXP2512 and EXP2524: Installation and Maintenance Guide...
-
Page 11: Table Of Contents
Chapter 1. Introduction ..... . 1 The IBM Documentation CD ....3 Hardware and software requirements . - Page 12 Hardware service and support ....46 IBM Taiwan product service ....46 Appendix B.
-
Page 13: Chapter 1. Introduction
If firmware and documentation updates are available, you can download them from the IBM support website. The EXP2500 might have features that are not described in the documentation that comes with the unit, and the documentation might be... - Page 14 Record information about the EXP2500 in Table 1. You will need this information if you have to call for service. Table 1. Product identification record Product name IBM System Storage EXP2512 Express Storage Enclosure or BM System Storage EXP2524 Express Storage Enclosure Machine type 1727-HC1 or 1727-HC2...
-
Page 15: The Ibm Documentation Cd
Bay 24 The IBM Documentation CD The IBM Documentation CD contains documentation for the EXP2500 in Portable Document Format (PDF) and includes the IBM Documentation Browser to help you find information quickly. Hardware and software requirements The IBM Documentation CD requires the following minimum hardware and... - Page 16 Select the EXP2500 from the Product menu. The Available Topics list displays all the documents for the EXP2500. Some documents might be in folders. A plus sign (+) indicates each folder or document that has additional documents under it. Click the plus sign to display the additional documents.
-
Page 17: Notices And Statements In This Document
Notices and statements in this document The caution and danger statements in this document are also in the multilingual IBM Systems Safety Notices document, which is on the IBM Documentation CD. Each statement is numbered for reference to the corresponding statement in the IBM Systems Safety Notices document. -
Page 18: Features And Operating Specifications
Features and operating specifications Table 3 contains a summary of the features and operating specifications of the EXP2500. Depending on your EXP2500 model, some features might not be available, or some specifications might not apply. Table 3. Features and operating specifications General: AC power supply with built-in fan: Heat output... -
Page 19: What The Exp2500 Offers
What the EXP2500 offers The EXP2500 provides several features for easy operation, including the following features: v Customer replaceable units (CRUs) The major CRUs in the EXP2500 are SAS, nearline SAS, or Solid State hard disk drives, ESMs, and power supplies. See “Replaceable EXP2500 components”... - Page 20 Front view of the EXP2524 Hot-swap hard disk drive Filler panel Bezels Rear view of the EXP2512 and EXP2524 Filler panel Hot-swap power supplies System Storage EXP2512 and EXP2524: Installation and Maintenance Guide...
-
Page 21: Chapter 2. Installation
Inventory checklist After you unpack the EXP2500, make sure that you have the following items: v Hardware: – IBM System Storage EXP2512 Express Storage Enclosure or IBM System Storage EXP2524 Express Storage Enclosure – Two rack jumper power cords – Two front bezels (left and right) –... -
Page 22: Installing Hot-Swap Hard Disk Drives
Installing hot-swap hard disk drives The EXP2512 supports up to 12 IBM SAS or nearline SAS hard disk drives. The EXP2524 supports up to 24 IBM SAS, nearline SAS, and Solid State hard disk drives. Each drive comes preinstalled in a drive tray, ready for installation in the EXP2500. - Page 23 4. Installing a 2.5-inch hot-swap drive: a. Touch the static-protective package that contains the hard disk drive to any unpainted surface on the outside of the enclosure; then, remove the hard disk drive from the package. b. Make sure that the drive-tray handle is in the open (unlocked) position. c.
- Page 24 5. Installing a 3.5-inch hot-swap drive: a. Touch the static-protective package that contains the hard disk drive to any unpainted surface on the outside of the enclosure; then, remove the hard disk drive from the package. b. Make sure that the tray handle is open; then, slide the hard disk drive into the hot-swap bay.
-
Page 25: Cabling The Exp2500
Connect one end of a SAS cable to the RAID controller or one of the two SAS ports on the BladeCenter SAS connectivity module. b. Connect the other end to the In (↑) SAS connector on the ESM in the EXP2500. To the IBM SAS RAID controller or SAS cable BladeCenter SAS connectivity module EXP2500... - Page 26 c. Repeat steps 2a on page 13 and 2b on page 13 for each EXP2500 that you add. System Storage EXP2512 and EXP2524: Installation and Maintenance Guide...
-
Page 27: Connecting The Power Cords
Connecting the power cords The EXP2500 comes with two power cords. You can connect the power cords to a primary power unit inside the rack cabinet, such as a properly grounded ac power distribution unit (PDU) or uninterruptible power supply. Note: Power cords, specific to a country, can be purchased separately. - Page 28 System Storage EXP2512 and EXP2524: Installation and Maintenance Guide...
-
Page 29: Chapter 3. Exp2500 Controls, Leds, And Power
The left bezel contains the EXP2500 LEDs, as shown in the following illustration. For a description of the LEDs, see “Front view: LEDs” on page Power-on LED Reserved for future use Locator LED Overtemperature LED System error LED © Copyright IBM Corp. 2010, 2011... -
Page 30: Front View: Leds
Bezel (right side) On the EXP2512, the right bezel contains the hard disk drive identification information, as shown in the following illustration. Drives 1 - 4 Drives 5 - 8 Drives 9 - 12 Front view: LEDs The LEDs on the front of the EXP2512 are shown in the following illustration. Hard disk drive activity LED Hard disk drive status LED Power-on LED... -
Page 31: Rear View: Power Supply
Overtemperature LED (amber) When this amber LED is lit, it indicates that the EXP2500 is in an overtemperature condition. System error LED (amber) When this amber LED is lit, it indicates that the unit has a fault, such as in a power supply, ESM, or hard disk drive. -
Page 32: Rear View: Esms
Note: Do not connect the Ethernet port to the public network. SAS in connector Connect a SAS cable to this connector and to an IBM SAS RAID controller or the SAS Out (↓) connector of another EXP2500 enclosure. System Storage EXP2512 and EXP2524: Installation and Maintenance Guide... -
Page 33: Exp2500 Power Features
The LEDs on the ESM are shown in the following illustration. ESM error LED (amber) Power-on Locator LED (green) LED (blue) SAS link Ethernet Ethernet SAS link LEDs speed LED link LED LEDs (green) (green) Power-on LED (green) When this green LED is lit, it indicates that the ESM is receiving power. ESM error LED (amber) When this amber LED is lit, it indicates that the ESM unit has a fault. -
Page 34: Powering Off The Exp2500
Note: There is no power-on switch on the EXP2500 or on the power supplies. A power supply is active when a power cord is connected to it and to a power source. The EXP2500 might take a few seconds to power-on. During this time, you might see the EXP2500 amber fault LED, green power LED, power supply LEDs, and blue system locator LED turn on and off intermittently. -
Page 35: Turning Off The Exp2500 In An Emergency
The EXP2500 is designed to run continuously, 24 hours a day. Turn off the power only under one or more of the following conditions: v Instructions in a hardware or software procedure require you to turn off the power. v A service technician tells you to turn off the power. v A power outage or emergency situation occurs. -
Page 36: Turning On The Exp2500 After An Emergency
Turning on the EXP2500 after an emergency To restart the EXP2500 after an emergency shutdown, or if a power failure or a power outage occurred, complete the following steps: 1. After the emergency situation is over or power is restored, check the EXP2500 for damage. -
Page 37: Chapter 4. Parts Listing, Exp2512 And Exp2524 Expansion Enclosures
Replaceable components are of three types: v Tier 1 customer replaceable unit (CRU): Replacement of Tier 1 CRUs is your responsibility. If IBM installs a Tier 1 CRU at your request, you will be charged for the installation. v Tier 2 customer replaceable unit: You may install a Tier 2 CRU yourself or request IBM to install it, at no additional charge, under the type of warranty service that is designated for your server. -
Page 38: Exp2512 Expansion Enclosure Parts Listing
81Y9879 2 U rail kit 69Y0233 Filler panel, ESM 69Y0237 800-watt power supply, ac 45W8229 69Y0236 IBM 1-meter SAS cable 39R6530 IBM 3-meter SAS cable 39R6532 Service pass-thru cable 43W9310 Power cord, rack jumper, 2.8-meter 39M5377 System Storage EXP2512 and EXP2524: Installation and Maintenance Guide... -
Page 39: Exp2524 Expansion Enclosure Parts Listing
400 GB Solid State disk drive 81Y9870 2 U rail kit 69Y0233 Filler panel, ESM 69Y0237 800-watt power supply, ac 45W8229 69Y0236 IBM 1-meter SAS cable 39R6530 IBM 3-meter SAS cable 39R6532 Service pass-thru cable 43W9310 Chapter 4. Parts listing, EXP2512 and EXP2524 expansion enclosures... - Page 40 Table 5. EXP2524 parts listing (continued) CRU part CRU part number number part Index Description (Tier 1) (Tier 2) number Power cord, rack jumper, 2.8-meter 39M5377 System Storage EXP2512 and EXP2524: Installation and Maintenance Guide...
-
Page 41: Installation Guidelines
Installation guidelines Before you install the EXP2500, read the following information: v Read the safety information that begins on page iii and the guidelines in “Handling static-sensitive devices.” This information will help you work safely. v Make sure that you have an adequate number of properly grounded electrical outlets for the EXP2500 and other devices that you will connect to the EXP2500. -
Page 42: Working With Hot-Swap Hard Disk Drives
These drives are known as hot-swap drives. Hard disk drives The EXP2500 supports IBM SAS or nearline SAS hard disk drives. Each drive comes preinstalled in a drive tray, ready for installation in the EXP2500. (Do not detach the drive from the tray.) You can install the drives directly into the 12 drive bays on the front of the EXP2500. - Page 43 3. Locate the hard disk drive that you want to remove. Attention: Never hot-swap a hard disk drive when its green activity LED is flashing. Hot-swap a drive only when its amber status LED is lit (not flashing) or when the drive is inactive (activity LED is off). 4.
- Page 44 5. Removing a 3.5-inch hard disk drive. a. Press the latch on the right end of the tray handle to release it. Hard disk drive Drive tray Latch Tray handle b. Pull out the tray handle to the open position. c.
- Page 45 6. Installing a 2.5-inch hot-swap drive: a. Touch the static-protective package that contains the hard disk drive to any unpainted surface on the outside of the enclosure; then, remove the hard disk drive from the package. b. Make sure that the drive-tray handle is in the open (unlocked) position. c.
- Page 46 7. Installing a 3.5-inch hot-swap drive: a. Touch the static-protective package that contains the hard disk drive to any unpainted surface on the outside of the enclosure; then, remove the hard disk drive from the package. b. Make sure that the tray handle is open; then, slide the hard disk drive into the hot-swap bay.
-
Page 47: Replacing An Esm
10. Turn on the power to the EXP2500. For more information, see “Powering on the EXP2500” on page 21. 11. Go to http://www.ibm.com/servers/storage/support/ to check for ESM code updates. For more information, see the download instructions on page 1. Chapter 4. Parts listing, EXP2512 and EXP2524 expansion enclosures... -
Page 48: Replacing A Hot-Swap Power Supply
Replacing a hot-swap power supply Before you replace a power supply, read the following important information: v The power supply does not require preventive maintenance. v Both power supplies must be installed to maintain cooling. v Use only power supplies that the EXP2500 supports. To replace a hot-swap power supply, complete the following steps: 1. -
Page 49: Replacing The Bezels
Replacing the bezels The left bezel contains the LEDs; the right bezel shows the hard disk drive IDs. See the illustrations in “Front view: components” on page 17 Removing the bezels Left bezel Right bezel Handles To remove either the left or right bezel, complete the following steps: 1. -
Page 50: Replacing The Midplane
Replacing the midplane The midplane assembly must be replaced only by a trained service provider. To replace the midplane assembly, complete the following steps. Attention: To prevent data loss, you must shut down the storage enclosure before you begin the procedure to replace the midplane assembly. 1. - Page 51 10. Remove the midplane assembly from the chassis. Rotate the midplane assembly up about 45° and then lift it out. Set the midplane assembly on a flat surface. Midplane assembly 11. Remove the six screws that attach the midplane to the midplane assembly and lift off the failed midplane.
- Page 52 13. Replace the midplane assembly in the enclosure chassis: a. Grasp the midplane assembly with two hands and hold it at a 45° angle. Midplane assembly b. Insert the three tabs on the midplane assembly into the tab holes in the enclosure and rotate the front of the assembly down.
-
Page 53: Chapter 5. Solving Problems
1. Reconnect the SAS cable. communication 2. Replace the SAS cable. failure 3. If the LED is still off, replace the ESM or the device into which the other end of the SAS cable is connected. © Copyright IBM Corp. 2010, 2011... - Page 54 Table 6. Troubleshooting information (continued) Component Problem indicator Possible cause Possible solutions One or more hard One or more green No activity to the No action is required. disk drives LEDs off drives All hard disk No activity to the No action is required.
-
Page 55: Chapter 6. Remote Management And System Diagnostics
'send buffer' size. Default is 56 bytes Displays Detailed Enclosure Inventory Data showenc showfwlevels Displays firmware levels for all devices connected to the system showinventory Displays information about all the components uptime Informs how long the system has been running © Copyright IBM Corp. 2010, 2011... - Page 56 System Storage EXP2512 and EXP2524: Installation and Maintenance Guide...
-
Page 57: Appendix A. Getting Help And Technical Assistance
If you need help, service, or technical assistance or just want more information about IBM products, you will find a wide variety of sources available from IBM to assist you. This section contains information about where to go for additional information about IBM and IBM products, what to do if you experience a problem with your system, and whom to call for service, if it is necessary. -
Page 58: Software Service And Support
You can find service information for IBM systems and optional devices at http://www.ibm.com/systems/support/. Software service and support Through IBM Support Line, you can get telephone assistance, for a fee, with usage, configuration, and software problems with System x and xSeries servers, BladeCenter products, IntelliStation workstations, and appliances. For information about which products are supported by Support Line in your country or region, see http://www.ibm.com/services/sl/products/. -
Page 59: Appendix B. Notices
The materials at those websites are not part of the materials for this IBM product, and use of those websites is at your own risk. IBM may use or distribute any of the information you supply in any way it believes appropriate without incurring any obligation to you. -
Page 60: Important Notes
IBM makes no representations or warranties with respect to non-IBM products. Support (if any) for the non-IBM products is provided by the third party, not IBM. System Storage EXP2512 and EXP2524: Installation and Maintenance Guide... -
Page 61: Particulate Contamination
If IBM determines that the levels of particulates or gases in your environment have caused damage to the device, IBM may condition provision of repair or replacement of devices or parts on implementation of appropriate remedial measures to mitigate such environmental contamination. -
Page 62: Electronic Emission Notices
In the request, be sure to include the publication part number and title. When you send information to IBM, you grant IBM a nonexclusive right to use or distribute the information in any way it believes appropriate without incurring any obligation to you. -
Page 63: Germany Class A Statement
EU-Mitgliedsstaaten und hält die Grenzwerte der EN 55022 Klasse A ein. Um dieses sicherzustellen, sind die Geräte wie in den Handbüchern beschrieben zu installieren und zu betreiben. Des Weiteren dürfen auch nur von der IBM empfohlene Kabel angeschlossen werden. IBM übernimmt keine Verantwortung für die Einhaltung der Schutzanforderungen, wenn das Produkt ohne Zustimmung der IBM verändert bzw. -
Page 64: Japan Voluntary Control Council For Interference (Vcci) Class A Statement
Der verantwortliche Ansprechpartner des Herstellers in der EU ist: IBM Deutschland Technical Regulations, Department M456 IBM-Allee 1, 71137 Ehningen, Germany Telephone: +49 7032 15-2937 E-mail: tjahn@de.ibm.com Generelle Informationen: Das Gerät erfüllt die Schutzanforderungen nach EN 55024 und EN 55022 Klasse A. -
Page 65: People's Republic Of China Class A Electronic Emission Statement
People's Republic of China Class A electronic emission statement Taiwan Class A compliance statement Appendix B. Notices... - Page 66 System Storage EXP2512 and EXP2524: Installation and Maintenance Guide...
-
Page 67: Index
6 help, getting 45 hot-swap components connectors 20 hard disk drive 17 error LED 21 power supply 19 Ethernet link LED 21 hot-swap power supply Ethernet port 20 controls and connectors 19 © Copyright IBM Corp. 2010, 2011... - Page 68 49 humidity specifications 6 parts listing 25 power cabling 15 power requirement specifications 6 power supply IBM Support Line 46 controls and connectors 19 important notices 5 replacing 36 information record for hard disk drive 2 specifications 6...
- Page 69 turning off the EXP2500 23 turning off the EXP2500 in an emergency 23 turning on the EXP2500 21 United States electronic emission Class A notice 50 United States FCC Class A notice 50 website publication ordering 45 support 45 support line, telephone numbers 46 weight of EXP2500 6 Index...
- Page 70 System Storage EXP2512 and EXP2524: Installation and Maintenance Guide...
- Page 72 Part Number: 90Y8809 Printed in USA GA32-0965-01...
Need help?
Do you have a question about the System Storage EXP2512 Express Storage Enclosure and is the answer not in the manual?
Questions and answers