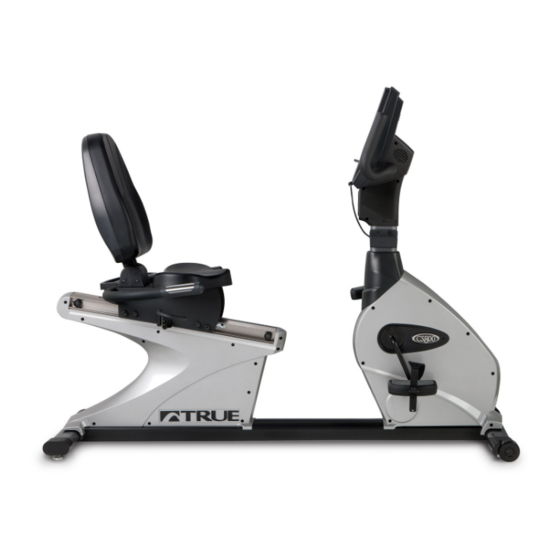
True CS800 Troubleshooting Manual
Hide thumbs
Also See for CS800:
- Owner's manual (34 pages) ,
- Assembly instructions manual (17 pages) ,
- Owner's manual (31 pages)
Table of Contents
Advertisement
Advertisement
Table of Contents

Summary of Contents for True CS800
-
Page 1: Troubleshooting
Troubleshooting CS800/LC900 Bikes... - Page 2 Press and hold the top left corner of screen until the True emblem will begin to flash after 4 seconds. Press and hold Manual Workout Button to reveal list of options 1.
- Page 3 CS800/LC900 Bike CS800, LC900 Bike Self Generating (Electromagnetic Brake) LCD 2 Window Press the CLEAR ENTRY button until the display blinks then immediately press and hold the ENTER button until ENTER PASSCODE appears. Press 20173 then ENTER. The word Production Test will appear.
- Page 4 CS800/LC900 Bike CS800, LC900 Bike Self Generating (Electromagnetic Brake) LCD 2 Window Manager Mode: 10101 Press the CLEAR ENTRY button until the display blinks then immediately press and hold the ENTER button until ENTER PASSCODE appears. Press 10101 then ENTER. The word configure will appear.
- Page 5 CS800/LC900 Bike CS800, LC900 Bike Self Generating (Electromagnetic Brake) LCD 2 Window Press the CLEAR ENTRY button until the display blinks then immediately press and hold the ENTER button until ENTER PASSCODE appears. Press 48362 then ENTER. The word Production Test will appear.
- Page 6 CS800/LC900 Bike Console Display Will Not Advance/Resets/ No RPM Touch Screen Upon starting any bike program, if the screen will not advance, asks if you would like to end workout, RPM signal is not being detected at the upper console, check the following: 1.
- Page 7 CS800/LC900 Bike Full Resistance When Pedaling Begins 1. Disconnect the console data cable on the upper panel. If there is still full resistance, continue to the next step. If the full resistance condition subsides, replace upper console. 2. Disconnect the console cable on the lower controller and retest for full resistance.
- Page 8 CS800/LC900 Bike No Resistance 1. Leaving the console cable plugged into the upper console, probe the console cable on pin 9 (Control Out) and pin 4 (GND) for Volts DC. Press the workload up button (+) on the upper console. Voltage should increase as resistance increases.
- Page 9 CS800/900LC Bike No Console Display Touch Screen The touch screen console requires a DC power supply to operate. follow the steps below to determine the component issue. 1. Disconnect the 2 conductor power cable (red and black) at the upper board and probe for 12 VDC 2.
- Page 10 CS800/LC900 Bike No Power/Console Display Not Powering Up 2 Window Display 1. Disconnect the console cable from the upper console. 2. Check for 12 VDC on pins 1 (+12V), and 4 (GND), and check for 11 &12= 12v, 9 & 10= 12 VDC on pins 2 (+12V), and 4 (GND).
- Page 11 (de-energize), before maintenance, (unless instructed to power equipment as part of a test procedure or an electrical check). True recommends the use of safety glasses when servicing equipment. Using non-specified / unauthorized parts or components...
- Page 12 CS800/LC900 Bike I pod will not connect Remove the 2 Philips screws that attach the I Pod plate to the console.
- Page 13 CS800/LC900 Bike I pod will not connect Unplug all of the cables that are attached to the I pod Faceplate.
- Page 14 CS800/LC900 Bike I pod will not connect Remove the I Pod cable from faceplate and unplug from the console. Replace new cable in reverse order. Reinstall the faceplate.
- Page 15 CS800/LC900 Bike Headphone Jack Has Static/No Sound In the event that the headphones when plugged in to The console create static, intermittent sound, or no Sound at all replace the headphone jack according to the procedure below. Remove the 2 Philips screws that attach the I Pod plate...
- Page 16 CS800/LC900 Bike Headphone Jack Has Static/No Sound Unplug all of the cables that are attached to the I pod Faceplate.
- Page 17 CS800/LC900 Bike Headphone Jack Has Static/No Sound Remove the 2 Phillips screws that attach the headphone jack to the I pod plate. Install the new headphone jack and test...
- Page 18 LCD 2 Window Displays Software Installation Instructions for the Bike 2 Window LCD Displays First check and record the current software version by pressing and holding the CLEAR ENTRY button while pedaling. When the screen blanks out press and hold ENTER until enter code appears, Press 20173 then press ENTER and then START to display the software version.
- Page 19 Broadcastvision TV Preset Programming Instructions 2 Window Display for TRUE FITNESS Treadmills and Bikes NOTES: Bikes Only: Because this is a self-generating product, you must continue to pedal during this procedure. Treadmills: Plug in treadmill and flip power switch ON.
- Page 20 To exit programming mode, Press and hold the CLEAR ENTRY key until display blanks and resets to normal operate mode. TV Programming is now complete. Should you need technical assistance for your TRUE Fitness product contact TRUE Fitness Technical Support at 1-800-883-8783...
- Page 21 Software Installation for Touch Screen...
- Page 22 Software Installation for Touch Screen...
- Page 23 Software Installation for Touch Screen...


Need help?
Do you have a question about the CS800 and is the answer not in the manual?
Questions and answers