
Related Manuals for Pioneer N-P01-S


Summary of Contents for Pioneer N-P01-S
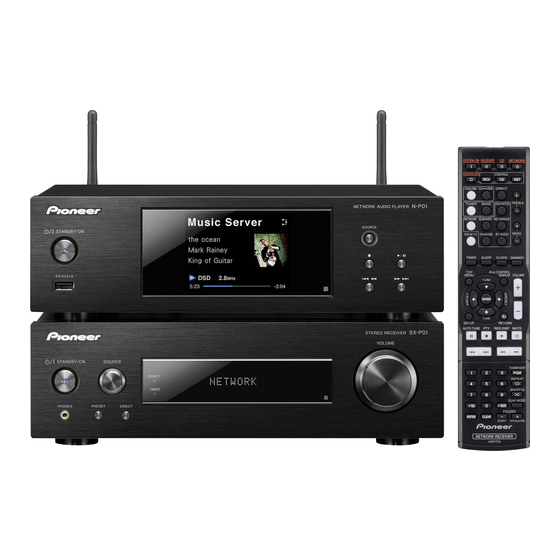
- Page 1 N-P01 -S/-K NETWORK AUDIO PLAYER XN-P02 -S/-K XN-P02DAB NETWORK RECEIVER -S/-K http://www.pioneer.co.uk (or http://www.pioneer.eu). Discover the benefits of registering your product online at Operating Instructions...
- Page 2 Check the power cord once in a while. When you find it VENTILATION CAUTION from the AC outlet in case of an accident. To avoid fire damaged, ask your nearest PIONEER authorized service (XN-P02, XN-P02DAB only) hazard, the power cord should also be unplugged from the center or your dealer for a replacement.
- Page 3 In this event, increase the distance between the antenna input connector and this unit (including products supported by this unit). • Pioneer is not responsible for any malfunction of the compatible Pioneer product due to communication error/malfunctions associated with your network connection and/or your connected equipment.
-
Page 4: Table Of Contents
Installing Pioneer ControlApp..... . 31 (Stereo receiver: SX-P01, SX-P01DAB) Using Pioneer ControlApp ......31 03 Getting started Troubleshooting chart . -
Page 5: About This Product
Before you start About this product Loading the batteries Operating range of remote control The remote has a range of about 7 m at an angle of about 30° XN-P02 or XN-P02DAB from the remote sensor. XN-P02 or XN-P02DAB Network Receiver System consists of Stereo receiver and Network audio player. -
Page 6: Remote Control
Remote control There are functions which can be operated only when the remote control is set in either of the network audio player control mode, stereo receiver control mode or CD player control mode, and functions which can be operated regardless of the mode of the remote control. <Stereo receiver SX-P01, SX-P01DAB only>... - Page 7 Input function buttons Buttons available for the network audio player Use to select the input source to this player. control mode TOP MENU The following functions are available only when the remote Displays the top menu of each input source. control is in the network control mode.
- Page 8 BAND CLEAR Buttons available for the stereo receiver control N-P01:Switches between FM ST (stereo) and FM MONO radio Press to clear the specified settings. mode bands (page 47, 48). Note The following functions are available only when the remote XN-P02, XN-P02DAB: Switches between FM ST (stereo) and •...
- Page 9 TOP MENU Buttons available for the CD player control mode Press to display the iPod/iPhone/iPad mini top menu. The following functions are available only when the remote /// control is in the CD player control mode. Use to select system setting and switch modes. Important ENTER •...
-
Page 10: Controls And Displays (Network Audio Player: N-P01)
Controls and displays (Network audio player: N-P01) Repeat and Shuffle Display Front panel Repeat all files. Repeat a file. N-P01 NETWORK AUDIO PLAYER SOURCE l STANDBY/ON Shuffle iPod/USB Play status 2.1 A Displays the play status. The play status differs depending on Song 1 the input source. -
Page 11: Connecting Your Equipment (Network Audio Player: N-P01)
Connecting your equipment (Network audio player: N-P01) CAUTION Analog audio output connections Digital audio output connections • Be sure to turn off the power and unplug the power cord By connecting this unit’s analog audio output to the analog By connecting this unit’s digital audio output to the digital from the power outlet whenever making or changing audio input of an amplifier, you can use the amplifier to enjoy audio input of an AV receiver or D/A converter, etc, you can... -
Page 12: Connecting Usb Storage Devices
It is possible to listen to two-channel audio using the USB terminal on the front of this player. Multiple Pioneer components equipped with CONTROL IN/ Internet OUT jacks can be connected to the unit, allowing centralized Connect your USB device to the USB terminal on the control of the components via the remote sensor on the unit. -
Page 13: Using Combined With The Xc-P01 Or Xc-P01Dab
ControlApp to be used, providing simple control over the make analog connections. Merely connecting the stereo receiver (SX-P01, SX-P01DAB) via the network audio CONTROL IN/OUT jacks alone will not allow proper system player (N-P01). Refer to page 31 for details of the Pioneer control. ControlApp. •... -
Page 14: Getting Started (Network Audio Player: N-P01)
1 minute. • After the Pioneer logo is displayed, the screen will go dark. The start up process is complete once the Pioneer logo is displayed a second time. -
Page 15: Ipod/Iphone/Ipad Playback
3G/4G/5G/6G/7G • Installing software versions other than indicated on the iPod touch 1G/2G/3G/4G/5G website of Pioneer to your iPod/iPhone/iPad may result in incompatibility with this player. iPhone 3GS • iPod, iPhone and iPad are licensed for reproduction of ... -
Page 16: Playing Your Ipod/Iphone/Ipad
iPod/iPhone/iPad playback (Network audio player: N-P01) Set up to stand the iPod/iPhone/iPad. Playing your iPod/iPhone/iPad • iPod/iPhone/iPad recharging occurs whenever an iPod/ When using an iPod/iPhone CAUTION iPhone/iPad is connected to this player. (This function is Make sure the iPod/iPhone cable is aligned along the groove only supported when the power is initially turned on or •... -
Page 17: Music Playback Using Bluetooth® Wireless Technology (Network Audio Player: N-P01)
Bluetooth SIG, Inc. and any use of Cell phone Press the BT AUDIO. such marks by PIONEER CORPORATION is under license. The unit switches to BT Audio and “Waiting device” will be Other trademarks and trade names are those of their displayed. -
Page 18: Listen To Music On The Unit From A Bluetooth Capable Device
Music playback using Bluetooth® wireless technology (Network audio player: N-P01) • Connected Select ‘Option Setting’ from Initial Setup menu. Radio wave caution This unit uses a 2.4 GHz radio wave frequency, which is a band BT Audio Select ‘Power Off Setting’ from Option Setting menu. used by other wireless systems (see list below). - Page 19 Music playback using Bluetooth® wireless technology (Network audio player: N-P01) Scope of operation Precautions regarding connections to products Use of this unit is limited to home use. (Transmission supported by this unit distances may be reduced depending on communication • Complete connections for all devices supported by this environment).
-
Page 20: Usb Playback (Network Audio Player: N-P01)
USB storage device. For details, see Connecting USB storage devices on page 12. Song 1 Pioneer does not guarantee that any file recorded on a USB Artist storage device will play or that power will be supplied to a USB Album storage device. -
Page 21: Playback With Network Features (Network Audio Player: N-P01)
Playback with NETWORK features (Network audio player: N-P01) Network setting If a broadband router (with built-in DHCP server function) is connected to this unit, you can simply turn on the DHCP server function without having to set up the network manually. Before you set up the network, consult with your ISP or the network manager for the required settings. -
Page 22: A: Wired Setting
Playback with NETWORK features (Network audio player: N-P01) • When you connect this player to the Internet via a proxy Note A: Wired setting server, proxy server settings are required. • If your router does not have a built-in DHCP server function, Select Use Proxy Server and press ENTER in step 4. -
Page 23: C: Connection Settings Using An Ios Device (With Ios 7.1 Or Later)
Playback with NETWORK features (Network audio player: N-P01) • Select Wi-Fi. C: Connection settings using an iOS device Check that the Wi-Fi mark is displayed on the iPhone, iPod touch or iPad screen. (with iOS 7.1 or later) If it is not displayed, turn Wi-Fi on, and then connect the You can apply iPod/iPhone/iPad (iOS device with iOS ver 7.1 iPhone, iPod touch or iPad to the wireless LAN router. -
Page 24: D: Wps Connection Setting
Playback with NETWORK features (Network audio player: N-P01) • Select Next. • Select Done. D: WPS connection setting WPS is abbreviation of Wi-Fi Protected Setup. A standard established by the Wi-Fi Alliance industry group for a function allowing settings related to interconnection of WPS compatible wireless LAN devices and encryption to be made with simple operations. -
Page 25: E: Wireless Setting
Playback with NETWORK features (Network audio player: N-P01) Follow the instructions shown in Connecting using PIN Use / to select the available wireless network you E: Wireless Setting code configuration on the right. want to connect to. Press NET SERVICE SETUP. Connecting using PIN Input The Initial Setup screen is shown on the display. -
Page 26: F: Connecting To A Router Without Wps-Pbc Function
SSID is displayed as Pioneer Setup:xxxxxx. “xxxxxx” is the Select DHCP to be Off and press ENTER in step 7. If your lower three bytes of the MAC address. -
Page 27: Friendly Name
Check the access code required for registration on this player, The information of the station you last selected is use this access code to access the special Pioneer Internet displayed on the display. radio site and register the desired broadcast stations in your favorites. -
Page 28: About The Spotify Audio Stream Playback Function
The access code required for registration on the special smartphone or other mobile digital device. CAUTION Pioneer Internet radio site is displayed. Make a memo of this address. • Even if you are away from home, if you start Spotify audio... -
Page 29: Introduction
There are cases where the time elapsed may not be When this player is selected as a DMR and DMS playback is indicated on the Pioneer website. AirPlay may not be correctly displayed. begun, the player’s input automatically switches to DMR. -
Page 30: Using Airplay To Enjoy Music
Playback with NETWORK features (Network audio player: N-P01) You can perform the following sort functions by pressing Using AirPlay to enjoy music Select N-P01. SORT, as long as your DLNA compatible digital media server supports the Sort function. Confirm that the iPod touch, iPhone, iPad, iTunes and Note this unit are connected to the same wired or wireless •... -
Page 31: Installing Pioneer Controlapp
If using an Android device You can obtain from “Google Play”. Using Pioneer ControlApp If using Pioneer ControlApp for the first time, follow these procedures to start the application. Connect this unit to the network you normally use. Connect your mobile device to the same network. -
Page 32: Additional Information (Network Audio Player: N-P01)
The album or artist name is not displayed. listed below, ask your nearest Pioneer authorized service * The line-of-sight transmission distance is an estimate. Actual Display of album names and artist names supports the center or your dealer to carry out repair work. - Page 33 Additional information (Network audio player: N-P01) Cannot access to the component or computer connected Player 12. Try using another server. Refer to the operation from any devices emitting electromagnetic waves on the 2.4 manual supplied with your server. GHz band (microwave ovens, game consoles, etc.). If this does via network.
-
Page 34: Setting Quick Start Mode
When using *1) Set the “XXX” in “192.168.1.XXX” to a number between 2 an application such as Pioneer ControlApp, the volume can and 248 that is not assigned to other devices. -
Page 35: Firmware Update
When downloading an update file from Download the latest firmware at Pioneer website. the Pioneer website onto your computer, the file will be in ZIP format. Unzip the ZIP file before saving it on the USB storage Be sure this player and your computer are connected to device. -
Page 36: Resetting This Player
Additional information (Network audio player: N-P01) Avoid the following locations: Browse the latest firmware on your computer (a) and Resetting this player then press Upload (b). • Places exposed to direct sunlight Use this procedure to reset all player settings to the factory The confirmation screen is displayed. -
Page 37: About Network Playback
Additional information (Network audio player: N-P01) Pioneer is not responsible for any malfunction of the player Content playable over a network About network playback and/or the Music Server features due to communication • Even when encoded in a compatible format, some files may... -
Page 38: About Playable Music File Formats
Additional information (Network audio player: N-P01) FLAC Category Extension Stream About playable music file formats FLAC Decoder .wav LPCM Sampling The USB and Music Server function of this player supports the USB/Music Server Copyright c 2000, 2001, 2002, 2003, 2004, 2005, 2006, 2007, frequency (Wired): 32 kHz, following music file formats. -
Page 39: About Ipod/Iphone/Ipad
Quantization 16 bit, 24 bit USB works with iPhone 5s, iPhone 5c, iPhone 5, iPhone 4s, c Uncompressed FLAC files are not supported. Pioneer does bitrate iPhone 4, iPhone 3GS, iPad Air, iPad (3rd and 4th generation), not guarantee playback. -
Page 40: About Aptx
Additional information (Network audio player: N-P01) About aptX ® © 2013 CSR plc and its group companies. The aptX mark and the aptX logo are trade marks of CSR plc or one of its group companies and may be registered in one or more jurisdictions. ®... -
Page 41: Control And Display (Stereo Receiver: Sx-P01, Sx-P01Dab)
Control and display (Stereo receiver: SX-P01, SX-P01DAB) How to use the stereo receiver (SX-P01, SX-P01DAB) supplied with the XN-P02 and XN-P02DAB. Front panel Stereo receiver /I STANDBY/ON Press to turn on and off the stereo receiver (page 44). SOURCE Use to select the input source for the stereo receiver (page 45). DIRECT indicator Lights when the DIRECT function is on (page 45). -
Page 42: Connecting Your Equipment
SX-P01 Monaural mini-plug cord (without resistor) AC IN To CONTROL OUT ANTENNA socket of other Pioneer component FM wire antenna SX-P01DAB: Connect the DAB/FM wire Wall socket (AC 220 V to antenna to the DAB/ 230 V, 50 Hz) FM socket. -
Page 43: Stereo Receiver: Sx-P01, Sx-P01Dab
Stereo receiver (amplifier built in) ControlApp to be used, providing simple control over the stereo receiver (SX-P01, SX-P01DAB) via the network audio player (N-P01). Refer to page 31 for details of the Pioneer Note ControlApp. • No sound is output from the subwoofer without a built-in •... -
Page 44: Getting Started (Stereo Receiver: Sx-P01, Sx-P01Dab)
Getting started (Stereo receiver: SX-P01, SX-P01DAB) Use / to select 24-hour or 12-hour display, then To turn the power on General functions press ENTER. Press the I SYSTEM ON button on the remote control to turn The time is displayed in the 24-hour on both of the stereo receiver and network audio player. -
Page 45: Input Selection
Getting started (Stereo receiver: SX-P01, SX-P01DAB) • Be sure your headphone has a 3.5 mm diameter plug and Muting Input selection impedance between 16 and 50 ohms. The recommended The volume is muted temporarily when pressing the MUTE The input source for the stereo receiver can be selected by impedance is 32 ohms. -
Page 46: Timer And Sleep Operation
Getting started (Stereo receiver: SX-P01, SX-P01DAB) Timer and sleep operation Press ENTER. Press the CONTROL RCV button on the remote control. If TUNER PRESET is selected in step 5, use / button Press the TIMER button. to select a preset. TIMER TIMER SLEEP... -
Page 47: Using The Tuner (Stereo Receiver: Sx-P01, Sx-P01Dab)
Using the tuner (Stereo receiver: SX-P01, SX-P01DAB) Press PRESET / to select a station preset number. Tune to a station. Tuning to a FM radio station You can also use the numeric buttons. Automatic tuning Tune to FM radio broadcasts using the automatic (search) To search for stations in the currently selected band, and manual (step) tuning functions. -
Page 48: Introduction To Rds
Using the tuner (Stereo receiver: SX-P01, SX-P01DAB) If “NO PTY” is displayed it means the tuner could not find Note Introduction to RDS that program type at the time of the search. • In addition, there are three other program types, ALARM, Radio Data System (RDS) is a system used by most FM radio •... -
Page 49: Listening To The Dab (Xn-P02Dab Only)
Using the tuner (Stereo receiver: SX-P01, SX-P01DAB) Selecting DAB stations Listening to the DAB (XN-P02DAB only) Turn on the stereo receiver. Refer to To turn the power on on page 44 for details. DAB (Digital Audio Broadcasting) is a digital transmission Select DAB. -
Page 50: Stereo Receiver: Sx-P01, Sx-P01Dab
Using the tuner (Stereo receiver: SX-P01, SX-P01DAB) SNR (Signal Noise Rate) DAB setup Noise may be generated and reception quality may become poor according to Signal Noise Rate. If reception quality is Press the CONTROL RCV button on the remote control. poor, move the antenna in different directions to find a position where the good rate is displayed. -
Page 51: Additional Information (Stereo Receiver: Sx-P01, Sx-P01Dab)
After that, execute Auto Scan function manually. If something is wrong with this product, check the following (page 49) before calling your authorized PIONEER dealer or service Select the stereo receiver by pressing the CONTROL RCV If the reception environment changed by removal, etc., execute centre. -
Page 52: Specifications (Network Audio Player: N-P01)
Additional information (Stereo receiver: SX-P01, SX-P01DAB) Accessories Specifications (Network audio player: N-P01) Specifications (Stereo receiver: SX-P01, Remote control ........1 SX-P01DAB) AAA size IEC R03 dry cell batteries. - Page 53 Português: Slovenščina: Declaration of Conformity with regard to the R&TTE Directive 1999/5/EC Pioneer declara que este [*] está Pioneer izjavlja, da je ta [*] v skladu z conforme com os requisitos essenciais bistvenimi zahtevami in ostalimi Manufacturer: EU Representative’s: e outras disposições da Directiva relevantnimi določili direktive...
- Page 54 253 Alexandra Road, #04-01, Singapore 159936 TEL: 65-6472-7555 PIONEER ELECTRONICS AUSTRALIA PTY. LTD. 5 Arco Lane, Heatherton, Victoria, 3202, Australia, TEL: (03) 9586-6300 PIONEER ELECTRONICS DE MEXICO S.A. DE C.V. Blvd.Manuel Avila Camacho 138 10 piso Col.Lomas de Chapultepec, Mexico, D.F. 11000 TEL: 55-9178-4270 K002_B3_En...
Need help?
Do you have a question about the N-P01-S and is the answer not in the manual?
Questions and answers