
Related Manuals for Pioneer N-70A-K/-S


Summary of Contents for Pioneer N-70A-K/-S
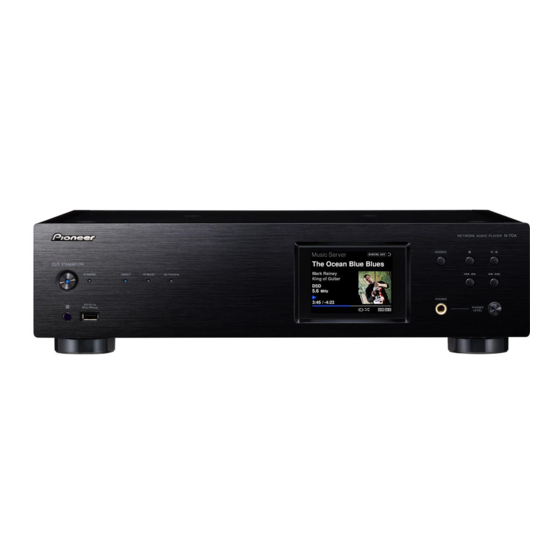
- Page 1 N-70A -K/-S NETWORK AUDIO PLAYER N-50A -K/-S http://www.pioneer.co.uk Discover the benefits of registering your product online at (or http://www.pioneer.eu). Operating Instructions...
- Page 2 CAUTION WARNING VENTILATION CAUTION TO PREVENT THE RISK OF ELECTRIC SHOCK, DO NOT This equipment is not waterproof. To prevent a fire or When installing this unit, make sure to leave space REMOVE COVER (OR BACK). NO USER-SERVICEABLE shock hazard, do not place any container filled with around the unit for ventilation to improve heat radiation PARTS INSIDE.
- Page 3 A damaged power cord can cause a fire or give you an electrical shock. Check the power cord once in a while. When you find it damaged, ask your nearest PIONEER authorized service center or your dealer for a replacement. S002*_A1_En...
-
Page 4: Table Of Contents
Contents Thank you for buying this Pioneer product. Please read through these operating instructions so you will know how to operate your model properly. Before you start Playing audio files stored on computers or other About this product ....... 5 components . -
Page 5: Before You Start
Before you start About this product Loading the batteries Operating range of remote control This operating Instructions uses simplified illustrations of the The remote has a range of about 7 m at an angle of about 30° product. Everything as shown in this operating Instructions from the remote sensor. -
Page 6: Controls And Displays
Controls and displays Front panel Press to stop playback. Press to start playback. During playback, pause/unpause playback. 9 10 Press to return to the beginning of the currently playing file. Hold down to fast-rewind. (Depending on the input function selected, it may not be possible to return to the beginning NETWORK AUDIO PLAYER N-50A of the currently playing file.) - Page 7 Controls and displays Play bar Display Displays the status of file playback. May not be displayed depending on the input or the file. Repeat and Shuffle Repeat all files. Music Server DIGITAL OUT Repeat a file. Song 1 Shuffle Artist SOUND feature indicator Album L.R.A...
-
Page 8: Remote Control
Controls and displays Hi-Bit 32 CLEAR Remote control Press this button to turn on the SOUND mode’s Hi-Bit 32 Press to clear the selected item. Use this for example if you function. Expands the dynamic range for digital audio signals. input the wrong number. -
Page 9: Connecting Your Equipment
Connecting your equipment N-50A CAUTION Analog audio output connections • Be sure to turn off the power and unplug the power cord By connecting this unit’s analog audio output to the analog AUDIO INPUT from the power outlet whenever making or changing audio input of an amplifier, you can use the amplifier to enjoy ANALOG connections. -
Page 10: Digital Audio Connections
Connecting your equipment Digital audio input connections Digital audio connections Connecting USB storage devices By connecting a digital audio component’s audio output to It is possible to listen to two-channel audio using the USB this unit’s digital audio input, this unit can be used as a D/A Digital audio output connections terminal on the front or the rear of this unit. -
Page 11: Using A Usb Cable To Connect To A Computer
DHCP server function, you have to set special driver on the computer. For details, see the website available) up the network manually. For details, see page 25. of Pioneer. Note • In order to connect to the Internet, you must conclude a Computer contract with an Internet Service Provider (ISP). -
Page 12: Connecting The Other Pioneer Devices And Controlling Centrally
WIRELESS iPod/iPhone Modem You can also centrally control Pioneer products with control input unit will receive the signals for the amplifier/CD player. 0.6A MAX) USB DAC terminals using this unit’s remote sensor. Those devices that do Point the remote control towards this unit to operate. -
Page 13: Plugging In
Connecting your equipment Plugging in Important • Before making or changing the connections, switch off the power and disconnect the power cord from the AC outlet. CAUTION • Do not use any power cord other than the one supplied with this unit. -
Page 14: Getting Started
• After the Pioneer logo is displayed, the screen will go dark. The start up process is complete once the Pioneer logo is displayed a second time. Brightness control for display and each indicator Press DIMMER button to dim the brightness of the display and each indicator. -
Page 15: Ipod/Iphone Playback
• This unit has been developed and tested for the software the USB terminal on page 15. version of iPod/iPhone indicated on the website of Pioneer (http://pioneer.jp/homeav/support/ios/eu/). Press iPod/USB FRONT or iPod/USB REAR to select iPod/ USB as the input source. - Page 16 iPod/iPhone playback Important • If this unit cannot play your iPod/iPhone, perform the following troubleshooting checks: Check whether the iPod/iPhone is supported by this unit (page 15). Reconnect the iPod/iPhone to the unit. If this doesn’t seem to work, try resetting your iPod/iPhone. Check the iPod/iPhone software is supported by this unit.
-
Page 17: Usb/External Hdd Playback
Song 1 Artwork in .jpg file format can be shown on the display if saved Pioneer does not guarantee that any file recorded on a USB in the bottom most folder. If a large .jpg format file is saved, it... -
Page 18: Network Quick Setup Guide
Network quick setup guide By connecting this unit to the network via the LAN interface, you can play back audio files Check connection stored on components on the network, including your computer, and listen to Internet radio stations. Press the STANDBY/ON button. The power to the unit will be turned on. -
Page 19: Try Using Network Functions
Listen to music on a computer or NAS (network attached storage). (page 22) Shared settings with Windows Media Player. Shared settings with NAS. Listen to music from files saved to a computer or NAS. Use the Pioneer ControlApp to operate the unit. (page 24) - Page 20 FRONT REAR CONTROL Router MUSIC SERVER SERVICE FAVORITES Playback will begin. Confirm that categories are displayed. Internet Radio No Title #001 Pioneer Radio.com Internet Radio LAN cable (commercially Computer available) Top Menu 24 kbps Genres 3:45 / -5:23 Countries...
- Page 21 Network quick setup guide Using an iPhone, iPod touch or iPad Start iTunes, click the AirPlay mark, and then select this Set the iPhone, iPod touch or iPad to music playback unit. mode. Connect an iPhone, iPod touch or iPad (iOS version 4.3.3 or higher) to the same router as this unit.
- Page 22 Network quick setup guide Listen to music on a computer or NAS Tap (touch) AirPlay. Select a track and play it. Swipe (slide) and hide display of the Control Center. (network attached storage). Playback will begin through this unit. Press the STANDBY/ON button. The power to the unit will be turned on.
- Page 23 Network quick setup guide Using a NAS that supports DLNA • Network and internet From the product name’s dropdown list, select “Permitted” and then press “OK”. Change NAS settings to allow access to NAS. Refer to the user manual of your NAS for more details. Using a computer with Windows Media Player 12 installed N-70A...
- Page 24 Up Sampling iPod/iPhone Note • Album name/artist name and artwork may not be displayed, depending on file format. Wireless Note • For details of how to use the Pioneer ControlApp, refer to: http://pioneer.jp/support/soft/iapp_controlapp/en.html (for iPhone/iPod touch) http://pioneer.jp/support/soft/aapp_controlapp/en.html (for Android)
-
Page 25: Perform Network Settings
Perform network settings Class A: 10.0.0.1 to 10.255.255.254 / Class B: 172.16.0.1 to Note Network setting 172.31.255.254 / Class C: 192.168.0.1 to 192.168.255.254 • If your router does not support DHCP, please manually set If a broadband router (with built-in DHCP server function) is Subnet Mask the network settings. -
Page 26: Setting The Network Standby Function
Setting the network standby function Listening to the Internet radio Allows power to the unit be turned on using the Pioneer You can select and listen to your favorite Internet radio station Press NET SERVICE repeatedly to select Internet Radio as ControlApp even when the unit is in standby mode. -
Page 27: Advanced Operations For The Internet Radio
Check the access code required for registration on this unit, Note use this access code to access the special Pioneer Internet • Playback may stall when the computer is switched off or Preparations (2) Connecting this unit to the... -
Page 28: Introduction
• DLNA-compatible digital media servers (on computers or order to delete the account information registered on this indicated on the Pioneer website. AirPlay may not be other components) unit. For instructions on resetting, see Resetting this unit compatible with iPod touch, iPhone, iPad or iTunes Files stored in a computer or DMS (Digital Media Server) as on page 36. - Page 29 Perform network settings • There are cases where the time elapsed may not be • Check your network environment if “Please wait” correctly displayed. continues to be displayed. If your DLNA compatible digital media server supports the Press MUSIC SERVER to select Music Server. Scan function.
-
Page 30: Using Other Functions
192 kHz/24 bits (depending on the connected expression can be achieved by requantizing 16 website of Pioneer. Please view the installing instructions device and environment, operation may not be successful). bit to 24 bit audio signals to 32 bit. -
Page 31: Adjust The Dac Lock Range (N-70A Only)
Using other functions Use / to select either 2-HOT/3-COLD or 2-COLD/3- Adjust the DAC lock range (N-70A only) Switch digital filter (N-70A only) HOT, then press ENTER. Use this function to make fine adjustments in the pursuit of You can perform separate settings for input signals PCM and Note higher audio quality. -
Page 32: Additional Information
MP3, WMA, Apple Lossless, FLAC, AIFF(*), DSD. listed below, ask your nearest Pioneer authorized service When a USB storage device/External HDD is *In the case of AIFF, display of files with a sampling frequency center or your dealer to carry out repair work. - Page 33 Additional information corresponding information again. Check whether the The folder stored on the component connected to the network The broadcasts from an Internet Radio station are stopped or connection status is set to “Do not authorize”. has been deleted or damaged. Check the folder stored on the interrupted.
-
Page 34: Wireless Lan
Computer sounds other than music can be heard through making the advanced wireless LAN settings will not USB cable. Unplug the unit from the wall and call a Pioneer necessarily improve the wireless LAN environment. Be careful the USB DAC In input. -
Page 35: Firmware Update
When downloading an update file from Download the latest firmware at Pioneer website. the Pioneer website onto your computer, the file will be in ZIP format. Unzip the ZIP file before saving it on the USB storage Be sure this unit and your computer are connected to device. -
Page 36: Resetting This Unit
Additional information Note Browse the latest firmware on your computer (a) and Resetting this unit • Confirm the unit’s IP address as follows: then press Upload (b). Use this procedure to reset all unit settings to the factory 1. Press NET SERVICE SETUP. The confirmation screen is displayed. -
Page 37: About Network Playback
U.S. patents and other intellectual property network connection may be blocked. Content playable over a network rights of Rovi Corporation. Reverse engineering and Pioneer is not responsible for any malfunction of the player and/or the Music Server features due to communication disassembly are prohibited. •... -
Page 38: About Playable File Formats
Additional information Authorizing this unit FLAC About playable file formats In order to be able to play with Music Server, this unit must be FLAC Decoder The unit supports the following file formats. authorized. This happens automatically when the unit makes Copyright ©... - Page 39 Additional information Gapless playback Category Extension Stream Category Extension Stream The unit can use USB memory/External HDD or a music .wav LPCM Sampling 32 kHz, 44.1 .flac FLAC Sampling 32 kHz, 44.1 FLAC server for gapless playback of the following file formats. frequency kHz, 48 kHz, frequency...
-
Page 40: Windows 8
Additional information The USB-DAC function of this unit supports the following file Windows 8 About iPod/iPhone formats. Note that some file formats are not available for playback although they are listed as playable file formats. This product is Windows 8.1 Compatible and Windows 8 Compatible. -
Page 41: About Spotify
Additional information Auto Power Down..15 min (default), 30 min, 60 min, Off About Spotify Specifications Weight (without package) N-70A ........11.5 kg The Spotify software is subject to third party licenses found by Analog audio output N-50A . - Page 42 253 Alexandra Road, #04-01, Singapore 159936 TEL: 65-6472-7555 PIONEER ELECTRONICS AUSTRALIA PTY. LTD. 5 Arco Lane, Heatherton, Victoria, 3202, Australia, TEL: (03) 9586-6300 PIONEER ELECTRONICS DE MEXICO S.A. DE C.V. Blvd.Manuel Avila Camacho 138 10 piso Col.Lomas de Chapultepec, Mexico, D.F. 11000 TEL: 55-9178-4270 K002_B3_En...
Need help?
Do you have a question about the N-70A-K/-S and is the answer not in the manual?
Questions and answers