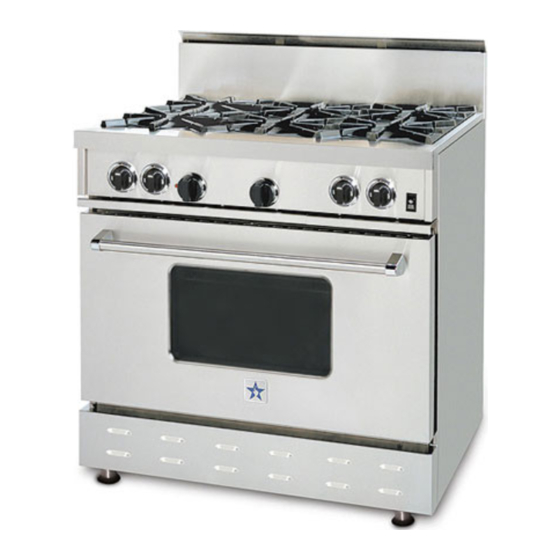
BlueStar RCS Use & Care Manual
Free standing ranges
Hide thumbs
Also See for RCS:
- Installation and user instructions manual (28 pages) ,
- Installation manual (12 pages)

Related Manuals for BlueStar RCS


Summary of Contents for BlueStar RCS
- Page 1 USE & CARE MANUAL Free Standing Ranges Heritage Classic Platinum™ Series...
- Page 2 BlueStar® Free Standing Range Use & Care Manual MODELS RCS, RPB, RNB, Heritage, Platinum THIS APPLIANCE WAS DESIGNED FOR EASE OF INSTALLATION AND OPERATION. HOWEVER, WE RECOMMEND THAT YOU READ ALL SECTIONS OF THIS MANUAL BEFORE YOU BEGIN INSTALLATION. INSTALLATION MUST BE PERFORMED BY AN APPROVED GAS INSTALLER OR GAS SERVICE TECHNICIAN OR THE WARRANTY IS VOID.
- Page 3 BlueStar® ranges are designed for discerning home chefs who demand restaurant-quality results in their own kitchens. As the owner of a new BlueStar® range you can look forward to years of culinary excellence. You will prepare meals with the speed and accuracy of a professional chef right in your own kitchen. All equipment is designed and manufactured to the highest quality standards in the industry specifically to meet the needs of the world’s most demanding chef: you.
-
Page 4: Service Information
SERVICE INFORMATION Date of Purchase Model Number Serial Number Dealer Name Dealer Phone Dealer Address Date of Installation Installer Name Installer Phone Installer Address Your installer should complete the Performance Checklist, found in the Installation Manual or page 45 of this manual, before leaving your residence. -
Page 5: Important Safety Instructions
IMPORTANT SAFETY INSTRUCTIONS SAVE THESE INSTRUCTIONS Read all instructions before using your appliance. Follow these important safety precautions to reduce the risk of fire, electric shock, personal injury or property damage. Do not remove permanent labels, warnings or data plates including the serial number from your appliance. Removal may void the manufacturer’s warranty and/or hinder effective servicing and maintenance. - Page 6 ENERAL AFETY NSTRUCTIONS SAVE THESE INSTRUCTIONS WARNING Your appliance should be installed by a qualified gas installation technician. Have the technician show you the exact location of the gas shutoff valve on the incoming gas line so you know how to turn off the gas if necessary.
-
Page 7: Important Safety Information
WARNING VENT OF AKE THE OLLOWING TEPS TO REVENT NJURY AND PREADING Do not use water on grease fires. Never pick up a flaming pan. Turn off the controls and smother the flaming pan with a fitted lid, cooking sheet or large flat tray. ... - Page 8 WARNING AFETY NSTRUCTIONS Do NOT cover the bottom of the oven floor with aluminum foil or any oven liner. Only use dry potholders. Moist or damp potholders on hot surfaces may result in steam burns. Do not allow potholders to touch hot burner areas. Do not use a towel or other bulky material as a potholder. ...
-
Page 9: Getting Started
GETTING STARTED ® We know you are excited to start cooking and baking with your new BlueStar range. Before you begin, it is essential that you follow these steps for safe and optimal use. Become familiar with all the parts of your range. - Page 10 COOKTOP BURNERS EFORE EGIN Each of your burners has a specific BTU (British Thermal Unit) rating. Before disassembly, note the ATTENTION location of each burner. If a burner is replaced in the wrong position it may not function correctly. Become familiar with the location of your burners. Below are the standard burner configurations. RNB Models –...
- Page 11 RCS Models – 30” , 36” RPB Models – 30” , 36” URNER PERATION Push in and turn the control knob counter clockwise to HIGH to start the ignition process. The igniter will spark and make a clicking sound. The clicking will stop after the burner ignites. The initial ignition may take a few seconds. You may hear multiple clicks before it ignites.
- Page 12 At the HIGH setting, flames should appear as a defined cone with a dark blue center and light blue outside. Some yellow/orange flame may be seen depending on the type of gas and the supply line. RATES AND RATES TIP: When placing the top grate back on the burner support, locate the sides with the raised edges and ensure they are positioned to the left/right side of the burner.
- Page 13 cleaning or other purposes, they must be re-installed in the same location they were removed from. Failure to do so may result in a burner that will not light or possibly have a high flame. TIP: Clean spills as soon as possible to prevent sticking and build-up, and to keep the burner ports clear. ...
- Page 14 NTEGRATED RIDDLE SOME MODELS Before You Begin You must season your integrated griddle before using. The seasoning process prevents food from sticking and the griddle from rusting. After seasoning, with time and use, your griddle will darken and develop a rich blue/black color, which is normal.
- Page 15 To prevent rust, do NOT allow your griddle to stand without a fresh coating of oil. Check the grease tray after each use to prevent overflowing. RCS M ORCELAIN COATED CAST IRON RIDDLE FOR ODELS...
- Page 16 HARBROILER SOME MODELS Before You Begin Your charbroiler grate is reversible. One side has narrow slats for use with delicate foods like fish and some vegetables. The other side has wider slats for use with larger foods items like steak and chicken. Before igniting the burner, decide which side is best for the dish you are preparing and place that side face up.
- Page 17 RENCH SOME MODELS Before You Begin You must season your French Top surface before using. The seasoning process prevents the surface from rusting. After seasoning, with time and use, your French Top surface will darken and develop a rich patina color which is normal. Seasoning your French Top Surface ATTENTION The complete seasoning process takes approximately 60 minutes and requires attention.
- Page 18 After every use, apply a light coating of corn oil or high smoke point oil. Wipe off excess using a dry cotton towel. Never flood a hot French Top ring or surface with cold water. This may cause the French Top’s steel plates to crack or warp, and will void your warranty.
- Page 19 – 12” 24” (H AISED RIDDLE ROILER ERITAGE LASSIC ODELS Before You Begin You must season your steel cooktop griddle plate before using. The seasoning process prevents food from sticking and the griddle plate from rusting. After seasoning, with time and use, your griddle plate will darken and develop a rich dark blue/black color which is normal.
- Page 20 If the igniter clicks more than 10 times, turn the control knob to OFF. Wait five minutes and try again. ATTENTION Turn and adjust the control knob(s) to the desired setting. Allow the griddle to pre-heat for at least 30 minutes before cooking. Raised Griddle/Broiler Cleaning Broiler racks ...
- Page 21 NTERCHANGEABLE RIDDLE HARBROILER YSTEM LATINUM ERIES ONLY The Platinum Series Griddle/Charbroiler system allows for two-zone cooking, with up to 40,000 BTUs of heat. The cast iron, interchangeable, griddle charbroiler system lets you use the griddle or charbroiler anywhere on the range top. Visit bluestarcooking.com to see the system in action.
-
Page 22: Operating The Oven
OPERATING THE OVEN EFORE EGIN Clean removable oven parts Remove and properly discard all temporary labels and packaging material including cardboard, zip ties, paper and wrapping from the oven, broiler pan, oven racks, oven rack glides and exterior surfaces. Remove protective plastic wrap from any stainless steel surfaces. - Page 23 Oven Guides and Racks Your oven has two standard racks and two five-position rack guides. Follow your recipe guidelines to determine the best rack location for your dish. TIP: For best results, center baking pans on the rack this will allow maximum air circulation around the food. WARNING ...
- Page 24 Operating the Oven WARNING Do NOT cover any slots, holes or passages on the bottom of the oven. Do NOT cover an entire oven rack with any material such as aluminum foil. Do NOT use a silicone mat on the oven floor. Foil and silicone mats will block airflow into the oven and may cause carbon monoxide poisoning.
- Page 25 Convection Baking and Roasting Convection baking and roasting uses a fan inside the oven to circulate the heated air more evenly, resulting in better heat distribution and a more consistent front to back, side to side, and top to bottom temperature. In general, convection baking or roasting takes less time and at lower temperatures than traditional baking or roasting.
- Page 26 Operating the PowR Oven™ (Platinum™ Series Only) BlueStar’s Platinum™ Series PowR Oven™ provides faster pre-heating. The power burner’s open flame is located in the center of the oven cavity on the back. A built-in fan turns on when on the burner is in use, adding to its efficiency and consistency.
- Page 27 Convection Baking and Roasting All Platinum™ Series PowR Oven™ are equipped with a Convection Fan. For even more efficient baking and roasting, you can use your PowR Oven™ with the Convection Fan. If you choose to use the Convection Fan, standard adjustments in temperature and time are recommended.
- Page 28 With oven door shut, push in and turn the oven thermostat control knob counter clockwise to BR (broil). The blue oven indicator light will illuminate. The broiler igniter will begin to glow and the ceramic broiler burners will light. The broiler will cycle on and off to maintain an even broiling temperature.
- Page 29 Oven Cleaning WARNING Do NOT clean the infrared ceramic broiler. Do NOT apply commercial oven cleaners to the oven door gasket. Do NOT rub or scrub the gasket since may damage the oven door seal. Make sure cleaning chemicals do not come in contact with any stainless steel, painted surfaces or the infrared ceramic broiler.
-
Page 30: Care And Cleaning
CARE AND CLEANING WARNING Make sure the cooktop surface and range are cool before cleaning. PART/ CLEANING FREQUENCY ATTENTION MATERIAL Do NOT use steel wool, metal pads or abrasive cleaners. Clean with stainless steel cleaner. Follow Backguard As needed cleaner manufacturer’s instructions. Discoloration may occur with heavy use. - Page 31 Grease Pan Remove from range. Discard grease and wash As needed Do NOT use abrasive sponges Insert (RNB, in hot soapy water. Apply stainless steel or steel wool Heritage, and cleaner as needed with a rag, following Platinum™ cleaner manufacturer’s instructions. models only) Dishwasher safe.
- Page 32 Turn on ventilation fan and Use a commercial oven cleaner. Follow make sure room is well vented. cleaner manufacturer’s instructions. Once a month; Oven Interior / more often Do NOT clean the infrared Porcelain with frequent ceramic broiler. This can easily Enamel use.
-
Page 33: Before Calling For Service
BEFORE CALLING FOR SERVICE ® Check these helpful tips for any problems with your range. If you need additional help call BlueStar Customer Service at 1-800-449-8691. COOKTOP PROBLEM POSSIBLE CAUSE SOLUTION Plug into a three-prong electrical outlet that is No electrical power to the unit. - Page 34 No electrical power to the unit. Check and re-set circuit breaker for the wall outlet used for this unit. Oven will not ignite (RNB, RCS, Heritage, Platinum™) Turn a top burner on. If top burner ignites, call Gas not flowing to oven. for service.
- Page 35 Fan guard is obstructed or clogged. like baked-on food or aluminum foil. Call for service. It is recommended that a certified BlueStar service provider adjust the air shutter on your PowR Oven™. To adjust the air shutter, make sure the range is off and cool.
-
Page 36: Maintenance
MAINTENANCE Air shutter adjustments are pre-set at the factory. However depending on a variety of factors including the type of gas supply, these adjustments may need to be fine-tuned after installation. A qualified installer should make these adjustments at the time of installation. Any air shutter adjustments that are needed after installation are not covered by your warranty. - Page 37 URNER HUTTER DJUSTMENT A properly adjusted burner will have sharp conical shaped blue flames. However, on some larger burners (22,000 BTU or 25,000 BTU) the cones are close together and blend into one another. The flame should be almost all blue. If your flames do not appear, follow the instructions to adjust the air shutter.
- Page 38 URNER LAME DJUSTMENT At its lowest setting, a properly adjusted burner will produce a steady flame about 1/8” above the burner ports. If your flames do not appear, follow the instructions to adjust the flame height. ATTENTION Before you begin, follow the steps in the Air Shutter Checklist. 1.
- Page 39 URNER HUTTER DJUSTMENT Before you begin, follow the steps in the Air Shutter Checklist. WARNING Wear heavy duty gloves when removing oven door, oven floor and front panel to prevent injury from CAUTION sharp edges. CAUTION Oven door weighs about 25 pounds. Use extreme care when removing or replacing to prevent personal ATTENTION injury or property damage.
- Page 40 10. Wearing heavy duty gloves, replace the oven floor in the oven, making sure that the seven holes are facing you. 11. Replace the kick panel and secure with the sheet metal screws. 12. Replace the oven door Grasp the door with both hands on each side of the door handle. ...
- Page 41 EPLACEMENT Only use a 40 Watt Appliance bulb. Regular light bulbs cannot tolerate oven temperatures. ATTENTION 1. Make sure oven is cool. 2. Grasp the clear globe lens with your fingers and turn counter clockwise to loosen and remove. 3. Replace the burned out bulb with a 40 Watt Appliance bulb. 4.
- Page 42 GNITER EPLACEMENT 1. For a front burner, remove the ring grate and top grate from the burner that needs the replacement igniter. For a rear burner, remove the ring grates and top grates from both the front and rear burners. 2.
-
Page 43: What Is Covered
WARRANTY WHAT IS COVERED? Prizer-Painter provides the following limited warranties to the original retail purchasers of Products sold and installed in the continental United States and Canada on or after February 22, 2002. The appliance must be installed by a certified gas technician or license plumber for any warranty authorizations. -
Page 44: What Is Not Covered
provide a refund if, in Prizer-Painter's sole judgment, repair or replacement is not feasible or appropriate under the circumstances. WHAT IS NOT COVERED? This Limited Warranty is the sole and exclusive warranty provided for the Product and extends only to original retail purchasers in the continental United States and Canada. -
Page 45: Performance Checklist
PERFORMANCE CHECKLIST This checklist has been developed to assure proper installation of your appliance. To validate your warranty you must mail or fax this form within 15 days of installation and a copy of your receipt to: Warranty Department, Prizer-Painter Stove Works Inc., 600 Arlington Street, Reading, PA 19611, or Fax (610) 376-2596. Failure to do so will void the warranty.
Need help?
Do you have a question about the RCS and is the answer not in the manual?
Questions and answers