Advertisement
Quick Links
Advertisement

Related Manuals for Vivax ACP-22CH65GECI


Summary of Contents for Vivax ACP-22CH65GECI
- Page 1 Service manual ACP-18CH50GECI ACP-22CH65GECI RoHS...
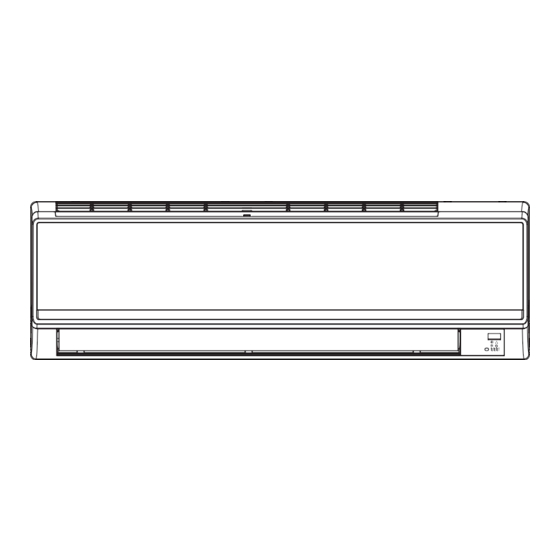
- Page 3 ACP-18CH50GECI/I ACP-22CH65GECI/I ACP-18CH50GECI/O ACP-22CH65GECI/O AUTO HEALTH X-FAN HUMIDITY FILTER TURBO HOUR ON/OFF ON/OFF MODE X-FAN TEMP TIMER TURBO SLEEP LIGHT ACP-18CH50GECI ACP-18CH50GECI/I ACP-18CH50GECI/O CB146W15700 ACP-22CH65GECI/I CB146W10161 ACP-22CH65GECI ACP-22CH65GECI/O...
- Page 4 Installing, starting up, and servicing air conditioner can be Make sure the outdoor unit is installed on a stable, level hazardous due to system pressure, electrical components, surface with no accumulation of snow, leaves, or trash and equipment location, etc. beside.
- Page 5 ACP-18CH50GECI ACP-18CH50GECI/I...
- Page 6 ACP-18CH50GECI/O...
- Page 7 ACP-22CH65GECI ACP-22CH65GECI/I...
- Page 8 ACP-22CH65GECI/O...
- Page 9 240V Indoor : DB20˚C/WB15˚C Outdoor : DB7˚C/WB6˚C Indoor air flow : High Pipe length : 5m Compressor speed (rps) Compressor speed (rps) ACP-22CH65GECI <Cooling> <Heating> • Conditions 220V 220V Indoor : DB27˚C/WB19˚C Outdoor : DB35˚C/WB24˚C Indoor air flow : High...
- Page 10 ACP-18CH50GECI ACP-22CH65GECI ACP-18CH50GECI ACP-22CH65GECI...
- Page 11 Indoor side noise when blowing Outdoor side noise High Super High Middle Indoor Fan Motor Rotating Speed Compressor frequency/Hz 18 24K...
- Page 12 ON/OFF ACP-18CH50GECI ACP-22CH65GECI ACP-18CH50GECI ACP-22CH65GECI...
- Page 13 Model: ACP-18CH50GECI/O Model: ACP-22CH65GECI/O...
-
Page 14: Indoor Unit
INDOOR UNIT OUTDOOR UNIT GAS SIDE 3-WAY VALVE Muffler Di s charge HEAT EXCHANGE (EVAPORATOR) Accumlator Suction COMPRESSOR HEAT EXCHANGE (CONDENSER) LIQUID SIDE 2-WAY VALVE Capillary Strainer COOLING INDOOR UNIT OUTDOOR UNIT GAS SIDE 3-WAY VALVE 4-Way valve Muffler Di s charge HEAT EXCHANGE (EVAPORATOR) - Page 15 ACP-18CH50GECI/I ACP-22CH65GECI/I...
- Page 16 DISPLAY TUBE ROOM TEM.SENSOR TEM.SENSOR TUBE ROOM DISP1 DISP2 N(1) COM-OUT AC-L YEGN YEGN PRINTED CIRCUIT BOARD JUMP EVAPORATOR EARTHING PANEL SWING-UD HEALTH-L HEALTH-N COOL PLASMA GENERATOR SWING MOTOR ACP-18CH50GECI/O WARNING OVERLOAD COMP. Please don't touch any terminal when the PROTECTOR voltage of terminal P(DC+) and N(DC-) at AP1 is higher than 30V to prevent the risk...
- Page 17 ACP-22CH65GECI/O COMPRESSOR 6YEGN R(M,V) COMP S(W,X) C(T,U) OUTROOM EXHAUST WARNING OUTTUBE TEM.SENSOR TEM.SENSOR Please don't touch any terminal when the TEM.SENSOR voltage of terminal P(DC+) and N(DC-) at AP1 is higher than 30V to prevent the risk of electrical shock!
- Page 18 ACP-18CH50GECI/I ACP-22CH65GECI/I Copper pin Auxiliary heating terminal of 3 Fan capacitor 4 Protective tube 5 Health relay K3 6 PG motor terminal relay K1, K2 neutral wire Terminal of Terminal of tube Up&down swing PG feedback ambient 7 Piezoresistor 8 Jumper cap...
- Page 19 ACP-18CH50GECI/O Compressor Electric expansion Compressor interface Temperature sensor overloadprotector valve Communication Outdoor fan 6 4-way 4-way valve interface with indoor Live wire valve unit Neutral wire 10 Earthing wire 11 Reactor interface 12 Reactor interface 2...
- Page 20 ACP-22CH65GECI/O Compressor overload Compressor interface Temperature sensor Electric expansion valve protector Communication interface Fan HALL interface Outdoor fan 4-way valve with indoor unit Live wire Earthing wire Neutral wire Reactor interface 1 PFC capacitor interface 1 Reactor interface 2...
-
Page 21: Mode Icon
ON/OFF Press it to start or stop operation. MODE Press it to select operation mode (AUT O/COOL/D RY /F AN/HE AT ). Press it to decrease temperature setting . Press it to increase temperature setting . FA N Press it to set fan speed . Press it to set swing angle . -
Page 22: Fan Speed Display
Up & down swing icon: is displayed when pressing the up & down swing button. Press this button again to clear the display. Left & right swing icon: is displayed when pressing the left & right swing button.Press this button again to clear the display. SET TIME display: After pressing TIMER button, ON or OFF will blink.This area will show the set time. - Page 23 ●In static swing condition, pressing button, the swing angle of left & right louver changes as below: ●If the unit is turned off during swing operation,the louver will stop at present position. X-FAN: Pressing X -FAN button in COOL or DRY mode,the icon "X-FAN" is displayed and the indoor fan will continue operation for 10 minutes in order to dry the indoor unit even though you have turned off the unit.
- Page 24 Slightly to press the place with , along the arrowhead direction to push the back cover of wireless remote control. (As show in figure) Take out the old batteries. (As show in figure) Insert two new AAA1.5V dry batteries, and pay attention to the polarity. (As show in figure) Attach the back cover of wireless remote control.
- Page 31 Pipe Reamer Point down Mark on the middle of it Gradienter Wall Wall Space Space to the to the wall wall above above Φ70 Φ70 Right Left Flare nut Unit: mm (Rear piping hole) (Rear piping hole) Copper tube Handle Inside Outside Caulking...
- Page 32 Indoor unit tubing Flare nut Pipes Open-end wrench (fixed) Flare nut Wrench Connection pipe Terminal block Indoor unit tubing Earth wire Outside diameter Torque Terminal cover Screw Φ6 Screw Φ9.52 Φ12 Cord clamp Φ16 Connecting cable Φ19 Terminal block Shield pipe yellow-green brown black...
- Page 33 Insulation fixing screw No gap Do not apply lubricating oil (refrigerant machine oil) when inserting the drain cap. If applied, deterioration and leakage of the drain plug may occur. Insert a hexagon wrench (4 mm) Slit Bind with vinyl tape Right piping Plastic bands Insulation material Pipe (top)
-
Page 34: Air Intake
Mounting plate Marking Air intake Min. 30 cm Valve side Min. 50 cm Min. 30 cm Air outtake Min. 200 cm Push Push Do not rise the drain hose. Do not form the drain hose into the waved shape. 50 mm or more Do not put the Do not put the drain... - Page 35 Compound Pressure gauge pressure gauge -101kPa Manifold valve (-76cmHg) Handle Hi Handle Lo (Keep full closed) Charge hose Charge hose Outdoor unit Connecting Vacuum pump pipe Liquid side piping adapter for (Smaller diameter) counter-flow prevention Packed valve at liquid side Vacuum pump Packed valve at gas side...
- Page 36 ACP-18CH50GECI Terminal block ACP-22CH65GECI Yellow-green Blue Brown Black Connecting cable Check places for flare nut connections (indoor unit) Check places for outdoor unit...
- Page 38 ACP-18CH50GECI/I AUTO HEALTH X-FAN HUMIDITY FILTER TURBO HOUR ON/OFF ON/OFF MODE X-FAN TEMP TIMER TURBO SLEEP LIGHT...
- Page 39 ACP-18CH50GECI/I...
- Page 40 ACP-22CH65GECI/I AUTO HEALTH X-FAN HUMIDITY FILTER TURBO HOUR ON/OFF ON/OFF MODE X-FAN TEMP TIMER TURBO SLEEP LIGHT...
- Page 41 ACP-22CH65GECI/I...
- Page 42 ACP-18CH50GECI/O...
- Page 43 ACP-18CH50GECI/O...
- Page 44 ACP-22CH65GECI/O...
- Page 45 ACP-22CH65GECI/O...
- Page 47 ACP-18CH50GECI/O ACP-22CH65GECI/O...
- Page 52 Start Is the wiring terminal between temperature sensor and the controller loosened or poor ly contacted? Insert the temperature sensor tightly Malfunction is eliminated. Is there short circuit due to tri-pover of the pa rts? Make the parts upright Malfunction is eliminated.
- Page 53 Possible causes: 1. Fan motor is locked; 2. The.feedback.terminal of PG motor is not connected tightly; 3. The control terminal of PG motor is not connected tightly; 4. Motor is damaged; 5. Malfunction of the rotation speed detection circuit of the mainboard. See the chart below: “H6”is...
- Page 54 Possible causes: 1. There is no jumper cap on the controller; 2. Jumper cap is not inserted properly and tightly; 3. Jumper cap is damaged; 4. Controller is damaged. See the chart below: C5 is displayed on the unit. Install a matching Is there jumper cap on the jumper cap .
- Page 55 ACP-18CH50GECI Test2 Test4 Test3 Test1 Test9 Tset8 Test7 Test6 Test5 Test10 Test12 Test13 Test11...
- Page 57 ACP-22CH65GECI/O Test9 Test3 Test4 Test2 Test1 Test5 Test7 Tset8 Test6 Test12 Test10 Test14 Test11 Test13...
- Page 59 Turn on the unit and wait 1 minute Use DC voltmeter to measure the voltage on the two ends of electrolytic capacitor Fault with the voltage Replace the control testing circuit on Voltage higher than 200V? panel AP1 control panel AP1 Measure the AC voltage between terminal L and N on wiring board XT(power supply)
- Page 61 Energize and switch on If the voltage Use AC voltmeter Check the supply between terminal L to measure the IPM protection and N on wiring voltage and voltage between occurs after the board XT is within machine has run for terminal L and N restore it to 210VAC~250VAC?
- Page 62 Anti-high temperature, overload protection Normal protection, please use If the outdoor ambient temperature is it after improve the outdoor higher than 53 ºC? ambient temperature After the unit de- energized for 20min Improve the If the radiating of outdoor radiating environment of and indoor unit is well? unit...
- Page 63 Energize the unit and start it If the stop time is not enough and the If the stop time of compressor high and low pressure of system is not is more than 3min? balance , please start it after 3min Improve the connection situation If the compressor wire COMP(UVW) is of control board AP1 and...
- Page 64 Synchronism Synchronism after energize the unit occurred during and start it operation Check if the fan Replace fan If the stop time of If the outdoor fan works terminal OFAN is capacitor C1 compressor is more than normally? connected well 3min Replace Improve the radiating...
- Page 65 After the unit de-energized for 20min If the overload protector SAT is well connected? Under ambient temperature, test the resistance of overload protector with ohmic Connect wire If the wiring terminal FA of electron well with wiring expansion is well connected? diagram The resistance value of firs t 4 l e ad fo ot an d th e...
- Page 66 Start Check the connection wire of reactor (L) of outdoor unit and PFC capacity Replace connection If there is damaged If the malfunction is wire with circuit short circuit removed? diagram Remove PFC capacity and test resistance of two terminals Capacity is Re-energize short...
- Page 67 Start If the unit is operation normal before malfunction Check connection wire of indoor and outdoor unit with circuit diagram Check built- in wiring of Connection indoor and correct? outdoor unit Malfunction of Check connection circuit is wire of indoor and If the wiring is detected with outdoor unit with...
- Page 68 Start Test voltage value with Test 12 position in diagram with voltage meter Number jumping Test voltage value with Test 13(18K) 11(24K) position in diagram with voltage meter Number jumping Outdoor unit Test voltage malfunction value with Test 10 position in diagram with voltage meter Number jumping...
- Page 72 2-way Valve (Liquid Side) 3-way Valve (Gas Side) Valve cap Hexagonal wrench (4mm) Open position Flare nut Flare nut Closed position Open position Closed position piping piping Service Service connection connection port cap port To outdoor unit To outdoor unit Works Shaft position Shaft position...
- Page 73 Liquid side Indoor unit Clsed Outdoor unit 2-way valve Gas side Clsed 3-way valve Vacuum pump OPEN CLOSE...
- Page 74 Liquid side Indoor unit Open Outdoor unit 2-Way valve Gas side Closed 3-Way valve CLOSE CLOSE Purge the air...
- Page 75 Liquid side Indoor unit Closed Outdoor unit 3-Way valve Gas side Closed 3-Way valve Gas cylinder R410A OPEN CLOSE...
- Page 79 Warning Be sure to wait for a minimum of 10 minutes after turning off all power supplies before disassembly.
- Page 85 Warning Be sure to wait for a minimum of 10 minutes after turning off all power supplies before disassembly. ACP-18CH50GECI/O...
- Page 87 Points Procedure Steps 4.Remove the axial flow fan The screw has reverse winding. Remove the nuts fixing the blade and thenremove the axial flow fan. Axial Flow Fan R e m o v e t h e 4 t a p p i n g fan motor xing frame screws fixing the motor;...
- Page 88 Points Steps Procedure 6. Remove soundproof sponge Since the piping ports on the sound blanket are torn Tear up the soundproof easily, remove the blanket sponge carefully. carefully. Soundproof sponge 7. Remove isolation sheet R e m o v e s c r e w s f i x i n g isolation sheet and then remove the isolation sheet.
- Page 89 Points Steps Procedure 9. Remove compressor compressor Twist off the three foot nuts on compressor and then remove the compressor. 10. Remove condenser sub-assy Remove the screws con- necting the support (con- denser) and condenser assy,and then remove the support (condenser). support condenser sub-assy Remove the chassis sub-...
- Page 90 Warning Be sure to wait for a minimum of 10 minutes after turning off all power supplies before disassembly. ACP-22CH65GECI/O...
Need help?
Do you have a question about the ACP-22CH65GECI and is the answer not in the manual?
Questions and answers