
Subscribe to Our Youtube Channel
Related Manuals for Premier Mounts PBL-UMS


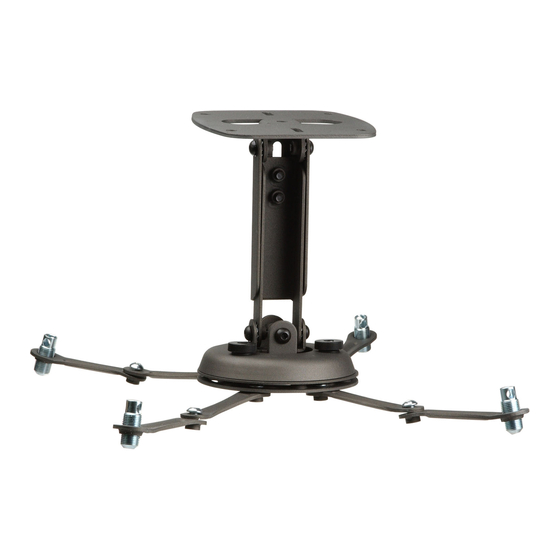
Summary of Contents for Premier Mounts PBL-UMS
- Page 1 I N S T A L L A T I O N M A N U A L Universal projector mount 3130 E. Miraloma Ave. Anaheim, CA 92806 Phone: 800 368-9700 Fax: 800 832-4888 VISIT US AT WWW.MOUNTS.COM PREMIER ©2004/ REV 00...
- Page 2 Features: Congratulations on your recent purchase of your PBL-UMS universal projector ceiling / wall mount kit. Designed for projectors weighing 25 lbs (13kg) or less. The mount is very easy to install and loaded with additional “no cost” installation features built into the mount. These features allow you to optimize your projector’s position to the screen for best projector performance and picture quality.
-
Page 3: Safety And Precautions
The installation instructions should be read, understood and followed to prevent personal injury or property damage. Keep these installation instructions in an easily accessible location for future reference. Indicates that the power plug is to be disconnected from Contact Premier Mounts for any questions the power outlet. Safety precautions must be taken at all times. -
Page 4: Mount Diagrams
Mount Diagrams MOUNTING Note: Dimensions are shown both in inches and (mm) HARDWARE 6.720 4) M4 x 12 Phillips screw (170.6) (4) M5 x 12 Phillips screw (4) M6 x 12 Hex head screw (3) #14 x 2 Wood screws (4) Plastic vinyl caps (1) M5 Allen wrench 10.250... - Page 5 PBL-UMS Universal mount assembly Single wood stud Option 1 mounting points Note: The four (two piece) leg Solid structure assemblies can be used as single mounting points leg or any combination of single Ceiling plate and dual legs together as shown...
-
Page 6: Parts List
Parts list Remove all the components from the box. Confirm that no components are missing from the package. If parts are missing STOP. Do not proceed with the installation. Contact PREMIER MOUNTS. (4) M4 x 12 Phillip screws Mounting bracket... - Page 7 Getting the projector ready WARNING: Proper installation procedure by qualified personnel as outlined in the installation instructions must be adhered to. Failure to do so could result in serious personal injury and possible damage to the projector. CAUTION: THE PROJECTOR IS FRAGILE HANDLE WITH CARE NOTE: Review the projectors manufacture’s operation manual and refer to the ceiling mounting section of the operator’s manual.
-
Page 8: Preparing The Mount
Preparing the mount Step 2 Separate the upper assembly from the projector mounting bracket by slightly loosening the two tension knurl knobs to create free play between the bracket tri-lock assembly and the upper section tri-lock assembly points. Next loosen the security screw knurl knob far enough to allow the two parts to be rotated 180°... - Page 9 Securing the bracket to the projector NOTE: The two piece mounting legs are designed to allow routing of the legs around critical ventilation screens on the base of the projector as shown. You may also reduce the two piece leg to a one piece leg as shown for a better overall fit to the projector. See figure 5, 6, 7.
-
Page 10: Leveling The Mounting Bracket
Leveling the mounting bracket Step 4 Rotate the leveling barrels to level the mounting bracket next, position the mounting bracket so that it avoids most, if not all, ventilation points (including lamp & filter access doors). When the position desired is achieved tighten the mounting hardware to the projector then tighten the hex head leg screws with the M5 Allen wrench (supplied). -
Page 11: Securing The Upper Assembly Ceiling Plate
Securing the upper assembly ceiling plate Step 5 Review your projector’s owners manual to determine what distance is recommended from the front of the lens to the edge of the screen for best picture ratio. (NOTE: however in most home theater and office ceiling mount installations this is not practical as the projector would be to low within the room. -
Page 12: Low-Profile Installation
Low-profile installation OPTIONAL If your installation requires the overall height of the mount to be less that the approximate 9” shown with the standard mount assembly, you can convert the height to only 2 ½” by simply removing the adjustment channel as shown. Once the extension channel is removed, attach the upper ceiling plate to the ceiling. Once attached install the bell housing assembly to the upper ceiling plate as shown. - Page 13 Please follow instruction on Step 5 (page 11) in this manual. Secure the ceiling plate to the ceiling structure FIGURE 12 Ceiling structure Wood stud Ceiling plate Lag bolts (supplied) Wood stud Allen wrench Ceiling structure Secure the bell housing with the two (2) M8 x 16 screws and flat washers NOTE: Do not use the star washers on a close...
-
Page 14: Securing The Projector To The Upper Assembly
Securing the projector to the upper assembly Step 6 FIGURE 14 Make sure the three knurl knobs are loosened to fully expose to the “tri-lock” mounting plate in the base The alignment slot must be in of the upper assembly. Carefully lift direct alignment with the safety the projector and insert the knob to lock the mounting bracket... - Page 15 Final line up adjustments Step 7 Wood stud With the projector secured in the mount and power on and signal supplied to the projector you can now proceed with the final height, tilt, roll and yaw to optimize the projected image. Ceiling Allen wrench The height can be adjusted by slightly loosening the two 8mm...
- Page 16 Installing the plastic caps Step 8 Once all the final adjustments have been done, install the plastic caps on the leveling barrels. See figure 15 FIGURE 15 - 16 -...
Need help?
Do you have a question about the PBL-UMS and is the answer not in the manual?
Questions and answers