Table of Contents
Advertisement
Quick Links
Advertisement
Table of Contents

Subscribe to Our Youtube Channel
Summary of Contents for Digitus DS-33102-1
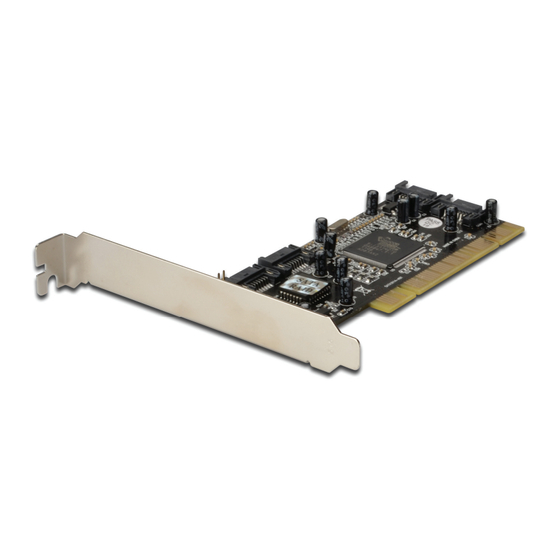
- Page 1 4-CHANNEL SATA PCI CONTROLLER User Manual DS-33102-1...
-
Page 2: Bus Interface
Features Silicon Image SiI3114 SATA controller chip Compliant with PCI Specification, Rev. 2.3, 32-bit, 33/66Mhz Compliant with Serial ATA 1.0 specification Provides four independent channels to support up to four Serial ATA drives Supports RAID0 (striping), RAID1 (mirroring), RAID5 (Parity RAID), RAID 0+1(mirroring + striping) and Concatenation modes ... -
Page 3: Hardware Installation
Hardware Installation Turn Off the power to your computer and any other connected peripheral devices. Unplug the power cord form the back of the computer. Remove your computer’s cover. Remove the slot bracket from an available PCI slot. To install the card, carefully align the card’s bus connector with the selected PCI slot on the motherboard. -
Page 4: Raid Arrays
RAID Arrays RAID Arrays are setup in the SATA 150 4-Channel PCI RAID Card’s BIOS. RAID 0 (Striping) This RAID array to be used on New/Blank hard drives. Striping will destroy existing data on the hard drive. Auto Configuration is recommended. -
Page 5: Manual Configuration
Manual configuration As the BIOS boots press Ctrl+S or F4 when prompted to enter the RAID BIOS. At the next screen select Create RAID Set, then press Enter. Select RAID0, then press Enter. Select the number of drives then press Enter. Select Manual configuration then press Enter Select chunk size from 8k, 16k, 32k, 64k or 128k, then press Enter. - Page 6 RAID 1 (Mirror) For New/Blank Hard Drives As the BIOS boots press Ctrl+S or F4 when prompted to enter the RAID BIOS. At the next screen select Create RAID Set, then press Enter. At the next screen select RAID1 then press Enter. Select Auto configuration, then press Enter.
- Page 7 Input the RAID size, press Enter. 10. Press Ctrl+E to exit the BIOS. 11. When asked Are you sure to exit(Y/N)?, press Y to exit and reboot. Note: If during boot the RAID BIOS reports an RAID1 set is in Rebuild status, The rebuild will continue after boot sequence is complete, disregard the message, continue booting, and let the Mirror rebuild.
- Page 8 Auto configuration (recommended) The default chunk size is 64k when selecting Auto configuration. As the BIOS boots press Ctrl+S or F4 when prompted to enter the RAID BIOS. At the next screen select Create RAID Set, then press Enter. Select RAID10, then press Enter. Select Auto configuration, then press Enter.
- Page 9 14. Press Ctrl+E to exit the BIOS. 15. When asked Are you sure to exit(Y/N)?, press Y to exit and reboot. 16. Continue with FDISK and FORMAT steps as if you were installing a conventional hard drive. RAID 5 (Parity) This RAID array to be used on New/Blank hard drives.
- Page 10 Manual configuration As the BIOS boots press Ctrl+S or F4 when prompted to enter the RAID BIOS. At the next screen select Create RAID Set, then press Enter. Select RAID5, then press Enter. Select the number of drives then press Enter. Select Manual configuration then press Enter.
-
Page 11: Deleting Raid Arrays
CONCATENATION This RAID array allows you to use one, two, three or four hard drives to a array. It does not provide any data protection or performance improvement but can be useful for utilizing leftover space on disks. As the BIOS boots press Ctrl+F4 or F4 when prompted to enter the RAID BIOS. -
Page 12: Resolving Conflicts
Resolving Conflicts When a RAID set is created, then metadata written to the disk includes drive connection information. If, after a disk failure, the replacement disk was previously part of a RAID set (or used in another system), it may have conflicting metadata. If so, this will prohibit the RAID set from being either created or rebuilt, in order for the RAID set to function properly, this old metadata must be first overwritten with the new metadata. - Page 13 ® Driver Installation For Windows 2000 For A New Installation A new installation requires a floppy disk for the driver installation. To make this floppy disk, copy the contents of the “\Driver\Windows driver\SIL3114_x86_15203” folder, found on the driver CD, onto a blank floppy disk then follow the directions below. Setup the RAID Array prior to Windows installation.
- Page 14 ® For Windows XP/Server 2003 For A New Installation A new installation requires a floppy disk for the driver installation. To make this floppy disk, copy the contents of the “Driver\Windows driver\SIL3114_x86_15203\” folder, found on the driver CD, onto a blank floppy disk then follow the directions below.
- Page 15 ® For Windows XP-x64/Server 2003-x64 For A New Installation A new installation requires a floppy disk for the driver installation. To make this floppy disk, copy the contents of the “Driver\Windows driver\SIL3114_x64_15203” folder, found on the driver CD, onto a blank floppy disk then follow the directions below.
- Page 16 For An Existing Installation Setup the RAID Array prior to driver installation and boot up to Windows. At the Found New Hardware Wizard: XP(w/SP1 or earlier)/Server 2003: continue to step #3 XP(w/SP2 or later)/Server 2003(w/SP1 or later): select No, not this time, then click Next.
- Page 17 For An Existing Installation Setup the RAID Array prior to driver installation and boot up to Windows. At Found New Hardware Wizard, select Locate and install driver software (recommended). Please insert driver CD, click Next. If the system prompts the user informing the drivers are not signed, select the option Install this driver software anyway.


Need help?
Do you have a question about the DS-33102-1 and is the answer not in the manual?
Questions and answers