Ubiquiti UniFi Quick Start Manual
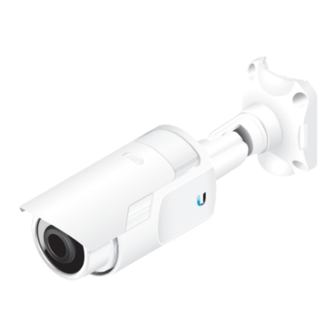
720p indoor/outdoor ip camera with infrared
Hide thumbs
Also See for UniFi:
- User manual (158 pages) ,
- Quick start manual (29 pages) ,
- Quick start manual (24 pages)
Table of Contents
Advertisement
Advertisement
Table of Contents

Related Manuals for Ubiquiti UniFi


Summary of Contents for Ubiquiti UniFi
- Page 1 720p Indoor/Outdoor IP Camera with Infrared Model: UVC...
-
Page 2: Wall-Mounting Requirements
UniFi® ™ Video Camera. This Quick Start Guide is designed to guide you through the installation of the UniFi Video Camera and show you how to access the Camera Configuration Interface. This Quick Start Guide also includes the warranty terms. -
Page 3: Hardware Overview
Hardware Overview Side View Sun Shade Adjusts Camera Up or Down Rotates Camera Rotates Base Bottom View Port Cover Ethernet Seal LEDs M/N: UVC 0.5A POE Video Camera Ethernet Port microSD Card Slot LEDs Ethernet The Ethernet LED will light steady green when an active Ethernet connection is made and flash when there is activity. -
Page 4: Before You Begin
Before You Begin A few notes about the camera before you begin installation: • If you wish to use the sun shade, it is easier to engage before you install the camera. • The camera has an adjustable base, tilt, and camera rotation. •... - Page 5 Sun Shade If you want to use the Sun Shade, press the Sun Shade Lock and Release Tab from behind the camera and slide the Sun Shade forward until it locks into place. Sun Shade Sun Shade Lock and Release Tab...
-
Page 6: Installation Overview
• Connect the other end of Ethernet cable to the PoE Adapter or a Ubiquiti Networks TOUGHSwitch ™ Connect Ethernet to the UniFi Video Camera 1. Press the latch to open the Port Cover on the bottom of the camera. - Page 7 3. Connect an Ethernet cable to the Ethernet port on the camera. M/N: UVC 0.5A POE Video Camera 4. Remove the Ethernet Seal from the Port Cover. 5. Slide the Port Cover back onto the camera near the Ethernet port and snap it in place. 6.
-
Page 8: Wall Mount
Wall Mount 1. Remove the adhesive Mounting Template from the backing and place the label on the wall where you want the camera. 2. Use a 7 mm drill bit to drill the holes in the wall. 3. Insert the four Screw Anchors into the wall. 4. -
Page 9: Pole Mount
Pole Mount To mount the UniFi Video Camera on a pole, use the included Metal Strap: 1. Open the Metal Strap by turning the locking screw counter-clockwise. 2. Slide the Metal Strap through the base of the camera. 3. Wrap the Metal Strap around the pole. Use a screwdriver or 7 mm socket drive to turn the locking screw clockwise and securely fasten the strap to the pole. -
Page 10: Connecting Power Over Ethernet
1. Connect the other end of the Ethernet cable to one of the following: • PoE Adapter Connect the UniFi Video Camera to the Ethernet port labeled POE on the included PoE Adapter. • EdgeSwitch (shown below) or TOUGHSwitch Connect the UniFi Video Camera to a port with 24V power enabled and skip steps 2 and 3. - Page 11 2. Connect an Ethernet cable from your LAN to the Ethernet port labeled LAN on the PoE Adapter. 3. Connect the power cord to the power port on the PoE Adapter. Connect the other end of the power cord to a power outlet.
- Page 12 UniFi Video The UniFI Video software is pre-installed on the UniFi NVR (sold separately). If you do not have the UniFi NVR, you can download and install the latest version of the UniFi Video software at downloads.ubnt.com/unifivideo; the UniFi Video auto-management feature should automatically detect and install your new camera(s).
- Page 13 1. Ensure that your host machine is connected to the same LAN as the UniFi Video Camera. 2. The UniFi Video Camera is set to DHCP by default. If you have a router or DHCP server providing addresses on your network, please check your DHCP Client Table or download the Ubiquiti Discovery Tool from: ...
-
Page 14: Adjusting The Camera View
Adjusting the Camera View Adjust Camera Up or Down Rotate Camera Rotate Base Note: Remove the protective plastic film from the camera lens and IR LEDs. For details on using the UniFi Video software, refer to the User Guide at: documentation.ubnt.com/unifivideo... -
Page 15: Specifications
Specifications UniFi Video Camera Dimensions 225 x 75 x 75 mm (8.85 x 2.95 x 2.95") Weight 373 g (13.1 oz) Ports (1) 10/100 Ethernet Port, microSD Card Slot Sensor Progressive Scan RGB CMOS ¼" Lens 3.6 mm/ F1.8 Power LED... -
Page 16: Safety Notices
Safety Notices Read, follow, and keep these instructions. Heed all warnings. Only use attachments/accessories specified by the manufacturer. WARNING: Do not use this product in location that can be submerged by water. WARNING: Avoid using this product during an electrical storm. -
Page 17: Limited Warranty
(VI) has no original Ubiquiti MAC label, or is missing any other original Ubiquiti label(s); or (VII) has not been received by Ubiquiti within 30 days of issuance of the RMA. -
Page 18: Limitation Of Liability
SUBJECT TO LIMITATIONS, INTERRUPTIONS, DELAYS, CANCELLATIONS AND OTHER PROBLEMS INHERENT IN THE USE OF COMMUNICATIONS FACILITIES. UBIQUITI NETWORKS, ITS AFFILIATES AND ITS AND THEIR THIRD PARTY PROVIDERS ARE NOT RESPONSIBLE FOR ANY INTERRUPTIONS, DELAYS, CANCELLATIONS, DELIVERY FAILURES, DATA LOSS, CONTENT CORRUPTION, PACKET LOSS, OR OTHER DAMAGE RESULTING FROM ANY OF THE FOREGOING. - Page 19 Note Some countries, states and provinces do not allow exclusions of implied warranties or conditions, so the above exclusion may not apply to you. You may have other rights that vary from country to country, state to state, or province to province. Some countries, states and provinces do not allow the exclusion or limitation of liability for incidental or consequential damages, so the above limitation may not apply to you.
-
Page 20: Industry Canada
Industry Canada This Class A digital apparatus complies with Canadian CAN ICES-3(B). To reduce potential radio interference to other users, the antenna type and its gain should be so chosen that the equivalent isotropically radiated power (e.i.r.p.) is not more than that permitted for successful communication. - Page 21 RoHS/WEEE Compliance Statement English European Directive 2002/96/EC requires that the equipment bearing this symbol on the product and/or its packaging must not be disposed of with unsorted municipal waste. The symbol indicates that this product should be disposed of separately from regular household waste streams.
- Page 22 Español La Directiva 2002/96/CE de la UE exige que los equipos que lleven este símbolo en el propio aparato y/o en su embalaje no deben eliminarse junto con otros residuos urbanos no seleccionados. El símbolo indica que el producto en cuestión debe separarse de los residuos domésticos convencionales con vistas a su eliminación.
-
Page 23: Declaration Of Conformity
UBIQUITI NETWORKS device, megfelel a vonatkozó alapvetõ [Hungarian] követelményeknek és az 1999/5/EC irányelv egyéb elõírásainak. Íslenska Hér me l sir UBIQUITI NETWORKS yfir ví a UBIQUITI NETWORKS device, er í samræmi vi grunnkröfur og a rar kröfur, sem ger ar eru í [Icelandic] tilskipun 1999/5/EC. -
Page 24: Online Resources
©2013-2014 Ubiquiti Networks, Inc. All rights reserved. Ubiquiti, Ubiquiti Networks, the Ubiquiti U logo, the Ubiquiti beam logo, TOUGHCable, TOUGHSwitch, and UniFi are trademarks or registered trademarks of Ubiquiti Networks, Inc. in the United States and in other countries. All other trademarks are the property of their respective owners.
Need help?
Do you have a question about the UniFi and is the answer not in the manual?
Questions and answers