Table of Contents
Advertisement
Smart Roller Nano
Roll Up Door Opener
WARNING: IT IS VITAL FOR THE SAFETY OF ALL
PERSONS INSTALLING AND USING THIS OPENER TO
FOLLOW THE INSTALLATION INSTRUCTIONS AND
SAFETY WARNINGS. FAILURE TO COMPLY MAY RESULT
IN SERIOUS PERSONAL INJURY AND/OR PROPERTY
INSTALLATION MANUAL
DAMAGE AND FAILURE OF THE OPENER SYSTEM.
Advertisement
Table of Contents

Related Manuals for Smart Openers Smart Roller Nano


Summary of Contents for Smart Openers Smart Roller Nano
- Page 1 Smart Roller Nano Roll Up Door Opener WARNING: IT IS VITAL FOR THE SAFETY OF ALL PERSONS INSTALLING AND USING THIS OPENER TO FOLLOW THE INSTALLATION INSTRUCTIONS AND SAFETY WARNINGS. FAILURE TO COMPLY MAY RESULT IN SERIOUS PERSONAL INJURY AND/OR PROPERTY INSTALLATION MANUAL DAMAGE AND FAILURE OF THE OPENER SYSTEM.
-
Page 2: Table Of Contents
TECHNICAL SPECIFICATIONS WARRANTY To the extent that they may be lawfully excluded, Smart Openers Pty Ltd hereby expressly excludes all conditions and warranties, statutory or otherwise, which may be implied by law as conditions or warranties of purchase of a Smart Openers Pty Ltd Garage Door Opener. Smart Openers Pty Ltd hereby further disclaims... -
Page 3: Important Safety Warnings
For a more detailed list of the Safety Warnings and to all relevant safety standards. Safety Issues associated with the installation and use of a Smart Roller Nano roll up door opener refer to the The Smart Roller Nano opener is designed and safety warnings in the OWNERS MANUAL. -
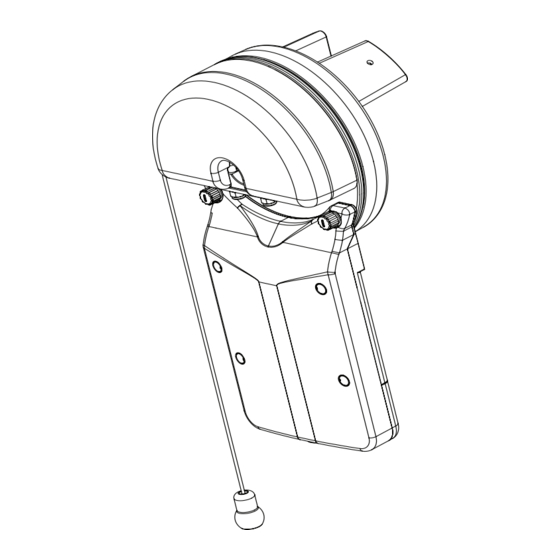
Page 4: Operating Controls
8 Input Terminal Block - used for connecting photo electric safety beam or 4 SET Button - used to save settings changes and external push button trigger. move to next parameter. 5 CODE Button - used to store transmitter code. © February 2009 Smart Openers Pty Ltd... -
Page 5: Before Installation
The forks in the Smart Roller Nano opener are not Remember the unit has mains voltage running through it designed to accept any such extension fingers and the (electrocution hazard, fire hazard). -
Page 6: Manual Release
Fig. 4 door should now be in automatic operation. IMPORTANT: If the only entry to the garage is via the garage door, Smart Openers strongly recommend the fitting of an external key release device. PULL RED CORD TO ENGAGE/DISENGAGE THE OPENER. - Page 7 10 Straighten the drive unit and secure the motor drive unit U-Bolt. 11 Remove prop and test manual operation of the door. It 10. SECURE DRIVE should travel smoothly and not catch on the drive unit. 11. REMOVE PROP UNIT Fig. 7 © February 2009 Smart Openers Pty Ltd...
-
Page 8: Tight Side Room Option
Enter parameter settings mode and change parameter settings. MODE Button Save settings and exit set up mode and return to normal operation. SET Button Save setting and move to next menu item. CODE Button Learn transmitter code. © February 2009 Smart Openers Pty Ltd... -
Page 9: Coding Transmitters
DISABLING VACATION MODE 1 Press and hold the MENU button for 10 secs or press transmitter buttons 1 + 2 together for 10 secs. (Fig. 19). © February 2009 Smart Openers Pty Ltd... -
Page 10: Left Or Right Hand Installation
SET again for 3 secs and repeat initialising procedure as per above. If limits set up and door force margin profile has been completed, to reposition limits press SET for 3 secs to reenter set up mode. -10- © February 2009 Smart Openers Pty Ltd... -
Page 11: Setting Limits Via Transmitter
If you are not happy with the limits positions and you are Complete still in the process of setting limits, press MODE to abort limits set up and repeat procedure as per above. Fig. 32 Door Closed Fig. 33 -11- © February 2009 Smart Openers Pty Ltd... -
Page 12: Obstruction Force Margin
Photo Beam Mode set to ON to enable auto-close function. Photo Beam Mode allows the door to close once the beam has been tripped and restored. Smart Openers strongly recommend the installation of a PE safety beam to protect persons and property (Factory Default = Off). -
Page 13: Auto-Close Mode
30 secs regardless whether the PE has been triggered. If the PE beam is triggered during that 30 seconds then the door will close 5 secs after the beam is restored. -13- © February 2009 Smart Openers Pty Ltd... -
Page 14: Hands Free Learning
2 Close the door onto the timber. If the door does not reverse easily and attempts to continue to close adjust the force margin as per procedure on page 12. 40mm Timber Fig. 45 -14- © February 2009 Smart Openers Pty Ltd... -
Page 15: Information For The User
• This installation manual is only for use by technical personnel qualified to carry out the installation. Once the Smart Roller Nano opener has been installed, • No information given in this manual can be considered the user must be informed about how it works and all the of any interest to the end user. -
Page 16: Warranty
6. To the extent permissible by statute, Smart Openers disclaims any liability of whatsoever nature in respect of any claim or demand for loss or damage which arises out of: accidental or deliberate damage to, or normal wear and tear to, the product or to the product’s components;...
Need help?
Do you have a question about the Smart Roller Nano and is the answer not in the manual?
Questions and answers