Lang ECCO-C Installation Operation & Maintenance
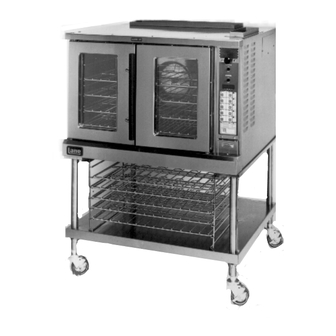
Electric full size convection oven
Hide thumbs
Also See for ECCO-C:
- Quick programming manual (4 pages) ,
- Service manual (73 pages) ,
- Service manual (71 pages)
Table of Contents
Advertisement
Quick Links
Download this manual
See also:
Service Manual
Advertisement
Table of Contents

Related Manuals for Lang ECCO-C


Summary of Contents for Lang ECCO-C
- Page 1 Installation Operation Maintenance Model: ECCO-C Electric Full Size Convection Oven Lang Manufacturing Company 6500 Merrill Creek Parkway Everett, WA 98203 Part Number 60800-02 Revision B Phone: 425-349-2400 Fax: 425-349-2483 July 1995...
-
Page 2: Table Of Contents
PARTS ................................. 11 CONTROL PANEL LAYOUT ......................11 PARTS LIST ............................12 WIRING DIAGRAMS ..........................13 208 /240 VOLT ............................. 13 480 VOLT OVEN ..........................14 Lang Manufacturing Company 800-224-5264 6500 Merrill Creek Parkway Fax: 425-349-2733 Everett, WA 98203 Copyright 1995... -
Page 3: Table Of Contents
Do not return noncombustible back wall maintain a 6 inch damaged merchandise to Lang Manufacturing clearance to the floor. Company. File your claim with the carrier. Do not install the oven closer than 12 inches... -
Page 4: Stacking The Ovens
The adjustable feet on the bottom of each leg ELECTRICAL CONNECTION may be screwed in or out as necessary to level the oven. The electrical connection must be made in accordance with local codes or in the absence of A spirit level placed on an oven rack will assist local codes with NFPA No. - Page 5 AMPERAGE AND KW CHART MODEL VOLT AMPERAGE 3 PHASE 1 PHASE L1 TO L2 L2 TO L3 L3 TO L1 TOTAL LINE 1 LINE 2 LINE 3 1 OVEN 11.5 36.5 36.5 22.9 55.3 1 OVEN 11.5 28.3 28.3 26.5 47.9 1 OVEN 11.5...
-
Page 6: Operation
OPERATION GENERAL Convection ovens constantly circulate air over Do not open the oven doors during baking as this and around the product. This strips away the thin will change the baking characteristics of the oven layer of moisture and cool air from around the and make it difficult to determine a final product allowing heat to penetrate more quickly. -
Page 7: Status Readout Display
Located below the control panel, behind the louvered access door. In the MANUAL OVERRIDE event of a computer failure, this switch takes control of the oven away from the computer and directs the temperature control to a manual thermostat located next to the switch. BACK-UP THERMOSTAT Activated when the MANUAL OVERRIDE switch it set to ON. -
Page 8: Product Changing
The STATUS READOUT will then display CANCEL SHELF " ", at that time press the SHELF Press the READ/CLEAR button twice then press BUTTON(S) that match the shelf position(s) the the shelf to be canceled. The STATUS product was placed on (A equals the top shelf, E READOUT will display or the time for equals the bottom shelf). -
Page 9: Temperature Recall Button
If service is required on the Lang computer, refer The READ/CLEAR button can also be used to Lang Authorized... -
Page 10: Maintenance
MAINTENANCE CLEANING Always start with a cold oven. Always apply these cleaners when the oven is cold and rub in the direction of the metal's grain. The porcelain or stainless interiors can easily be cleaned using most domestic or commercial oven DOOR CHAIN ADJUSTMENT cleaners. -
Page 11: Service
SERVICE WARNING SERVICE ON THIS, OR ANY OTHER, LANG APPLIANCE MUST BE PERFORMED BY QUALIFIED PERSONNEL ONLY. CONSULT YOUR AUTHORIZED SERVICE STATION DIRECTORY OR CALL THE FACTORY AT 206-881-7569 FOR THE SERVICE STATION NEAREST YOU. CALIBRATION ELEMENT REMOVAL The Lang Computerized Convection Oven is electronically controlled. -
Page 12: Safety Thermostat Removal
Remove the wires from the motor and safety Remove the oven racks and rack slides from the thermostat. Be sure to mark the wires for proper oven cavity. replacement. Remove the four thumb screws located at the Loosen the set screws holding the blower fan to corners of the fan baffle. -
Page 13: Parts
PARTS CONTROL PANEL LAYOUT ITEM NO. DESCRIPTION ITEM NO. DESCRIPTION Touch control panel Manual override switch G - Temperature sensor connection H - Output to contactors Heat contactor Microprocessor Motor contactor A - 12 volt supply Manual override relay B - Ribbon connectors Terminal block Beeper board 12 volt transformer... -
Page 14: Parts List
PARTS LIST DESCRIPTION PART # Bulb Socket: Oven Lamp 31602-04 Bulb: Oven Lamp 31603-04 Circuit Board Assembly: Buzzer 40102-10 Circuit Board Assembly: Front Panel 40102-08 Circuit Board Assembly: Microprocessor 40102-11 Circuit Breaker: 1 Pole 31800-01 Circuit Breaker: 3 Pole (480 Volt Units Only) 31800-04 Contactor: 2 Pole, 24 Volt Coil, 2 Speed Motor 30701-05... -
Page 15: Wiring Diagrams
WIRING DIAGRAMS 208 /240 VOLT... -
Page 16: 480 Volt Oven
480 VOLT OVEN...
Need help?
Do you have a question about the ECCO-C and is the answer not in the manual?
Questions and answers