Table of Contents
Advertisement
Advertisement
Table of Contents

Related Manuals for Russell Hobbs RHSB150


Summary of Contents for Russell Hobbs RHSB150
- Page 1 INSTRUCTIONS AND WARRANTY RHSB150 RUSSELL HOBBS HERITAGE KITCHEN MACHINE...
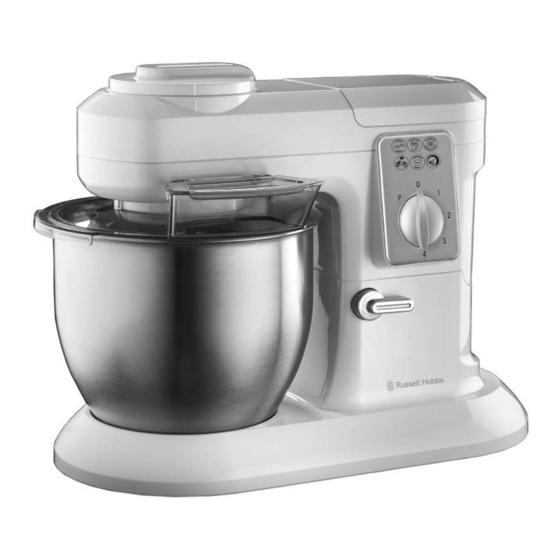
- Page 2 Congratulations on purchasing our Russell Hobbs Heritage Kitchen Machine. Each unit is manufactured to ensure safety and reliability. Before using this appliance for the first time, please read the instruction manual carefully and keep it for future reference. FEATURES OF THE RUSSELL HOBBS HERITAGE KITCHEN MACHINE ...
-
Page 3: Important Safeguards
IMPORTANT SAFEGUARDS When using any electrical appliance, basic safety precautions should always be followed including the following: 1. Please read the instructions carefully before using any appliance. 2. Always ensure that the voltage on the rating label corresponds to the mains voltage in your home. - Page 4 14. A short cord is provided to reduce the hazards resulting from becoming entangled in or tripping over a longer cord. 15. Do not let the cord hang over the edge of a table or counter. Ensure that the cord is not in a position where it can be pulled on inadvertently.
-
Page 5: Parts Diagram
30. Always insist on the use of original spare parts. Failure to comply with the above mentioned precautions and instructions, could affect the safe operation of this machine. THIS APPLIANCE IS FOR HOUSEHOLD USE ONLY PARTS DIAGRAM 1. Drive outlet cover 2. - Page 6 is important to keep these away from babies, infants and children for safety purposes. All parts of the kitchen machine need to be thoroughly cleaned before being used for the first time. (See “Cleaning and maintenance” section). POSITIONING Place the kitchen machine on a firm, stable, level surface. ...
-
Page 7: Fitting The Splash Guard
The head release lever will return to the lock position. SPLASH GUARD The mixing bowl can be used with or without the splash guard. It is recommended to use the mixing bowl with the splash guard and chute cover fitted to avoid spatter. ... -
Page 8: Fitting The Bowl
CHUTE COVER Caution: Do not insert fingers or utensils into the feeding chute at any time. To avoid spatter, ensure the chute cover is fitted when the kitchen machine is in use. The chute cover sits on top of the feeding chute on the splash guard. ... -
Page 9: Fitting Accessories
FITTING ACCESSORIES Ensure that the kitchen machine is switched off and unplugged. Raise the head (See “Raising the Head” section) Select the appropriate accessory: o Creamer-Beater: For making cakes, biscuits, pastry, icing, fillings, éclairs and mashed potato. o Balloon Whisk: For eggs, cream, batters, fatless sponges, meringues, cheesecakes, mousses, soufflé’s. -
Page 10: Speed Control
POWER UP Caution: - If the speed control is not set to ‘0' (off position), the kitchen machine will start when the power supply is connected. Please fit accessories correctly to avoid damaging the machine. Check that the speed control is set to "0". ... -
Page 11: Hot Liquids
HOT LIQUIDS Caution: Take extreme care if mixing hot liquids. The mixing accessories may splash liquids creating a scalding hazard. Ideally, you should not try mixing liquids that are hotter than you can comfortably handle i.e. temperatures below 40°C. If your recipe calls for mixing liquids hotter than 40°C, ensure you take steps to prevent scalding from possible splatter. - Page 12 Place the Heritage kitchen machine on a firm, stable, level surface. Position the power cord away from the edge of tables or countertops so it cannot be tripped over or caught. Caution: Do not operate the blender accessory empty for more than 1 (one) minute. Never fill the glass jug with boiling liquid.
-
Page 13: Adding Ingredients
Check that the speed control is set to “0”. Put the plug into the wall power outlet and switch it on. SPEED CONTROL Turn the speed control clockwise to the speed you want. Turning the speed control anti-clockwise to ‘P’ will give you a pulse at high speed. ... -
Page 14: Removing The Blade Unit
You may add liquid ingredients (such as oil, cream, water, etc.) to the food when blending. To do so, use the small hole located on the top of the blender jug lid, by the filler cap. Ensure to replace the filler cap after adding additional ingredients. Caution: Check that the added ingredients do not push the volume over the MAX mark. -
Page 15: Food Processor
FITTING THE BLADE UNIT Lower the blade unit into the upturned jug. Use the grips to turn the blade unit clockwise to engage the latches on the blade unit with the tabs on the inside of the jug. FOOD PROCESSOR A Food Processor allows you to chop, grate and slice, particularly in large quantities which will save you masses of time. -
Page 16: Using The Bowl
POSITIONING Place the Heritage kitchen machine on a firm, stable, level surface. Position the power cord away from the edge of tables or countertops so it cannot be tripped over or caught. Fit the bowl and splash guard cover to the kitchen machine. The kitchen machine’s drive operates when the motor is running. - Page 17 Put the plastic bowl onto the turn axis, onto the power outlet and turn the handle in a clockwise direction. Put the blade support on the axis in the middle of the bowl and press it to the bottom. ...
- Page 18 POWER UP Caution: - If the speed control is not set to the ‘0’ (off position) the kitchen machine will start when the power supply is connected. If accessories are not fitted correctly you may damage the machine. Check that the speed control is set to “0”. ...
-
Page 19: Processing Guide
POWER DOWN Turn the speed control to the ‘0’ (off position) and wait until the blades stop moving before removing the lid from the bowl or removing the bowl from the drive outlet. HOT LIQUIDS Caution: Pouring hot liquids into the processor bowl could cause the bowl to break. Before pouring into the bowl, let the liquid cool down to a temperature you can comfortably handle –... - Page 20 Be sure that there is no egg yolk in the egg white. Egg whites should be at room temperature for maximum volume. Use a high setting. Beating time will vary according to the freshness of the eggs. Hints for whipping cream:- ...
-
Page 21: Slicing & Shredding
Whipped 300ml From speed 1 to 4 for about 5 minutes. cream fresh cream Shakes, Beating eggs into creamed mixtures. cocktails or From speed 1 for about 4 minutes. other liquids Food Processor MAXIMUM TIMES (s) FUNCTION INGREDIENT MAX QUANTITIES SLICING SHREDDING MELON 400g... -
Page 22: Cleaning And Maintenance
CLEANING AND MAINTENANCE General Ensure that the kitchen machine is switched off and unplugged before cleaning. Give it a few minutes to cool down. Clean the kitchen machine as soon after use as possible to prevent residues setting. ... -
Page 23: Servicing The Appliance
SERVICING THE APPLIANCE There are no user serviceable parts in this appliance. If the unit is not operating correctly, please check the following: You have followed the instructions correctly That the unit has been wired correctly and that the wall socket is switched on. ... -
Page 24: Changing The Plug
CHANGING THE PLUG Should the need arise to change the fitted plug, follow the instructions below. This unit is designed to operate on the stated current only. Connecting to other power sources may damage the appliance. Connect a three-pin plug as follows: The wires in this mains lead are coloured in accordance with the following code: Green/Yellow = Earth... - Page 25 rectangles) on a floured surface, then lay them on a baking sheet or pizza tray. Spread the pizza bases with tomato puree and add toppings - mushrooms, ham, olives, sun dried tomatoes, spinach, artichokes etc. Top with dried herbs, pieces of mozzarella and a drizzle of olive oil.
-
Page 26: Basic White Bread
wooden spoon. Gradually add the liquid and mix with the Dough Hook Accessory, on speed 1. As the ingredients combine and the dough ball becomes more formed, increase the speed to 2. Knead for a couple of minutes on this speed until the dough ball is smooth. - Page 27 SOFT POPPY SEED ROLLS Makes 8-10 INGREDIENTS 570g white bread flour 1 tbsp sunflower oil 1 sachet active dried yeast (about 2 ½ tsp) 1 ½ tsp sugar 300ml milk, warmed slightly 2 tsp salt 2 eggs (room temperature) 75g poppy seeds Preheat the oven to 220°C.
- Page 28 HOT CHOCOLATE SOUFFLÉ INGREDIENTS 50g cake flour 75g butter 1½ tbsp cocoa powder 450ml milk 4 eggs, separated 50g castor sugar Preheat the oven to 190°C. Melt the butter in a pan, stir in the flour and cocoa and blend over a low heat.
- Page 29 RUM & APRICOT PANCAKES INGREDIENTS 100g cake flour 25g ground almonds 50g dried apricots 300ml milk 1 egg 25g butter, melted Grated rind of ½ lemon 2-3 tbsp rum Pinch salt oil for frying Cream or ice cream (to serve- optional) Soak the dried apricots overnight in the rum.
- Page 30 Roughly chop the tomatoes and shred the basil. Spread each of the pancake wraps with a small amount of the pesto, add cooked chicken, chopped tomatoes and basil. Season with salt and black pepper, then roll up and put the wraps in an ovenproof dish and sprinkle with the two cheeses.
- Page 31 custard to cream. CLASSIC VICTORIA SPONGE CAKE INGREDIENTS 100g butter or margarine 100g castor sugar 2 large eggs 100g self raising flour 1 drop vanilla essence Preheat the overn to 180ºC. Grease two 18cm straight sided baking tins and line the bases with greaseproof paper.
- Page 32 WALNUT & RICOTTA CAKE CAKE 150g butter, softened 150g castor sugar 5 eggs, separated 1 lemon rind, grated 150g ricotta cheese 50g cake flour 1 tsp vanilla extract 100g walnut pieces, chopped and toasted TOPPING 2 tbsp brandy 50g plain chocolate, grated Extra handful walnut pieces Preheat the oven to 190ºC.
-
Page 33: Sponge Cake
combined slightly. Add the eggs and milk and beat for a few seconds, gradually adding the flour. Continue beating until well mixed. Pour into the cake tin and bake for about 1 ½ hours. Cool in the tin for 15 minutes then turn onto a wire rack. SPONGE CAKE INGREDIENTS 500g cake flour... - Page 34 SWEET & SOUR SAUCE INGREDIENTS 4 shallots, peeled Small piece fresh ginger, peeled 2 cloves fresh garlic 2 tbsp soy sauce Dash white wine vinegar 2 tsp mustard 2 tsp tomato puree Put everything in the blender jug and blend on speed 4 until smooth. Serve with chicken or fish, or as a dip.
- Page 35 LEEK & POTATO SOUP Serves: 4 INGREDIENTS 150g leeks, trimmed 150g potatoes, peeled 2 vegetable or chicken stock cubes 800ml water Salt and pepper to taste Pulse the leeks and potatoes for a couple of seconds (you want them lumpy, not mushy). Transfer to a saucepan and add the water and stock cubes.
- Page 36 CHOCOLATE PEAR SMOOTHIE INGREDIENTS 300ml chocolate milk 2 pears, peeled, cored and roughly chopped Put everything into the blender jug. Blend on speed 2 for 15 seconds, then 3 for 5 seconds. MANGO LASSI INGREDIENTS 200ml natural yoghurt 1 ripe mango 200ml milk 2tsp honey Stone, peel and roughly chop the mango.
- Page 37 BANANA, VANILLA & HONEY SMOOTHIE INGREDIENTS 400ml milk 1 large banana, roughly chopped 4 tsp honey 2 tsp vanilla extract Put everything into the blender jug. Blend on speed 2 for 10 seconds, then 3 for 5 seconds. APPLE & MANGO SMOOTHIE INGREDIENTS 600ml apple juice 1 ripe mango...
- Page 38 CRANBERRY , ORANGE & BANANA SMOOTHIE INGREDIENTS 300ml orange juice 300ml cranberry juice 1 small banana, roughly chopped Put everything into the blender jug. Blend on speed 2 for 10 seconds, then 3 for 5 seconds. PEACH & APRICOT SMOOTHIE INGREDIENTS 4 halves of tinned apricot (in juice) 80ml apricot juice (from tin)
- Page 39 APPLE, MELON & KIWI FRUIT SMOOTHIE INGREDIENTS 400ml apple juice 1 kiwi fruit, peeled and roughly chopped 150g melon, roughly chopped Put everything into the blender jug. Blend on speed 2 for 10 seconds, then 3 to 10 seconds. CHOCOLATE CHERRY SMOOTHIE INGREDIENTS 350ml lemonade 125ml lemonade...
- Page 40 VEGETABLE STRUDEL Serves: 6-12 People INGREDIENTS Strudel dough: 300g flour 1tsp salt 100ml Luke warm water 30ml olive oil ½tsp white vinegar Vegetables: 1 red pepper, sliced 1 yellow pepper, sliced 1 green pepper; sliced 2 baby marrow; sliced 6 button mushrooms; sliced 3 carrots; grated Black pepper 6tbsp sweet chilli sauce ½...
-
Page 41: Pasta Dough
and cut into thick slices to serve. CARROT & PINEAPPLE SALAD INGREDIENTS 380 – 400g pineapple 200g carrots 50g raisins Using the Cutter accessory with the thinner grating drum, grate your pineapple and carrots. Combine all the ingredients in a bowl and store in the refrigerator until required. PASTA DOUGH Makes 500g INGREDIENTS... - Page 42 PLEASE AFFIX YOUR PROOF OF PURCHASE/RECEIPT HERE IN THE EVENT OF A CLAIM UNDER WARRANTY THIS RECEIPT MUST BE PRODUCED. W A R R A N T Y Home of Living Brands (Pty) Limited (“Home of Living Brands”) warrants to the original purchaser of this product (“the customer”) that this product will be free of defects in quality and workmanship which under normal personal, family or household use and purpose may manifest within a period of 2 (two) years from the date of purchase (“warranty period”).
Need help?
Do you have a question about the RHSB150 and is the answer not in the manual?
Questions and answers