Canon PowerShot G2 User Manual
Hide thumbs
Also See for PowerShot G2:
- Service manual (155 pages) ,
- Reference manual (28 pages) ,
- Parts catalog (23 pages)
Table of Contents
Advertisement
Quick Links
Camera User Guide
Flowchart and Reference Guides
• Please start by reading the Precaution on the reverse side of this cover.
• For instructions to operate Card Photo Printer CP-10 (optional),
please see the User Guide that accompanies it.
This Guide
Shooting with the Camera
Software Starter Guide
Installing the Software
Software Starter Guide
Connecting the Camera to a Computer
Software Starter Guide
Downloading Images to a Computer
ENGLISH
Advertisement
Chapters
Table of Contents
Troubleshooting

Related Manuals for Canon PowerShot G2


Summary of Contents for Canon PowerShot G2
- Page 1 Camera User Guide Flowchart and Reference Guides This Guide Shooting with the Camera Software Starter Guide Installing the Software Software Starter Guide Connecting the Camera to a Computer Software Starter Guide Downloading Images to a Computer • Please start by reading the Precaution on the reverse side of this cover. •...
-
Page 2: Trademark Acknowledgements
• While every effort has been made to ensure that the information contained in this guide is accurate and complete, no liability can be accepted for any errors or omissions. • Canon Inc. reserves the right to change the specifications of the hardware and software described herein at any time without prior notice. -
Page 3: Table Of Contents
Table of Contents Read this First ................4 Quick Start .................. 8 Components Guide ..............10 Front View ................... 10 Back View ..................11 Controls ..................12 Main Dial / Mode Dial ..............13 Display Panel ................15 Preparing the Camera .............. 16 Charging the Battery Pack ............. - Page 4 Stitch Assist Mode ..............49 Movie Mode ................ 52 Macro Mode ................ 53 Self-Timer ................54 Continuous Mode ..............55 Digital Zoom ................57 Shooting - Selecting Particular Effects ........58 Changing the Resolution and Compression ........58 Changing the File Format .............. 60 Program AE .................
- Page 5 List of Messages ................. 136 Specifications ................138 Index ..................143 Canon Customer Support ............146 Icon Conventions in the Text This mark denotes issues that may affect the camera’s operation. This mark denotes additional topics that complement the basic operating procedures.
-
Page 6: Read This First
Before you try to photograph important subjects, we highly recommend that you shoot several trial images to confirm that the camera is operating and being operated correctly. Please note that Canon Inc., its subsidiaries and affiliates, and its distributors are not liable for any consequential damages arising from any malfunction of a camera or accessory, including CompactFlash™... - Page 7 Continued use of the equipment may result in fire or electrical shock. Please consult your camera distributor or the closest Canon Customer Support Help Desk.
- Page 8 • Do not use substances containing alcohol, benzene, thinners or other flammable substances to clean or maintain the equipment. The use of these substances may lead to fire. • Remove the power cord on a regular periodic basis and wipe away the dust and dirt that collects on the plug, the exterior of the electrical outlet and the surround area.
-
Page 9: Preventing Malfunctions
• The camera terminal of the supplied compact power cord is designed for exclusive use with your camera. Do not use it with other products or batteries. There is a risk of fire and other hazards. • Exercise due caution when screwing on the separately sold wide converter lens, tele- converter lens, close-up lens and conversion lens adapter. -
Page 10: Quick Start
Quick Start Install the Battery (p. 18). Slide the battery cover lock, push the battery cover open and insert the battery. Terminals Charge the Battery (p. 16). Confirm that the main dial (lower dial) is turned . Charge the battery. The battery is approximately 90% charged (adequate charge for use) when the orange indicator beside the viewfinder stops flashing and shines steadily. - Page 11 Turn the mode dial (upper dial) to (p. 41). Compose the picture and focus (p. 36). Aim the camera and lightly press the shutter button halfway. Two beeps will sound when the autofocus is set. Shoot (p. 36). Press the shutter button all the way. You will hear the sound of the shutter close when the shot is complete.
-
Page 12: Components Guide
Components Guide Front View AF-Auxiliary Light Emitter Optical Viewfinder Window (p. 37) Red-Eye Reduction Lamp (p. 43) Self-Timer Lamp (p. 54) Remote Sensor (p. 122) Built-In Flash (p. 43) Speaker (Manual Focus) Button (p. 81) Terminal Cover Strap Eyelet (p. 28) Microphone Lens A/V OUT (Audio / Video Out) -
Page 13: Back View
Back View Viewfinder (p. 37) Strap Eyelet (p. 28) CF Card Slot Cover (p. 24) Battery Cover (p. 18) Battery Cover Lock (p. 18) Tripod Socket Components Guide... -
Page 14: Controls
Controls Main Dial (p. 13) Hot Shoe (p. 123) Mode Dial (p. 13) Indicators Shutter Button (p. 36) Diopter Adjustment Lever Zoom Lever (p. 37) Shooting: (Telephoto)/ (Wide Angle) (p. 38) Display Panel (p. 15) Replaying: (Zoom In)/ (Zoom Out) (p. 87) LCD Monitor (Continuous) / (p. -
Page 15: Main Dial / Mode Dial
Main Dial / Mode Dial Main Dial (lower dial) Mode Dial (upper dial) Main Dial Use the main dial to switch between the power off, shooting and replaying modes. : Off (p. 29) : Shooting (p. 30) : Replaying (p. 30) •... -
Page 16: Mode Dial
Mode Dial The mode dial is for selecting a shooting mode when the main dial is set to (shooting) mode. Creative Zone Auto Image Zone • : Auto (p. 41) • Creative Zone User selects exposure, aperture or other Camera automatically selects settings to achieve special effects. -
Page 17: Display Panel
Display Panel The display panel shows the camera settings, the remaining image capacity, movie shooting time, battery charge and other information. The H symbol displays in the mode (White Balance) setting. AE Lock / FE Lock pp. 75, 77 Shutter Speed / Movie Shooting Time Aperture Setting Compression p. -
Page 18: Preparing The Camera
Preparing the Camera Charging the Battery Pack Use the following procedures to charge the battery pack the first time and subsequently when the low battery icon ( ) and Lb ( ) message flash. Turn the main dial to Slide the battery cover lock in the direction of the arrow and open the battery cover. - Page 19 90% (adequate charge for use). It takes approximately 2 more hours to charge it fully (based on standard Canon testing criteria). Charge it within a temperature range of 5 to 40º C (41 to 104º F).
-
Page 20: Installing The Battery Pack
Installing the Battery Pack Install Battery Pack BP-511 (supplied) into the camera as follows. Use a household power source to power the camera for extended periods (p. 20). Turn the main dial to Slide the battery cover lock in the direction of the arrow and open the battery cover. -
Page 21: Battery Performance
Approx. 400 images Approx. 1000 images Battery Pack BP-511/BP-512 (full charged) • The data above reflects standard Canon testing conditions. The actual figures will vary according to the shooting conditions and settings. • Movie data is excluded. • At low temperatures, the battery pack performance may diminish and the low battery icon appear very rapidly. -
Page 22: Using A Household Power Source
Using a Household Power Source You should use a household power source for long periods of continuous use or for connecting to a computer or Card Photo Printer CP-10 (optional). Attach the power cord to the compact Connect to an Electrical Outlet power adapter and plug it into an . -
Page 23: Using A Charge Adapter / Car Battery Cable Kit (Optional)
Using a Charge Adapter / Car Battery Cable Kit (Optional) Charge Adapter / Car Battery Cable Kit CR-560 (optional) can be used to charge battery packs or to power the camera from a car’s cigarette lighter socket. You can also charge Battery Pack BP-511 or Battery Pack BP-512 (optional) from a household power source without using the camera by connecting Compact Power Adapter CA-560 (supplied with the charger adapter) to Charge Adapter / Car Battery Cable Kit CR-560. - Page 24 Charging the Battery Pack Attach the car battery cable to the charge adapter. With the engine running, plug the car To a Car’s Cigarette battery cable into the cigarette lighter Lighter Socket socket. Attach the battery pack. • Align the battery pack with the mark on the charge adapter and slide it in the direction of the arrow.
- Page 25 With the engine running, unplug the car battery cable from the socket. • Whenever you turn the engine off, the battery will stop charging, so be sure to unplug the charge adapter from the cigarette lighter socket. • Wait until the engine is running again to plug it back into the cigarette lighter socket and resume charging.
-
Page 26: Installing A Cf Card
Installing a CF Card Turn the main dial to Slide the CF card cover in the direction of the arrow and lift it open. Insert the CF card with the label facing up and the arrow pointing in. • Push the card in until the CF card eject button fully extends. - Page 27 1834 sec. * Figures over 1000 display as “999” since the display panel can only show up to three digits. • The data above reflects standard Canon testing conditions. The actual figures will vary according to the shooting conditions and settings.
-
Page 28: Setting The Date/ Time
Setting the Date/ Time Turn the main dial to • The camera will power up. Press the button. • The [ (Rec.)] or [ (Play)] menu will display. Press the arrow on the omni selector to select the [ (Set up)] menu. •... -
Page 29: Setting The Language
Setting the Language Turn the main dial to • The camera will power up. Press the button. • The (Rec.) or (Play) menu will display. Press the arrow on the omni selector to select the (Set up) menu. • Pressing the button also switches between menus. -
Page 30: Attaching The Strap
Attaching the Strap Pass the tip of the strap up through the strap eyelet on the camera and then through the bottom of the buckle on the strap. Pull the strap tight in the buckle so that it won’t slip. Perform the same steps on the other side of the camera. -
Page 31: Basic Functions
Basic Functions Turning the Power On Turn the main dial left or right from the position. • The power is off when the main dial is set to position, and on in any other positions. • You will hear a startup sound and see the startup window when the power comes on, except when the LCD monitor is closed or shut Example of the main dial... -
Page 32: Switching Between Shooting And Replaying
Power Save Function The camera features a power save function that turns the camera off under the following conditions when it is set to on. Shooting Mode: powers down approximately 3 minutes after a control is last accessed. The LCD monitor will shut off approximately 3 minutes after a control is last accessed even if the power save function is turned off. -
Page 33: Using The Lcd Monitor
Using the LCD Monitor The LCD monitor can be used to confirm an image during shooting, to replay recorded images or to adjust menu settings. It can be opened to the following range of positions. • Opened left to right 180 degrees. It locks temporarily at 90 degrees. -
Page 34: Camera Body
The LCD monitor can also be positioned as below. Open the LCD monitor left 180 degrees and tilt it 180 degrees toward the lens. • In this position, icons and messages do not appear on the LCD monitor. • The image shown on the LCD monitor is automatically flipped and reversed so that it appears correctly from in front of the lens. -
Page 35: Information Displayed On The Lcd Monitor
• The camera shake warning icon will appear at the center of the LCD monitor in low light conditions while the camera is preparing to shoot. When this icon appears, use the flash or fix the camera to a tripod to shoot. Replaying •... -
Page 36: About The Histogram
Replaying In simple display mode, the following information File Number displays. Compression Settings p. 58 L M1 M2 S Resolution Settings p. 58 File Format p. 60 Movie p. 52 Protection Status p. 96 • In addition to the above, the file number, image number and shooting date/time are displayed as in the example to the left. - Page 37 The following information may also appear with some image files. Audio file is attached (wav file). An audio file other than a wav file or a file with an unrecognized format is attached. A JPEG file not supported by “Design rule for Camera File system” standards. A file with an unrecognized format.
-
Page 38: Pressing The Shutter Button
Pressing the Shutter Button The shutter button features a two-stage action. Pressing Halfway Pressing halfway automatically sets the exposure, focus and white balance. • The indicators shine or flash as follows. - Green: Metering complete (two beeps sound) - Orange: Flash will fire - Flashing Orange: Camera shake warning/ Indicator Insufficient exposure... -
Page 39: Using The Optical Viewfinder To Shoot
Using the Optical Viewfinder to Shoot The camera is equipped with an optical viewfinder. Viewfinder • Compose images so that the autofocus crosshairs in the center of the viewfinder is Diopter aimed directly at the subject. Adjustment • You can adjust the viewfinder with the diopter Lever adjustment lever to adapt to your vision so that the subject appears in crisp focus. -
Page 40: Adjusting The Zoom
Adjusting the Zoom The zoom can be adjusted from 34 mm to 102 mm (equivalent to 35 mm film format). Telephoto / Wide Angle • Press the zoom lever toward to zoom in (telephoto). • Press the zoom lever toward to zoom out (wide angle). -
Page 41: Selecting Menus And Settings
Selecting Menus and Settings Menus are used to adjust shooting, replaying, date / time and beep sound settings. Watch the LCD monitor while performing the following procedures. Press the button. • In mode, the [ (Rec.)] menu will appear. mode, the [ (Play)] menu will appear. -
Page 42: Menu Settings And Factory Defaults
Menu Settings and Factory Defaults This chart shows the options for each menu and the default settings. Reference Menu Item Available Settings Page Resolution (excluding movies) p. 58 L 2272 x 1704* / M1 1600 x 1200 / M2 1024 x 768 / S 640 x 480 Resolution (movies) 320 x 240 / 160 x 120... -
Page 43: Shooting - Letting The Camera Select Settings
Shooting - Letting the Camera Select Settings Auto Mode In this mode, all you have to do is press the shutter button and let the camera do everything else. Turn the mode dial to Aim the camera at the subject. Operate the zoom lever to achieve the desired composition (relative subject size in the viewfinder). -
Page 44: Checking An Image Right After Shooting
• You can change the following settings. - Resolution: L (Large)* / M1 (Medium 1) / M2 (Medium 2) / S (Small) - Compression: (Superfine) / (Fine)* / (Normal) - Flash: (Red-Eye Reduction Auto)* / (Auto) / (Off) - Drive Method: Single* / Self-Timer - Macro: Off* / On - Digital Zoom: Off* / On... -
Page 45: Using The Built-In Flash
Changing the Image Display Duration The length of time images are displayed with the Review function can be switched from 2 seconds to 10 seconds or off. In the [ (Rec.)] menu, select [Review]. • See Selecting Menus and Settings (p. 39). Select a Review setting and press the button. -
Page 46: Flash Modes
Press the button to switch between flash modes. • The selected flash mode will show in the display panel. It will also appear on the LCD monitor if it is on. Shoot the image. • The flash will fire if the indicator beside the viewfinder shines orange when the shutter button is pressed halfway. - Page 47 • The fastest shutter speed for flash synchronization is 1/250 second. The camera automatically resets the shutter speed to 1/250 second if a faster speed is selected. • The flash may take up to approximately 10 seconds to charge in some cases. Actual times will vary according to usage and the battery charge.
-
Page 48: Pan Focus Mode
Pan Focus Mode This mode fixes the focus so that shot can be taken quickly when the shutter button is pressed. Use this mode when you do not want to miss a shot, but you cannot predetermine the subject’s position or focal distance. The focal length is preset to the maximum wide angle setting. -
Page 49: Landscape Mode
Landscape Mode Use this mode to shoot expansive landscape scenes. Turn the mode dial to • Shooting procedures are the same as for the Auto mode (p. 41). • The macro, AEB, AE lock, FE Lock, AF frame, light metering, file format (RAW), and image adjustment (ISO speed, contrast, sharpness and saturation) settings cannot be adjusted in this mode. -
Page 50: Changing The Color Effect
Changing the Color Effect You can shoot with different color effects. (Vivid) Emphasizes the contrast and color saturation to record in bold color. (Neutral) Tones down the contrast and color saturation to record neutral hues. (Sepia) Records in sepia tones. (B/W) Records in black and white. -
Page 51: Stitch Assist Mode
Stitch Assist Mode Use this mode to shoot a series of overlapping frames for merging (stitching) into a large panoramic image on the computer. Horizontal Vertical 2 x 2 • Please use the bundled PhotoStitch program to merge the images on a computer. Framing a Subject PhotoStitch detects the overlapping portions of adjoining images and merges them. - Page 52 • Compose each frame so that it overlaps 30 to 50% of the adjoining image. Try to keep the vertical misalignment to within 10% of the image height. • Do not include moving items in the overlap. • Do not try to stitch images that include both distant and close items. Objects may appear warped or doubled up.
- Page 53 Select the shooting sequence with the arrow of the omni selector and press the button. • You can also press the shutter button directly to shoot instead of pressing the button. Shoot the first image. • The exposure and white balance settings are set and locked with the first image.
-
Page 54: Movie Mode
CF card becomes full. * These figures reflect standard shooting conditions established by Canon. Actual times may vary according to the subject and shooting conditions. • Be careful not to touch the microphone while shooting. -
Page 55: Macro Mode
Macro Mode Use the macro mode to shoot close-ups of subjects in the range of 6 to 70 cm (2.4 in. to 2.3 ft.) at maximum wide angle and 20 to 70 cm (7.9 in. to 2.3 ft.) at maximum telephoto. Press the button. -
Page 56: Self-Timer
Self-Timer You can take pictures with the self-timer in any shooting mode. Press the button. • Press the button several times to display icon in the display panel. The icon will also appear in the LCD monitor if it is on. •... -
Page 57: Continuous Mode
• The shoot speed is approximately 1.5 frames / second* in mode and 2.5 frames/second* mode. * Large/Fine, LCD monitor off mode. (These figures reflect standard Canon testing conditions. The actual figures will vary according to the shooting conditions and settings.) Shooting - Letting the Camera Select Settings... - Page 58 • This mode cannot be selected in the shooting mode. • In mode, images do not appear on the LCD monitor as they are shot. • An externally mounted flash will not fire in this mode. • The built-in flash can be used, but the interval between images will lengthen to accommodate the flash recharge time.
-
Page 59: Digital Zoom
Digital Zoom Images can be zoomed up to approximately 11 times with the combined optical and digital zoom functions. Press the button to turn the LCD monitor on. Turn the mode dial to any shooting mode except for In the [ (Rec.)] menu, select [Digital Zoom]. -
Page 60: Shooting - Selecting Particular Effects
Shooting - Selecting Particular Effects Camera settings- such as image resolution and compression, shutter speed and aperture- can be freely changed for shooting. • Please see “Auto Mode” (p. 41) for shooting procedures once you have changed a setting. Changing the Resolution and Compression You can change the resolution and compression (excluding movies) settings to suit the purpose of the image you are about to shoot. - Page 61 160 x 120 pixels 60 KB/sec. • This figure reflects standard shooting conditions established by Canon. Actual figures may vary according to the subject and shooting conditions. • Please see the list of CF cards and their approximate capacities (p. 25).
-
Page 62: Changing The File Format
* The bundled software can be used to open or adjust the parameters of images recorded in the RAW file format. Please consult the Software Starter Guide for details. ** As measured by standard Canon test conditions. Turn the mode dial to , In the [ (Rec.)] menu, select [File Format]. -
Page 63: Program Ae
Program AE Use the program AE mode to have the camera automatically set the shutter speed and aperture settings to match the brightness of the scene. Turn the mode dial to . Shoot the image. • The shutter speed and aperture settings will be set automatically and shown in the display panel. -
Page 64: Setting The Shutter Speed
Setting the Shutter Speed When you set the shutter speed in the shutter speed-priority AE mode, the camera automatically selects an aperture setting to match the brightness. Faster shutter speeds allow you to catch an instantaneous image of a moving subject while slower speeds create a flowing effect and allow you to shoot without a flash in dark areas. - Page 65 • If the aperture value is flashing in the display panel or shown in red in the LCD monitor, the image is under- or overexposed (insufficient light). Adjust the shutter speed using the arrow on the omni selector until the flashing stops or the aperture value display turns to white.
-
Page 66: Setting The Aperture
Setting the Aperture When you set the aperture in the aperture-priority AE mode, the camera automatically selects a shutter speed to match the brightness. Selecting a lower aperture value (opening the aperture) allows you to fade the background and create a beautiful portrait. A higher aperture value (closing it) brings the entire range from foreground to background into focus. - Page 67 • If the shutter speed is flashing in the display panel or shown in red in the LCD monitor, the image is under- or overexposed (insufficient light). Adjust the aperture value using the arrow on the omni selector until the flashing stops or the shutter speed display turnes to white.
-
Page 68: Manually Setting The Shutter Speed And Aperture
Manually Setting the Shutter Speed and Aperture You can manually set the shutter speed and aperture to achieve a particular effect. This is convenient for shooting fireworks and other images for which it is difficult to set the correct exposure automatically. Turn the mode dial to •... - Page 69 • The exposure compensation, AE Lock, FE Lock, flash exposure compensation, AEB and ISO speed (Auto) settings cannot be adjusted in this mode. • The 1/1000 second shutter speed can be selected when the aperture is set to F8.0. • If you wish to change the exposure, press the arrow on the omni selector to adjust the shutter speed, or the arrow to adjust the aperture.
-
Page 70: Selecting An Af Frame
Selecting an AF Frame The AF frame indicates the area of the composition on which the camera focuses. You can select one AF frame from among the three available. This is convenient for focusing accurately on an off-center subject to obtain the composition you desire. Press the button. -
Page 71: Adjusting The Exposure Compensation
Adjusting the Exposure Compensation Adjust the exposure compensation setting to avoid making the subject too dark when it is backlit or shot against a bright background. Press the button once. • The exposure compensation bar will appear in the display panel. The bar will also appear in the LCD monitor if it is on. -
Page 72: Setting The White Balance
Setting the White Balance When the white balance mode is set to match the light source, the camera can reproduce colors more accurately. Set the white balance mode to a natural or artificial light setting according to the circumstances. Settings are automatically set by the camera Auto For recording outdoors on a bright day Daylight... -
Page 73: Setting A Custom White Balance
• This setting cannot be adjusted in the (sepia or B/ W) shooting modes. In mode, it can only be adjusted for the first image. • The selected shooting mode will determine whether or not the white balance setting is cancelled when the camera is turned off (p. 85). Setting a Custom White Balance You can set a custom white balance to obtain the optimal setting for the shooting conditions by having the camera evaluate a subject such as a white piece of paper,... - Page 74 Shoot the image. • If you pressed the shutter button at Step 4, the white balance mode will reappear after the shot, allowing you to change the setting for the next shot. • To set and use a custom white balance setting, it is advisable to select the shooting mode and set the exposure compensation and flash exposure compensation to zero (±0).
-
Page 75: Auto Exposure Bracketing (Aeb Mode)
Auto Exposure Bracketing (AEB Mode) In this mode, the camera automatically changes the exposure within a set range to take three shots after you press the shutter button once. You can adjust AEB settings in 1/3EV steps within the range of -2EV to +2EV of the standard exposure setting. AEB settings can be combined with exposure compensation settings (p. -
Page 76: Adjusting The Flash Output (Flash Exposure Compensation)
Adjusting the Flash Output (Flash Exposure Compensation) You can adjust the flash output for flash photography. Press the button four times. • The icon and the flash exposure compensation bar will appear in the display panel. The flash exposure compensation bar will also appear in the LCD monitor if it is on. -
Page 77: Locking The Exposure Setting (Ae Lock)
Locking the Exposure Setting (AE Lock) You can set the exposure and focus separately. This is effective when the contrast is too strong between the subject and background or when a subject is backlit. For an explanation of how different combinations of light metering options and a selected AF frame affect where the AE lock is metered, see page 76. - Page 78 • The AE lock function cannot be used when the optical viewfinder is used to shoot. • This function can only be selected in the , shooting modes. • The automatically selected combinations of shutter speeds and aperture values can be freely changed without altering the exposure with the following procedures.
-
Page 79: Locking The Flash Exposure Setting (Fe Lock)
Locking the Flash Exposure Setting (FE Lock) You can lock the flash exposure so that the exposure settings are correctly set for a particular portion of your subject. For an explanation of how different combinations of light metering options and a selected AF frame affect where the FE lock is metered, see page 76. -
Page 80: Switching Between Metering Modes
Switching between Metering Modes You can switch between metering modes to shoot. Evaluative metering is the default mode. Appropriate for standard shooting conditions, including backlit scenes. The camera divides images into several zones for metering. The camera Evaluative evaluates the complex lighting conditions, such as the position of the Metering subject, the brightness, the direct light, and the backlighting, and adjusts Metering Mode... - Page 81 Selecting a Spot AE Point Option Turn the mode dial to , In the [ (Rec.)] menu, select [Spot AE Point]. • See Selecting Menus and Settings (p. 39). Select the [Center] or [AF Point] option. Press the button. • The spot AE point setting will take effect. Press button and shoot the image.
-
Page 82: Shooting Problem Subjects For The Autofocus
Shooting Problem Subjects for the Autofocus The autofocus may not work well on the following types of subject. - Subjects with extremely low contrast to the surroundings - Subjects mixing close and far objects - Subjects with extremely bright objects at the center of the composition - Subjects that are moving quickly To shoot these subjects, first aim the camera at an object at a similar distance, lock the focus and recompose the image with the desired subject, or use the manual focus. -
Page 83: Shooting In Manual Focus Mode
Recompose the image and press the shutter button all the way to shoot the image. • Method 2 is convenient because you can let go of the shutter button to recompose the image. Shooting in Manual Focus Mode The focus can be manually set. Press the button to turn the LCD monitor on. -
Page 84: Switching Between Focus Settings
Switching between Focus Settings You can switch between focus settings to shoot. The camera is continually focusing on whatever it is aimed even when the shutter Continuous button is not pressed, allowing you to shoot without missing opportunities. The camera only focuses when the shutter button is pressed halfway, conserving Single battery power. -
Page 85: Manually Setting Image Characteristics
Manually Setting Image Characteristics The ISO speed, contrast, sharpness and saturation settings can be adjusted for shooting. In the [ (Rec.)] menu, select one of the above items. • See Selecting Menus and Settings (p. 39). Select a value for the item and press button. -
Page 86: Resetting The File Number
Resetting the File Number You can select the way file numbers are assigned. File number is reset to the start (100-0001) each time a new CF card is inserted. New images recorded on CF cards with existing files are assigned the next available number. The file number of the last image to be shot is memorized so that images recorded to a new CF card start from the next number. -
Page 87: Functions Available In Each Shooting Mode
Functions Available in Each Shooting Mode This chart shows the functions available in each shooting mode. Reference Page Auto Red-Eye Reduction, Auto Flash Red-Eye Reduction, p. 43 Flash On p. 53 Macro Mode Single Shot p. 55 Drive Mode Continuous p. -
Page 88: Replaying
Replaying Viewing Images Singly (Single Image Replay) You can view the recorded images in the LCD monitor. Open the LCD monitor. • The LCD monitor can be freely opened to any position (p. 31). Turn the main dial to • The last recorded image will display (Single Image Replay). -
Page 89: Magnifying Images
Magnifying Images In single image replay, the displayed image can be magnified by an approximate factor of 3 or 6. Turn the main dial to Move the zoom lever toward the symbol. • The display cycles to the next magnification level (approximately 3 and then 6 times) each time the zoom lever is moved toward the symbol. -
Page 90: Viewing Nine Images At A Time (Index Replay)
Viewing Nine Images at a Time (Index Replay) Up to nine images can be viewed at once in Index Replay. Open the LCD monitor. • The LCD monitor can be freely opened to any position (p. 31). Turn the main dial to Press the button. -
Page 91: Jumping Between Images
Jumping between Images The display can be advanced or set back 9 images in either single image replay or index replay. Turn the main dial to and select either single image replay or index replay. Press the button. • The jump bar will display. The displayed image(s) will change. -
Page 92: Viewing Movies
Viewing Movies You can replay the images shot in mode. Open the LCD monitor. • The LCD monitor can be freely opened to any position (p. 31). Turn the main dial to • Movies cannot be viewed in index replay. Press the arrow on the omni selector to display an image shot in... -
Page 93: Rotating Images In The Display
Rotating Images in the Display Images can be rotated 90º and 270º clockwise in the LCD monitor. Original 90º 270º In the [ (Play)] menu, select [Rotate] and press the button. • See Selecting Menus and Settings (p. 39). Press the arrow on the omni selector to select an image you want to rotate and press the... -
Page 94: Automated Playback (Slide Show)
Automated Playback (Slide Show) Starting a Slide Show All images, or a selection of images, can be displayed one-by-one in an automated slide show. All Images Plays all the images on the CF card in order Slide Show 1 - 3 Plays the images selected for each show in order In the [ (Play)] menu, select [Slide... - Page 95 Press the button. • The Slide Show menu will display again. Press button again to close the menu. • Movie images play for the length of time that they were recorded regardless of the time set in the slide show settings. •...
-
Page 96: Selecting Images For Slide Shows
Selecting Images for Slide Shows You can mark images for inclusion in slide shows 1-3. Up to 100 images may be marked per slide show. Images display in the order of their selection. Display the slide show menu. Press the arrow on the omni selector to select [Program]. -
Page 97: Adjusting The Play Time And Repeat Settings
Adjusting the Play Time and Repeat Settings You can change the play time for all the images in a show and have the show repeat itself continuously. Sets the duration that each image in a slide show is displayed. The options are any one of 3-10 Play Time seconds, 15 seconds, 30 seconds and Manual. -
Page 98: Protecting Images
Protecting Images You can protect important images from accidental erasure. In the [ (Play)] menu, select [Protect] and press the button. • See Selecting Menus and Settings (p. 39). Press the arrow on the omni selector to move to and select an image you want to protect and press the button. -
Page 99: Erasing
Erasing Erasing Images Singly • Please note that erased images cannot be recovered. Exercise adequate caution before erasing a file. Turn the main dial to [ Press the arrow on the omni selector to select the image you wish to erase and press the button. -
Page 100: Erasing All Images
Erasing All Images • Please note that erased images cannot be recovered. Exercise adequate caution before erasing a file. In the [ (Play)] menu, select [Erase all] and press the button. • See Selecting Menus and Settings (p. 35) Press the arrow on the omni selector to select [OK] and press the button. -
Page 101: Formatting A Cf Card
• To cancel formatting instead, select [Cancel] and press the button. • When a non-Canon brand CF card is malfunctioning, reformatting it may solve the problem. • CF cards formatted in another camera, computer or peripheral device may not operate correctly. When that happens, reformat the CF card with this camera. -
Page 102: Print Settings (Dpof Settings)
Print Settings (DPOF Settings) Images on a CF card can be individually selected for printing in a specified number of copies. You can also select the print type and whether or not to print the date and file number. These settings are compatible with the Digital Print Order Format (DPOF) standards so that images can be printed on DPOF-compliant digital printers or at participating photo labs. - Page 103 Select images for printing. Single Images Number of Copies • When the print type (p. 102) is set to [Standard] or [Both], press the arrow on the omni selector to select an image and arrow to mark it for printing. You can set the number of copies (up to 99) to be printed at the same time.
- Page 104 • Images are printed in order from oldest to newest by the shooting date. • A maximum of 998 images can be marked per CF card. • When [Both] is selected, the number of copies can be set, but applies to standard prints only.
-
Page 105: Setting The Print Style
Setting the Print Style The following print settings can be selected. Standard Prints one image per page Print Type Index Prints the selected images together at a reduced size in an index format Both Prints the images in both the standard and index formats Date Adds the date to the print File No. - Page 106 File No. • Select [On or [Off]. Press the button. • The set up menu will close. • The [Date] and [File No.] options cannot both be set to [On] when the print type is set to [Index]. • When the print type is set to the [Both] option, it is possible to have both the date and file number selected by the camera, but only the file number will print on the index images.
-
Page 107: Resetting The Print Settings
Resetting the Print Settings The print settings can all be removed at once. The print type is reset to [Standard] and the date and file number options are set to [Off]. Display the Print Order menu. Press the arrow on the omni selector to select [Reset] and press the button. -
Page 108: Printing With Card Photo Printer Cp-10 (Optional)
Printing with Card Photo Printer CP-10 (Optional) Card Photo Printer CP-10, sold separately, can be connected to the camera and used to print images very easily directly from the camera. It can also be used with the DPOF print settings. Connecting Card Photo Printer CP-10 to the Camera Two direct interface cables are supplied with the printer. - Page 109 Open the LCD monitor. After the printer is connected, turn the Conneted to the Printer camera’s main dial to • will display when the printer is correctly connected • When you detach the cable from the camera, do not forget to press the PUSH button while you remove it.
-
Page 110: Printing
Printing An image can be printed when displayed in single replay or selected in index replay. Press arrow on the omni selector to choose an image and press button. Set the number of prints, the print style and cropping settings as required. •... - Page 111 Selecting the Number of Copies In replay mode, press the button and the arrow on the omni selector to select the [Copies] option. Press the arrow on the omni selector to specify the desired number of copies. • You can specify from 1 to 99 prints. Setting the Print Style You can select from among the following print styles.
-
Page 112: Settings Menu
Borders • Choose [Borderless] or [Bordered]. Date • Choose [On] or [Off]. press the button to close the settings menu. • If [Borderless] or [Multiple] is selected as the print style, the center portion of the recorded image (the image displayed in the LCD monitor) is printed at an enlarged size. - Page 113 Trim the Image. Changing the Size of the Trimming Frame • Move the zoom lever toward the symbol. • The trimming frame can be changed to a minimum selection of approximately half the displayed image or a maximum selection that is virtually the same size as the image.
-
Page 114: Printing With Dpof Print Settings On Card Photo Printer Cp-10
Printing with DPOF Print Settings on Card Photo Printer CP-10 You can use the DPOF print settings to print with Card Photo Printer CP-10. In the [ (Play)] menu, select [Print Order] and press the button. • See Selecting Menus and Settings (p. 39). •... - Page 115 • When the Print Type is set to [Index], 20 images are printed on one page. Cancel Printing • To cancel printing between images, press the button. A confirmation dialog will display. Press the arrow to select [OK] and press the button.
-
Page 116: List Of Menu Options
List of Menu Options The chart below lists menu items and settings. See Selecting Menus and Settings (p. 39) to learn how to select a setting. Rec. Menu * Some items may not appear in certain shooting modes (p. 85). Reference Item Menu Screen... - Page 117 Reference Item Menu Screen Settings Content Page p. 57 Combines with the optical zoom to zoom Digital Zoom images up to an approximate factor of • Off • On Sets the frequency of autofocus p. 82 AF Mode activation. When the LCD monitor is off, this setting locks in single mode.
- Page 118 Reference Item Menu Screen Settings Content Page File No. Reset Sets how file numbers are assigned to p. 84 images when new CF cards are inserted. • On • Off Adjusts the image contrast. Contrast p. 83 • - • 0 •...
-
Page 119: Play Menu
Play Menu Reference Item Menu Screen Settings Content Page Protects images from accidental erasure. Protect... p. 96 Rotates images 90 or 270 degrees Rotate... p. 91 clockwise in the display. Erases all images from a CF card Erase all... p. 98 (excluding protected images). -
Page 120: Set Up Menu
Set up Menu Reference Item Menu Screen Settings Content Page Sets whether or not the beep sounds Beep p. 36 when the shutter button is pressed or when a menu operation is performed. • On • Off (Still beeps to warn of an error even when set to Off) LCD Brightness Sets the brightness level of the LCD... - Page 121 Reference Item Menu Screen Settings Content Page Date/Time... Sets the date, time and date format. p. 26 Format... Formats (initializes) a CF card. p. 99 Language... p. 27 Sets the language used in the menus and messages on the LCD monitor. •...
-
Page 122: Shooting / Replaying With A Tv Monitor
Shooting / Replaying with a TV Monitor A video-compatible television connected via the supplied AV cable AVC-DC100 can be used to view images as you shoot or replay them. Turn the main dial to and confirm that the TV is turned off. Attach AV cable AVC-DC100 to the A/V OUT terminal on the camera. -
Page 123: Using The Wireless Controller
Using the Wireless Controller Installing the Battery Install the date battery (CR2025) into Wireless Controller WL-DC100 before use. • Be particularly careful to keep the date batteries out of the reach of children. Seek medical assistance immediately if a child swallows a battery since corrosive battery fluids could damage the stomach or intestinal wall. -
Page 124: Shooting / Replaying
Shooting / Replaying Remote Sensor The wireless controller can be used to shoot or replay. The wireless controller can be operated from an approximate distance of up to 5 m (16.4 ft.) from the remote sensor. Transmitter Shooting Press the button on the camera until the icon appears in the display panel, then replay with the wireless controller. -
Page 125: Using An Externally Mounted Flash (Optional)
550EX or a Macro Ring Lite MR-14EX (p. 125). Other flashes may fire at full intensity or not fire at all. Please check the manual for your flash. • Certain functions noted in the manuals for the Canon Speedlite 220EX, 380EX, 420EX, 550EX and Macro Ring Lite MR-14EX cannot be performed when mounted on this camera. - Page 126 To shoot with the flash, you are recommended to set the white balance to the (Flash) setting. Other Canon Flashes • Since other flashes fire at full strength, set the shutter speed and aperture accordingly. Set the shutter speed to 1/250 second (maximum flash synchro shutter speed) or slower, and set the aperture to a value appropriate to the flash’s...
- Page 127 How to Mount Macro Ring Lite MR-14EX The separately sold Conversion Lens Adapter LA-DC58 and the Macro Lite Adapter 58C are required to mount Macro Ring Lite MR-14EX on the camera. Remove the outer ring on the lens. Ring Attach Conversion Lens Adapter LA- DC58 by turning it in the direction of the arrows.
- Page 128 • Shoot from a distance of at least 20 cm (8 in.) from the subject in macro mode. To shoot closer up, use the mode and set the aperture to a higher value. • When you are using Macro Ring Lite MR-14EX, you can shoot in E-TTL automatic flash exposure compensation mode just by setting the camera’s shooting mode to .
-
Page 129: Using Conversion Lenses (Optional)
Using Conversion Lenses (Optional) Close-up Lenses (Optional) The separately sold Conversion Lens Adapter LA-DC58 is required to use conversion and close-up lenses with the camera, such as the separately sold Wide Converter WC-DC58, Tele-converter TC-DC58 and Close-up Lens 250D (58 mm). •... -
Page 130: Mounting The Lenses
Close-up Lens 250D (58 mm) This lens with a 58 mm-threaded diameter makes macro shooting easier. With the camera in macro mode, it can shoot subjects in the range of 12 to 20 cm (4.7 to 7.9 in) from the lens tip. •... - Page 131 • Since the image seen in the viewfinder does not change when a conversion lens is installed, use the LCD monitor to compose images. • Please note that the images will not merge properly with the PhotoStitch program on a computer when they are shot in mode with a conversion or close-up lens.
-
Page 132: Appendices
Appendices Replacing the Date Battery If the Set Date / Time menu appears when you turn on the camera power, the date battery charge is low and the date and time settings have been lost. Please replace the battery with a generic CR2016 lithium coin battery with the following procedures. -
Page 133: Battery Cover
Place a new date battery into the date Negative Terminal (-) battery holder with the negative terminal (-) facing upward. Replace the date battery holder, replace the battery pack and close the battery cover. If you ever dispose of your camera, first remove the date battery for recycling according to the recycling system of your country. -
Page 134: Camera Care And Maintenance
• Never use synthetic cleansers on the camera body or lens. If dirt remains, contact the nearest Canon Customer Support Help Desk (see the back of this guide). -
Page 135: Troubleshooting
• Format CF card. See Formatting a CF card (p. 99) correctly • If reformatting doesn't work, the CF card logic circuits may be damaged. Contact the nearest Canon Customer Support Help Desk. Lens will not Battery cover or CF card •... - Page 136 Problem Cause Solution Camera moved • Be careful not to move the camera when pressing the Image is shutter button. blurred or out of focus • Use a tripod at slow shutter speeds when the camera shake warning displays. • Be careful not to block the AF auxiliary light emitter with Autofocus function hampered by obstruction your finger or other items.
-
Page 137: List Of Error / Message Codes
List of Error / Message Codes The following error and message codes may appear on the display panel. Error Codes The camera has experienced a problem. Turn the main dial to (xx: number) wait a second, and then try shooting or replaying. If the error code appears repeatedly, there is a problem. -
Page 138: List Of Messages
List of Messages The following messages may appear on the LCD monitor. Busy... Image is being recorded to, or read from, CF card. No CF card: You attempted to shoot or replay images without a CF card installed. Cannot record!: You attempted to shoot an image without a CF card installed. - Page 139 Unidentified Image: You attempted to replay an image that was recorded in a special format (proprietary format used by the camera of another manufacturer, etc.), or to replay a movie shot in another camera. Protected!: You attempted to erase a protected image. Too many marks: Too many images have been marked for printing or for inclusion in a slide show.
-
Page 140: Specifications
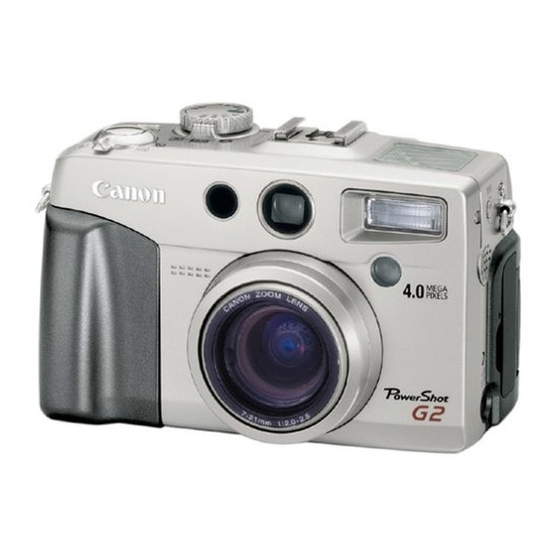
Specifications PowerShot G2 Image sensor: Approx. 4-million-pixel (effective)/1/1.8 inch CCD Approx. 4.1 million pixels (total) Lens: 7 (W) - 21 (T) mm (35mm film equivalent: 34 - 102mm) F 2.0 (W) - 2.5 (T) Digital zoom Up to approx. 3.6 times (Up to approximately 11 times in... - Page 141 Terminals for external flash: Sync-terminals at accessory shoe Use of following external flashes is recommended: Canon Speedlite 220EX, 380EX, 420EX, 550EX and Macro Ring Lite MR-14EX Flash exposure compensation: ±2.0 EV (in 1/3-stop increments), FE lock selectable Shooting modes:...
- Page 142 Languages: 12 languages available for menus and messages (English, German, French, Dutch, Danish, Finnish, Italian, Norwegian, Swedish, Spanish, Chinese and Japanese) Interface: Universal Serial Bus (USB), Audio / Video Output (NTSC or PAL selectable, monaural audio) Power source: 1. Rechargeable Lithium-ion battery (type: BP-511) (included in the camera kit / optional) 2.
- Page 143 Approx. 0.8x ∞ Focal length: Lens configuration: 3 groups 3 pieces 10 mm - ∞ (0.4 in. - ∞) (when attached to a PowerShot G2 Focusing range (from tip of lens): at maximum wide angle) Thread diameter: 58 mm Standard filter threads (Conversion Lens Adapter...
- Page 144 (from tip of lens): G2 at maximum telephoto) Thread diameter: 58 mm Standard filter threads (Conversion Lens Adapter LA-DC58 is required to install the lens on a PowerShot G2) Dimensions: Diameter: 65 mm (2.6 in.) / Length: 37 mm (1.5 in.) Weight: Approx.
-
Page 145: Index
Index DPOF 100 Diopter Adjustment 37 AEB Shooting 73 AE Lock 75 AF Mode 115 Erasing 97 Aperture 64, 66 All Images 98, 117 Aperture Priority AE ( ) 64 Displayed Image 9 Auto ( ) 41 Single Images 97 Auto Replay (Slide Show) 92 Exposure Compensation 69 AV Cable 120... - Page 146 Menu Landscape 47 Rec. 114 List of Modes 85 Replay 117 Macro Mode 53 Selecting and Setting 39 Manual Exposure ( ) 66 Settings Categories 40 Movie 52 Setup 118 Night Scene ( ) 47 Metering Method 78 Pan Focus ( ) 46 Mode Dial 13 Portrait (...
-
Page 147: Canon Customer Support
Canon U.S.A., Inc. Canon Customer Care Center Phone (US): 1-800-828-4040 (Available Mon. - Fri., 9 AM to 8 PM Eastern Time) Canon Canada Inc. Phone (Canada): 1-800-OK-CANON (1-800-652-2666) (24 hours/day, 7 days/week) EUROPE Europe, Africa & Middle East Canon Europa N.V. -
Page 148: Canon Customer Support
No.1 Jalan Kilang Timor, #09-00, Pacific Tech Centre, Singapore 159303 Phone: (65) 799 8888 Fax: (65) 273 3317 Canon Marketing (Malaysia) Sdn. Bhd. Wisma General Lumber, Block D, Peremba Square, Saujana Resort, Section U2, 40150, Shah Alam, Selangor Darul Ehsan, Malaysia... -
Page 151: Fcc Notice
If such changes or modifications should be made, you could be required to stop operation of the equipment. Canon U.S.A. Inc. One Canon Plaza, Lake Success, NY 11042, U.S.A. Tel No. (516) 328-5600 Canadian Radio Interference Regulations THIS CLASS B DIGITAL APPARATUS MEETS ALL REQUIREMENTS OF THE CANADIAN INTERFER- ENCE CAUSING EQUIPMENT REGULATIONS. - Page 152 CDI-E022-010 0701NiXX © 2001 CANON INC. PRINTED IN JAPAN...
- Page 153 Software Starter Guide PowerShot S110 DIGITAL ELPH/DIGITAL IXUS v PowerShot S300 DIGITAL ELPH/DIGITAL IXUS 300 PowerShot A10/A20 PowerShot G2 To Download Images to a Computer Windows Macintosh Install the Software p. 20 p. 66 Connect the Camera to a Computer p.
-
Page 154: Trademark Acknowledgments
Canon. • Canon makes no warranties for damages resulting from corrupted or lost data due to a mistaken operation or malfunction of the camera, the software, the CompactFlash™ cards (CF cards), personal computers, peripheral devices, or use of non-Canon CF cards. - Page 155 In consideration of the right to use the SOFTWARE, you agree to abide by the terms and conditions of this Agreement. 1. LICENSE: Canon grants you the personal, non-exclusive right to use the SOFTWARE only on a single computer. You may physically transfer the SOFTWARE from one computer to another provided that the SOFTWARE is used on only one computer at a time.
- Page 156 SOFTWARE is subject to the laws of the United States, and Canada, and other applicable copyright and trademark laws, and nothing in this Agreement constitutes a waiver of the rights of Canon, its affiliated corporations and third party licensors under such laws. You only own the CD-ROM media in which the Software is stored.
- Page 157 (Windows / Macintosh) A Guide to the Manuals ............. 2 What Can Be Accomplished with the Software ....6 Canon Digital Camera solution Disk ........6 Arcsoft Camera Suite CD-ROM ........... 10 Adobe Photoshop LE CD-ROM ........... 11 Camera and Software Compatibility ........12 System Requirements ............
-
Page 158: A Guide To The Manuals
A Guide to the Manuals The following manuals are supplied with the software products. Please read the respective manual according to the guidelines below. Software Starter Guide (This Guide) This manual explains how to install the software and provides a simple description of how you can download images recorded with the camera onto your computer. - Page 159 Card Photo Printer CP-10 Printer Driver User Guide (Windows/Macintosh) This manual in PDF format explains how to install the printer driver for Card Photo Printer CP-10 (sold separately) onto your computer and connect the printer to the computer for printing. Read this Manual for the Following •...
- Page 160 The ZoomBrowser EX Software User Guide (Windows) and ImageBrowser Software User Guide (Macintosh) are contained as PDF files on the Canon Digital Camera Solution Disk, a CD-ROM. Windows 1.
-
Page 161: How To Install Adobe Acrobat Reader
Canon Digital Camera Solution Disk. Windows 1. Place the Canon Digital Camera Solution Disk in your computer’s CD-ROM drive. The installer panel will display. 2. In the installer panel, click [Using the Software] and [CP-10 Printer Driver]. -
Page 162: What Can Be Accomplished With The Software
○ ○ ○ ○ ○ Canon Digital Camera Solution Disk Some camera models do not support some of the software functions. Please check the Camera and Software Compatibility chart to confirm the compatibility of your camera. ( p. 12) • Downloading Camera Images to Your Computer... - Page 163 Plug-In Module (Macintosh) This plug-in module loads camera images into plug-in compliant programs on the computer. USB Mounter (Macintosh) This utility allows you to treat the camera like a computer drive or read-only CF card reader, displaying the CF card contents on the computer and permitting files to be downloaded as if they were being copied from a card reader.
- Page 164 • Creating Mail Attachments from Images ZoomBrowser EX (Windows)/ImageBrowser (Macintosh) These programs can start your email program* and send images as file attachments to it. Since the file size and compression rate can be controlled, you can reduce large image files to sizes small enough for easy transmission. * The automatic start of email programs is only supported by Windows and the email programs must be enabled as MAPI clients.
- Page 165 • Programs for Printing Indexes PhotoRecord (Windows) / ImageBrowser (Macintosh) These programs can output an index of the computer or camera’s image thumbnails (tiny versions) to a printer. •Programs for Printing with Card Photo Printer CP-10 PhotoRecord (Windows) / ImageBrowser (Macintosh) These programs can output your original photo cards or labels (8-label sheets) to Card Photo Printer CP-10 (sold separately) connected to the computer by interface cable PIF-100 (sold separately).
-
Page 166: Editing And Applying Special Effects To Images
• Computer-Controlled Camera Shooting RemoteCapture This program allows your camera’s shutter to be controlled by the computer when the two are connected. The recorded images are loaded directly into the computer. Depending on your camera model, the screen may slightly differ. ○... -
Page 167: Arcsoft Videoimpression
○ ○ ○ Adobe Photoshop LE CD-ROM This program is bundled with PowerShot G2. • Editing and Applying Special Effects to Images Adobe Photoshop LE This program allows you to edit and apply various special effects to images, such as changing color to sepia tones, as well as to print images. -
Page 168: Camera And Software Compatibility
○ ○ ○ Camera and Software Compatibility The Canon Digital Camera Solution Disk contains a number of software programs and drivers. Check the chart below for the compatibility of your particular camera model with each program’s special functions. Model PowerShot Series... -
Page 169: System Requirements
PhotoStitch in the QuickTime VR format. QuickTime 5.0 is included on the Canon Digital Camera Solution Disk. • A sound card is required to play movie audio tracks. • The Canon CP-10 Printer Driver is not compatible with Windows XP. -
Page 170: Macintosh
(800 x 600 pixels / 32,000 colors or better is required to use ArcSoft PhotoImpression or ArcSoft VideoImpression.) • A CD-ROM drive is required to install the software. • QuickTime 5.0 is included on the Canon Digital Camera Solution Disk. • USB Mounter is compatible with Mac OS 9.0 or higher. -
Page 171: Connecting The Camera To A Computer
Connecting the Camera to a Computer ○ ○ ○ ○ ○ ○ ○ ○ ○ ○ ○ ○ ○ ○ ○ ○ ○ ○ ○ ○ ○ ○ ○ ○ ○ ○ ○ ○ ○ ○ ○ ○ ○ ○ ○... -
Page 172: Connecting To A Usb Port
Attach the supplied USB cable to the computer’s USB port and the camera’s Digital Terminal. • You do not need to turn off the computer for this procedure. • Refer to your computer manual for the location of the computer’s USB ports. PowerShot G2 Digital Terminal USB Cable on the Camera... -
Page 173: Connecting To A Cf Card Reader Or Pc Card Reader
Precautions for Detaching the Cable • Always hold down the Push button on the cable or hold the connector by its sides when you detach it from the camera’s Digital Terminal. PUSH Button Example: PowerShot G2 ○ ○ ○ ○... -
Page 174: Cf Card Folder Structure And File Names
CF Card Folder Structure and File Names The images on a CF card are placed in subfolders named [xxxCANON], where the “xxx” represents a number from 100 to 998, within the [DCIM] folder. IMG_xxxx.JPG (JPEG format images) CRW_xxxx.CRW (RAW format images) DCIM xxxCANON CRW_xxxx.THM*... - Page 175 Using the Software on the Windows Platform Installing/Uninstalling the Software ....... 20 Installing from the Canon Digital Camera Solution Disk ..20 Installing from the ArcSoft Camera Suite CD-ROM ....21 Installing from the Adobe Photoshop LE CD-ROM ....21 Installing the Card Photo Printer CP-10 Printer Driver ...
-
Page 176: Installing/Uninstalling The Software
• Users of Windows 2000 must first log in as an Administrator to install programs. Close any programs that are running. Set the Canon Digital Camera Solution Disk in the computer’s CD-ROM drive. • The installer panel will display automatically. • If the installer panel does not appear automatically, use the following procedures to display it. -
Page 177: Installing From The Arcsoft Camera Suite Cd-Rom
After the installation is complete and the installer panel displays again, click the [Exit] button. • Remove the Canon Digital Camera Solution Disk once the installation is complete so that the proper driver may be installed. • Continue with the procedures on page 23 to install the driver software to allow the camera to be connected to a computer via the USB interface and download images. -
Page 178: Installing The Card Photo Printer Cp-10 Printer Driver
Driver or USB WIA Driver. Uninstalling (Deleting) the Card Photo Printer CP-10 Printer Driver For instructions to delete the printer driver, please see the Card Photo Printer CP-10 Printer User Guide contained on the Canon Digital Camera Solution Disk as a PDF file. -
Page 179: Installing The Usb Twain Driver/Usb Wia Driver
Installing the USB TWAIN Driver/USB WIA Driver • Be very careful to follow the steps below in order to install the driver software. 1. Install one of the following drivers from the Canon Digital Camera Solution Disk (p. 20). Windows 98/2000: USB TWAIN Driver... - Page 180 Window Me/Window 2000 • Users of Windows 2000 must first log in as an Administrator to install programs. Attach the supplied USB cable to the computer’s USB port and the camera’s Digital Terminal, and set the camera to Replay mode. •...
- Page 181 After a moment, the following dialog will display. Click [OK] and the following dialog will display. Click the [Browse] button, select the [Program Files], [Canon], [DC USB TWAIN] and [CAMERA2] or [CAMERA3] folders on the drive on which you installed the software.
- Page 182 Windows XP • Users of Windows XP Professional must first log in as an Administrator to install programs. Attach the supplied USB cable to the computer’s USB port and the camera’s Digital Terminal, and set the camera to Replay mode. For USB interface connection instructions, see “Connecting to a USB port”...
-
Page 183: Setting An Event To Start Automatically (Windows Xp Only)
○ ○ ○ ○ ○ ○ ○ ○ ○ ○ ○ ○ ○ ○ ○ ○ ○ ○ ○ ○ ○ ○ ○ ○ ○ ○ ○ ○ ○ ○ ○ ○ ○ ○ ○ ○ ○ ○ ○ ○ Setting an Event to Start Automatically (Windows XP only) You can set your computer to automatically start an event when the camera is connected to the computer via the USB cable. - Page 184 2. Now repeat the above, however this time set [Select an event] to [(camera name) Connected], and in the [Actions] section, set [Start this program] to [Canon ZoomBrowser EX]. When you want to start the Scanners and Cameras Wizard automatically 1.
-
Page 185: Troubleshooting The Usb Twain Driver/Usb Wia Driver Installation
○ ○ ○ ○ ○ ○ ○ ○ ○ ○ ○ ○ ○ ○ ○ ○ ○ ○ ○ ○ ○ ○ ○ ○ ○ ○ ○ ○ ○ ○ ○ ○ ○ ○ ○ ○ ○ ○ ○ ○ Troubleshooting the USB TWAIN Driver/USB WIA Driver Installation First, Check the Following... -
Page 186: Uninstalling The Usb Twain Driver/Usb Wia Driver
• Windows Me or Windows XP Select the icon of your camera model, right-click the mouse button and select [Delete]. USB TWAIN Driver: Click the [Start] menu and select [Programs], [Canon Utilities], [Digital Camera USB TWAIN Driver] and [USB TWAIN Driver Uninstall]. -
Page 187: Troubleshooting The Usb Twain Driver/Usb Wia Driver Uninstall
○ ○ ○ ○ ○ ○ ○ ○ ○ ○ ○ ○ ○ ○ ○ ○ ○ ○ ○ ○ ○ ○ ○ ○ ○ ○ ○ ○ ○ ○ ○ ○ ○ ○ ○ ○ ○ ○ ○ ○ Troubleshooting the USB TWAIN Driver/USB WIA Driver Uninstall If you have problems uninstalling the driver, use the following procedures to remove it. - Page 188 Be extremely careful not to delete the wrong files. If you delete the wrong file, you may be unable to restart Windows. Find and delete the [Canon.IncCanon DC], [Canon.IncCanon DC1], [Canon.IncCanon DC2] or [Canon.IncCanon DC3] files. • If none of the above files are contained in the Other folder, you do not need to...
- Page 189 Windows 2000/Windows XP • Users of Windows 2000 or Windows XP Professional must first log in as an Administrator to uninstall the driver. Open the [System Properties] dialog and check the [Device Manager]. 1. For Windows 2000, in the [Control Panel], double-click the [System] icon. For Windows XP, in the [Control Panel], click [Performance and Maintenance] and click [System].
- Page 190 Click each [Oem*] file until you find one that contains “*** Canon Digital Camera USB Setup File ***” in its first line. When you find the correct file, note down its name and close the Notepad window.
-
Page 191: Downloading Images To A Computer
Downloading Images to a Computer This topic briefly explains how to use ZoomBrowser EX to perform a range of operations from downloading the camera’s images to printing them. • For a more detailed explanation of ZoomBrowser EX operations, please see the ZoomBrowser EX Help menu or PDF manual, ZoomBrowser EX Software User Guide (p. - Page 192 Select [Canon ZoomBrowser EX] and click [OK]. • ZoomBrowser EX will start and open the ZoomBrowser EX Automation Wizard dialog. Confirm that [Display images in the Camera Window] is selected and click the [Finish] button. The Camera Window will open and display the camera images as thumbnails (tiny versions) (p.
- Page 193 Wizard. Start ZoomBrowser EX. • Double-click the [Canon ZoomBrowser EX] icon on the desktop. The first time ZoomBrowser EX starts, a confirmation message will appear asking whether you wish to register the [My Pictures] folder in ZoomBrowser EX. Click [Yes] if you plan to use the My Pictures folder.
- Page 194 Insert the CF card or loaded PC card adapter into the reader. Start ZoomBrowser EX. • Double-click the [Canon ZoomBrowser EX] icon on the desktop. • If you are using Windows Me, a confirmation message will appear the first time ZoomBrowser EX starts, asking whether you wish to register the [My Pictures] folder in ZoomBrowser EX.
-
Page 195: The Zoombrowser Ex Camera Window
○ ○ ○ ○ ○ ○ ○ ○ ○ ○ ○ ○ ○ ○ ○ ○ ○ ○ ○ ○ ○ ○ ○ ○ ○ ○ ○ ○ ○ ○ ○ ○ ○ ○ ○ ○ ○ ○ ○ ○ The ZoomBrowser EX Camera Window When a connection is opened to a CF card in a camera or a reader, the card’s images display as thumbnails in the Camera window. -
Page 196: Downloading And Saving Images From The Camera
Downloaded images are saved to the computer disk and appear in the Browser Display Area. • The folder you created above normally appears within the [C:\Program Files\Canon\ZoomBrowser EX\Image Library One] folder. The downloaded image files are saved to the folder you created. -
Page 197: Printing Images
• You can also download images by dragging them from the Camera window and dropping them on the Browser Display Area or Tree View area. Tree View Area “RAW” displays on RAW images Browser Display Area The movie icon displays on movie thumbnails To disconnect the camera, click the close box at the right of the Camera window... - Page 198 The other print modes allow you to do such things as tile the images for printing or arrange them for printing on Canon perforated paper. See the ZoomBrowser EX Software User Guide (p. 4), a PDF file, for a detailed explanation of the print modes.
- Page 199 • PhotoRecord Window Select a layout pattern for each page. Click the arrow You can freely display a pop-up input page titles, menu. image titles, or text. You can drag images to change the layout. Slide this left to shrink the image size and right to Select whether increase it.
-
Page 200: Zoombrowser Ex Features
ZoomBrowser EX Features This topic introduces additional, convenient ZoomBrowser EX features. • For a more detailed explanation, please see the ZoomBrowser EX Help menu or PDF manual, ZoomBrowser EX Software User Guide (p. 4). ○ ○ ○ ○ ○ ○ ○... - Page 201 Registering a Folder as an Image Folder Folders shown in the Tree View area with a symbol are called Image Folders. ZoomBrowser EX only manages the images contained in these folders and the subfolders nestled within them. Click the [Register Image Folder] button. The Select Image Folder dialog will display.
-
Page 202: Converting Raw Format Images
* As measured by standard Canon test conditions. • Please see the Camera User Guide to learn how to shoot RAW images. - Page 203 Converting RAW Images with Quality Adjustment Select a RAW image. • Select a RAW image from the Browser Display Area of ZoomBrowser EX. Click the [File] menu and select [Convert RAW Image(s) with User Defined Parameters]. • The RAW Image Parameter Settings dialog will display. Select quality settings and click [OK].
- Page 204 Converting Images with RAW Image Converter If you are using the WIA Driver or downloading directly from a CF card reader, you can use RAW Image Converter to convert RAW images. The converted images can be saved in the TIFF (8 bits/channel), TIFF (16 bits/channel), or Windows BMP formats. •...
- Page 205 • Conversion Settings Dialog Click an option to set whether images convert automatically or are adjusted for image quality. Click the [Convert with RAW image quality conversion] option to display the RAW Image Parameter Settings dialog and make adjustments before conversion (p. 47). To process images more quickly, remove this check mark if you...
-
Page 206: Replaying Movies
QuickTime Player will start and replay the movie. • If QuickTime 3.0 or a later version is not already installed, install the QuickTime 5.0 program from the Canon Digital Camera Solution Disk. Place the disk in the CD-ROM drive and click [QuickTime 5.0 Installation] in the installer panel (p. -
Page 207: Merging Panoramic Images With Photostitch
○ ○ ○ ○ ○ ○ ○ ○ ○ ○ ○ ○ ○ ○ ○ ○ ○ ○ ○ ○ ○ ○ ○ ○ ○ ○ ○ ○ ○ ○ ○ ○ ○ ○ ○ ○ ○ ○ ○ ○ Merging Panoramic Images with PhotoStitch To Merge Images Registered in ZoomBrowser EX You can merge a series of overlapping images into a single, seamless panorama. -
Page 208: Shooting With Remotecapture
○ ○ ○ ○ ○ ○ ○ ○ ○ ○ ○ ○ ○ ○ ○ ○ ○ ○ ○ ○ ○ ○ ○ ○ ○ ○ ○ ○ ○ ○ ○ ○ ○ ○ ○ ○ ○ ○ ○ ○ Shooting with RemoteCapture RemoteCapture will start if you click the [Edit] menu in ZoomBrowser EX and select [RemoteCapture] when the camera is connected to the computer via a USB interface. -
Page 209: Viewfinder Display
Displays the number of images computer. that will fit onto the computer or CF card in the camera. * Appears when you are using PowerShot G2. When using other cameras, it appears as follows: Viewfinder Display: Test Preview A preview of the test shot displays. - Page 210 • Windows Me: the Scanners and Cameras Wizard will appear. Click the [Cancel] button and double-click the [Canon ZoomBrowser EX] icon on the desktop to start ZoomBrowser EX. From its [Edit] menu, select [RemoteCapture]. The Shooting - RemoteCapture window will display. Proceed to Step 7.
- Page 211 Click the [Release] button. • The image will record and be automatically saved to the computer. You can also release the shutter by pressing the camera’s shutter button directly or pressing the space bar on the computer keyboard. Interval Timer Shooting You can shoot a specified number of frames at set intervals.
- Page 212 How to Display the Subject in the Camera’s LCD Monitor (PowerShot G2 only) You can view the subject you are shooting in the camera’s LCD monitor. 1. In the Shooting-RemoteCapture window, click the [Camera] menu and select [Camera Display Settings].
-
Page 213: Loading Images Into Twain-Compliant Programs
Loading Images into TWAIN-Compliant Programs This topic explains how to load images into the TWAIN-compliant application programs, ArcSoft PhotoImpression (PhotoImpression) and Adobe Photoshop LE (Photoshop LE). For detailed instructions, see the Help menu for the respective program. • This feature is only supported by Windows 98 and Windows 2000. It is not supported by Windows Me and Windows XP. - Page 214 Click the button. • The TWAIN Driver will start (p. 60). CF Card Reader/PC Card Reader Connection Insert the CF card or loaded PC card adapter into the reader. Click the Windows [Start] menu and select [Programs], [ArcSoft Camera Suite] and [PhotoImpression]. •...
-
Page 215: Loading Images Into Photoshop Le
Click the [File] menu and select [Import] and [Select TWAIN_32 Source]. Choose an appropriate source and click [Select]. Select [Canon XXX USB], where the XXX represents your camera model name, as the source as appropriate. If several models are listed, select the one that corresponds to your camera. - Page 216 • TWAIN Driver Window Camera Settings Button Click here to adjust or check camera settings (p. 39). Preferences Button Click here to adjust or check image transmission settings (p. 49). Rotate 90 Degrees Buttons Click a button to rotate the selected image 90 degrees left or right.
- Page 217 Click the [OK] button. The acquired image(s) will display in PhotoImpression’s or Photoshop LE’s main window. To save the acquired image(s), click the [File] menu of the image editing software and select [Save as]. Input a file name and change the file location and format settings if necessary.
-
Page 218: Downloading Images With The Wia Driver
Downloading Images with the WIA Driver If you are using Windows Me/XP (and installed the USB WIA Driver), you have the following alternatives for downloading images to the computer. ○ ○ ○ ○ ○ ○ ○ ○ ○ ○ ○ ○... -
Page 219: Downloading With Windows Explorer
○ ○ ○ ○ ○ ○ ○ ○ ○ ○ ○ ○ ○ ○ ○ ○ ○ ○ ○ ○ ○ ○ ○ ○ ○ ○ ○ ○ ○ ○ ○ ○ ○ ○ ○ ○ ○ ○ ○ ○ Downloading with Windows Explorer Images can be downloaded to the computer with Windows Explorer just as you would copy any other file. -
Page 220: Downloading With The File Dialog
○ ○ ○ ○ ○ ○ ○ ○ ○ ○ ○ ○ ○ ○ ○ ○ ○ ○ ○ ○ ○ ○ ○ ○ ○ ○ ○ ○ ○ ○ ○ ○ ○ ○ ○ ○ ○ ○ ○ ○ Downloading with the File Dialog You can select an image with the Open dialog, load it into the program and save it to the computer. - Page 221 Using the Software on the Macintosh Platform Installing/Uninstalling the Software ........ 66 Installing from the Canon Digital Camera Solution Disk ... 66 Installing from the ArcSoft Camera Suite CD-ROM ....67 Installing from the Adobe Photoshop LE CD-ROM ....67 Installing the Card Photo Printer CP-10 Printer Driver ....
-
Page 222: Installing/Uninstalling The Software
Installing from the Canon Digital Camera Solution Disk Close any programs that are running. Set the Canon Digital Camera Solution Disk in the computer’s CD-ROM drive. Double-click the CD-ROM icon and the [Canon Digital Camera Installer] icon. • The installer panel will display. -
Page 223: Installing From The Arcsoft Camera Suite Cd-Rom
○ ○ ○ ○ ○ ○ ○ ○ ○ ○ ○ ○ ○ ○ ○ ○ ○ ○ ○ ○ ○ ○ ○ ○ ○ ○ ○ ○ ○ ○ ○ ○ ○ ○ ○ ○ ○ ○ ○ ○ Installing from the ArcSoft Camera Suite CD-ROM Installing ArcSoft PhotoImpression Close all other programs that are running. -
Page 224: Installing The Card Photo Printer Cp-10 Printer Driver
[Digital Camera Plug-In] folders and read the [Readme] file. Uninstalling (Deleting) the Card Photo Printer CP-10 Printer Driver For instructions to delete the printer driver, please see the Card Photo Printer CP-10 Printer driver User Guide contained on the Canon Digital Camera Solution Disk as a PDF file. -
Page 225: Downloading Images To A Computer
Downloading Images to a Computer This topic briefly explains how to use ImageBrowser to perform a range of operations from downloading the camera’s images to printing them. • For a more detailed explanation, please see the ImageBrowser Help menu or PDF manual, ImageBrowser Software User Guide (p. 4). If the Continue Connection Confirmation Message Displays •... - Page 226 Confirm that [USB port] and your camera model name are selected and click the [Set] button. Your camera model name will appear here. • The Camera Window will open and display the camera images as thumbnails (tiny versions) (p. 72). •...
-
Page 227: How To Set Imagebrowser To Not Start Automatically
Canon ImageBrowser Icon • If the icon does not appear on the desktop, double-click the folder in which you installed the program, followed by the [Canon Utilities] and [ImageBrowser] folders and the [ImageBrowser] file. Double-click the [DCIM] folder in the Explorer View Section. -
Page 228: The Imagebrowser Camera Window
○ ○ ○ ○ ○ ○ ○ ○ ○ ○ ○ ○ ○ ○ ○ ○ ○ ○ ○ ○ ○ ○ ○ ○ ○ ○ ○ ○ ○ ○ ○ ○ ○ ○ ○ ○ ○ ○ ○ ○ The ImageBrowser Camera Window When a connection is opened to a CF card in a camera or a reader, the card’s images display as thumbnails in the Camera window. -
Page 229: Downloading And Saving Images From The Camera
○ ○ ○ ○ ○ ○ ○ ○ ○ ○ ○ ○ ○ ○ ○ ○ ○ ○ ○ ○ ○ ○ ○ ○ ○ ○ ○ ○ ○ ○ ○ ○ ○ ○ ○ ○ ○ ○ ○ ○ Downloading and Saving Images from the Camera Select [Macintosh HD] in the Explorer View Section. - Page 230 Select images in the Camera window and click the [Download] button. • Click a thumbnail to select it or press [Shift] and click to select multiple thumbnails. Thumbnail “RAW” displays The movie icon displays on RAW images. on movie thumbnails. Downloaded images are saved to the computer and appear in the Browser area.
-
Page 231: Printing Images
The other options allow you to print an index or print onto Canon perforated paper. For more details on the Layout Options window, please see the PDF... -
Page 232: Print Window
In the next window, select a paper size and click the [OK] button. • The Layout Options window will close and the Print window will open, allowing you to change the layout and printing settings. • The settings available in Step 4 will vary according to the type of layout selected in Step 3. -
Page 233: Imagebrowser Features
* As measured by standard Canon test conditions. • Please see the Camera User Guide to learn how to shoot RAW images. - Page 234 Converting RAW Images with Quality Adjustment Select a RAW image. • Select a RAW image from the Browser Window of ImageBrowser. Click the [File] menu and select [Convert RAW Images with User Defined Parameters]. • The RAW Image Parameter Settings dialog will display. Select quality settings and click [OK].
- Page 235 Converting Images with RAW Image Converter If you are using the USB Mounter or downloading directly from a CF card reader, you can use RAW Image Converter to convert RAW images. The converted images can be saved in the TIFF (8 bit s/ channel) or TIFF (16 bit s/ channel) formats. •...
- Page 236 • Conversion Settings Dialog Click an option to set whether images convert automatically or are adjusted for image quality. Click the [Convert with RAW image quality conversion] option to display the RAW Image Parameter Settings dialog and make adjustments before conversion (p. 78). To process images more quickly, remove Click an option to set...
-
Page 237: Replaying Movies
QuickTime Player will start and replay the movie. • If QuickTime 3.0 or a later version is not already installed, install the QuickTime 5.0 program from the Canon Digital Camera Solution Disk. Place the disk in the CD-ROM drive and click [QuickTime 5.0 Installation] in the installer panel (p. -
Page 238: Merging Panoramic Images With Photostitch
○ ○ ○ ○ ○ ○ ○ ○ ○ ○ ○ ○ ○ ○ ○ ○ ○ ○ ○ ○ ○ ○ ○ ○ ○ ○ ○ ○ ○ ○ ○ ○ ○ ○ ○ ○ ○ ○ ○ ○ Merging Panoramic Images with PhotoStitch To Merge Images Registered in ImageBrowser You can merge a series of overlapping images into a single, seamless panorama. -
Page 239: Shooting With Remotecapture
○ ○ ○ ○ ○ ○ ○ ○ ○ ○ ○ ○ ○ ○ ○ ○ ○ ○ ○ ○ ○ ○ ○ ○ ○ ○ ○ ○ ○ ○ ○ ○ ○ ○ ○ ○ ○ ○ ○ ○ Shooting with RemoteCapture RemoteCapture will start if you click the [Edit] menu in ImageBrowser and select [RemoteCapture] when the camera is connected to the computer via a USB interface. - Page 240 Displays the number of images computer. that will fit onto the computer or CF card in the camera. * Appears when you are using PowerShot G2. When using other cameras, it appears as follows: Viewfinder Display: Test Preview A preview of the test shot displays.
- Page 241 • You can change the focal length with the Zoom slider. If the focal distance or the brightness changes, click the [AF/AE Reset] button to refresh the image (PowerShot G2 only). Click the [Release] button. • The image will record and be automatically saved to the computer. You can also release the shutter by pressing the camera’s shutter button directly or by...
- Page 242 Interval Timer Shooting You can shoot a specified number of frames at set intervals. In the Save-RemoteCapture window or Shooting-RemoteCapture window, click the [File] menu and select [Interval Timer Shooting]. • The Interval Timer Shooting dialog will display. • You can also select this function in the Shooting window by clicking the [Shooting] menu and selecting [Interval Timer Shooting].
- Page 243 Select a folder for saving images. How to Display the Subject in the Camera’s LCD Monitor (PowerShot G2 only) You can view the subject you are shooting in the camera’s LCD monitor. 1. In the Shooting-RemoteCapture window, click the [File] menu and select [Camera Display Settings].
-
Page 244: Loading Images Into Plug-In Compliant Programs
Copy the Plug-In Module into the Adobe Photoshop [Plug- Ins] Folder Double-click the folder in which you installed the program, followed by the [Canon Utilities] and [Digital Camera Plug-In] folders to open them. Copy the [Canon Digital Camera Plug-In] file to the Adobe Photoshop [Import/Export] folder. - Page 245 • You can also open the Settings for USB Connection dialog by clicking the Apple menu and selecting [Control Panels] and [Canon ImageBrowser Auto Launch]. Click here to close the dialog. Click here to clear the check mark. CF Card Reader / PC Card Reader Connection Insert the CF card or loaded PC card adapter into the reader.
- Page 246 • The Plug-In Module can only display still images. Start ImageBrowser to download movies to the computer (p. 69). Downloading from the Camera Click the Adobe Photoshop LE [File] menu and select [Import] and [Canon Digital Camera Plug-In]. Click the icon, confirm that [USB Port] and your camera model name are selected and click the [Set] button.
- Page 247 • The Plug-In Module Window Display Style Button Change the shape of the Thumbnail Preferences Button Display Area. Adjust or check image transmission settings (p. 80). Rotate 90 Degrees Buttons Rotate the selected image 90 Camera Settings Button degrees left or right. Adjust or check camera Image Information Button settings (p.
-
Page 248: Downloading Images With The Usb Mounter
To download images with the USB Mounter, first enable it with the following procedures. Select [Control Panels] from the Apple menu and [Canon USB Camera Driver]. • The Canon USB Camera Driver control panel will display. Select [Card Reader Mode] and Click here to close it. close the control panel. -
Page 249: Downloading Images
○ ○ ○ ○ ○ ○ ○ ○ ○ ○ ○ ○ ○ ○ ○ ○ ○ ○ ○ ○ ○ ○ ○ ○ ○ ○ ○ ○ ○ ○ ○ ○ ○ ○ ○ ○ ○ ○ ○ ○ Downloading Images Attach the supplied USB cable to the computer’s USB port and the camera’s Digital Terminal. -
Page 251: Windows / Macintosh
Troubleshooting (Windows / Macintosh) This topic explains some of the causes for and solutions to problems with the software. - Page 252 Please restore the database using the procedures described in the “Troubleshooting” section of the PDF manual, ZoomBrowser EX Software User Guide. You can display the ZoomBrowser Software User Guide from the installer panel of the Canon Digital Camera Solution Disk.
-
Page 253: Customer Support
Tel No.: 08705 143 723 (Calls may be recorded) Canon Australia Pty. Ltd. Fax No.: 08705 143 340 Info-Line: (02) 9805 2864 Canon Communication & Image France S.A. Canon New Zealand Ltd. Tel: 01.41.30.15.15 Fax: 01.41.30.15.05 Info-Line: 0900 - 522666... -
Page 254: Adobe Customer Support
Adobe Customer Support Adobe Systems Inc. technical support information is available in the PDF file format on the supplied CD-ROM. PDF File Location and Opening Instructions Windows: Place the Adobe Photoshop LE CD-ROM in the drive and double-click the [My Computer] icon on the Windows desktop, followed by the [Photosle] CD-ROM icon. - Page 256 CDI-E032-010 0901CHxx © 2001 CANON INC. PRINTED IN JAPAN...
Need help?
Do you have a question about the PowerShot G2 and is the answer not in the manual?
Questions and answers