Table of Contents
Advertisement
Quick Links
Advertisement
Table of Contents

Related Manuals for CP Plus 4/8/16 Channel DVR


Summary of Contents for CP Plus 4/8/16 Channel DVR
- Page 2 CAUTION! TO REDUCE THE RISK OF ELECTRIC SHOCK, DO NOT REMOVE COVER WHILE THE DEVICE IS CONNECTED TO A POWER SOURCE. THE DEVICE’S INTERNAL PARTS CANNOT BE SAFELY REPAIRED BY USERS. REFER SERVICING TO QUALIFIED SERVICE PERSONNEL. WARNING TO PREVENT FIRE OR ELECTRIC SHOCK HAZARD, DO NOT EXPOSE THIS APPLIANCE TO RAIN OR MOISTURE.
-
Page 3: Limitation Of Liability
LIMITATION OF LIABILITY This user manual is supplied “as is,” with no warranties, be it expressed or implied, including, but not limited to the implied warranties of merchantability, suitability for any exact purpose, or non-infringement on any third party’s rights. This publication may include technical inaccuracies or typographical errors. - Page 4 Handle hard disk drives with care. It is possible to damage hard drives if they are moved while their motors are still running. To allow the hard drive to spin down and park its heads, wait at least 10 seconds after disconnecting it from a power source before moving the unit.
-
Page 5: Copyright Statement
COPYRIGHT STATEMENT All rights reserved. No part of this publication may be reproduced in any form or by any means, transcribed, translated into any language or computer language, transformed in any other way, stored in a retrieval system, or transmitted in any form or by any means, electronic, mechanical, recording, photocopying or otherwise, without the prior written permission from the owner. -
Page 6: Table Of Contents
Table of Contents LIMITATION OF LIABILITY ........................2 DISCLAIMER OF WARRANTY......................2 SAFETY INSTRUCTIONS ........................2 COPYRIGHT STATEMENT ........................4 Table of Contents............................5 1.YOUR DVR AT A GLANCE ....................... 8 2.Contents of the Package ........................9 2.1 Getting Started Checklist ....................9 3. - Page 7 5.3.3 Recording Bit-rate.................... 36 5.3.4 Record Resolution.................... 36 5.3.5 Recording Frame Rate ..................37 5.3.6 Record Audio ....................37 5.3.7 Recording Pack Time..................37 5.3.8 Recording Modes..................... 37 5.4 Video .......................... 39 5.4.1 Channel......................39 5.4.2 Name ....................... 39 5.4.3 Position ......................39 5.4.4 Live........................
- Page 8 6.5.3 Other Operations....................55 6.5.4 Replay......................56 6.5.5 Toolbar Guide ....................57 6.5.6 Remote Settings ....................57 6.5.7 Local Settings ....................66 6.5.8 Logout ......................67 7. Wap Connection ........................... 67 8. Mobile Phone Support.......................... 68 8.1 Windows CE Mobile Phone..................69 8.2 Symbian S60 3 and 5 Edition Phones ..............
-
Page 9: Product Overview
1.YOUR DVR AT A GLANCE Product Overview Model 4 CH 8 CH 16 CH Video Format PAL/NSTC Video Compression H.264 Baseline Compression Video Input / BNC 16 Input / 1 Output BNC 4 Input / 1 Output BNC 8 Input / 1 Output Output /1 CH Spot Audio Format... -
Page 10: 2.Contents Of The Package
Congratulations on purchasing a state-of-the-art Digital Video Recorder (DVR). This DVR offers the industry’s best triplex functionality with video/audio recording, playback, and network capability, which can all be run simultaneously, streamlining the use of CCTV systems and boosting the security level of the home, business, or social venue where it is installed. Users can access live or recorded feed from standard or PTZ cameras directly at the location of the DVR installation, or anywhere in the world using web-browsers or a mobile phone*. -
Page 11: Hardware
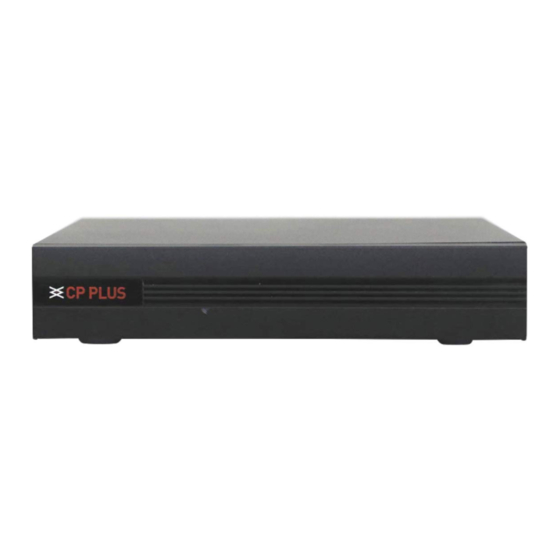
3. Hardware 3.1 Front Panel (Please take actual machine model as quasi) The appearance of the front panel varies slightly with each different DVR model. The illustrations of front panels in the following images are examples for reference. This subsection will explain the functions of each of the buttons and other components on the front panel of the DVR. -
Page 12: Back Panel
• IR Window ( ): Infrared sensor for remote control. • USB Connector: Use these USB ports to connect backup devices (i.e. flash drives, USB DVD recorders, etc.) or a mouse to the DVR. • Number 0-9 Buttons/ : Using these buttons, you can choose to display video on your monitor either as a full-screen view of each of the cameras individually (Channels 1 through 9), or you can press the “... -
Page 13: Panels And Connectors
8-CH(1U): 8-CH (NON-1U) 8-CH(NON-1U) 16- CH: 1. USB connectors Use these USB ports to connect the mouse and backup devices (flash drives, USB DVD recorders) to the DVR. Note: On some models, the USB port is on the side panel or on the front panel. - Page 14 2. Audio Output Connector -- (optional) Single-channel audio output connector for connecting speakers (4CH-RCA, 8CH/ 16CH-DB9) 3. Audio Input Connectors (AUDIO IN 1-4/1-8/1-16) - (optional) 4-/8-/16-channel audio input connectors for connecting to audio signal input (4ch-RCA, 8ch/16ch -DB9) 4. Video Input Connectors (Video IN 1-4/1-8/1-16) 4-/8-/16- channel video input connectors for connecting to analog video signal input, BNC (1Vp-p, 75Ω) 5.
-
Page 15: Remote Control
12. Ground 13. Spot Video Out-(optional): this enables users to auto-cruise each channel. 14. S_AOUT - (optional) 15. Microphone (optional): port for connecting a microphone to communicate with. 16. HDMI (16-CH): High-definition multimedia interface (HDMI) port. 17. PTZ - (optional) 3.3 Remote Control Pressing the “enter”... -
Page 16: Mouse Control
3.4 Mouse Control As well as the remote control and the buttons on the DVR itself, you can use a mouse to operate the DVR. The mouse operates just like a mouse on a typical computer. To start, connect the mouse to the USB port in the back panel of the DVR; note that you can hot-plug the mouse. In live view, right-clicking will either display or hide the toolbar. -
Page 17: Installing Hard Disk Drives (Hdds)
Audio Connection---(optional) The audio input interface is a standard RCA socket, 2Vp-p, 600 Ω. Keep the audio signal cable away from strong electromagnetic and electric interference. Monitor Connect the main output connector to a monitor or a TV screen. Use a BNC-to-RCA converter, if needed, to work with the Audio/Video RCA cable. -
Page 18: Ptz Control Connections- (Optional)
Power connector Data connector The HDD should be installed inside the DVR. Connect the HDD in according to the instructions, screwing the HDD into the HDD brackets or DVR base. All necessary cables are included with the DVR. If using a hard drive from another manufacturer, use instructions that came with the hard drive for specific details on proper wiring and installation. -
Page 19: Getting Started And The Main Screen
4. Getting Started and the Main Screen 1) Turn on the DVR and wait for the system program to load. If any of the following conditions are true, • You have not yet installed a hard disk drive into the device. •... -
Page 20: Status Bar
output device is connected to this channel, you can monitor both audio and video feeds. To display a full-screen view of a single channel, press the corresponding numerical or positional buttons ( ) on the remote control (the channel number is displayed in the top left corner of each window); alternatively, you can do so by left double-clicking on the desired window. - Page 21 PLAY KEYLOCK EZOOM Advance SYSTEM SETTINGS MUTE ON/MUTE OFF MANUAL REC / STOP MANUAL REC Click the “ADVANCED” button and the screen will display the following toolbar: PIP*1 PIP*2 VO SWITCH QUAD 6 SHOW 8 SHOW 9 SHOW Hide Advanced The functions of the buttons in the toolbar are as follows: System configuration Search, playback, and backup of recorded files...
-
Page 22: Tool Bar Menu Options
EZOOM: Click “EZOOM” to enter zoom mode, and then left-click and drag the cursor to select the area to be magnified. Right-click to exit zoom mode. PIP 1*1: This feature displays the video from one channel in a small inset window, while another channel is displayed in full-screen view. - Page 23 Method 1: Playback by Date Date input: Adjust the date and time to match the recording you are searching for: first, select “TIME” and press “Enter” to input numbers directly to set the year, month, and date; next, input the time in the next field, and click “►”. A window that reads “CHOOSE PLAYBACK CHN”...
- Page 24 2. After moving the cursor up or down and selecting the files, left-click to enter the playback menu. It will play the video from a single channel in full-screen view. 3. If the “RECORD TIME” section is marked as “ON” under the “VIDEO DISPLAY” section, it will show the date/time that the video was recorded when playing back recorded file;if it is marked as “OFF,”...
-
Page 25: Video Backup
Playback Control In playback mode, users can view the playback control panel as well as the date and time of the file being played. The following are the functions of and options for the items in the playback control panel: Fast rewind: the available speeds are 2x, 4x, 8x, 16x, 32x, and 64x. - Page 26 Press “Enter” to confirm a selection. A checkmark (√) will appear at the end of the filename after the selection has been made (pressing “Enter” again will cancel the selection, and the “√” will disappear). Once the files have been selected, they can be exported by selecting “Backup.” U-DISK Backup by Time Note: In standard English, a “U-DISK”...
-
Page 27: Playing Backed Up Videos On Home Computers
4.2.5 Playing Backed Up Videos on Home Computers 1) Copy the program “Hsplayer.exe” from the installation CD to the computer to be used. Double-click the “ ” icon to run the program. Maximize the window Minimize the window Close the Window Open Capture Play Slow Fast... -
Page 28: Ptz Control- (Optional - Not All Models Have A Ptz Control)
4)Right-click to open the shortcut menu window. open the video recorder in “*.avi” or “*.264” format to set up the path for saving captured images Full Screen Language options (for changing languages) Note: Files backed up on USB drives can be played using Windows Media Player directly. Files backed up onto DVDs can be played using “Hsplayer.exe.”... - Page 29 “PTZ” or press the “Enter” key to enter the control frame. In the PTZ control frame, press the “ ” button or right-click, and a “ ” icon will appear in the upper right corner of the screen. “PTZ Direction Control” From the PTZ control frame, move the mouse to the upper, lower, left and right locations of the current frame, and this time, left-click and hold the mouse.
-
Page 30: Channel Status Display
“PRESET” Adjust the direction and angle of the camera, input the corresponding preset point numbers, and then click “ ” to preset the point numbers of the menu. Input the preset point number, and click “ ”, to automatically switch the camera to the corresponding location of the preset point. -
Page 31: Menu Options
5.1.1 Menu Options In order to modify/adjust the system configuration, it is necessary to enter the “System” menu; to do this, click the “Settings” icon ( ) in the “Tools” menu. After clicking the “Settings” icon, a dialog box with settings for all of the systems and options available for the DVR will appear. -
Page 32: System
(c) Use the menu to become familiar with the existing non-adjustable settings. When making selections from the fields or entering information into them using the remote control directional keys or the DVR front panel, as well as when positioning the cursor over them, a short description of the settings in question will appear at the bottom of the window. -
Page 33: User Management
DATE: Set the date using the numerical keypad. DATE FORMAT: Press “Enter” to switch the date format, include YY-MM-DD, MM/DD/YY and DD-MM-YY. TIME FORMAT: Press “Enter” to switch the time format from a 12-hour clock to a 24-hour clock and vice versa. TIME: Set the system time using the numerical keypad. - Page 34 DEVICE ID: In this field, to identify the device. PASSWORD: In this field, a password for accessing the DVR system can be set or changed. The following settings can only be set by the system administrator (who will be referred to throughout this manual as “the Administrator”;...
-
Page 35: Hdd (Hard Disk Drive)
VIEW PERMISSION: Another very important function for the Administrator is “View Permission”, which allows the Administrator to set different viewing permissions for different users (see the preceding figure on the right). The Administrator can decide which channel(s) each user is allowed to view. The Administrator has permission to view all channels, and this permission cannot be modified. -
Page 36: Volume- (Optional)
full, it will not record again until “overwrite” is enabled. If a user chooses “AUTO,” recording continues and overwrites previous recording when the hard disk drive is full. If a user chooses “2 DAYS,” recording on the hard disk will continue for no more than two days. After two days, the recording will be automatically overwritten. -
Page 37: Information
AUTO MAINTAIN: When “AUTO MAINTAIN” is on, users can set a specific time for the DVR to restart. The system will restart automatically according to the parameter(s) chosen. 5.2.8 Information Click “System Settings,” then click “System,” and select “Information” to enter the “System Info”... -
Page 38: Recording Frame Rate
5.3.5 Recording Frame Rate In this window, users can choose the recording frame rate (frames per second) for the current channel. The higher the recording frame rate, the more natural the movement seen in playback mode will seem. Select a recording frame rate depending on the how carefully the activity in the video needs to be monitored. - Page 39 certain hours made more secure with combined alarm-triggered and motion-detection recording. Additionally, the recording schedule can include specific no-record time slots for when users are usually in the office (or other location where the camera is installed) alone at very early hours of weekday mornings.
-
Page 40: Video
5. To save this schedule, click the “ ” button at the bottom of the screen. Regardless of whether the schedule is set for each day individually or by copying one schedule to multiple days of th week, it is necessary activate it by clicking the “ ”... -
Page 41: Live
5.4.4 Live When this field is set to “ON,” the selected channel can be viewed in live view mode; when “OFF” has been selected, it cannot. 5.4.5 Audio (Sound Settings) - (optional) The audio input for the selected channel can be set up using this field. The options include “UNBIND,”... -
Page 42: Network
sequencing time when auto-sequence is enabled. Values can be set from 1-300 seconds. Spot time (For 16-CH DVRs): Set sequential time for spot out from this field. Channel: From this field, select one channel whose area coverage will be set up in the following field (Area Covered). -
Page 43: Sub-Stream
SUBNET MASK: After pressing “Enter,” input numbers for the subnet mask. GATEWAY: After pressing “Enter,” enter numbers for the default gateway. 2) If PPPOE has been selected, it is necessary to enter the PPPOE username and password provided by the ISP. MEDIA PORT: Port for the private protocol of the DVR and computer;... -
Page 44: Ddns Setup
Bit rate: There are 6 options: 64K, 128K, 192K, 256K, 384K, and 512K. Stream control: There are two options:VBR and CBR. 5.5.3 DDNS Setup Move the cursor to “DDNS SETUP” and press “Enter” to enter the DDNS setup menu. DDNS: The two options are “ON” and “OFF.” If there is a DDNS server, select “ON”. SERVER: There are two options: “3322”... -
Page 45: Mobile Setup
SSL: SSL is a security link transport protocol that can be used to encrypt information communicated over the Internet (including email) to prevent hackers from accessing the email communication or other information of users on a network, such as passwords. Interval: This indicates the interval for sending email include;... -
Page 46: Ip Access Setup
NETWORK TYPE: From this field, select from different mobile networks, including 3G, 2.5G, 2.75G and WiFi; press “ ” to save a new network. Explanation: Make sure to connect the DVR to the Internet before setting the DVR port number, and make sure the server port is not equal to network menus. Note: It is only possible to view one channel at one time when viewing DVR videos from a mobile phone. -
Page 47: Ftp Settings
5.5.8 FTP Settings Move the cursor to “FTP Setting” (the tab will be highlighted when selected) and press “Enter” to access the FTP settings menu. Port, User name, Password: Install the FTP server first, then register, and remember the port, username, and password. Entered the port, username, and password used here will be the same as the ones entered on the server. -
Page 48: Prerecord
5.6.4 PRERECORD This sets the duration of the recording time before the alarm is activated. The options for prerecording time are: “OFF” and “5 seconds.” 5.6.5 EXCEPTION ALARM To access the “Exception Alarm” page, in the toolbar, first click “System Settings,” and then click “Alarm.”... -
Page 49: Motion Detection
N.O.: “Normally open”: It means that in its normal state, the sensor is kept under constant low voltage. If the output voltage changes from low to high, then the alarm will be triggered. N.C.: “Normally closed” (also referred to as “normally connected”): The normal state of the sensor is under constant high voltage. -
Page 50: Ptz- (Optional)
require this functionality. This may be handy when, for example, the camera covers the road and an adjoining area. While it would be useful to have the motion detection enabled on the area near the entrance to a building, it would most likely not be helpful to see it triggered every time a car or truck passes by on the nearby road. -
Page 51: Ptz Channel
5.7.1 PTZ Channel This is the channel that PTZ is connected to. 5.7.2 PTZ Protocol From this field, select the PTZ device protocol. It must be consistent with the protocol of the actual PTZ cameras installed. There are two available options: Pelco-D and Pelco-P. The changes will take effect after clicking “... -
Page 52: Network Security Setting
To ensure reliable remote viewing of DVR footage, it is highly recommended that users have either Windows XP or Windows Vista installed on their computers, and that they use either Internet Explorer 6.0, Internet Explorer 7.0, Mozilla Firefox, or Google Chrome as their Internet browser.(In the appendix, there is an explanation of how to access the DVR using Firefox or Google Chrome.) 6.2 Network Security Setting... -
Page 53: Connection Settings
√ Download signed ActiveX controls √ Download unsigned ActiveX controls √ Run ActiveX controls and plug-ins √ Script ActiveX controls safe for scripting. Prompt: Before setting up remote access, turn off the firewall and any anti-virus software currently running on the computer. 6.3 Connection Settings Remote access to the hard disk drive is carried out over the Internet. - Page 54 Step 4: Double-click “Internet protocol (TCP/IP)” from the “This connection uses the following items” list in the center of the window(see preceding figure). Step 5: Examine the IP address, subnet mask, and default gateway on the PC. Step 6: Set the corresponding IP address, subnet mask, and default gateway on the DVR (for detailed instructions, refer to Section 5.5.5 Network Setup).
-
Page 55: Control Download And Installation
6.4 Control Download and Installation After the aforementioned settings have been adjusted and saved, open the Internet browser, enter http://192.168.1.X (192.168.1.X is the set IP address of the DVR) and confirm. If the http port of DVR setting has been changed (if it is not “80”), it will be necessary to add a “:” followed by a port number. -
Page 56: Controls
6.5.2 Controls To use the controls, move the cursor over the icons, which will become highlighted when selected. Connect all windows or disconnect all windows. Capture images which can be saved in a local disk, (the default system save path is “c:\DVR\BACKUP\”.) Quick-start to record video on all channels. -
Page 57: Replay
Users can play, start, and stop this channel’s recording using the shortcut menu. 3. Right-click the screen while in live view mode, and click “connect all” or “disconnect all” to quickly open or close all windows. 6.5.4 Replay Click “REPLAY” to enter the playback interface. To search for a recording by date, click calendar in the upper-right corner, and use “... -
Page 58: Toolbar Guide
The highlighted date indicates the recording date of the video being played. Click on a date to view the recording file list for that day. For example, the preceding figure shows that there are videos on file that were recorded on June 12 and 13 (indicated by the numbers being in bold print), and is the recording file list that is currently open is the list of videos recorded on June... - Page 59 quality, and frame rate) for each channel. B. Recording Settings Click “Record Setting” to enter the recording settings menu. From this page, users can enable or disable recording for each channel, set recording schedules, and adjust specific recording parameters, i.e. enabling/disabling audio, setting the pack time, and setting recording modes. C.
- Page 60 select ”Device Alarm” to enter the “Device Alarm” setup interface. From this interface, users can set alarm event types; that is, they can decide which types of events will trigger an alarm by selecting event types from the “Event Type” dropdown menu. They can also turn the buzzer and alarm out on or off from this page.
- Page 61 From the sidebar on the left, click “PTZ Setting” to access the PTZ settings interface. Users can set PTZ parameters remotely using the same methods used in the local DVR setup. All of the parameters can be adjusted by selecting values from their respective dropdown menus. E.
- Page 62 F. Mobile Settings From the sidebar on the left, click “Network Setting,” and then select “Mobile” to enter the “Mobile Settings” interface. From this page, users can set ports and select a network type. G. Email Settings From the sidebar on the left, click “Network Setting,” and then select “Email” to enter the email settings interface.
- Page 63 H. IP Firewall Settings From the sidebar on the left, click “Network Setting,” and then select ”IP Firewall” to enter the firewall settings interface. From this page, users can turn the firewall on or off for specific IP addresses. I. ESMS Settings From the sidebar on the left, click “Network Setting,”...
- Page 64 J. FTP Settings From the sidebar on the left, click “Network Setting,” and then select “FTP Settings” to enter the file transfer protocol (FTP) settings interface. From this page, users can set the port, username, password, and host name for FTP. K.
- Page 65 L. System Information Device/Software Version Information: From the sidebar on the left, click “System INFO,” and then select “Version INFO” to enter the system information interface. Here, users can find out the device name and software version, and the release date. HDD Information: Clicking “HDD INFO”...
- Page 66 M.REMOTE UPGRADE From the sidebar on the left, click “REMOTE UPGRADE” to enter the remote upgrade interface. Clicking “ ” will select file for upgrading. Then click the “Remote Upgrade” button in the center of the screen. N. User Management Add/Delete Users: From the sidebar on the left, click “User Manager,”...
-
Page 67: Local Settings
OR DEL” to enter the user management interface. Once a password has been enabled, this interface can only be accessed by the Administrator. The Administrator can add new users or delete any users at his or her discretion. Privacy Settings: From the sidebar on the left, click “User Manager,” and then select “MODIFY PASSWORD OR PRI”... -
Page 68: Logout
this page, users can set up the save path for local settings; in the “Record Save Path” field, they can create a save path for recordings, in the “Frame Save Path” field, they can create a save path for video/still images, and in the “File Save Path” they can create a save path for downloads. -
Page 69: Mobile Phone Support
4. After logging in to the system successfully, a settings page will appear. From this page, users can choose the channel to monitor, the image size, and the refresh rate. Click “OK” for the settings to take effect. 5. At this point, the mobile phone should be displaying the video from the selected channel. The image will automatically refresh in several seconds if a refresh rate was selected on the settings page. -
Page 70: Windows Ce Mobile Phone
you must install a mobile operating system specific program into your mobile. The mobile programs are located on the included CD, or downloaded via iTunes for the iPhone mobile. In iTunes, please search for “MobileEye”. Please see the instruction manual for your mobile to install the program. -
Page 71: Symbian S60 3 Rd And 5 Th Edition Phones
To connect to the system and begin watching the live feed from the CCTV cameras connected to this DVR, press the “Connect” button near the top of the screen. To choose the camera, use the “Channel” dropdown menu. To modify settings, press the “Setting” button. The frame rate (fps), resolution (size), and bit rate (Kbps) of the current channel will be displayed at the bottom of the screen. - Page 72 After the installation is complete, locate the Mobile Eye icon “ ” in the list of applications on the mobile phone. In order to start working with the CCTV feed on the Symbian mobile phone, it will be necessary to configure the program by entering the preferred network access point, the IP address of the DVR, the mobile phone port, the username, and the password.
- Page 73 it will be possible to watch the remote video feed on the Symbian S60 mobile phone. Run the Mobile Eye program, and the following screen will appear. IP address line Camera view Status information line Play Connecting Control buttons Functional buttons Play/Stop Favorite Exit...
- Page 74 This function displays the camera feed in the full-screen mode. All menus and buttons will be hidden in full-screen mode. Snap The function enables users to take a snapshot of the camera view. Setting After pressing this button, the connectivity setup screen will appear. Next Group Pressing this button will switch to next 4 channels.
-
Page 75: Apple Iphone
Nokia E55 Nokia N95 8GB Nokia E60 Nokia N96 Nokia E61 Nokia N97 Nokia E61i Samsung I7110 Nokia E62 Samsung INNOV8 Nokia E63 Samsung SGH-G810 Nokia E65 Samsung SGH-i400 Nokia E66 Samsung SGH-i450 Nokia E70 Samsung SGH-i520 Nokia E71 Samsung SGH-i550 Nokia E75 Samsung SGH-i560 Nokia E90... - Page 76 Figure 2 ② Press “ ” and the following screen will appear. Figure 3 ③ Press “ ” as shown in Figure 3. The screen shown in Figure 4 will then appear. Press “ ” (shown in Figure 4), and the screen shown in Figure 5 will appear. Enter the password for a registered Apple iTunes account, and press “...
- Page 77 password, the screen shown in Figure 6 will then appear. Figure 4 Figure 5 Figure 6 “ ” Loading: this indicates that the “MobileEye” software is downloading. When the “ ” process bar displays a “ ”status, the MobileEye software has finished installing. After installing “MobileEye,”...
- Page 78 Figure 7 How to use MobileEye: 1. Click the “MobileEye” icon to open the program. Figure 8 (2) Press the settings button (shown inside the red box in Figure 8). After pressing the settings button, a screen like the one shown in Figure 9 will appear.
- Page 79 Figure 9 (3) There are two ways to view the live feed from the DVR on the screen: a. After pressing the “Server Access” button, the following screen (the one in Figure 10) will appear. In the Settings menu (see adjacent screen), enter the following information: ①Server ID: this is the DVR’s device ID number ②User ID: Enter the user name of the DVR in this field.
- Page 80 Figure 11 Return to the main screen. The following is an explanation of the buttons on the main screen: 1. PTZ direction controls: up, down, left, right 2. PTZ lens controls: zoom in/zoom out; focus+/ focus-; iris+/ iris-. 3. Use the numbers to select the live view channel to display. 4.
-
Page 81: Android Mobile
8.4 Android Mobile 1). Install Mobile Eye 1. Copy the setup software “Mobile Eye-Android.apk” to a computer. 2. For instructions on installing software onto the Android mobile phone, refer to the user manual included with the phone. 3. Install an HTC manager “HTCSync.exe” on the same computer where “Mobile Eye-Android.apk”... - Page 82 If prompted, make sure to allow the application to access the internet.
- Page 83 When the application has finished installing, the phone will display the following screen. 2). Mobile Eye Program Description The main functions of the Mobile Eye application are: remote access viewing of live video surveillance recorded with a DVR via mobile phones, full-screen viewing of videos streamed from a DVR, remote access control of PTZ cameras, capturing video frames as still images, and tagging recordings as “favorites.”...
- Page 84 Below is displayed the main start page of the application: Switch Video Snapshot Full-Screen PTZ Zoom, Control Focus, Iris 2.2) System Settings Interface Press the “Setting” button to access the settings page. This page will be used during the first time entering the system, and later if it becomes necessary to change the parameters of the system.
- Page 85 Save as Favorite: Saves settings for future usage User name: The device ID name/number of the DVR Password: The password set for entering the DVR system Server: The public IP address or dynamic domain name of the DVR Port: The server port of the DVR for remote access viewing via mobile phone- the default is “10510”.
-
Page 86: Blackberry Mobile
See below for more details: :Press this icon to connect to the DVR : Press this icon to open the settings menu : Change the live view channel. :Use the arrows to move the PTZ up, down, left, and right. : These icons operate the zoom, focus, and iris of the PTZ camera. - Page 87 phone is not connected to the computer, whereas Figure2 means the phone has been successfully connected to it, as indicated by the status circled in red in each figure. Figure1 Figure 2 5. Click “Application Loader” to access its interface. In this screen there are two options to select from.
- Page 88 6. After clicking “Start,” the following screen will appear. From this screen, click “Browse” (circled in red in the following screenshot). 7. After clicking “Browse,” the following file search screen will appear. Open the folder to which the application files were saved. Make sure that both the “.alx” and “.cod” files have been saved in the same folder.
- Page 89 8. The “Application Loader” screen will automatically appear. In this screen, “MobileEye” should now be listed in the “Device application selection” list with “Install” listed under the “Action” column (as shown in the following screenshot) if the installation was successful. 9.
- Page 90 10. Select “Mobile Eye” from the “Name” list, click “Next,” and the following screen will appear. At the bottom of the “Summary” page (see following screenshot) click “Finish” to confirm the operation, and the application “MobileEye” will be removed from the device. 2).
- Page 91 ① Main System Interface After the installation, touch the “MobileEye” icon in the application (as in the following illustration). After opening “Mobile Eye,” the following screen will appear; this is the main system interface.. ② System Configuration interface Press “Configure” (see preceding screenshot) to access to the page for configuring and modifying settings.
- Page 92 Record lists: Saved records can be found here; User name: This refers to the DVR’s device ID Password: This is user password for entering the DVR system Address: This is the public IP address or dynamic domain name of DVR. Port: The server port listed on the DVR menu;...
- Page 93 Explanation of Toolbar Buttons: Choose Channel:This function switches the channel being viewed. It may only be enabled AFTER connecting to the DVR. : These keys move the PTZ up, down, left, and right. :These keys can be used to adjust the PTZ zoom, focus, and iris settings.
-
Page 94: Troubleshooting
3) FAQ – Frequently Asked Questions 1:Why can’t the mobile phone connect to the server? A: Check that the server, port, username, and password have been entered correctly; misspellings and entering incorrect information are typical causes of connection problems. B: Make sure the mobile phone is connected to the Internet; if an Internet service plan has not been purchased or if the Internet connection itself is not functioning, it will be impossible to connect to the server. - Page 95 Check the power cord; is it properly connected to the power source? Check the on/off switch – is it turned on? Check the upgrade procedure. Check the main board of the DVR – do all of the indicators indicate that the settings are correct? 2.
- Page 96 Make sure the power and data connection cables of the HDD are connected and undamaged. The HDD could be defective – test it with another device to find out. The SATA port may be not working – have a qualified technician examine it to find out.
-
Page 97: Appendix 1. Setting Up Internet Connections For Remote Access
9. After right-clicking “Stop recording” on the toolbar, the recording does not stop. How do I stop recording? The “Stop recording” function can only be excuted by right-clicking during Manual recording. If you want to stop recording, please set the time is not recording. 10. -
Page 98: Appendix 2. Dvr-Compatible Hard Disk Drives
address. This address can be used by other network devices (ie. computers) to access the DVR to remotely monitor the CCTV cameras and change settings. You can also get a static IP address from your internet service provider – this way, you will always have the same address at all times, though this method is rather expensive. -
Page 99: Appendix 4. Dvr- Compatible Portable Sata Dvd Recorders
the DVR. Before using a DVD recorder not found on this list to back up data from the DVR, it extremely important to test it for compatibility first. • Pioneer DVR-XD09C Appendix 4. DVR- Compatible Portable SATA DVD Recorders The following is a list of portable SATA DVD recorders tested and found to be compatible with the DVR. -
Page 100: Appendix 6. Dvr- Compatible Portable Wireless Mouse
Appendix 6. DVR- Compatible Portable Wireless Mouse The following is a list of wireless mouse tested and found to be compatible with the DVR. Before using a wireless mouse not found on this list, it is extremely important to test it for compatibility first. - Page 101 4. Drag the add-on into the browser interface and the following screen will appear. 5. Select “Allow” to download multiple files and the following screen will appear. 6. Select “Continue” to continue installing extensions and the following screen will appear. 7.
-
Page 102: Appendix 9 How To Use Auto Id-"Plug N Play" Quick Guide
Note: If the web page still does not open, press the “ ” icon on the right of the address field to display this page in an IE based-tab. 8. Fill in your correct user name and password to log in. and the following screen will appear. Appendix 9 How to Use Auto ID- "Plug n play"... - Page 103 2. Then, open the main menu, click “Network”, then click “Other Settings” and select “Auto ID”, to access the “Auto ID” option. 3. Regarding use of the router to browse the Internet, first you should have the transmit codex of the router’s port already mapped. Alternatively, open the UPnP, and the router will automatically map the port.
- Page 104 4. Once the network is connected, enter “http://www.ipremoteview.com” in the address field of the Internet browser. Then enter the DVR ID number into the “Product ID” field, as shown in the following screenshot. Note:If after following the preceding instructions the login page does not work or the Auto ID function fails, try the following steps to add the website to the zone: 5.
- Page 105 Note: Refer to Section 6.4 Control Download and Installation for instructions on what to do after logging in here. Statement ◎If there is any doubt or disputability regarding information in this manual, you can call our company for clarification. ◎This manual provides reference information for several types machines; contact our customer service department if you have any questions or encounter any difficulties using your device;...
Need help?
Do you have a question about the 4/8/16 Channel DVR and is the answer not in the manual?
Questions and answers