
Subscribe to Our Youtube Channel
Related Manuals for TIPTEL 1020


Summary of Contents for TIPTEL 1020
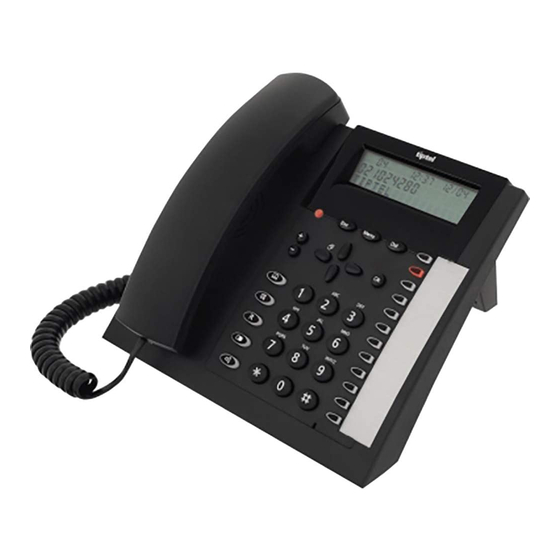
- Page 1 Operating instructions (en) Easy-to-use telephone with hands-free function, message waiting indicator, phone book and headset connector tiptel 1020 tiptel...
-
Page 3: Table Of Contents
Contents Contents Contents ......................3 Safety notices ....................5 Assignment of buttons ..................6 Controls ......................8 Getting started ....................9 Deliverables....................9 Fitting the stand ..................9 Underlay ...................... 9 Wall bracket ....................10 Connecting ....................11 MWI switch ....................12 Telephone functions / making calls ............... - Page 4 Contents Settings ......................24 Setup options ....................24 Setup menu ....................25 Adjusting the volume .................. 26 Message waiting indicator (MWI) ..............27 FSK message waiting indicator ..............27 MWI with polarity change of the telephone line voltage ......27 MWI using high voltage ................
-
Page 5: Safety Notices
Safety notices Safety notices Please observe the following very closely when setting up, connecting and using the telephone: Only plug the connection cables into sockets designated for this use. Lay the connection cables such that they do not pose any risk of accidents. Connected cables must not be subjected to excessive mechanical stress. -
Page 6: Assignment Of Buttons
Assignment of buttons Assignment of buttons Control button (left): Used for navigation and settings. From the top-level menu, accesses the call log. Control button (right): Used for navigation and settings. Control buttons (up/down): Used for navigation and settings. OK button: Used to save a new setting. Starts dialling a telephone number entered or selected. - Page 7 Assignment of buttons Pressing the direct dial button for three seconds enables a telephone 3 secs number and a name to be entered. Mute button: Disables the microphone during a telephone call. When the phone is in the top-level menu, the call tone can be disabled and enabled again (for some peace).
-
Page 8: Controls
Controls Controls... -
Page 9: Getting Started
Getting started Getting started Deliverables Included with your telephone: Telephone including receiver Spiral cable (receiver cord) Stand Telephone connector cable Operating instructions Fitting the stand To use the device as a table-top telephone, fit the stand supplied (as shown). The stand has three positions, enabling the telephone to lie at different angles. -
Page 10: Wall Bracket
Getting started Wall bracket For wall installation, secure the stand to the wall using the two screws (as shown in Fig. 1). Then attach the telephone unit to the stand (Fig. 2). Pull out the plastic piece in the receiver holder, and put it back in rotated by 180 degrees (Fig. -
Page 11: Connecting
Getting started Connecting All of the necessary cables must be plugged in before you can start using your tel- ephone. Plug the long end of the spiral cable into the jack with the receiver symbol and the short end into the telephone receiver. Plug the telephone connector cable with the small connector into the "LINE"... -
Page 12: Mwi Switch
Getting started A language selection menu is displayed after connecting for the first time. Use the control buttons (up/down) to select a language and confirm with the OK button. Use ESC to then exit the menu. MWI switch The MWI switch is used to switch between the different Message Waiting Indicators of a telecommunication system (see also Page 27, "Message waiting indicator"). -
Page 13: Telephone Functions / Making Calls
Telephone functions / making calls Telephone functions / making calls During a telephone call, a call timer is displayed showing how long the line has been engaged. This enables you to see at all times how long you have been on the phone. -
Page 14: Non-Immediate Dialling (Dial Preparation)
Telephone functions / making calls Non-immediate dialling (dial preparation) Here the digits entered are not dialled immediately, meaning corrections can be made before dialling. Use the numeric keypad to enter the The digits pressed are displayed but not … required number. yet dialled. -
Page 15: Transferring Calls / Flash (R Button)
Telephone functions / making calls To end the call, press Loudspeaker The line is disconnected. again (same as putting down the receiver). When the headset is plugged into the connector, the hands-free function is not available. Instead the headset is used for the conversation. Transferring calls / flash (R button) On most telephone systems, the R button can be used to transfer calls. -
Page 16: Call Logs
Call logs Call logs General Two call logs are stored in your telephone - calls received and telephone numbers dialled. Each list stores the last 50 calls with date and time. If a caller's phone num- ber is sent during a call, it is also shown. If the telephone number matches one from the phone book, the name of the caller is displayed. -
Page 17: Call Numbers Dialled
Call logs Press the Loudspeaker to establish The connection is established and a connection. hands-free speaking is enabled. Simply pick up the receiver. The connection is established and you can hold your conversation. Call numbers dialled When in the top-level menu, press The display changes and shows the the Redial button. -
Page 18: Text Entries
Text entries Text entries Text entry via the numeric keypad When your telephone is in text entry mode, you can enter names with the digit but- tons. Please refer to the printing on the case and table "Overview of possible char- acters"... -
Page 19: Phone Book
Phone book Phone book General The phone book manages the names and telephone numbers of your contacts. A maximum number of 99 entries can be stored. An entry comprises a name (search term) and telephone number. The name must start with a letter. The telephone number should always start with the area code (prefix) so that the appropriate but- ton lights up when the incoming telephone number matches the number stored. -
Page 20: Selecting From The Phone Book
Phone book Press DEL to delete single charac- The character under the cursor is delet- ters. To delete the entire line, keep DEL The entire line is deleted. 3 secs pressed for three seconds. Press OK to confirm your input. The cursor stops flashing and the entry is accepted. -
Page 21: Editing And Deleting Entries
Phone book Press Loudspeaker to end the call. The line is disconnected and the top-level menu is shown. Simply put down the receiver. The line is disconnected. Editing and deleting entries Press Phone book. The phone book is opened at the begin- ning with "A". -
Page 22: Direct Dial Buttons
Direct dial buttons Direct dial buttons General Your telephone has twelve lit direct dial buttons that can be programmed individual- ly. The telephone number should always start with the area code (prefix) so that the appropriate button lights up when an incoming telephone number matches the number stored. -
Page 23: Dialling With A Direct Dial Button
Direct dial buttons Use the numeric keypad to enter the It is best to enter something here so that … name (see also Page 18, "Text en- the entry can be identified later on. try via the numeric keypad"). Press OK to confirm your input. The cursor stops flashing and the entry is accepted. -
Page 24: Settings
Settings Settings Setup options Language ....... Set a language here so that all the operating in- structions are displayed in your language. LCD contrast ......The contrast can be set here on five levels, enabling you to adjust the contrast to your particular viewing angle. -
Page 25: Setup Menu
Settings Setup menu With the receiver down, press the The menu is displayed. Menu button. Use the Control buttons (left/right) to search for the settings you wish to change. Configure the required setting using The display shows the different setting the Control buttons (up/down). -
Page 26: Adjusting The Volume
Settings Adjusting the volume The volume can be set when the loudspeaker is enabled. With the receiver picked up, the receiver volume changes, when an incoming call is being indicated, the vol- ume of the call tone melody changes. Adjust the volume with the The volume bar shows the current set- Plus/Minus buttons. -
Page 27: Message Waiting Indicator (Mwi)
Message waiting indicator (MWI) Message waiting indicator (MWI) Your telephone supports different types of message waiting indicator. Apart from FSK (Frequency Shift Keying), the type depends on the MWI switch setting on the rear of the unit. Information on the MWI type used is available from your system administrator or network provider. -
Page 28: Mwi With Special Ring Tone
Message waiting indicator (MWI) MWI with special ring tone When the switch is set to SR (Special Ring), the LED flashes when the telecommu- nication system sends a special ring tone. This special ring tone is made up of three parts, T1---T2---T3. -
Page 29: Appendix
Your contact for services arising from guarantee obligations is the authorised dealer where you bought the device. TIPTEL will grant a guarantee of 2 years from the date of handover for the material and for the manufacturing of the telecommunications terminal unit. -
Page 30: Ce Sign
If you do not have further use of your TIPTEL device, TIPTEL will take back the de- vice without any charge. The device will be properly taken to pieces for recycling. -
Page 31: Troubleshooting
Appendix Troubleshooting Power failure The internal clock stops if there is a power failure in the telephone network. All set- tings are retained however, meaning the settings stay as they were before when power is restored. All you need to do is reset the clock. Please try first to narrow down the cause of a problem and to rectify it using the following table. -
Page 32: Default Settings
Appendix Default settings The following list shows the factory settings for your telephone. All of these defaults can be changed. Language English Contrast Date 01.01 Year 2010 Time 00:00 Outside line ------ Ring tone Call volume Flash Short 000 ms 000 ms 000 ms Technical specifications... -
Page 33: Notes For Admins
Appendix Notes for admins For activating special system features, please contact Tiptel support. Firmware version (tiptel 1020) for information only Factory default Lock settings (e.g. hotel mode): Call list and last dialled numbers will not be available. One touch memory keys cannot be programmed. -
Page 34: Index
Index Index Adjusting the volume ....... 26 LCD contrast ........24 Area code (prefix) ...... 19, 22 Loudspeaker mode ......13 Assignment of buttons ....... 6 Message waiting indicator ....27 Call logs ........... 16 Mute button ........13 Call numbers dialled ......17 MWI switch ........ - Page 35 Index Text entries ........18 Times for special ring tone ....24 Underlay ..........9 Transferring calls ......15 Troubleshooting ....... 31 Wall bracket ........10...
- Page 40 Tiptel.com GmbH Business Solutions Halskestraße 1 D - 40880 Ratingen Tel.: 0900 100 – 84 78 35* Vanity Tel.: 0900 100 – TIPTEL* *(1.49 euros/min. from Deutsche Telekom landlines, Internet: www.tiptel.de varying mobile network charges possible) International: Internet: www.tiptel.com Tiptel GmbH...
Need help?
Do you have a question about the 1020 and is the answer not in the manual?
Questions and answers