Table of Contents
Advertisement
Advertisement
Table of Contents

Related Manuals for Jetmaster MYNX


Summary of Contents for Jetmaster MYNX
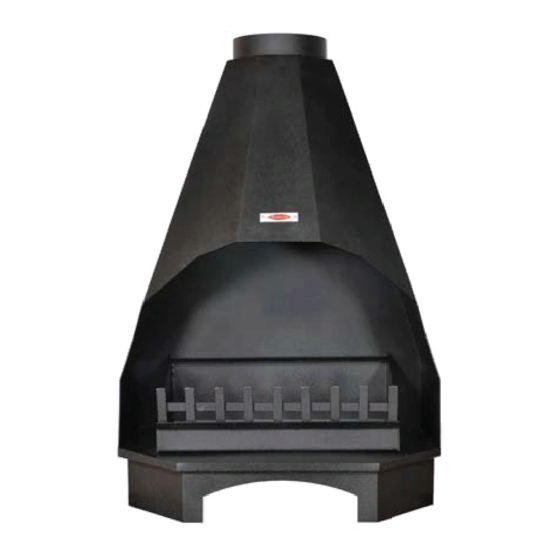
- Page 1 MYNX THE FIRST FIREPLACE INSTALLATION & OPERATING INSTRUCTIONS...
-
Page 2: Table Of Contents
INSTALLATION AND OPERATING INSTRUCTIONS: MYNX PLEASE READ THIS CAREFULLY BEFORE STARTING WORK INDEX 1) Index 2) Technical Data 3) Placement Of The Unit a) Placement inside the room i) Safety distances ii) Hearth iii) Roof / ceiling influence b) Roof & Ceiling requirements... -
Page 3: Placement Of The Unit
Installation and operation of the Mynx ROOM SIZE FLUE SIZE Ø175 105m 3) Placement Of The Unit take special care that no combustible material is placed close to the opening a) Placement inside the room of the fireplace. No combustible materials i) Safety distances e.g. -
Page 4: Ii) Hearth
Installation and operation of the Mynx ii) Hearth b) Roof & Ceiling requirements Heat is radiated from the bottom of this i) Flue length fireplace. It is therefore important to ensure that the fireplace is installed on a NOTE: It is important to note that the correct non-combustible surface. -
Page 5: Ii) Flue Termination Point
Installation and operation of the Mynx ii) Flue termination point The guidelines stipulated below are the minimum requirements allowed. It is important to terminate the top of Surrounding landscapes, buildings and the flue in such a way that it will allow... -
Page 6: Iii) Ceiling Penetration
Installation and operation of the Mynx Then If the flue is closer than 600mm The flue termination must be at to the apex of the roof least 600mm above the roof apex. If the flue is further than 600mm The flue termination must be at from the apex of the roof least 1000mm above the roof level. -
Page 7: Iv) Roof Cavity
Installation and operation of the Mynx iv) Roof Cavity provided to prevent the wooden beams It is important that all combustible from overheating. materials in the ceiling cavity be protected from the heat radiated by the flue pipe. It is recommended that all joints in the... -
Page 8: C) Additional Accessories
Installation and operation of the Mynx c ) A d d i t i o n a l a c c e s s o ri e s i) Basic flue kit In order to allow multiple installations, This kit is required with all installations. - Page 9 Installation and operation of the Mynx i i i ) D a m p e r fl u e s e c t i o n This is a short flue section containing a damper. The damper can be used to regulate the draw through the flue pipe, improving the efficiency of the unit.
-
Page 10: How To Install
Installation and operation of the Mynx 4) How To Install b) Now fit the flue pipes. a) Locate the unit, and cut Flue pipes are fitted with the knurled end through the ceiling facing upwards. Slide the flue pipe over... - Page 11 Installation and operation of the Mynx A typical scenario is: The bottom of the flue pipe is located pipe has one joint inside the roof cavity on the fireplace. There is one joint in that is secured with 2 screws, and sealed the flue exposed inside the house, with silicone.
-
Page 12: C) Fixing The Flue Length
Installation and operation of the Mynx c) Fixing the flue length. d) Fitting the cowl. Refer to section 3)b)ii) on page 4 for the NOTE: Before fitting the cowl, it is important details on the position of the flue to ensure that the flue has been set to the termination point. - Page 13 Installation and operation of the Mynx The first step in this process is to cut / NOTE: Bear in mind that the aim of this break a hole through the roof surface. process is to prevent water leakage through the roof. Always be on the lookout for possible...
- Page 14 Installation and operation of the Mynx NOTE: On most tiled roofs, it would be membrane . Work the membrane allowable to lift the row of tiles right above thoroughly into the waterproofing paint the fluepipe and to place the top of the lead using a brush.
- Page 15 Installation and operation of the Mynx NOTE: The paint is water based, and will Ensure that the area to be sealed on the be washed away if it is exposed to rain flue pipe and the flashing is clean and before it has dried.
-
Page 16: Heat Insulation
Installation and operation of the Mynx Heat insulation. g) Finishing. It is important that all safety distances The ceiling must be finished by fitting referred to in this manual are adhered the escutcheon plate around the flue pipe onto the ceiling. - Page 17 All metal surfaces exposed on the outside of the building must be coated with a high quality heat resistant enamel paint. Before applying the enamel paint, first ensure that all scratches are touched in with the Jetmaster touch-up paint. This will lay the foundation for a durable outer coating.
-
Page 18: Use
Installation and operation of the Mynx 5) Use b) Building a fire a) What wood to use Start by placing some fire lighters or crumpled up newspaper at the bottom Wet wood that is unseasoned will not of the log pan. -
Page 19: C) Using The Damper (Accessory)
Installation and operation of the Mynx c) Using the damper (accessory) A Flue damper is available as on optional this flow rate, especially when a large fire extra. This damper can be used to improve is burning, will allow more of the heat to... -
Page 20: Maintenance
Installation and operation of the Mynx If there is no spillage, the damper can be 6) Maintenance set to position 2, and again checking for spillage. If there is any spillage, turn the a) Painting of exposed surfaces. damper back to position 1. -
Page 21: Installation & Operating Instructions
Installation and operation of the Mynx NOTES INSTALLATION & OPERATING INSTRUCTIONS... - Page 22 Jetmaster, carried out in accordance with the installation and Operating Instructions current at the time of purchase. c) When a valid claim arises under this warranty, Jetmaster will, at its sole discretion, either repair or replace the fireplace.
- Page 23 Jetmaster (Pty) Ltd. PO BOX 43178, Industria 2042 SOUTH AFRICA 0800005858 (Toll-free no.) Gauteng: Cape Town: 1316 Clubhouse Street Cnr. Koeberg Road and School Street Maraisburg, Johannesburg Milnerton Tel: (011) 661 5900 Tel: (021) 552 0808 Fax: (011) 474 2144...
Need help?
Do you have a question about the MYNX and is the answer not in the manual?
Questions and answers