Advertisement
Advertisement
Table of Contents

Summary of Contents for Ozito PRR-850
-
Page 2: Specifications
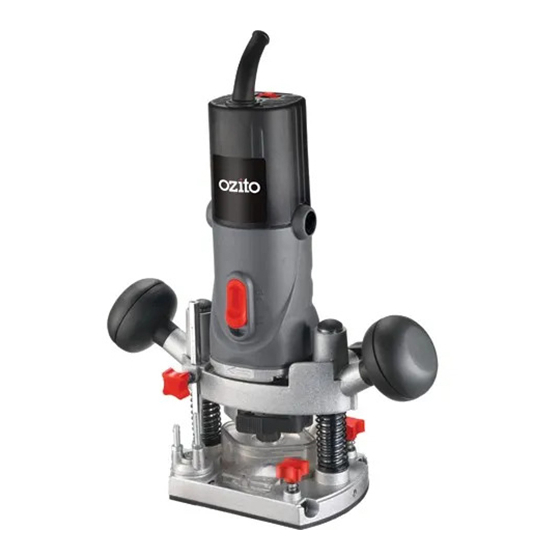
SPECIFICATIONS MODEL NO. PRR-850 Motor: 850W Input: 230-240V ~ 50Hz No load speed: 11,500 -32,000 /min Collet Size: 6.35mm (1/4”) Weight (tool only): 2.93kgs KNOW YOUR PRODUCT Front Back 1. Turret Depth Stop 19. Allen Key 10. Guide Fence Locking Knob 2. -
Page 3: Table Of Contents
TABLE OF CONTENTS SPECIFICATIONS…………………………………………. Page 2 TABLE OF CONTENTS…………………………………… Page 3 INTRODUCTION………………………………………….. Page 4 GENERAL SAFETY INSTRUCTIONS…………………….. Page 4 GENERAL SAFETY RULES……………………………….. Page 5 OPERATION………………………………………………… Page 8 MAINTENANCE…………………………………………… Page 13 TROUBLE SHOOTING…………………………………… Page 14 SPARE PARTS……………………………………………… Page 14 DESCRIPTION OF SYMBOLS……………………………. Page 15 CONTENTS…………………………………………………... -
Page 4: Introduction
We aim to provide quality tools at an affordable price. We hope you will enjoy using this tool for many years. Your Plunge Router PRR-850 has been designed for routing wood and wood products and is intended for DIY use only. -
Page 5: General Safety Rules
GENERAL SAFETY RULES WARNING! Read all instructions. Failure to follow all instructions listed below may result in electric shock, fire and/or serious injury. The term "power tool" in all of the warnings listed below refers to your mains-operated (corded) power tool or battery-operated (cordless) power tool. Save these instructions 1) Work area a) Keep work area clean and well lit. - Page 6 GENERAL SAFETY RULES (cont.) e) Do not overreach. Keep proper footing and balance at all times. This enables better control of the power tool in unexpected situations. Dress properly. Do not wear loose clothing or jewellery. Keep your hair, clothing and gloves away from moving parts. Loose clothes, jewellery or long hair can be caught in moving parts.
- Page 7 ADDITIONAL SAFETY INSTRUCTIONS FOR ROUTERS This appliance is not intended for use by persons (including children) with reduced physical, sensory or mental capabilities, or lack of experience and knowledge, unless they have been given supervision or instruction concerning use of the appliance by a person responsible for their safety.
-
Page 8: Operation
OPERATION WARNING! Before attempting any of the following operations, make sure that the tool is switched off and unplugged and that the spindle has stopped. Installing the handles 1. Insert the Phillip heads screws/washer provided through the hole in the handle (4). 2. - Page 9 OPERATION (cont.) Fitting the Straight Guide Fence Remove the two bolts from the guide fence rods (17) using the allen key (19) provided in a anti clockwise direction. Using the allen key (19) tigthen the guide fence rods (17) onto the guide fence (18) in a clockwise direction (Fig. 6). Fig.
- Page 10 OPERATION (cont.) 3. Adjust the distance between the router bit and guide fence (18) by moving the guide to the correct distance from the router bit and the cut you are making. 4. Tighten the guide fence (18) locking knob (10) by rotating clockwise (Fig.
- Page 11 OPERATION (cont.) Using the Batten as a Guide When it is not possible to use the guide fence (18) for example when routing grooves in the back panel of a bookcase to support shelves, proceed as follows. • Place a batten onto the workpiece. •...
- Page 12 OPERATION (cont.) 7. Tighten the depth rod adjustment knob (2). 8. Remove the piece of wood. 9. Pull the plunge lock lever (11) down and let the router return to its original position. Release the plunge lock lever. 10. After switching the router on, plunge it down and make the desired cut. 11.
-
Page 13: Maintenance
Details of the type of cutters for which the tool is designed MAINTENANCE Your Ozito Router has been designed to operate over a long period of time with a minimum of maintenance. Continuous satisfactory operation depends upon proper tool care and regular cleaning. -
Page 14: Trouble Shooting
Note: Ozito Industries will not be responsible for any damage or injuries caused by the repair of the tool by an unauthorised person or by mishandling of the tool. -
Page 15: Description Of Symbols
Reuse of recycled material decreases pollution in the environment. Please recycle packaging where facilities exist. Check with your local council authority for recycling advice. CONTENTS 1 x Plunge Router (PRR-850) 1 x Guide Fence 1 x Collet 6.35mm (1/4”) 1 x Template Guide... -
Page 16: Warranty
If the tool shows signs of damage or defects caused by or resulting from abuse, accidents • or alterations. • Failure to perform maintenance as set out within the instruction manual. • If the tool is disassembled or tampered with in any way. OZITO Australia/New Zealand (Head Office) 1-23 Letcon Drive, Bangholme, Victoria, Australia 3175...


Need help?
Do you have a question about the PRR-850 and is the answer not in the manual?
Questions and answers