Table of Contents
Advertisement
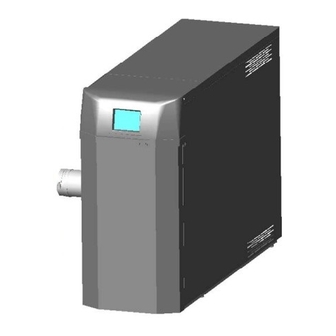
Trinity Lx
Model Numbers: Lx150-800
Version Date: 2010-07-01
INSTALLATION AND OPERATION INSTRUCTIONS FOR
TRINITY LX SERIES BOILERS AND WATER HEATERS
This manual to be read in conjunction with the following documents which
provide specific instructions for controller setup, plumbing and wiring:
Appendix A - Controller and Touchscreen Display Instructions
Appendix B - Boiler Applications: Plumbing and Wiring
Appendix C - Water Heater Applications: Plumbing and Wiring
TABLE OF CONTENTS
1.0
INTRODUCTION ................................................................................................................ 3
2.0
SPECIFICATIONS .............................................................................................................. 6
3.0
APPLIANCE LOCATION................................................................................................... 7
4.0
GENERAL VENTING....................................................................................................... 12
5.0
VENT/AIR-INTAKE TERMINATION CLEARANCES.................................................. 24
6.0
CONDENSATE DRAIN .................................................................................................... 28
7.0
INSTALLING GAS PIPING.............................................................................................. 29
8.0
LIGHTING THE APPLIANCE ......................................................................................... 31
9.0
GAS VALVE AND BURNER SET-UP ............................................................................ 33
10.0 WIRING SCHEMATICS ................................................................................................... 39
11.0 INSTALLATION CHECKLIST ........................................................................................ 43
12.0 ANNUAL MAINTENANCE AND INSPECTION ........................................................... 45
13.0 PARTS LIST ...................................................................................................................... 47
14.0 TROUBLESHOOTING ..................................................................................................... 57
HAZARD SYMBOLS AND DEFINITIONS
unit may result in property damage, serious injury to occupants, or possibly death.
BONUS
Night Time Setback
(Time of Day)
Lx800 Only
Danger Sign: Indicates a hazardous situation which, if not avoided, will
result in serious injury or death.
Warning Sign: Indicates a hazardous situation which, if not avoided,
could result in serious injury or death.
Caution Sign plus Safety Alert Symbol: Indicates a hazardous situation
which, if not avoided, could result in minor or moderate injury.
Caution Sign without Safety Alert Symbol: Indicates a hazardous
situation which, if not avoided, could result in property damage.
Notice Sign: Indicates a hazardous situation which, if not avoided,
could result in property damage.
This Appliance must be installed by a licensed and trained Heating
Technician or the Warranty is Void. Failure to properly install this
NEW FEATURES
Second Central Heat Input
Internal Lead-Lag Control
System Sensor
Modulation Sensor Alternatives
Warm Weather Shutdown
Lx800
®
Advertisement
Table of Contents

Related Manuals for NTI Lx150-800


Summary of Contents for NTI Lx150-800
-
Page 1: Table Of Contents
Trinity Lx (Time of Day) Second Central Heat Input Lx800 Only Internal Lead-Lag Control System Sensor Model Numbers: Lx150-800 Modulation Sensor Alternatives Version Date: 2010-07-01 Warm Weather Shutdown INSTALLATION AND OPERATION INSTRUCTIONS FOR TRINITY LX SERIES BOILERS AND WATER HEATERS... - Page 2 │Installation and Operation Instructions Trinity Lx Lx Series Read Before Proceeding If you do not follow these instructions exactly, a fire or explosion may result causing property damage, serious injury or death. FOR YOUR SAFETY, READ BEFORE OPERATING_ A) This appliance does not have a pilot. It is equipped with an ignition device which automatically lights the burner.
-
Page 3: Introduction
Do not convert the Lx800 to Propane (LP). Operate with Natural Gas only. General Installation Requirements The installation of your NTI Trinity Lx gas appliance must conform to the requirements of this manual, your local authority, and the National Fuel Gas Code ANSI Z223.1 and or CAN/CGA B149 Installation Codes. - Page 4 LP Propane. The Lx800 operates with Natural Gas only, DO NOT convert to Propane. Listed below are the NTI applicable models and their corresponding Natural to LP Propane Conversion Kit number. Liquefied Petroleum (LP) propane gas is heavier than air; therefore, it is imperative that your Trinity Lx appliance is not installed in a pit or similar location that will permit heavier than air gas to collect.
- Page 5 │ Trinity Lx Lx Series Installation and Operation Instructions IN THE STATE OF MASSACHUSETTS ONLY (a) For all horizontally vented gas fueled equipment installed in every dwelling, building or structure used in whole or in part for residential purposes, including those owned and operated by the Commonwealth and where the side wall exhaust vent termination is less than seven (7) feet above finished grade in the area of the venting, including but not limited to decks and porches, the following requirements shall be satisfied: 1.
-
Page 6: Specifications
│Installation and Operation Instructions Trinity Lx Lx Series 2.0 SPECIFICATIONS Table 2-1 Specifications DESCRIPTION Lx150 Lx150E Lx200 Lx300 Lx400 Lx800 CSA Input Modulation 25,000-150,000 25,000-150,000 25,000-199,000 55,000-275,000 75,000-399,000 160,000-800,000 btu/hr [kw] [7.3-44.0] [7.3-44.0] [7.3-58.3] [16.1-80.5] [21.9-117] [46.9-234] 1, 3 DOE Heating Capacity 136,000 139,000 182,000... -
Page 7: Appliance Location
│ Trinity Lx Lx Series Installation and Operation Instructions 3.0 APPLIANCE LOCATION In all cases, the Trinity Lx must be installed indoors in a dry location where the ambient temperature must be maintained above freezing and below 100°F [38°C]. Gas components must be protected from dripping, spraying water, or rain during operation and servicing. - Page 8 │Installation and Operation Instructions Trinity Lx Lx Series Figure 3-1(a) Lx150-200 Models Closet Installation, Minimum Clearances Piping must be CPVC Top 12” [305 mm] 1” [25 mm] clearance for hot water and vent pipes 6” [152 mm] max. above vent opening Ventilation Air Opening Ventilation Air Openings 1 in...
- Page 9 │ Trinity Lx Lx Series Installation and Operation Instructions Figure 3-1(c) Lx800 Model Closet Installation, Minimum Clearances Ventilation Air Openings - Openings are not required if the appliance area meets the Recommended Clearances in Table 3-1. Top 12” [305 mm] 6”...
- Page 10 │Installation and Operation Instructions Trinity Lx Lx Series Figure 3-2(a) Lx150-200 Models Wall Mounting Installations Failure to follow instructions may Remove the upper wall mount bracket from the result in fire, serious injury, or death. back of the appliance. Secure the upper wall mount bracket to a solid This unit requires two people to lift it or damage and injury may result.
- Page 11 │ Trinity Lx Lx Series Installation and Operation Instructions Figure 3-2(b) Lx300-400 Models Wall Mounting Installations Failure to follow instructions may While leaving the upper bracket intact (A), result in fire, serious injury, or death. remove the wall mount bracket attached to the bottom-back of the appliance (B).
-
Page 12: General Venting
│Installation and Operation Instructions Trinity Lx Lx Series 4.0 GENERAL VENTING The Trinity Lx is a “Direct Vent” appliance requiring a “Special Venting System” designed for pressurized venting. Both the Vent and Air-Intake piping must be piped to the outdoors, using the vent material and rules outlined in this section. - Page 13 │ Trinity Lx Lx Series Installation and Operation Instructions Figure 4-1(a) Lx150-200 Model Figure 4-1(b) Lx150-200 Model Near Appliance Venting (CPVC) Near Appliance Venting (PVC) Swing Joint Swing Joint to attain slope in to attain slope in horizontal runs horizontal runs Air Inlet Air Inlet 3”...
- Page 14 │Installation and Operation Instructions Trinity Lx Lx Series Figure 4-3(a) Lx800 Figure 4-3(b) Lx800 Near Appliance Venting (CPVC) Near Appliance Venting (PVC) Mandatory Vent Pipe Transition Piece 6” CPVC (factory supplied). See Table 4-2. Swing Joint Swing Joint to attain slope in to attain slope in horizontal runs horizontal runs...
- Page 15 │ Trinity Lx Lx Series Installation and Operation Instructions Mandatory Pre-commissioning Procedure for Plastic Venting Do not apply power to the appliance prior to Step 4 in the Mandatory Pre-commissioning Procedure for Plastic Venting. 1) Working with the power turned off to the appliance, completely install the vent and air intake system, securely cementing joints together.
- Page 16 • Clearance requirements in this manual supersede those of the instructions included with the vent terminal. Side Wall Termination Kit (Lx300-800) • Use NTI part number 83236 (4” kit connections. 6” venting must reduce down to 4” at interior trim piece). • Side-wall terminations only. See Figures 4-6(b) and 4-7(b).
- Page 17 │ Trinity Lx Lx Series Installation and Operation Instructions Two-Pipe Venting Options Figure 4-5(a) Lx150-200 Figure 4-5(b) All Models Two-Pipe Side Wall Termination Two-Pipe Roof Termination Typical for all models. Lx200 unit shown for illustration purposes. Figure 4-6(a) Lx300-400 Figure 4-6(b) Lx300-400 Two-Pipe Side Wall Termination Two-Pipe Side Wall Termination (Optional Kit)
- Page 18 │Installation and Operation Instructions Trinity Lx Lx Series Figure 4-7(a) Lx800 Figure 4-7(b) Lx800 Two-Pipe Side Wall Termination Two-Pipe Side Wall Termination (Optional Kit) Indoor Combustion Air Options Figure 4-8(a) Lx800 Only Figure 4-8(b) Lx800 Only Side Wall Vent / Indoor Combustion Air (Optional Kit) Roof Vent / Indoor Combustion Air (Optional Kit)
- Page 19 │ Trinity Lx Lx Series Installation and Operation Instructions Indoor Combustion Air Requirements (Lx800 Only) Drawing combustion air from the room can result in competition for combustion air with other fuel burning appliances, ventilation air systems or exhaust sources. See Table 4.5 for a list of design considerations and installation guidelines.
- Page 20 │Installation and Operation Instructions Trinity Lx Lx Series Labeling and Identification – Roof Top Terminations Figure 4-9(a) All Models Figure 4-9(b) Lx150-200 Two-Pipe Roof Top Termination Concentric Vent Roof Top Termination Two-pipe terminations typically penetrate the roof To prevent water leakage, install adequate roof surface.
- Page 21 │ Trinity Lx Lx Series Installation and Operation Instructions Labeling and Identification – Two-Pipe Side Wall Terminations Figure 4-11(a) All Models Figure 4-11(b) Lx300-800 Only Two-Pipe Side Wall Termination Two-Pipe Side Wall Termination (Optional Kit) Gas Vent Directly Below Gas Vent Directly Below Keep Free of Obstructions Keep Free of Obstructions Exhaust...
- Page 22 Combustion air containing chemicals such as chloride, fluoride, bromine or iodine or dust and debris will cause corrosion damage of the heat exchanger voiding your NTI warranty. Refer to Table 4-1 for a list of corrosive products and contaminants sources to avoid.
- Page 23 Mounting shown, to provide rigidity. Bracket 4. NTI Provides a mounting bracket PN. 82075 for securing the exhaust pipes. 5. Ensure that the Vent/Air-Intake clearances are maintained, see Section 5.0 for details.
-
Page 24: Vent/Air-Intake Termination Clearances
│Installation and Operation Instructions Trinity Lx Lx Series 5.0 VENT/AIR-INTAKE TERMINATION CLEARANCES The quick reference table below is to be read in conjunction with the numbered notes as indicated, Figures 5-1 through 5-6, and the Venting Rules and Guidelines in Section 4.0. The instructions detailed in this section are a combination of Trinity Lx specific and National Gas Code restrictions. - Page 25 │ Trinity Lx Lx Series Installation and Operation Instructions Figure 5-1 All Models Termination Clearances Quick Reference Diagram Illustrations of Termination Clearances Figure 5-2 All Models Side Wall Termination - Clearances Above Grade Clearances “F” and “G” Canada – Minimum 3 ft [915 mm] The US –...
- Page 26 │Installation and Operation Instructions Trinity Lx Lx Series Figure 5-3 Typical for All Models Figure 5-4 Lx300-800 Only Two-Pipe Side Wall Clearances Termination Kit Side Wall Clearances Horizontal Separation 4-12” [102 mm – 305 mm] or greater than 36” [915 mm] From appliance exhaust...
- Page 27 │ Trinity Lx Lx Series Installation and Operation Instructions Extra precaution must be taken to adequately support the weight of the Vent/Air-Intake piping in applications using roof-top terminations. Failure to follow these instructions may result in venting or appliance component failure resulting in flue gas spillage leading to property damage, serious injury or death.
-
Page 28: Condensate Drain
│Installation and Operation Instructions Trinity Lx Lx Series 6.0 CONDENSATE DRAIN This unit produces liquid condensate in the heat exchanger and venting system as a product of combustion. Steps must be taken to ensure that condensate does not collect in the venting system; therefore, all exhaust piping must slope back to the appliance a minimum 1/4”... -
Page 29: Installing Gas Piping
Ensure that: • The gas line connection to the appliance does not apply any weight to the gas valve. NTI recommends using approved flexible gas piping (if acceptable by local codes) to connect the appliance to the gas supply (See Figure 7-1 for details). - Page 30 │Installation and Operation Instructions Trinity Lx Lx Series Figure 7-1 Lx150-800 (Typical) Gas Line Connection Manual Shutoff Valve - Should overheating occur or the gas supply fail to shut off, turn off the Manual Shutoff Valve manual gas control valve to the appliance.
-
Page 31: Lighting The Appliance
│ Trinity Lx Lx Series Installation and Operation Instructions 8.0 LIGHTING THE APPLIANCE Before Start-up refer to Mandatory Pre-commissioning Procedure for Plastic Venting in Section 4.0. Failure to follow these instructions can result in explosions, injury or death. Prior to turning the gas supply on and lighting the appliance, ensure all aspects of the installation are complete and in conformance with the instructions provided in this manual, including the Vent/Air-Intake, Condensate Drain, and System Water Piping. - Page 32 If the unit fails to light consistently and smoothly, contact NTI for technical assistance at 1-800-688-2575. Never allow the appliance to operate if the ignition or operation of the burner is rough or erratic.
-
Page 33: Gas Valve And Burner Set-Up
│ Trinity Lx Lx Series Installation and Operation Instructions 9.0 GAS VALVE AND BURNER SET-UP The Trinity Lx gas valve must be set-up by a licensed Gas Technician. Improper set-up may result in incorrect operation, damage to components or property, injury or death. Gas Line Pressure The appliance gas valve is equipped with a line pressure test port;... - Page 34 │Installation and Operation Instructions Trinity Lx Lx Series Figure 9-1 Lx150 Orientation Gas Valve and Venturi Assembly Orifice Location Gas Valve (See Kit 82650-1) Manifold Pressure Throttle/Input Test Port Adjustment Screw Venturi Line Pressure Test Port Air Intake Gas In Figure 9-2 Lx150E, Lx200, Lx300 Orientation Gas Valve and Venturi Assembly Lx150E and Lx200...
- Page 35 │ Trinity Lx Lx Series Installation and Operation Instructions Figure 9-3 Lx400 Orientation Gas Valve and Venturi Assembly Manifold Pressure Throttle/Input Line Pressure Test Port Test Port Adjustment Screw Orifice Location (See Kit 83017-1) Gas In Gas Valve Air Intake Venturi Figure 9-4 Lx800 Orientation Gas Valve and Venturi Assembly...
- Page 36 4. Operate the unit at the minimum modulation rate (Table 9-2). Ensure the combustion remains smooth and and CO remain within the limits (Table 9-1). If not, do not adjust further, contact NTI for assistance. Flue Gas Analysis and Adjustment Each Trinity Lx is factory set to operate with Natural Gas, for appliances field converted to operate with Propane Gas, a flue gas analysis and adjustment is mandatory.
- Page 37 │ Trinity Lx Lx Series Installation and Operation Instructions Figure 9-5 Lx150-200 Models Flue Gas Sampling Using Test Port Test Port Combustion Analyzer FLUE GAS TEST PORT PLUG - Remove test port plug to perform flue gas analysis. Re-install plug once sampling completed to prevent flue gas leakage during appliance operation.
- Page 38 │Installation and Operation Instructions Trinity Lx Lx Series Figure 9-7 Lx800 Model Flue Gas Sampling Using Test Port FLUE GAS TEST PORT PLUG - Remove test port plug to perform flue gas analysis. Re-install plug once sampling completed to prevent flue gas leakage during appliance operation.
-
Page 39: Wiring Schematics
│ Trinity Lx Lx Series Installation and Operation Instructions 10.0 WIRING SCHEMATICS Figure 10-1(a) Lx150-400 Connection Diagram... - Page 40 │Installation and Operation Instructions Trinity Lx Lx Series Figure 10-1(b) Lx150-400 Ladder/Logic Diagram...
- Page 41 │ Trinity Lx Lx Series Installation and Operation Instructions Figure 10-2(a) Lx800 Connection Diagram...
- Page 42 │Installation and Operation Instructions Trinity Lx Lx Series Figure 10-2(b) Lx800 Ladder/Logic Diagram...
-
Page 43: Installation Checklist
│ Trinity Lx Lx Series Installation and Operation Instructions 11.0 INSTALLATION CHECKLIST Installation 1. If operating on Propane Gas, convert appliance using appropriate Kit number. See Table 7-1. 2. Locate the appliance in accordance with Section 3.0 of this manual. 3. - Page 44 │Installation and Operation Instructions Trinity Lx Lx Series Table 11-1 Hot Water Boiler Checklist for Controls and Safety Devices Applicable Paragraph Input Btuh Certification and Reporting 400,000 to Compliance Means/Measures ASME Requirements 2,500,000 CSD-1 1-3.1-77 Operating Controls Forced Circulation CW-130(a), Required Flow Switch - Factory installed.
-
Page 45: Annual Maintenance And Inspection
Important Boilers Only - The hydronic system may need to be flushed to eliminate hard water scale (Use Fernox DS-40 Descaler, NTI PN: 83450. See Table 2-1 in Appendix B - Boiler Applications). Boiler Only - Boiler system cleansers and corrosion inhibitors must not be used to flush contaminants from water heaters or potable water systems. - Page 46 │Installation and Operation Instructions Trinity Lx Lx Series Refractory Ceramic Fibers (RFC) Personal Protective Equipment Recommended - Read the following warnings and handling instructions carefully before commencing any service work in the combustion chamber. The insulating material on the inside of the burner door and at the back of the combustion chamber contain Refractory Ceramic Fibers and should not be handled without personal protective equipment.
-
Page 47: Parts List
│ Trinity Lx Lx Series Installation and Operation Instructions 13.0 PARTS LIST For a list of parts that corresponds to the item numbers in the bubbles, refer to Table 13-1. Note that that some item numbers may appear more than once in the parts list depending on which model number is being referenced. Building Owners - Replacement parts are available from your stocking wholesaler. - Page 48 │Installation and Operation Instructions Trinity Lx Lx Series Figure 13-1(b) Lx150-200 Models Heat Exchanger, Gas Valve, Blower and Burner Assembly Figure 13-2 Lx150-400 (Common) Electrical Housing, Controller, and Display Module...
- Page 49 │ Trinity Lx Lx Series Installation and Operation Instructions Figure 13-3(a) Lx300-400 Models Cabinet, Vent and Air-Intake Parts...
- Page 50 │Installation and Operation Instructions Trinity Lx Lx Series Figure 13-3(b) Lx300-400 Models Heat Exchanger, Gas Valve, Blower and Burner Assembly...
- Page 51 │ Trinity Lx Lx Series Installation and Operation Instructions Figure 13-4(a) Lx800 Model Cabinet, Vent and Air-Intake Parts...
- Page 52 │Installation and Operation Instructions Trinity Lx Lx Series Figure 13-4(b) Lx800 Model Heat Exchanger, Gas Valve, Blower and Burner Assembly...
- Page 53 │ Trinity Lx Lx Series Installation and Operation Instructions Figure 13-4(c) Lx800 Model Electrical Housing, Controller, and Display Module Table 13-1 Parts List: Lx150-800 Models Item Part # Models Description 82657 Premix burner 135.8 (Lx100-150; not Lx150E) 82658 150E, 200 Premix burner, 200.6 (Lx150E, Lx200)
- Page 54 │Installation and Operation Instructions Trinity Lx Lx Series Item Part # Models Description 83017 400-LP Gas Valve Orifice, 6.2mm, LP (Lx400) 82054 150,150E,200,300 Gas Valve (CVI) VK8115F1134B (Valve Only) 82989 Gas Valve VR8615VB 1044B (Lx400) 84012 Gas Valve V8730C 1023B (Lx800) 83870 150,150E,200,300,400 Ignition Electrode, Dual –...
- Page 55 │ Trinity Lx Lx Series Installation and Operation Instructions Item Part # Models Description 83426-2 150E,200 1-1/2" PVC Pipe, Sys 15, 4.5" Long 39(a) 84208 1-1/2" Air Metering Assembly (Lx300) 39(b) 84209 2” PVC Air Inlet Assembly (Lx300) 83952 Air Inlet Assembly (Lx400) 83425-1 150,150E,200 Air Metering Elbow (Lx150-200)
- Page 56 │Installation and Operation Instructions Trinity Lx Lx Series Item Part # Models Description 83887 150,150E,200 Right Side (Lx150-200) 84210 Right Side (Lx300) 83597 Right Side R1 (Lx400) 84143 Right Side (Lx800) 83888 150 - CAN Lx150 Left Side (CAN) 83888-1 150 - US Lx150 Left Side (US), not 150E 83888-2...
-
Page 57: Troubleshooting
│ Trinity Lx Lx Series Installation and Operation Instructions 14.0 TROUBLESHOOTING Observe the following precautions when servicing the appliance. Failure to comply with these may result in fire, property damage, serious injury or death. Servicing the Appliance • Disconnect or shut off all energy sources to the appliance: 120VAC power, water and gas. •... - Page 58 │Installation and Operation Instructions Trinity Lx Lx Series Figure 14-1(a) Lx150-400 Figure 14-1(b) Lx800 Control Panel Fuse Locations Control Panel Fuse Location Fuse “A” 3AG 7A 250V Fast-Acting Fuse “C” ATO 2A 32V Auto Fuse “B” 3AG Blade Type 7A 250V Fuse “A”...
- Page 59 6. If 12VDC is not detected across +V and –V, replace the power supply with NTI PN83592-1. DO NOT drop the plastic housing or allow it to swing down freely, it may be damaged...
- Page 60 │Installation and Operation Instructions Trinity Lx Lx Series Summary and Diagnostics Display – The Trinity Lx controller and Touchscreen display provides detailed operational and diagnostic information for aid in troubleshooting. When power is applied to the appliance the initial page displayed is the Summary page. Information presented on the Summary page includes Demand source, Burner state, status of sensors and pumps, and so forth.
- Page 61 Incorrect air switch setting Contact NTI technical support. Faulty air switch If venting and air inlet are clear, temporarily jumper the air switch. If the unit lights and operates smoothly –...
- Page 62 │Installation and Operation Instructions Trinity Lx Lx Series Table 14-1 Troubleshooting Chart PROBLEM POSSIBLE CAUSE CORRECTIVE ACTION Hold 66 – Interrupted air - Blower problem Check low voltage wiring from blower to switch ON (and blower is on) - Faulty controller controller.
- Page 63 Condensation or other foreign matter may be obstructing the tubing, preventing the switch from sensing differential pressure caused by air flow through the metering elbow. Incorrect air switch setting Contact NTI technical support. Blown fuse " " Check Fuse Inoperative CH and/or DHW Blown fuse "...
- Page 64 │Installation and Operation Instructions Trinity Lx Lx Series Table 14-1 Troubleshooting Chart PROBLEM POSSIBLE CAUSE CORRECTIVE ACTION Faulty controller If Fuse “B” not blown, and controller is operating, navigate to pump diagnostic on display. Manually switch pump on, check for 120VAC at pump connection terminal on line voltage barrier strip.
- Page 65 │ Trinity Lx Lx Series Installation and Operation Instructions Table 14-3 Hold and Lockout Codes Code Description Note None Hold / No lockout Unconfigured safety data Lockout Waiting for safety data verification Lockout Internal fault: Hardware fault Hold Internal fault: Safety Relay key feedback error Hold Internal fault: Unstable power (DCDC) output Hold...
- Page 66 │Installation and Operation Instructions Trinity Lx Lx Series Table 14-3 Hold and Lockout Codes Code Description Note 24VAC voltage low/high Hold Modulation fault Hold Pump fault Hold Motor tachometer fault Hold AC inputs phase reversed Lockout 54-57 RESERVED Internal fault: HFS shorted to IAS Lockout Internal fault: Mux pin shorted Lockout...
- Page 67 │ Trinity Lx Lx Series Installation and Operation Instructions Table 14-3 Hold and Lockout Codes Code Description Note High fire switch OFF Hold High fire switch stuck ON Hold Low fire switch OFF Hold Low fire switch stuck ON Hold Fan speed failed during pre-purge Hold / Lockout Fan speed failed during pre-ignition...
- Page 68 │Installation and Operation Instructions Trinity Lx Lx Series Table 14-3 Hold and Lockout Codes Code Description Note Invalid Ignite failure response setting Lockout Invalid Ignite failure retries setting Lockout Invalid Ignition source setting Lockout Invalid Interlock open response setting Lockout Invalid Interlock start check setting Lockout Invalid LCI enable setting...
- Page 69 │ Trinity Lx Lx Series Installation and Operation Instructions Table 14-4 Alert Codes Code Description Action/Response None (No alert) Alert PCB was restored from factory defaults Safety configuration parameters were restored from factory defaults Configuration parameters were restored from factory defaults Invalid Factory Invisibility PCB was detected Invalid Factory Range PCB was detected Invalid range PCB record has been dropped...
- Page 70 │Installation and Operation Instructions Trinity Lx Lx Series Table 14-4 Alert Codes Code Description Action/Response Safety processor brown-out reset occurred Application processor watchdog reset occurred Application processor brown-out reset occurred Safety processor watchdog reset occurred Alarm was reset by the user at the control Burner control firing rate was >...
- Page 71 │ Trinity Lx Lx Series Installation and Operation Instructions Table 14-4 Alert Codes Code Description Action/Response Manual rate was > CH max modulation rate Manual rate was > DHW max modulation rate Manual rate was < min modulation rate Manual rate in Standby was > absolute max rate Modulation commanded rate was >...
- Page 72 │Installation and Operation Instructions Trinity Lx Lx Series Table 14-4 Alert Codes Code Description Action/Response Lead Lag D-gain was invalid Lead Lag OFF hysteresis was invalid Lead Lag ON hysteresis was invalid Lead Lag slave enable was invalid Lead Lag hysteresis step time was invalid 203 RESERVED 190- Lead Lag master was suspended due to fault...
- Page 73 │ Trinity Lx Lx Series Installation and Operation Instructions Table 14-4 Alert Codes Code Description Action/Response Abnormal Recycle: LCI off during Main Flame Establishing Period Abnormal Recycle: LCI off during Ignition period Abnormal Recycle: Demand off during Drive to Purge Rate Abnormal Recycle: Demand off during Measured Purge Time Abnormal Recycle: Demand off during Drive to Light off Rate Abnormal Recycle: Demand off during Pre-Ignition test...
- Page 74 │Installation and Operation Instructions Trinity Lx Lx Series Table 14-4 Alert Codes Code Description Action/Response Abnormal Recycle: Hardware invalid AC line Abnormal Recycle: Hardware SLO flame ripple Abnormal Recycle: Hardware SLO flame sample Abnormal Recycle: Hardware SLO flame bias range Abnormal Recycle: Hardware SLO flame bias heat Abnormal Recycle: Hardware SLO spark stuck Abnormal Recycle: Hardware SLO spark changed...
- Page 75 │ Trinity Lx Lx Series Installation and Operation Instructions Table 14-4 Alert Codes Code Description Action/Response Demand lost in run due to no flame 464- RESERVED Internal error: EEPROM write was attempted before EEPROM was initialized Internal error: EEPROM cycle count address was invalid Internal error: EEPROM days count address was invalid Internal error: EEPROM hours count address was invalid Internal error: Lockout record EEPROM index was invalid...
- Page 76 NY Thermal Inc. 65 Drury Cove Road Saint John, NB E3H 2Z8 Canada Technical Assistance: 1-800-688-2575 Website: www.nythermal.com Fax: 1-506-432-1135...
Need help?
Do you have a question about the Lx150-800 and is the answer not in the manual?
Questions and answers