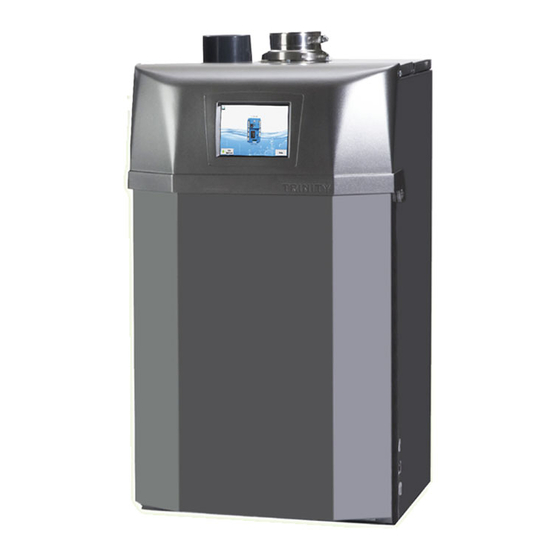
NTI Trinity Lx150 Installation And Operation Instructions Manual
Hide thumbs
Also See for Trinity Lx150:
- Installation and operation instructions manual (64 pages) ,
- Installation and operation instructions manual (76 pages) ,
- Installation and operation instructions manual (84 pages)
Table of Contents
Advertisement
Trinity Lx
Model Numbers: Lx150 - 800
Version Date: 2016-01-27
INSTALLATION AND OPERATION INSTRUCTIONS FOR
TRINITY Lx BOILER
TABLE OF CONTENTS
1.0
INTRODUCTION ................................................................................................................ 3
2.0
INTRODUCTION ................................................................................................................ 6
3.0
BOILER LOCATION .......................................................................................................... 8
4.0
GENERAL VENTING ....................................................................................................... 13
5.0
VENT AND AIR-INTAKE TERMINATION CLEARANCES ........................................ 28
6.0
CONDENSATE DRAIN .................................................................................................... 31
7.0
INSTALLING GAS PIPING .............................................................................................. 32
8.0
LIGHTING THE BOILER ................................................................................................. 34
9.0
GAS VALVE AND BURNER SET-UP ............................................................................ 36
10.0 BOILER AND HEATING SYSTEM PIPING ................................................................... 43
11.0 LEAD LAG INSTRUCTIONS ........................................................................................... 51
12.0 FIELD WIRING ................................................................................................................. 54
13.0 WIRING SCHEMATICS ................................................................................................... 60
14.0 INSTALLATION CHECKLIST ........................................................................................ 64
15.0 ANNUAL MAINTENANCE AND INSPECTION ........................................................... 65
16.0 PARTS LIST ...................................................................................................................... 67
17.0 TROUBLESHOOTING ..................................................................................................... 79
HAZARD SYMBOLS AND DEFINITIONS
Danger Sign: Indicates a hazardous situation which, if not avoided, will
result in serious injury or death.
Warning Sign: Indicates a hazardous situation which, if not avoided,
could result in serious injury or death.
Caution Sign plus Safety Alert Symbol: Indicates a hazardous situation
which, if not avoided, could result in minor or moderate injury.
Caution Sign without Safety Alert Symbol: Indicates a hazardous
situation which, if not avoided, could result in property damage.
Notice Sign: Indicates a hazardous situation which, if not avoided,
could result in property damage.
This Boiler must be installed by a licensed and trained Heating
Technician or the Warranty is Void. Failure to properly install this
unit may result in property damage, serious injury to occupants, or
possibly death.
H
Visit us
online
NTI # 86573
Advertisement
Table of Contents

Related Manuals for NTI Trinity Lx150


Summary of Contents for NTI Trinity Lx150
-
Page 1: Table Of Contents
This Boiler must be installed by a licensed and trained Heating Technician or the Warranty is Void. Failure to properly install this unit may result in property damage, serious injury to occupants, or possibly death. Visit us online NTI # 86573... - Page 2 │Installation and Operation Instructions Trinity Lx Lx Series Read Before Proceeding If you do not follow these instructions exactly, a fire or explosion may result causing property damage, serious injury or death. FOR YOUR SAFETY, READ BEFORE OPERATING_ A) This boiler does not have a pilot. It is equipped with an ignition device which automatically lights the burner.
-
Page 3: Introduction
1.0 INTRODUCTION General Installation Requirements The installation of your NTI Trinity Lx boiler must conform to the requirements of this manual, your local authority, and the National Fuel Gas Code ANSI Z223.1 and or CAN/CGA B149 Installation Codes. Where required by the Authority, the installation must conform to the standard for “Controls and Safety Devices for Automatically Fired Boilers ANSI/ASME CSD-1. - Page 4 │Installation and Operation Instructions Trinity Lx Lx Series Failure to use the appropriate Natural to LP Conversion Kit and Orifice when operating the Trinity Lx with Propane will result in extremely dangerous burner operation leading to property damage, serious injury or death. Refer to section titled ATTENTION: LIQUEFIED PETROLEUM (LP) PROPANE for applicable conversion kit and LP orifice numbers.
- Page 5 │ Trinity Lx Lx Series Installation and Operation Instructions IN THE STATE OF MASSACHUSETTS ONLY (a) For all horizontally vented gas fueled equipment installed in every dwelling, building or structure used in whole or in part for residential purposes, including those owned and operated by the Commonwealth and where the side wall exhaust vent termination is less than seven (7) feet above finished grade in the area of the venting, including but not limited to decks and porches, the following requirements shall be satisfied: INSTALLATION OF CARBON MONOXIDE DETECTORS At the time of installation of the side wall...
-
Page 6: Introduction
│Installation and Operation Instructions Trinity Lx Lx Series 2.0 INTRODUCTION Table 2-1 General Specifications Lx150E Lx700 DESCRIPTION Lx150 Lx300 Lx400 Lx500 Lx600 Lx200 Lx800 Gas Connection ½” (Female) ¾” (Female) 1” (Male) (inches, NPT) Water Connections 1” (Female) 1-1/4” (Female) 2”... - Page 7 │ Trinity Lx Lx Series Installation and Operation Instructions High Altitude Operation The Trinity Lx is designed to operate at its maximum listed capacity in installations less than or equal to 2000 ft [610 m] above Sea Level. Since the density of air decreases as elevation increases, maximum specified capacity should be de-rated for elevations above 2000 ft [610 m] in accordance with Table 2-3.
-
Page 8: Boiler Location
│Installation and Operation Instructions Trinity Lx Lx Series 3.0 BOILER LOCATION In all cases, the Trinity Lx must be installed indoors in a dry location where the ambient temperature must be maintained above freezing and below 100F [38C]. Gas components must be protected from dripping, spraying water, or rain during operation and servicing. - Page 9 │ Trinity Lx Lx Series Installation and Operation Instructions Figure 3-1(a) Closet Installation, Minimum Clearances (Lx150-200) Piping must be CPVC Top 12” [305 mm] 1” [25 mm] clearance for hot water and vent pipes 6” [152 mm] max. above vent opening Ventilation Air Opening Ventilation Air Openings 1 in...
- Page 10 │Installation and Operation Instructions Trinity Lx Lx Series Figure 3-1(c) Closet Installation, Minimum Clearances (Lx500-800) Model Lx800 Ventilation Air Openings - shown Openings are not required if the appliance area meets the Recommended Clearances in Table 3-1. Top 12” [305 mm] 6”...
- Page 11 │ Trinity Lx Lx Series Installation and Operation Instructions Figure 3-2(a) Wall Mounting Installations (Lx150-200) Failure to follow instructions may Remove the upper wall mount bracket from the result in fire, serious injury, or death. back of the boiler. ...
- Page 12 │Installation and Operation Instructions Trinity Lx Lx Series Figure 3-2(b) Wall Mounting Installations (Lx300-400) Failure to follow instructions may While leaving the upper bracket intact (A), result in fire, serious injury, or death. remove the wall mount bracket attached to the bottom-back of the boiler (B).
-
Page 13: General Venting
│ Trinity Lx Lx Series Installation and Operation Instructions 4.0 GENERAL VENTING The Trinity Lx is certified as a “Category IV” boiler requiring a “Special Venting System” designed for pressurized venting. The Exhaust Vent must be piped to the outdoors, using the vent materials and rules outlined in this section. - Page 14 │Installation and Operation Instructions Trinity Lx Lx Series Direct Vent Installation (Mandatory for models Lx150-400) When installed as a Direct Vent boiler the combustion air-inlet must also be piped directly to the outdoors using the methods described in this section and in accordance with the National Fuel Gas Code, ANSI Z223.1 (U.S.) or CSA B149.1 (Canada) and local requirements.
- Page 15 │ Trinity Lx Lx Series Installation and Operation Instructions Combustion Air-inlet Contamination Be careful not to locate the Air-inlet termination in an area where contaminants can be drawn in and used for combustion. Combustion air containing dust, debris or air-borne contaminants will drastically increase the required maintenance and may cause a corrosive reaction in the Heat Exchanger which could result in premature failure, fire, serious injury, or death.
- Page 16 │Installation and Operation Instructions Trinity Lx Lx Series Near Boiler Vent/Air-inlet Piping Each Trinity Lx is equipped with a short piece of approved CPVC vent pipe (see Table 4-2 CPVC Vent Pipe Transition Piece). Insert one end into the boiler flue outlet adapter and cement the other to field venting (see Table 4-4 for approved venting material).
- Page 17 │ Trinity Lx Lx Series Installation and Operation Instructions Figure 4-2(a) Near Boiler Venting (CPVC) Figure 4-2(b) Near Boiler Venting (PVC) Models Lx150-200 Models Lx150-200 Swing Joint Swing Joint to attain slope in to attain slope in horizontal runs horizontal runs Air Inlet Air Inlet 3”...
- Page 18 │Installation and Operation Instructions Trinity Lx Lx Series Figure 4-4(a) Near Boiler Venting (CPVC/PVC) Models Lx500-600 Swing Joint to attain slope in horizontal runs Air-Inlet 4” Pipe * Exhaust Vent 4” CPVC Exhaust Vent Air-Inlet Adapter 4” PVC (check 4” stainless steel local codes and Table 4-3) (factory supplied...
- Page 19 │ Trinity Lx Lx Series Installation and Operation Instructions Vent/Air-inlet Pipe Material Table 4-4 Acceptable Vent and Air-inlet Pipe Material Installation Standards 2, 3 Items Materials United States Canada PVC - DWV ANSI/ASTM D2265 Vent Air-inlet materials installed on gas PVC Schedule 40 ANSI/ASTM D1785 All venting material in...
- Page 20 │Installation and Operation Instructions Trinity Lx Lx Series Vent and Air-inlet Pipe Length Determination Use Table 4-5 to determine the maximum pipe length that can be used. The table calculates sweep, 90º elbows, and 45º elbows at 5 equivalent feet each. Note: models Lx150-200 have limitations when operating with Propane Gas (LP).
- Page 21 Table 4-6. Kits certified with the Trinity Lx are listed in Table 4-6 and available from IPEX, DuraVent, Centrotherm and/or NTI. For more information on System 636 Vent Kits or wholesaler locations contact IPEX directly USA: 1-800- │...
- Page 22 │Installation and Operation Instructions Trinity Lx Lx Series Sidewall Termination - Due to potential moisture loading (build-up) along the exterior wall, sidewall venting may not be the preferred venting option. Refer to Figures 4-8 and 4-10 for roof top venting options. Sidewall Termination Examples –...
- Page 23 │ Trinity Lx Lx Series Installation and Operation Instructions Extra precaution must be taken to adequately support the weight of the Vent/Air-inlet piping in applications using roof-top terminations. Failure to follow these instructions may result in venting or boiler component failure resulting in flue gas spillage leading to property damage, serious injury or death.
- Page 24 │Installation and Operation Instructions Trinity Lx Lx Series Sidewall Termination Details – Direct Vent Installation Figure 4-9(a) Figure 4-9(b) Two-Pipe Termination (Sidewall) IPEX Concentric Termination (Sidewall) Horizontal 4-12” or greater than 36” Refer to documentation included with termination kit for complete installation instructions.
- Page 25 │ Trinity Lx Lx Series Installation and Operation Instructions Roof Termination Details – Direct Vent Installation Figure 4-10(a) Figure 4-10(b) Two-Pipe Termination (Roof) IPEX Concentric Termination (Roof) Exhaust Refer to documentation included with termination kit for Vent Screen complete installation instructions. Vent pipe piece to retain vent screen Vent pipe piece to...
- Page 26 Combustion air containing chemicals such as chloride, fluoride, bromine or iodine or dust and debris will cause corrosion damage of the heat exchanger voiding your NTI warranty. Refer to Table 4-1 for a list of corrosive products and contaminants sources to avoid.
- Page 27 │ Trinity Lx Lx Series Installation and Operation Instructions Figure 4-11 Venting Below Grade For installations that exit the wall below grade: Exhaust 1. Excavate site to a point below where the pipes are to exit as shown. 2. Ensure the wall is fully sealed where the pipes Air-inlet penetrate.
-
Page 28: Vent And Air-Intake Termination Clearances
│Installation and Operation Instructions Trinity Lx Lx Series 5.0 VENT AND AIR-INTAKE TERMINATION CLEARANCES The quick reference table below is to be read in conjunction with the numbered notes as indicated, Figures 5-1 through 5-6, and the Venting Rules and Guidelines in Section 4.0. The instructions detailed in this section are a combination of Trinity Lx specific and National Gas Code restrictions. - Page 29 │ Trinity Lx Lx Series Installation and Operation Instructions Figure 5-1 Termination Clearances Quick Reference Diagram...
- Page 30 │Installation and Operation Instructions Trinity Lx Lx Series Figure 5-2 Sidewall Termination Clearances (See Table 5-1) Clearances “F” and “G” Canada – Minimum 3 ft. [915 mm] The US – Minimum 1 ft. [305 mm] Two-Pipe Termination Clearance “Q” Adjacent to Public Walkway or Driveway Concentric Vent Minimum 7ft.
-
Page 31: Condensate Drain
│ Trinity Lx Lx Series Installation and Operation Instructions 6.0 CONDENSATE DRAIN This unit produces liquid condensate in the heat exchanger and venting system as a product of combustion. Steps must be taken to ensure that condensate does not collect in the venting system; therefore, all exhaust piping must slope back to the boiler a minimum 1/4”... -
Page 32: Installing Gas Piping
Ensure that: The gas line connection to the boiler does not apply any weight to the gas valve. NTI recommends using approved flexible gas piping (if acceptable by local codes) to connect the boiler to the gas supply (See Figure 7-1 for details). - Page 33 │ Trinity Lx Lx Series Installation and Operation Instructions Strain on the gas valve and fittings may result in vibration, premature component failure and leakage and may result in a fire, explosion, property damage, serious injury or death. Flexible gas piping cannot be used within the boiler cabinet and cannot pass through the cabinet wall, use rigid piping as shown in Figure 7-1.
-
Page 34: Lighting The Boiler
│Installation and Operation Instructions Trinity Lx Lx Series 8.0 LIGHTING THE BOILER Before Start-up refer to Mandatory Pre-commissioning Procedure for Plastic Venting in Section 4.0. Failure to follow these instructions can result in explosions, injury or death. Prior to turning the gas supply on and lighting the boiler, ensure all aspects of the installation are complete and in conformance with the instructions provided in this manual, including the Vent/Air-Intake, Condensate Drain, and System Water Piping. - Page 35 If the unit fails to light consistently and smoothly, contact NTI for technical assistance at 1-800-688-2575. Never allow the boiler to operate if the ignition or operation of the burner is rough or erratic.
-
Page 36: Gas Valve And Burner Set-Up
│Installation and Operation Instructions Trinity Lx Lx Series 9.0 GAS VALVE AND BURNER SET-UP The Trinity Lx gas valve must be set-up by a licensed Gas Technician. Improper set-up may result in incorrect operation, damage to components or property, injury or death. Gas Line Pressure The boiler gas valve is equipped with a line pressure test port;... - Page 37 │ Trinity Lx Lx Series Installation and Operation Instructions Figure 9-1 Gas Valve and Venturi Assembly (Lx150-300) Lx150 Orientation Illustrated Gas Valve Orifice Location (See Kit 82650-1) Manifold Pressure Test Port Throttle/Input Adjustment Screw Line Pressure Test Port Gas In Air-inlet Venturi Gas In...
- Page 38 │Installation and Operation Instructions Trinity Lx Lx Series Figure 9-3 Gas Valve and Venturi Assembly (Lx400) Manifold Pressure Throttle/Input Test Port Adjustment Screw Line Pressure Orifice Location Test Port (See Kit 83017-1) Venturi Gas In Gas Valve Air Inlet Figure 9-4 Gas Valve and Venturi Assembly (Lx500) Gas Valve Line Pressure Test Port...
- Page 39 │ Trinity Lx Lx Series Installation and Operation Instructions Figure 9-5 Gas Valve and Venturi Assembly (Lx600-800) Throttle/Input Gas Valve Adjustment Screw Manifold Pressure Test Port (outlet flange) Manual Gas Shutoff Valve Gas In Line Pressure Test Port (inlet flange) Remove cover to make adjustments to the throttle/input...
- Page 40 4. Operate the unit at the minimum modulation rate (Table 9-2). Ensure the combustion remains smooth and and CO remain within the limits (Table 9-1). If not, do not adjust further, contact NTI for assistance. Flue Gas Analysis and Adjustment Each Trinity Lx is factory set to operate with Natural Gas, for boilers field converted to operate with Propane Gas, a flue gas analysis and adjustment is mandatory.
- Page 41 │ Trinity Lx Lx Series Installation and Operation Instructions Figure 9-7 Flue Gas Sampling Using Test Port (Lx150-200) Test Port Combustion Analyzer FLUE GAS TEST PORT PLUG - Remove test port plug to perform flue gas analysis. Re-install plug once sampling completed to prevent flue gas leakage during appliance operation.
- Page 42 │Installation and Operation Instructions Trinity Lx Lx Series Figure 9-9 Flue Gas Sampling Using Test Port (Lx500-600) Combustion Analyzer FLUE GAS TEST PORT PLUG Remove test port plug to perform flue gas analysis. Re-install plug once sampling completed to prevent flue gas leakage during appliance Test Port operation.
-
Page 43: Boiler And Heating System Piping
For retrofits, all system piping including radiators, must be cleansed of all build-up including sludge and scale. All systems, old and new, must be cleansed to remove flux, grease and carbon residue. NTI recommends cleansing the boiler system with “Fernox F3 Cleaner”. For retrofit applications with heavy limescale and sludge deposits, a heavier duty cleaner may be required;... - Page 44 Note: the use of glycol may reduce the usable output capacity of the boiler, thus requiring the unit to be “de-rated” by limiting the maximum operating capacity and/or the maximum water temperature. NTI recommends against exceeding 35% concentration of glycol.
- Page 45 │ Trinity Lx Lx Series Installation and Operation Instructions Figure 10-1(a) Near Boiler Piping (Lx150-400) Pressure Relief Valve discharge to floor drain Inlet Safety Flow Switch Trim-able paddle Outlet Pressure Gauge Pressure Relief Valve Near Boiler tees and fittings Figure 10-1(b) Near Boiler Piping (Lx500-800) To Boiler and system plumbing.
- Page 46 Trinity Lx Lx Series Low Water Cutoff (LWCO) / Safety Flow Switch – Trinity Lx150-400 boilers are provided with a factory installed Water Pressure Switch; in the event the pressure drops below 10 psi, the burner is inhibited from firing. Where required by the Authority having jurisdiction, an external LWCO, or Safety Flow Switch, may have to be installed;...
- Page 47 │ Trinity Lx Lx Series Installation and Operation Instructions Table 10-4 Minimum Circulator and Pipe Sizes Minimum Primary Loop Pump Size Restriction Minimum Min. Flow Max Temp. Model Head Loss Pipe Size (GPM) Rise B&G Grundfos Taco Armstrong 8' at 7 GPM 1"...
- Page 48 │Installation and Operation Instructions Trinity Lx Lx Series Indirect Fired Water Heater – When installed as per Figure 10-3, the indirect fired water heater is in series with the boiler during a demand for DHW. Therefore when using this configuration it is important to use an Indirect Fired Water Heater that has minimal head loss.
- Page 49 │ Trinity Lx Lx Series Installation and Operation Instructions Figure 10-2 Primary / Secondary Plumbing (Single System Circulator Configuration)
- Page 50 │Installation and Operation Instructions Trinity Lx Lx Series Figure 10-3 Primary / Secondary Plumbing (Multiple System Circulator Configuration)
-
Page 51: Lead Lag Instructions
COM of each boiler in parallel; see Field Wiring Tables 12-2(a) and 12-2(b) and Figure 12-2. System Sensor (Optional) – install a system sensor (NTI P/N: 84010) on the outlet (supply) pipe feeding the heating system, see Figure 11-1. Wire the system sensor to SENSOR COM and SYSTEM (OD / SYS SENSOR for Lx500-800 models) of the Master Boiler;... - Page 52 │Installation and Operation Instructions Trinity Lx Lx Series Figure 11-1 All Models Multiple Boiler Lead-Lag Plumbing Configuration...
- Page 53 │ Trinity Lx Lx Series Installation and Operation Instructions Lead Lag Instructions – Central Heating Central Heat Demand Switch (Room Thermostat) – connect to R (24VAC) and CH2 (LL) of the Master Boiler; see Field Wiring Tables 12-2(a) and 12-2(b) and Figure 12-2. Switch must be an isolated end switch (dry contact).
-
Page 54: Field Wiring
│Installation and Operation Instructions Trinity Lx Lx Series 12.0 FIELD WIRING All wiring must be in accordance with the Canadian Electrical code, CSA C22.2 and any applicable local codes. Ensure that the wiring complies with this manual. The boiler must be electrically grounded in accordance with the National Electrical Code ANSI/NFPA 70, local codes, and/or the Canadian Electrical Code CSA C22.1. - Page 55 │ Trinity Lx Lx Series Installation and Operation Instructions Figure 12-1(a) Line Voltage Field Wiring (Lx150-400) 120VAC SUPPLY PUMP A PUMP B PUMP C LINE NEUTRAL SERVICE SWITCH (field supplied) Table 12-1(a) Line Voltage Field Connections (Lx150-400) Connection Location Description Location for connecting line voltage of the power supply.
- Page 56 │Installation and Operation Instructions Trinity Lx Lx Series Figure 12-1(b) Line Voltage Wiring (Lx500-800) Table 12-1(b) Line Voltage Field Connections (Lx500-800) Connection Location Description Location for connecting line voltage of the power supply. Note, most installation codes L1 (120VAC) require the installation of a service switch to break line voltage to the boiler. Location for connecting neutral of the power supply.
- Page 57 Central Heat demand. System Water Temperature – An optional strap-on System Sensor is available from NTI (P/N 84010). When connected to terminals 9 and 10, the control will indicate a “CH” or SYSTEM “Lead-Lag”...
- Page 58 May be connected to a BMS, maximum capacity of 0.63Amps at 24VAC. Notes For applications requiring a High Gas Pressure Switch, see supplemental instructions included with NTI High Gas Pressure Switch Kit, P/N 84094. Note that this is the only High Gas Pressure Switch that has been tested with the unit...
- Page 59 4, 5 and 6 [LIM, CH1, and CH2 (LL)]. Failure to follow these instructions may damage the unit. Fuse (24VAC) - Trinity Lx150-400 models are equipped with a “blade style” 2 Amp fuse to protect the internal transformer located within the slide-out control panel box.
-
Page 60: Wiring Schematics
│Installation and Operation Instructions Trinity Lx Lx Series 13.0 WIRING SCHEMATICS Figure 13-1(a) Connection Diagram (Lx150-400) - Page 61 │ Trinity Lx Lx Series Installation and Operation Instructions Figure 13-1(b) Ladder/Logic Diagram (Lx150-400)
- Page 62 │Installation and Operation Instructions Trinity Lx Lx Series Figure 13-2(a) Connection Diagram (Lx500-800)
- Page 63 │ Trinity Lx Lx Series Installation and Operation Instructions Figure 13-2(b) Ladder/Logic Diagram (Lx500-800)
-
Page 64: Installation Checklist
│Installation and Operation Instructions Trinity Lx Lx Series 14.0 INSTALLATION CHECKLIST Installation 1. If operating on Propane Gas, convert boiler using appropriate Kit number. See Table 7-1. 2. Locate the boiler in accordance with Section 3.0 of this manual. ... -
Page 65: Annual Maintenance And Inspection
8. Listen for water flow noises indicating a drop in boiler water flow rate. The hydronic system may need to be flushed to eliminate hard water scale (Use Fernox DS-40 Descaler, NTI PN: 83450; see Table 10-1). Combustion Chamber Cleaning Procedure Units operating with LP Gas or in an industrial environment will have to be cleaned a minimum of once per year. - Page 66 │Installation and Operation Instructions Trinity Lx Lx Series Refractory Ceramic Fibers (RFC) Personal Protective Equipment Recommended - Read the following warnings and handling instructions carefully before commencing any service work in the combustion chamber. The insulating material on the inside of the burner door and at the back of the combustion chamber contains Refractory Ceramic Fibers and should not be handled without personal protective equipment.
-
Page 67: Parts List
│ Trinity Lx Lx Series Installation and Operation Instructions 16.0 PARTS LIST For a list of parts that corresponds to the item numbers in the bubbles, refer to Table 16-1. Note that that some item numbers may appear more than once in the parts list depending on which model number is being referenced. Building Owners - Replacement parts are available from your stocking wholesaler. - Page 68 │Installation and Operation Instructions Trinity Lx Lx Series Figure 16-2 Heat Exchanger, Gas Valve, Blower and Burner Assembly (Lx150-200) Figure 16-3 Electrical Housing, Controller, and Display Module (Lx150-400)
- Page 69 │ Trinity Lx Lx Series Installation and Operation Instructions Figure 16-4 Cabinet, Vent and Air-Intake Parts (Lx300-400)
- Page 70 │Installation and Operation Instructions Trinity Lx Lx Series Figure 16-5 Heat Exchanger, Gas Valve, Blower and Burner Assembly (Lx300-400)
- Page 71 │ Trinity Lx Lx Series Installation and Operation Instructions Commercial Models (Lx500-800) Figure 16-6 Cabinet, Vent and Air-inlet Parts (Lx500-800)
- Page 72 │Installation and Operation Instructions Trinity Lx Lx Series Figure 16-7 Heat Exchanger, Gas Valve, Blower and Burner Assembly (Lx500)
- Page 73 │ Trinity Lx Lx Series Installation and Operation Instructions Figure 16-8 Heat Exchanger, Gas Valve, Blower and Burner Assembly (Lx600-800)
- Page 74 │Installation and Operation Instructions Trinity Lx Lx Series Figure 16-9 Electrical Housing, Controller, and Display Module (Lx500-800) 58 wal Table 16-1 Parts List: Trinity Lx Item Part # Models Description 82657 Premix burner 135.8 (Lx100-150; not Lx150E) 82658 150E, 200 Premix burner, 200.6 (Lx150E, Lx200) 84207 Premix burner, (Lx300)
- Page 75 │ Trinity Lx Lx Series Installation and Operation Instructions Item Part # Models Description 81994 CVI Venturi 51 (Lx300) 82990 CVI Venturi (Lx400) 84013 600–800 CVI Venturi (Lx600-800) 82650 150, 150E, 200 CVI 5.20mm Orifice #45.900.444.107B (Lx150-200) 84157 CVI 6.20mm Orifice (Lx300) 82993 400 (NG) Gas Valve Orifice, 8.0mm, NG (Lx400)
- Page 76 │Installation and Operation Instructions Trinity Lx Lx Series Item Part # Models Description 83996 700, 800 Condensate Drain Tube (Lx700-800) 83112 All Models Trinity Divider Plate Insulation c/w Washer & Screw (Lx Series) 82770 150–500 Burner Door Viton Gasket (Lx150-500) 84136 600–800 Burner Door Viton Gasket (Lx600-800)
- Page 77 │ Trinity Lx Lx Series Installation and Operation Instructions Item Part # Models Description 83876 150, 150E, 200 Electrical J-box Cover R1, Left (Lx100-200) 83872 All Models Barrier Strip, Line Voltage (Lx Series) 83877 150, 150E, 200 Electrical J-box, Line Voltage (Lx150-200) 83707 All Models Ignition Coil Q652B1006/B (Lx Series)
- Page 78 │Installation and Operation Instructions Trinity Lx Lx Series Item Part # Models Description 84146 700, 800 Rear Top (Lx700-800) 83961 300, 400 Fuel-Air Metallic Tubing with Ends (Lx400) 84379 Fuel-Air Metallic Tubing with Ends (Lx500) 84147 600–800 Fuel-Air Metallic Tubing with Ends (Lx600-800) 83915 300, 400 High-Vent Pressure Switch, AFS460-367 (Lx300-400)
-
Page 79: Troubleshooting
│ Trinity Lx Lx Series Installation and Operation Instructions 17.0 TROUBLESHOOTING Observe the following precautions when servicing the boiler. Failure to comply with these may result in fire, property damage, serious injury or death. Servicing the Boiler Disconnect or shut off all energy sources to the boiler: 120VAC power, water and gas. ... - Page 80 Fast-Acting Fuses There are three (3) fuses associated with the Trinity Lx150-400 controller but only one (1) with the Lx500-800 controller. Check these fuses before replacing the controller or any other electrical component; if the fuse is blown, it will prevent the protected device(s) from functioning.
- Page 81 │ Trinity Lx Lx Series Installation and Operation Instructions User Interface (Touch-screen Display) A blank screen does not necessarily indicate a problem; the display may be configured to automatically blank the screen after a pre-set interval. Simply touch the screen to activate it. Confirm that 120V power is being supplied to the boiler.
- Page 82 │Installation and Operation Instructions Trinity Lx Lx Series Summary and Diagnostics Display – The Trinity Lx controller and Touchscreen display provides detailed operational and diagnostic information for aid in troubleshooting. When power is applied to the boiler the initial page displayed is the Summary page. Information presented on the Summary page includes Demand source, Burner state, status of sensors and pumps, and so forth.
- Page 83 Incorrect air switch setting Contact NTI technical support. Faulty air proving switch If venting and air inlet are clear, temporarily jumper the air switch. If the unit lights and operates smoothly –...
- Page 84 Tripped Thermal Fuse (Lx500-800 Check Thermal Fuse on the back of the heat only) exchanger (accessed from the rear of the cabinet). If tripped contact NTI. Tripped High Vent Pressure Switch The high vent pressure switch will trip when the (Lx500-800 only) combustion chamber is blocked or venting is too restrictive.
- Page 85 │ Trinity Lx Lx Series Installation and Operation Instructions Table 17-1 Troubleshooting Chart PROBLEM POSSIBLE CAUSE CORRECTIVE ACTION Verify that 2-position Molex connector on Hold 91– Inlet sensor fault Sensor disconnected wiring harness is securely attached to mating connector on inlet sensor. ...
- Page 86 Condensation or other foreign matter may be obstructing the tubing, preventing the switch from sensing differential pressure caused by air flow through the metering elbow. Incorrect air switch setting Contact NTI technical support. Blown fuse " " Check Fuse Inoperative CH and/or DHW Blown fuse "...
- Page 87 │ Trinity Lx Lx Series Installation and Operation Instructions Table 17-1 Troubleshooting Chart PROBLEM POSSIBLE CAUSE CORRECTIVE ACTION Verify that the 5-position Molex connector on Blower operating at high Blower signal cable disconnected speed while burner off the wiring harness is securely connected to its mating connector on the blower.
- Page 88 │Installation and Operation Instructions Trinity Lx Lx Series Table 17-3 Hold and Lockout Codes Code Description Note Internal fault: Zero crossing not detected Hold Internal fault: Flame bias out of range Hold Internal fault: Invalid Burner control state Lockout Internal fault: Invalid Burner control state flag Lockout Internal fault: Safety relay drive cap short Hold...
- Page 89 │ Trinity Lx Lx Series Installation and Operation Instructions Table 17-3 Hold and Lockout Codes Code Description Note Internal fault: HFS shorted to IAS Lockout Internal fault: Mux pin shorted Lockout Internal fault: HFS shorted to LFS Lockout Anti short cycle Hold Fan speed not proved Hold...
- Page 90 │Installation and Operation Instructions Trinity Lx Lx Series Table 17-3 Hold and Lockout Codes Code Description Note 114-115 RESERVED Wait for OK to Run Disabled Flap valve condensate fault Disabled Controller interaction system fault Hold Controller interaction communications fault Hold Flap valve backflow fault Disabled Flap valve fault...
- Page 91 │ Trinity Lx Lx Series Installation and Operation Instructions Table 17-3 Hold and Lockout Codes Code Description Note Safety relay feedback incorrect in run Lockout Main relay feedback incorrect Lockout Pilot relay feedback incorrect Lockout Safety relay feedback incorrect Lockout Safety relay open Lockout Main relay ON at safe start check...
- Page 92 │Installation and Operation Instructions Trinity Lx Lx Series Table 17-3 Hold and Lockout Codes Code Description Note Unconfigured DHW high limit set point setting Lockout Unconfigured Outlet high limit set point setting Lockout Unconfigured Stack limit set point setting Lockout Invalid DHW demand source setting Lockout Invalid Flame threshold setting...
- Page 93 │ Trinity Lx Lx Series Installation and Operation Instructions Table 17-4 Alert Codes Code Description None (No alert) Alert PCB was restored from factory defaults Safety configuration parameters were restored from factory defaults Configuration parameters were restored from factory defaults Invalid Factory Invisibility PCB was detected Invalid Factory Range PCB was detected Invalid range PCB record has been dropped...
- Page 94 │Installation and Operation Instructions Trinity Lx Lx Series Table 17-4 Alert Codes Code Description Maximum cycle count was reached Maximum hours count was reached Illegal Modbus write was attempted Modbus write attempt was rejected (NOT ALLOWED) Illegal Modbus read was attempted Safety processor brown-out reset occurred Application processor watchdog reset occurred Application processor brown-out reset occurred...
- Page 95 │ Trinity Lx Lx Series Installation and Operation Instructions Table 17-4 Alert Codes Code Description CH max modulation rate was > absolute max rate CH modulation range (max minus min) was too small (< 4% or 40 RPM) DHW max modulation rate was invalid, % vs. RPM DHW max modulation rate was >...
- Page 96 │Installation and Operation Instructions Trinity Lx Lx Series Table 17-4 Alert Codes Code Description DHW demand source was invalid DHW P-gain was invalid DHW I-gain was invalid DHW D-gain was invalid DHW OFF hysteresis was invalid DHW ON hysteresis was invalid DHW hysteresis step time was invalid DHW sensor type was invalid Inlet sensor type was invalid for DHW...
- Page 97 │ Trinity Lx Lx Series Installation and Operation Instructions Table 17-4 Alert Codes Code Description Lead Lag header temperature was invalid Lead Lag was suspended due to no enabled Program Module installed Lead Lag slave session has timed out Too many Lead Lag slaves were detected Lead Lag slave was discovered Incompatible Lead Lag slave was discovered No base load rate was set for Lead Lag slave...
- Page 98 │Installation and Operation Instructions Trinity Lx Lx Series Table 17-4 Alert Codes Code Description CH ODR min water temperature was invalid RESERVED DHW set point was invalid DHW time of day set point was invalid DHW storage setpoint was invalid STAT may not be a DHW demand source when Remote Stat is enabled No DHW anticondensation setpoint was configured No CH anticondensation setpoint was configured...
- Page 99 │ Trinity Lx Lx Series Installation and Operation Instructions Table 17-4 Alert Codes Code Description Abnormal Recycle: ILK off during Main Flame Establishing Period Abnormal Recycle: ILK off during Ignition period Run was terminated due to ILK was off Run was terminated due to interrupted air flow switch was off Stuck reset switch Run was terminated due to fan failure Abnormal Recycle: Fan failed during Drive to Purge Rate...
- Page 100 │Installation and Operation Instructions Trinity Lx Lx Series Table 17-4 Alert Codes Code Description Abnormal Recycle: fault DHW sensor Abnormal Recycle: DHW high limit Abnormal Recycle: fault inlet sensor Abnormal Recycle: Check Parameters Failed Internal error: No factory parameters were detected in control Internal error: PID iteration frequency was invalid Internal error: Demand-Rate interval time was invalid Internal error: Factory calibration parameter for modulation was invalid...
- Page 101 │ Trinity Lx Lx Series Installation and Operation Instructions Table 17-4 Alert Codes Code Description Internal error: EEPROM write was attempted before EEPROM was initialized Internal error: EEPROM cycle count address was invalid Internal error: EEPROM days count address was invalid Internal error: EEPROM hours count address was invalid Internal error: Lockout record EEPROM index was invalid Internal error: Request to write PM status was invalid...
- Page 102 │Installation and Operation Instructions Trinity Lx Lx Series Table 17-4 Alert Codes Code Description Parameter PCB was switched to backup Range PCB was switched to backup Lead Lag modulation sensor was not valid with setpoint source Lead Lag modulation sensor was not valid with local setpoint source Lead Lag modulation sensor was not valid with local modulation rate source Disagreement on number of interacting controls...
- Page 103 │ Trinity Lx Lx Series Installation and Operation Instructions NOTES...
- Page 104 │Installation and Operation Instructions Trinity Lx Lx Series Visit us online NY Thermal Inc. 30 Stonegate Dr. Saint John, NB E2H 0A4 Canada Technical Assistance: 1-800-688-2575 Website: www.ntiboilers.com Fax: 1-506-432-1135...
Need help?
Do you have a question about the Trinity Lx150 and is the answer not in the manual?
Questions and answers