BK Precision 1693 Instruction Manual

BK Precision 1693 Instruction Manual

Switching dc power supply

Advertisement

Model
1693, 1694
Switching DC Power Supply
INSTRUCTION MANUAL

Advertisement

Table of Contents
loading
Need help?

Need help?

Do you have a question about the 1693 and is the answer not in the manual?

Questions and answers

Summary of Contents for BK Precision 1693

  • Page 1 Model 1693, 1694 Switching DC Power Supply INSTRUCTION MANUAL...
  • Page 3: Safety Summary

    Safety Summary The following safety precautions apply to both operating and maintenance personnel and must be observed during all phases of operation, service, and repair of this instrument. Before applying power, follow the installation instructions and become familiar with the operating instructions for this instrument.
  • Page 4 WARNINGS AND CAUTIONS WARNING and CAUTION statements, such as the following examples, denote a hazard and appear throughout this manual. Follow all instructions contained in these statements. A WARNING statement calls attention to an operating procedure, practice, or condition, which, if not followed correctly, could result in injury or death to personnel.
  • Page 5 Compliance Statements Disposal of Old Electrical & Electronic Equipment (Applicable in the European Union and other European countries with separate collection systems) This product is subject to Directive 2002/96/EC of the European Parliament and the Council of the European Union on waste electrical and electronic equipment (WEEE), and in jurisdictions adopting that Directive, is marked as being put on the market after August 13, 2005, and should not be disposed of as...
  • Page 6: Table Of Contents

    Contents Safety Summary ..................1 Introduction ....................5 Installation ....................6 Initial Inspection ................6 Input Power Requirements
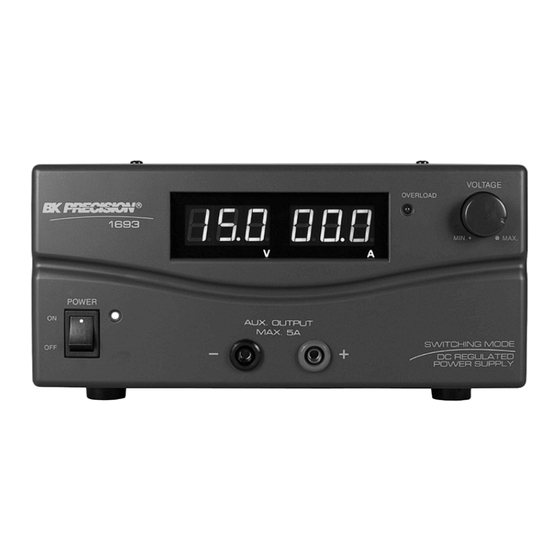
 ............... 6 Controls and Indicators ................7 Front Panel ..................7 Rear Panel ..................8 Operating Instructions ................9 Instrument Hook-Up ............... 10 Using Both Main and Auxiliary Outputs ..........
  • Page 7: Introduction

    These 900W power supplies provide a variable voltage output from 1 V to 15 V at 60 A (model 1693) or from 1 V to 30 V at 30 A (model 1694). In addition, a remote sensing terminal is available for use to compensate for voltage drops due to resistances from load leads.
  • Page 8: Installation

    Installation Initial Inspection This unit is tested prior to shipment. It is therefore ready for immediate use upon receipt. The initial physical inspections should be made to ensure that no damage has been sustained during shipment. Inspect the packing box on receipt for any external damage. If any external damage is evident, remove the instrument and visually inspect its case and parts for any damage.
  • Page 9: Controls And Indicators

    Output Voltage Control Knob – Control Both Main and Auxiliary Output Power ON/OFF Switch Power ON/OFF LED Auxiliary Output Terminal (max 5 A for 1693, max 3 A for 1694) Note: Please see Section 5.2 for more details on using both main and...
  • Page 10: Rear Panel

    Rear Panel Figure 2 - Rear Panel Main Output Terminal (rated 60 A for 1693 / 30 A for 1694) Note: Please see Section 5.2 for more details on using both main and auxiliary output terminals together. Remote Sensing Terminal...
  • Page 11: Operating Instructions

    This series has two models with different output voltage range and current. Make sure you have purchased the correct one. Model Number Output Voltage Range Total Rated Current 1693 1 – 15 V 60 A 1694 1 – 30 V...
  • Page 12: Instrument Hook-Up

    Instrument Hook-Up 1. Check the rating label of the power supply and make sure it complies with your AC mains voltage. Connect the power supply to the AC mains using the provided power cord. CAUTION: The AC input is double pole fusing. 2.
  • Page 13: Using Both Main And Auxiliary Outputs

    For example, setting the voltage output for model 1693 (1-15 V, 0-60 A) to 15 V would output 15 V at both the main and auxiliary terminals. A total of 60 A can be drawn between the two terminals.
  • Page 14: Disconnection

    2. Check and make sure the power connections are secure. 3. Then make connections between Remote Sensing and equipment. Figure 3 shows typical connection between power supply and device for remote sense operation. Figure 3 - Remote Sense Connection The remote sensing wire should be at least 22AWG wire size. 5.3.2 Disconnection WARNING: Wrong disconnect sequence will damage the power supply.
  • Page 15 Figure 4 - Remote Control Connector Solder 3 wires (22AWG) to pins 1, 2, and 3 of pin plug as shown in Figure 5. Figure 5 - Pin Numbers Make sure the load is disconnected and the power supply is OFF before continuing to the next step.
  • Page 16 Figure 6 - Connector Ring Then, you can choose either method A or B below to use the analog remote control feature. Method A: Using an External Variable DC Voltage Source A variable external voltage source of 0 to 5 V is fed into the analog remote control terminal to adjust the output voltage level of both Main and Auxiliary outputs.
  • Page 17: Enable And Disable The Output

    Method B: Using a 5 kΩ Variable Resistor 1. Make sure the load is disconnected and the power supply is OFF. 2. Prepare a 5 kΩ variable resistor and connect wires from pins 1, 2, and 3 as Figure 7 shown in Figure 7 - Variable Resistor Connection 3.
  • Page 18: Maintenance

    Maintenance When the Unit is Not Turning On Check if the power ON/OFF switch is turned ON. If not, then check the power cord. Please make sure that the power cord is properly connected to the unit. Please also check the main switch and ensure that the AC supply at your site is the same as the one mentioned at the rear chassis of the unit.
  • Page 19: Instrument Repair Service

    Figure 8 - Fuse Location Instrument Repair Service Because of the specialized skills and test equipment required for instrument repair and calibration, many customers prefer to rely upon B&K Precision for this service. We maintain a network of B&K Precision authorized service agencies for this purpose.
  • Page 20: Specifications

    Specifications 1693 1694 Output Variable Output 1-15 V 1-30 V Voltage Rated Main Output 60 A 30 A Current Rated Auxiliary Output Current Ripple and Noise 40 mVpp Load Regulation 0.1% + 5 mV Line Regulation 0.05% + 3 mV Meter Type &...
  • Page 21 1693 1694 Overload (Constant Current Limiting), Short Circuit, OTP Protections (Overtemperature Protection), and OVP (Overvoltage Protection) Special Features Remote control and remote sensing Operating 32 °F to 104 °F (0 °C to 40 °C) ≤ 80% R.H. Temperature Storage Temperature 5 °F to 158 °F (-15 °C to 70 °C) ≤...
  • Page 22: Certification

    Certification CE Compliant CE Declaration of Conformity The power supply meets the requirements of 2006/95/EC Low Voltage Directive and 2004/108/EC Electromagnetic Compatibility Directive. Low Voltage Directive EN60950 Safety requirements for electrical equipment for measurement, control, and laboratory use. EMC Directive EN 55022 Electrical equipment for measurement, control, and laboratory use.
  • Page 23: Service Information

    Service Information Warranty Service: Please go to the support and service section on our website at www.bkprecision.com to obtain an RMA #. Return the product in the original packaging with proof of purchase to the address below. Clearly state on the RMA the performance problem and return any leads, probes, connectors, and accessories that you are using with the device.
  • Page 24: Limited One-Year Warranty

    Limited One-Year Warranty B&K Precision Corp. warrants to the original purchaser that its products and the component parts thereof will be free from defects in workmanship and materials, for a period of one year from date of purchase. B&K Precision Corp. will, without charge, repair or replace, at its option, defective product or component parts.
  • Page 25 (Page intentionally left blank)
  • Page 26 22820 Savi Ranch Parkway Yorba Linda, CA 92887 www.bkprecision.com © 2011 B&K Precision Corp. Printed in Hong Kong v041211...

This manual is also suitable for:

1694

Table of Contents