
Related Manuals for Avision Multifunction Scan Center


Summary of Contents for Avision Multifunction Scan Center
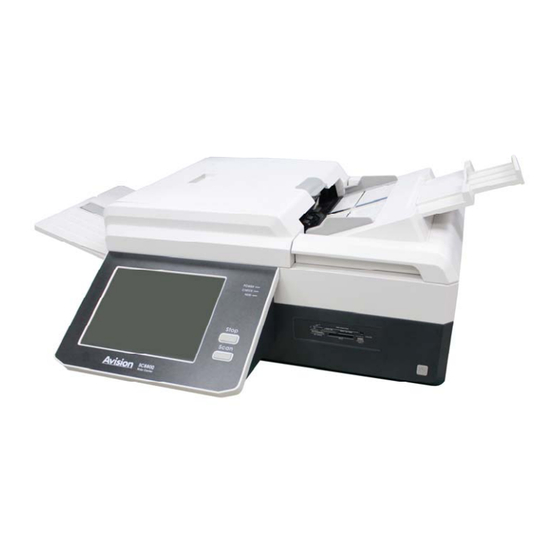
- Page 1 Multifunction Scan Center User's Manual Regulatory model: DT-1214H manual-en-250-0823-E-SC8800-v100 Avision Inc.
-
Page 2: Safety Information
Safety Information When using this equipment, the following safety precautions should always be followed. Safety During Operation In this manual, the following important symbols are used: WARNING: Indicates potentially hazardous situations, which if instructions are not followed, could result in death or serious injury. -
Page 3: Copyrights And Trademarks
Precautions Do not install the equipment near heating or air conditioning units. Do not install the equipment in a humid or dusty place. Place the equipment securely on an even, flat surface. Tilted or uneven surfaces may cause mechanical or paper-feeding problems. Retain the box and packing materials for shipping purposes. - Page 4 Restriction of the use of certain hazardous substances (RoHS) Directive 2011/65/EU CE compliance of this product is valid if powered with the correct CE-marked AC adapter provide by Avision. This product satisfies the Class A limits of EN55022, EN55024, safety requirements of EN 60950 and ROHS requirements of EN50581.
-
Page 5: Table Of Contents
Table of Contents Getting Started ............1 Introduction ..................... 1 Features ....................1 External View ................... 3 The Front View ................... 3 The Connection Ports ................. 4 The Control Panel ................5 Pre-installation & Symbol Information ............. 6 Preinstallation..................6 Frequently Used Buttons on the Touch Panel ........ - Page 6 Configuring the Machine ......... 58 Specifying the Product’s Network Settings ..........59 Specifying More Administrator Settings by The Touch Panel....62 Information Report................63 Configuration................... 63 Network Settings ................64 Security Management ..............65 Service Mode ................... 65 E-Mail Default .................. 65 Filing Default ...................
-
Page 7: Getting Started
1 Getting Started Introduction Thank you for purchasing this multi-functional product (MFP). With the product, you can instantly scan single-sided or double-sided paper-based document and deliver the electronic image to various destinations including e-mail addresses, ftp servers, a network printer, web site, or someone else’s computer on the network. In addition, the product allows you to save the scanned image to a network printer, a USB flash drive, or the product’s own memory. - Page 8 Duplex Scanning: Through the auto document feeder, the product allows you to scan double-sided documents to digitize your documents more effectively. Sending Multi-Page Document: With the Auto Document Feeder, the product allows a stack of 50-page document(s) to be continuously scanned at one time in reliable quality to increase your efficiency. Managing the Product Remotely: The product provides a convenient way to manage your e-mail address book, filing destinations (folders), and telephone book remotely.
-
Page 9: External View
External View The Front View ADF Input Tray Cover Open Lever Load the document Cover Open Lever Automatic document Pull this lever to open onto this part when feeder. the ADF cover. scanning document. Pull this lever to open the imprinter cover. Flatbed Cover Paper Stopper Close this cover when... -
Page 10: The Connection Ports
The Connection Ports LAN Port Main Power Switch COM Ports Connect the product The main power Connect the product to network with a switch of the to an external LAN cable. product. keyboard. To turn on the Audio Ports (x6) product, press 「l」. -
Page 11: The Control Panel
The Control Panel LED Indicator Lights Power Turn on the power and the Power LED light will be solidly lit. Check If there is an error condition, the Check LED light will blink in red color. The HDD LED light Start Button Stop Button blinks continuously... -
Page 12: Pre-Installation & Symbol Information
Pre-installation & Symbol Information Preinstallation The product has to be setup properly on your network to perform e-mail and filing functions. The following network parameters have to be set. Important ! Make a copy of the following table and ask your Network Administrator to complete the information. - Page 13 Explanation of contents: 1. *DHCP Enable: Choose Yes to obtain IP/subnet/gateway/DNS server/WINS server addresses automatically from DHCP server. 2. *IP Address: The Internet Protocol (IP) address assigned to your machine by your network administrator or by DHCP server. 3. Subnet Mask: The net mask address assigned by your network administrator or by DHCP server.
- Page 14 Note: DHCP server: With DHCP (Dynamic Host Configuration Protocol), a host can automatically be given a unique IP address each time it connects to a network--making IP address management an easier task for network administrators. If the DHCP server is available from your network, you do not need to enter TCP/IP, subnet mask, gateway, and DNS information.
-
Page 15: Frequently Used Buttons On The Touch Panel
Frequently Used Buttons on the Touch Panel The following table lists the frequently used buttons and their functions on the touch panel: The Shutdown button: Choose to shutdown, reboot, sleep, or refresh the machine. The Information button: Choose to inform you current status of the machine. The Start button: Choose to start scanning the document and sending the scanned image to E-mail, Public Folder, USB Flash Drive, or... -
Page 16: Installing Your Machine
2 Installing Your Machine This chapter is specifically targeted to the persons who are responsible for the administration of the product. It is recommended that the administrator read this chapter before installing the machine. Minimum Configuration Requirements To make the best use of the product, the following configuration is required: To send e-mails from the product: •... -
Page 17: Installing The Adf Output Tray
Installing the ADF Output Tray Raise the Stacker Tray to about 45 degrees and then insert the left pin of the Stacker Tray to the left hole in the back of the product as illustrated. Hold the left side of the Stacker Tray with your left hand and press the right end of the Stacker Tray inward to position the right pin above the right hole in the back of the product as illustrated. -
Page 18: Unlocking The Scan Unit
Unlocking the Scan Unit Before using the product, please first unlock the product. The Transportation Lock is designed to prevent the optical unit from moving during transportation. To unlock the product, follow these steps: Open the Flatbed Scanner Backside Cover. The Transportation Lock is located at the upper-left corner as indicated. - Page 19 Note: To lock the product, please do the following, Turn off the product. If the scan unit is not located at the home position, turn on the product. After the scan unit returns to home position, turn off the product. Home Position Move the lock switch to the “Locked Position”.
-
Page 20: Connecting The Cables
Connecting the Cables Connecting the Ethernet Cables Connecting to the Network Connect one end of your Ethernet LAN cable to an available port of your Ethernet Hub Connect the other end to the LAN port at the back of the product. Connecting the Power and Turning on the Machine Connect one end of the power cable to the power receptacle of the product Connect the other end to an appropriate power outlet. - Page 21 Press the [-] side of the main Power Switch. Press the [Power] button on the lower right corner of the product. After showing the product is turned on, and the Power LED lights in green. booting up message, the LCD Touch Panel prompts the preset ready status. Note: If you turn off the product by pressing the main Power switch while the touch panel has not been completely shut down, this may cause damage to...
-
Page 22: Installing The Print Cartridge
Installing the Print Cartridge Open the box of the print cartridge and remove the protective tape from the bottom of the cartridge. Do not touch the ink nozzles ( ) or the gold contacts ( ) after the tape has been removed. Open the Imprinter Cover. - Page 23 Grasp the tab of the cartridge and insert the cartridge into the holder with the label facing up and the tab pointing to the left. Lower the locking lever of the Print Cartridge Holder until it locks in. Position the print cartridge holder along where the document will pass through.
-
Page 24: Operation
3 Operation Document Loading Tips Feeding the following types of documents might result in paper jams or damages to the documents. To scan these documents, use the flatbed (platen glass) instead. Documents with paper clips or staples Documents on which the ink is still wet Documents non-uniformed thickness... -
Page 25: Placing Document(S) In The Adf
Placing Document(s) in the ADF 1. Check if your documents are within these guidelines and make sure your document is free of staples, paper clips and is not tore out. High Quality Paper, PPC Paper (Xerox specified paper), Type Carbonless Paper 28 ~ 209 g/m Weight A3, A4, A5, A6, A7, B4, B5, B6, B7, B8, Letter, Double... - Page 26 Paper Guide 5. Adjust the Paper Guides to center the document(s) in the ADF. Side the paper guide so that they will touch the edges of document lightly.
-
Page 27: Placing Document(S) On The Flatbed Glass
Placing Document(s) on the Flatbed Glass Open the document(s) cover to reveal the glass. Place your document with the text FACE DOWN on the glass and align the document in the upper-right corner. Document Cover Document Facing Down Close the document cover. -
Page 28: Copying
Copying Basic Copy Operation Important! Before making copies through a network printer, please make sure the printer has been connected to the network and that the power of the printer has been turned on FIRST. Otherwise, the copy function may not work properly. To make copies: Place your document(s) with text FACE DOWN in the ADF or FACE DOWN on the glass. - Page 29 Tap the [Output Printer] button to open the following Printer Manager. Tap the [Add Printer] button. Select Browse for a printer to list all available printers in the same domain section and choose a printer, or Add a printer by name and enter a desired printer path with its login name and password to specify a printer you want.
-
Page 30: Change More Copy Settings
Change More Copy Settings You can customize copy jobs using the various settings available from the touch panel, including the following: • Copies • Reducing or Enlarging the originals • Color Mode • Image Quality • Density • Output Printer •... -
Page 31: Color Mode
Color Mode Use the Color Mode feature to specify whether to print copies in color or black/white. To select the color mode for your output color: 1. Tap the [Color Mode] button. 2. Select B/W or Color. Image Quality There are 3 types of image quality modes you can choose to optimize the output for a particular type of content. - Page 32 Output Printer Use the Output Printer feature to add a printer for the product. To add a printer for the product: Tap the [Output Printer] button to open the following Printer Manager. Tap the [Add Printer] button. Select Browse for a printer to list all available printers in the same domain section and choose a printer, or Add a printer by name and enter a desired printer path with its login name and password to specify a printer you want.
-
Page 33: Paper Size
Paper Tray Use the Paper Tray feature to specify what printer tray to use for copy job. There are 3 types of paper tray available, including Auto (Automatic selection of paper tray), Tray1, and Bypass (Multi-purpose tray). To choose what printer tray to use: Tap the [Paper Tray] button. - Page 34 Preview The preview feature allows you to view the scanned images in a low resolution to check if the scanned image is corrected. To preview your scanned documents: Tap [Preview] to show ON in the [Preview] button. Tap [Start], and the [Preview] window appears after scanning as shown below: Options on the Preview screen Preview...
- Page 35 The page is now moved from Position1 to Position3 (the specified Tilted arrow’s position), as shown below: Tap a thumbnail page and then the [Insert Pages] Insert Page button ( ). The scanned images will be added after the selected page. The following message box appears to instruct you to continue scanning your desired original that is going to be inserted.
- Page 36 Tap a thumbnail page that you want to delete. Delete Page The chosen page is deleted, and the rest pages remain on the horizontal scroll bar. Rotates the previewed image by 90 degrees Rotate 90∘to Left counterclockwise. Rotates the previewed image by 90 degrees Rotate 90∘to Right clockwise.
-
Page 37: Advanced Copy
Advanced Copy Use the Advanced Copy features to further customize your scanned document. These features include Collate, Duplex, Orientation, N-up, Deskew, Shrink, Color Dropout, Blank Removal, and Position. Tap the [Advanced Copy] button to open the following Advanced Copy window. To use these advanced copy features, see the table depicted below: Options for Advanced Copy Advanced Copy... - Page 38 Duplex Choose one of the four types for your duplex printing. (Check if your printer includes a duplex option.) Choice: *1 to 1 Sided, 1 to 2 Sided, 2 to 2 Sided, 2 to 1 Sided 1 to 1 Sided: Copy single-sided originals onto one side of one sheet of paper.
- Page 39 Orientation Specify how you would bind your duplex printing. Note: This feature is only available for a printer which supports the duplex feature. Choice: *Long Edge to Long Edge, Long Edge to Short Edge, Short Edge to Long Edge, Short Edge to Short Edge Long Edge means documents to be bound or to be flipped on the long edge of paper.
- Page 40 N-up When copying multiple-page documents, you can copy more than one page on a single sheet of paper. The scanned images are resized to fit on the copied page. Choice: *Off ( ):Copies an original onto one sheet of paper. 2-up(2-in-1 ): Copies two separate originals onto one sheet of paper.
- Page 41 Color Dropout allows you to drop either of the red, blue, or Color Dropout green color in your scanned image. If your image contains red color watermark or background, choose the R (Red) channel then any red watermark or background will be removed. This feature is used to sharpen your text when using OCR (Optical Character Recognition) software.
-
Page 42: Sending Your Document To E-Mail Addresses
Sending Your Document to E-mail Addresses Basic E-mail Operation To Send a Scanned Image as an attachment to an Email Address: Place your document(s) with text FACE DOWN in the ADF or FACE DOWN on the glass. Tap the [E-mail] button on the touch panel to open the following [E-mail] window. - Page 43 To enter email addresses from the address book: Tap the [Address Book] button, , to choose your email addresses from E-mail list or Group List. You can also type a key word to search a complete email address by tapping the [Public] folder or [LDAP] server button. To add an email address to the address book, see the section of the E-mail settings on the embedded web page.
-
Page 44: Change More E-Mail Settings
Change More E-mail Settings You can customize E-mail jobs using the various settings available from the touch panel, including the following: • Scan Options • File Separation • Attachment Scan Options The product roughly classifies regular scanning jobs into 3 main document types, including: Photo: Used for the original containing pictures or photographs. - Page 45 Tapping the [Custom] button will open the following Custom window. Refer to Chapter 5 Customizing Scan Options for further details. File Separation Choose default maximum image size for attachment sent by the product. The purpose to set file separation is to avoid the file size limitation of SMTP servers. To choose a file separation size for your attachment : Tap the [File Separation] button.
-
Page 46: Sending Your Document To Filing Servers
Sending Your Document to Filing Servers Basic Filing Operation To Send a Scanned Image to a Filing Server: Place your document(s) with text FACE DOWN in the ADF or FACE DOWN on the glass. Tap the [Filing] button on the touch panel to open the following Filing window. To select a folder to save your scanned image into (Suppose some folders are added in the product’s web page): Tap the [Left / Right] arrow button in the Folder scroll box and then a desired... - Page 47 On the Preview screen, If the scanned image is OK, press the [Start] button ( ) on the touch panel or the [Scan] button ( ) on the control panel to distribute the scanned image. You may also insert more pages by taping the [Insert Pages ( )] button on the bottom of the screen.
-
Page 48: Change Filing Settings
Change Filing Settings Tapping the [Add New Folder] button opens the following New Folder window. The New Folder screen contains server destinations with various parameters. Refer to the following table to enter the relevant values. New Folder Item Description Folder Name Enter name of your folder. - Page 49 Passive Mode If your ftp connection in the active mode fails, select the passive mode instead. Choice: *ON, OFF. Login Name Enter your login name for the server. Password Enter your password for the server. Report to The product will send a report to the Report to E-mail E-mail address after sending a file to the target server.
-
Page 50: Scan Options
Sending Source This option allows you to scan and send your current document image or select and send images from your USB flash drive to your specified destination. Scan: Select this button to scan and send your document to your specified filing destination. -
Page 51: Using The Shortcut Button
Using the Shortcut Button To use a shortcut button, Select and tap the green [Start] button of a shortcut button to use from the shortcut button list on the main screen of the touch panel. Green Start Button of Shortcut Button Note: If you want to change settings of your shortcut button before tapping the green [Start] button, simply tap the [Change] button on the shortcut button to update your settings, and then tap OK. -
Page 52: Storage Printing
Storage Printing Storage Printing allows a user to print a document from a USB flash device or the public folder embedded in the product to a designated printer in network. The Storage Print screen will change to reflect a number of choices you can use when working with USB Flash or Public Folder. - Page 53 To print a document from the public folder, Tap the [Storage Print] button at the bottom-left corner of the touch panel. Select the [Public Folder] button and enter your PIN number (If necessary) from the pop-up dialog box, and tap OK. Storage Print screen pops up on the touch panel, as shown below: Select Printer Select your designated printer by tapping [Change].
-
Page 54: Scanning And Broadcasting Your Images
Scanning and Broadcasting Your Images The Scancast (Scan and broadcast) feature allows you to scan a document and save the image to the product's memory and then respectively specify various destinations to send the images to these destinations. To send a scanned document to multiple destinations, Tap the [Scancast] button on the main screen of the touch panel. - Page 55 The scan options in Scancast are the same with those in E-mail or Filing. Tap the [Change] button to update scan options. Refer to Section Change More E-MAIL Settings or Chapter 5 Customizing Scan Options to configure your favorite scan options for Scancast. Tap either the [Start] button on the touch panel or the [Scan] button on the control panel.
- Page 56 The [Scancast] window for multiple destinations appears again to allow a user to select another destination where to resend the same scanned document. Repeat Step 8 to 10 until you finish sending all your desired destinations. If your job has been completed, tap the [Close (X)] button to close the window and delete the scanned images.
-
Page 57: Creating A New Shortcut Button
Creating A New Shortcut Button The product’s Shortcut buttons provides you an effective way to make copy or distribute your documents in seconds. This function saves you a considerable amount of time in typing or choosing your favorable settings. Before using a shortcut button, you need to first create a shortcut button. There are two ways to create a shortcut button, via the product’s web page and through the touch panel on the product. - Page 58 Click Sign in since the machine is shipped with no specific login name and password and then the web page will be automatically display to contain full options. Click Data Manager, and Shortcut to open the Shortcut screen, as shown below:...
- Page 59 Click New to open the following shortcut-setting screen, as an example: Choose your desired shortcut mode from the Shortcut Mode drop-down list box. The shortcut-setting screen will change to reflect a number of choices you can use when working with Copy, E-mail, Filing, Public Folder, USB Flash Drive, Google Drive, or Microsoft SharePoint.
- Page 60 Click the [Add] button to create a shortcut button, My Copy, on the touch panel, as shown below: New Shortcut Button...
- Page 61 To create a new shortcut button via the Touch Panel, Tap the [Login] button ( ) to bring up the administrator Login screen since you need the administrator privilege to create a shortcut button. Enter your login name and password respectively in the Login Name and Password field via the soft keyboard, and then tap OK.
- Page 62 Tap the [Add A New ShortCut] button on the touch panel screen to enter your favor shortcut name in the following dialog box. Your new shortcut button will be added to the main screen of the touch panel, as shown below: New Shortcut Button...
-
Page 63: Viewing The User's Manual
Viewing the User’s Manual The SC8800 provides a very convenient feature to view the user’s manual on the touch screen. To view or download the user’s manual, please follow these steps: On the main operation screen, tap the Information button ( ), the Information/Report page appears. -
Page 64: Configuring The Machine
4 Configuring the Machine The following settings or destinations must be defined by the system administrator before the product is used to distribute the scanned document in the network. Network and E-mail parameters: Defines the parameters for TCP/IP, and SMTP protocols to send your scanned document to e-mail addresses. -
Page 65: Specifying The Product's Network Settings
Specifying the Product’s Network Settings Turn on the product. After the product is warming up for a few seconds, the Main (also called Shortcut) screen appears on the touch panel, as shown below: Tap the [Login] button ( ) to bring up the administrator Login screen since you need the administrator privilege to make initial setup. - Page 66 Tap the [Menu] button on the touch panel. This opens the following [Menu] screen. Tap the [Network Settings] button to open the following Network Settings screen.
- Page 67 Tap anywhere respectively on the IP Address/Subnet Mask/Gateway IP/DNS Server/WINS Server field to bring up the soft keyboard and then enter the relevant values. (Of course, you don’t need to specify the first three settings if you enable DHCP by tapping the [DHCP Enable] button.) Tap Done to return to the Network Settings screen after entering your information.
-
Page 68: Specifying More Administrator Settings By The Touch Panel
Specifying More Administrator Settings by The Touch Panel After the product is turned on, an administrator has privilege to bring up the [Menu] button on the touch panel. Tapping the [Menu] button opens the [Menu] screen, which displays 10 buttons for an administrator to view or modify various settings. To view or modify various settings from the 10 buttons on the Menu screen, Tap the [Login] button ( ) on the touch panel to bring up the... -
Page 69: Information Report
Information Report Displays the product’s basic information. Item Description Device Displays the product’s model name, manufacturer, serial number, and Mac address. Version Displays the product’s system version, scanner firmware version, scan library version, and image library version. Page Count Displays the page count respectively for color and black/white modes. -
Page 70: Network Settings
Network Settings Presets the settings and defaults for network features. Item Description DHCP Enable If a DHCP server is available in your network and the DHCP is also enabled, the IP, subnet mask, Gateway IP, WINS server, and DNS server will be automatically given. -
Page 71: Security Management
Security Management Assigns local users’ privileges to perform the individual product function such as the Copy, E-mail, Filing, or USB Flash function. Item Description ShortCut And Check the names of functions to be allowed to perform. Choice:Copy, Email, Filing, USB Flash ShortCut Only Allowed to use only the shortcut buttons shown on the main (or Shortcut) screen of the touch panel. -
Page 72: Filing Default
Filing Default Presets the settings and defaults for Filing features. Item Description Folder URL Tap and choose a type of protocol of your filing server in the Folder URL. Choice includes * ftp://, file://, ftps://. Enter the Folder URL in the text field. You can enter either the domain name or the IP address with the directory path. -
Page 73: Bug Report
Bug Report Tap the option to create a bug report and then send it to your USB flash drive or an e-mail address. The bug report is useful for a service personnel to troubleshoot your problem. To send the product’s bug report to your USB flash, Insert this USB Flash drive in a USB port at the back of the product, and wait for the product to successfully detect the USB Flash Drive in a moment. -
Page 74: Specifying More Administrator Settings By An Embedded Web Page
Specifying More Administrator Settings by an Embedded Web Page Specify the network settings on the touch panel via the soft keyboard. (Please refer to the preceding section, Specifying the Product’s Network Settings.) The product is designed with an embedded web page to allow the system administrator to remotely manage the product. - Page 75 Click Sign in on the Sign-in dialog box since the machine is shipped with no specific login name and password and then the web page will be automatically updated to contain full options. In the left side of the web page, click each item on the menu to enter relevant value respectively.
-
Page 76: Summary Of The Web Pages
Summary of the Web Pages Information/Report: Used to display the product’s basic information. Item Description Model Displays the product’s model name. Manufacturer Displays the manufacturer name. MAC Address Displays the scan unit’s MAC address. Serial Number Displays the product’s serial number. System F/W Version Displays the system’s firmware version. - Page 77 IP information on Network Settings: Used to specify the product’s network settings. Item Description DHCP Enable If you have a DHCP server available on your network and the DHCP has been enabled, the IP, subnet mask, Gateway IP, WINS server, and DNS server will be automatically given.
- Page 78 Mail information on Network Settings: Used to specify the product’s mail server information. Item Description Mail Server Enter the SMTP IP. Port# Enter the SMTP Port number. Device E-mail Address E-mail Address Enter the email address of the device. This is also the default “From”...
- Page 79 LDAP Settings: Used to specify the product’s LDAP server information. Item Description Server Name Enter your LDAP server name. IP/URL Enter your LDAP server IP or URL address. Port# Enter the Port number of the LDAP server. Login Name Enter the login name of the LDAP server. Note: In Microsoft Active Directory, some servers may require you to add “domain name”...
- Page 80 Configuration: Used to specify the product’s general information, administration’s profile and other management settings such as energy saver (timer), display language, and so on. Item Description General Machine Sets product’s machine name. (The name that you Name wish to show in recipient’s e-mail.) NTP Server Specify the NTP server address.
- Page 81 Language Choose the language you wish to show in the LCD Touch Panel. Choice: *English, Chinese Traditional, Chinese Simplified, Spanish, Portuguese, Russian. Update Update all the above information. *Factory Default Account Management: Used to set user’s privileges including using the copy, e-mail, or filing function of the product by assigning an account authentication method.
- Page 82 E-Mail Default: Used to specify the default settings set by the administrator when sending an e-mail from the product. The default settings mean the e-mail settings will be reset to these values when the system auto reset time is over or when the product turns off and on again.
- Page 83 Filing Default: Used to specify the parameters for a Filing Template. Basic Item Description Choose a type of protocol of your filing server in the Folder URL. Target Choice includes * ftp://, file://, ftps://. Enter the Folder URL in the second field. You can enter either the domain name or the IP address with the directory path.
- Page 84 Address Book: Used to add/delete/modify an E-mail address information in the address book containing the Email list and Group list. Item Description Email List Name Enter the name of your E-mail Address. Enter an email address in the list. E-mail Address Description Enter the description of an E-mail address.
- Page 85 Passive Mode If your ftp connection in the active mode fails, select the passive mode instead. Choice: *ON, OFF. Login Name Enter your login name for the server. Password Enter your password for the server. Reply to E-mail The product will send a report to the Reply to E-mail address after sending a file to the target server.
- Page 86 Shortcut: Refer to these two sections, Creating A New Shortcut Button & Using the Shortcut Button for further details. Item Description Shortcut Mode Shortcut modes are classified as Copy, E-mail, Filing, Public Folder (The product’s built-in hard disk), USB Flash Drive, Google Drive, and Microsoft SharePoint. Shortcut Name Gives a shortcut name for your shortcut button.
- Page 87 Microsoft SharePoint Use Microsoft Specify your user name/ password for Microsoft SharePoint SharePoint. account Use Windows Use Windows login account for Microsoft SharePoint. login account Host/Website Specify your Microsoft SharePoint’s address. Document Specify your Microsoft SharePoint’s folder for storing Library/Folder scanned documents..
- Page 88 Import/Export: Used to export the product’s current settings to an xnd file as a backup. The advantage of this xnd file is to allow an administrator to use this backup file to import your product settings to other products with the same model and firmware version.
-
Page 89: Specifying A Filing Destination
Specifying A Filing Destination Before you begin to send your scanned document to your destination server, there are a few things you need to be aware of. The following will introduce you several server systems used with the product. Setting the Servers to Store Your Image FTP Stands for “File Transfer Protocol.”... - Page 90 Check the “Full Control“ to have full privileges of the shared directory. Check “Full Control”...
-
Page 91: Customizing Your Scan Options
5 Customizing Your Scan Options The product classifies regular scanning jobs into 3 main document types, including Photo, Document, and Mix. If the current scan settings of Photo, Document, or Mix do not fit your requirement for a particular scanning task, tap the [Custom] button to change your scan settings. - Page 92 Tap the [Custom] button on the [Document Type] window to open the following [Custom] window. The following table shows detailed option instructions in [Custom] Window.
- Page 93 Options for Custom Window Custom Item Description Image Mode Auto Color Detection (B/W): Automatically detects and scans your color document in color. If your original is not in color, the product will scan the original in black & white. Auto Color Detection (Gray): Automatically detects and scans your color document in color.
- Page 94 Diffusion: Diffusion is a type of Halftone. Diffusion gives good image texture and makes text in images more readable than Halftone. Diffusion Image Fixed Processing: Used for black-and-white and other high contrast documents. A single level is set to determine the black-and-white transition.
- Page 95 Six types of Portable Document Format (PDF) file formats are File Format supported. Standard: A Standard PDF file Password: A PDF with password Digital Signature: The PDF file with a digital signature. Searchable: A PDF file with searchable text. . Mix: A PDF file combines with its password, digital sign, and OCR capabilities.
- Page 96 The resolution is measured in pixels per inch (ppi) (sometimes Resolution referred to as dots per inch or dpi). Higher resolutions result in more detail in the scan, slower scanning and in general, greater file sizes. For example, an A4 size color image scanned at 300 dpi with color mode consumes approximately 25 MB of disk space.
- Page 97 Adjust the Contrast slider right or left to increase or decrease Contrast the contrast. Contrast: 1 Contrast: 4 Contrast: 7 (Normal) Choice: Level1~7. Default value: 4 Choose the compression level for your scanned image. Compression The compression levels of MTIFF or TIFF includes G4 only. Choice: Low, *Medium, High, G4, None Remove a blank page by your chosen threshold.
- Page 98 Choose your paper size in the printer tray. Scan Area Choice: *Auto, A4, A5, B5, Letter, Legal, A3, B4, Ledger. The [Imprinter] button allows you to print alphanumeric characters, Imprinter date, time, document count and custom message on your scanned image if digital imprinter is selected or at the back of your document if external imprinter is selected.
- Page 99 Counter: Show the document count for the scan session. This value is increased sequentially by the scanner. Choice: *Number(1234), Number(12345), Number(123456), Number(123457), Number(12345678), Number(123456789), Number(1234567890) Date/Time: Choose if you wish to include the date and time in your print string. Format: YYYYMMDDHHSS For example, 20090402170645-check0001 indicates year, month, date, hour, seconds, your custom text and the counter.
- Page 100 String Orientation: Choose your string orientation. Choice: *Normal, Rotated, Vertical, Vertical Inversion, 90 degrees CW, 90 degrees CCW Normal Rotated Vertical Vertical Inversion 90 degrees CW 90 degrees CCW If you select the digital imprinter to stamp text on your scanned image, the illustration of normal and rotated string is shown below: Rotated...
- Page 101 Print Position (External) Choose the position you wish to print your string. Tap Up arrow button to increase the value or Down arrow to decrease the value. Range: 0~355mm, default:30mm The value indicates the height from the bottom of your paper to the last letter of your string.
- Page 102 Font Transparency Choose your desired font transparency value by tapping the Up/Down arrow button. Choice: 0~100%. Default value: 0 Font Size Choose your desired font size value by tapping the Left/Right arrow button. Choice: Level1~10. Default value: 5 Clean Printhead If the print quality is not good or the imprinter does not print, it is probably the ink emission holes in the nozzle plate (printhead) are blocked.
-
Page 103: Troubleshooting
6 Troubleshooting Clearing Paper Jams If document is jammed, follow the procedure in below to remove it. Pull the Handle of the ADF to open the ADF cover. Gently pull the jammed paper out of the ADF. Close the ADF cover by pressing down on the center of the ADF until it clicks into place. -
Page 104: Errors Indicated In The Operational Panel
Errors Indicated in the Operational Panel When an error occurs, the Check LED will blink in red. Error Code and Error Messages Error Code Error Message Suggested Solution Hardware Error Remove the jammed paper. Fan your 110103 Paper jam paper, flatten the corners of your documents and try again. - Page 105 Ping the IP address of the product from 910019 another PC in DOS prompt. For example, type “Ping 10.1.20.144” in Dos 110172 prompt. If the product has no response, 110173 then perform the following steps. 1. Check if the RJ-45 connector is firmly Connection failure plugged-in.
- Page 106 Error Code Error Message Suggested Solution Scan Error Restart the product and try again. If this 110127 Memory is not error still occurs, contact your system enough. administrator. 110150 Wait until the scan job is completed. Driver busy Free more space by deleting some files Disk is full.
- Page 107 Error Code Error Message Suggested Solution Network Error 410094 Check password. Check with your System Administrator and make sure the password is correct. 310156 Check your login Check with your System Administrator name and password. and make sure your login name and password are correct.
- Page 108 640165 Storage or Scan+ Inserting current images from storage Storage can not be device can not be made as ShortCut. made as ShortCut 210166 When sending the image to a printer, if you scan in black and white mode in less Recommend to set resolution to 600 dpi.
-
Page 109: Technical Support
No. 20, Creation Road I, Science-Based Industrial Park, Hsinchu 300, Taiwan, ROC TEL: +886 (3) 578-2388 FAX: +886 (3) 577-7017 E-MAIL: service@avision.com.tw Web Site: http://www.avision.com.tw US and Canada Area Avision Labs, Inc. 6815 Mowry Ave., Newark CA 94560, USA TEL: +1 (510) 739-2369 FAX: +1 (510) 739-6060 E-MAIL: support@avision-labs.com... - Page 110 South American Avision Brasil Ltda. Rua Bamboré 41, Vila Monumento, Ipiranga. CEP: 04278-060, São Paulo, Brasil TEL: +55-11-2737-2005 E-MAIL: suporte@avisionbrasil.com.br Web Site: http://www.avisionbrasil.com.br/...
-
Page 111: Maintenance
7 Maintenance This section describes how to clean the product, and replace the consumables. Before you clean the inside of the scanner, turn off its power and unplug the power cable from the power outlet. Cleaning the scanner without turning off its power may cause an electric Caution! shock. -
Page 112: Cleaning The Flatbed Glass
Cleaning the Flatbed Glass Wipe the platen glass with a soft, lint-free cloth moistened with a specified cleaner to clean the smudges and fingerprints on the platen glass. If the platen glass is dirty, dirt will appear on the scanned image. Notice: Wait a few minutes until the cleaner is completely vaporized. -
Page 113: Cleaning The Adf
Cleaning the ADF After using the scanner for a long period of time, the rollers and glass inside the scanner may become contaminated with ink, toner particles or paper dust. It is necessary to perform routine cleaning to ensure the optimum image quality and performance. - Page 114 Warning: The glass surface inside the ADF becomes hot during the scanner operation. Before you start cleaning the inside of the scanner, turn off the product and wait a few minutes to let the product cool down. The ADF Friction Roller Assembly Clean the ADF Pad ( Wipe the pad from side to side ( ) with a soft, lint-free cloth moistened with a specified cleaner.
- Page 115 The Feeding Rollers that do not rotate freely Clean the Feeding Rollers ( ) that do not rotate freely. Wipe the roller from side to side ( ) with a soft, lint-free cloth moistened with a specified cleaner. To rotate the rollers, push one of the Feeding Rollers as shown inward, rotate it.
-
Page 116: Cleaning The Skew Sensor
Cleaning the Skew Sensor Dust or paper residue on the skew sensors can cause scan quality issues or false paper jam messages. Make sure there is no residue on the surface of the skew sensors. Pull the Handle and open the ADF cover with a light force. ADF Handle ADF Cover Remove the dust or paper residue left on the surface of the Skew Sensors (x4... -
Page 117: Cleaning The Imprinter
Cleaning the Imprinter After frequent use, the waste ink will begin to accumulate on the base surface of the print cartridge holder which can damage the printouts. Make sure to maintain the base surface clean. Wipe off any dirt or dust on the base surface of the Print Cartridge Holder with a soft lint-free cloth. -
Page 118: Cleaning The Print Cartridge
Cleaning the Print Cartridge Poor quality prints may occur due to blocked ink emission holes in the Ink Nozzles of the Print Cartridge. Leaving the imprinter unused for a long period of time can also cause the ink emission holes to become blocked. When these holes are blocked, clean the Ink Nozzles. - Page 119 Reinsert the Print Cartridge and close the Print Cartridge Cover. a. Grasp the tab of the Cartridge and b. Lower the locking lever of the Print insert the Cartridge into the holder Cartridge Holder until it locks in. with the text side facing up and the tab pointing to the left.
-
Page 120: Consumables And Replacement Cycle
Please replenish the consumables from the store where you purchased the product or a Avision authorized service provider. Replacing the ADF Friction Roller Assembly Pull the ADF Handle and open the ADF cover with a light force. - Page 121 Pinch the ADF Friction Roller Assembly and slide it outward to remove it. ADF Friction Roller Reinsert the new ADF Separator Roller Assembly to its original slot and slide it inward.
-
Page 122: Replacing The Adf Pick Roller
Replacing the ADF Pick Roller Pull the ADF Handle and open the ADF cover with a light force. ADF Cover ADF Handle Open the Pick Roller Cover. Pickup Roller Cover Loosen the lower roller from its slot. - Page 123 Move the tab of the Upper Pickup Roller outward to remove it from the scanner. Pickup Roller Reinsert the new ADF Pick Rollers by first insert the right end of the Upper Pick Roller to its slot. Upper Pickup Roller Move the tab of the Upper Pickup Roller inward as shown.
- Page 124 Position the lower ADF Pickup Roller to its slot. After installing ADF Pickup Roller to the slot, lubricate the corresponding gear on the machine as shown with EM-D110 P/N 076-0010A-0-SP. Rotate the gear until all surface is completed lubricated. Lubricate this gear with EM-D110 P/N 076-0010A-0-SP Close the ADF Pickup Roller Cover.
- Page 125 Pick Roller Cover Reset the ADF Pick Roller counter from the touch panel (login>Menu>Information/Report). Notice: Do not close the ADF while the Pickup Roller Cover is kept open. Note: Make sure the ADF is completely closed. Feeding errors may occur if the ADF is not closed completely.
-
Page 126: Replacing The Print Cartridge
Replacing the Print Cartridge When printed characters appear light or missing characters are evident, complete the following steps to replace your print cartridge: Open the Imprinter Cover. Open the Print Cartridge Holder by lifting up the locking lever with your finger. Hold the tab of the cartridge and remove the Cartridge from its holder. - Page 127 Do not touch the ink nozzles ( ) or the gold contacts ( ) after the tape has been removed. Grasp the tab of the cartridge and insert the cartridge into the holder with the print side face up and the tab pointing to the left. Lower the locking lever of the Print Cartridge Holder until it locks in.
- Page 128 Position the print cartridge holder along where the document will pass through. Close the Imprinter Cover.
-
Page 129: Replacing The Attract Ink Box Assembly
Replacing the Attract Ink Box Assembly Pull the ADF Handle and open the ADF cover with a light force. Press the right end of the Attract Ink Box Assembly and lift it up to remove it from the device. Attract Ink Assembly Note: How to judge the Attract Ink Box Assembly is near its life time:... - Page 130 Reassembling: To install the Attract Ink Box Assembly, follow these steps: Pull the ADF Handle and open the ADF Cover with a light force. Insert the left end of the Attract Ink Box Assembly to the left side of its original position as illustrated.
-
Page 131: Specifications
8 Specifications All specifications are subject to change without notice. Items Specifications Model Number : DT-1214H General Specifications System Description Stand-alone Internet Appliance Image Sensor Color Charged-Coupled Device (CCD) Light Source LED Light Bar Optical Resolution 600 x 600 dpi Output Quality Input: 48 bits color Output: 24 bits Color... - Page 132 Scan Size ADF Paper Capacity 100 sheets (75 g/m+² or 20 lb. Paper) 150 sheets (60 g/m² or 16 lb. Paper) ADF Paper Size 2” x 3.5” (50 x 88 mm) ~ 11.7” x 36” (297 x 914 mm) Flatbed Max. Paper Size 8.5”...
- Page 133 Mail Server Authentication SMTP, POP3 Supported Mail Server Lotus Mail Server 5.0 Application MS Exchange Server 2000 RedHat 7.0 SendMail MAC Mail Server in OS 9.04 Supported LDAP Server Windows 2000 Active Directory Windows NT 4.0 + MS Exchange 5.5 Lotus Notes R5 Supported Mail Application Microsoft Outlook 2000...
-
Page 134: Index
Index Duplex A 1 to 1 Sided, 1 to 2 Sided, 2 to 2 Sided, 2 Account Management, 75 to 1 Sided, 32 Activity Log Report, 67 E Address Book, 78 ADF Friction Roller Assembly, 108 Energy Saver Advanced Copy, 31 5, 15, 30, 60, 240 minutes, 74 Attachment, 39 Ethernet Hub, 14... - Page 135 Security Management, 65 Gateway IP, SMTP Server, SMPT Port, 6 Sending Multi-Page Document, 2 Network Settings IP address, Subnet mask, Gateway IP, DNS ShortCut And Server, 60 Copy, Email, Filing, USB Flash, 65 SMTP, 8 O soft keyboard, 61 Orientation Specifying More Administrator Settings by an Embedded Web Page, 68 Long Edge to Long Edge, Long Edge to Short...
Need help?
Do you have a question about the Multifunction Scan Center and is the answer not in the manual?
Questions and answers