Advertisement
Advertisement
Table of Contents

Related Manuals for Digitus 2-PORT NAS SATA HDD ENCLOSURE


Summary of Contents for Digitus 2-PORT NAS SATA HDD ENCLOSURE
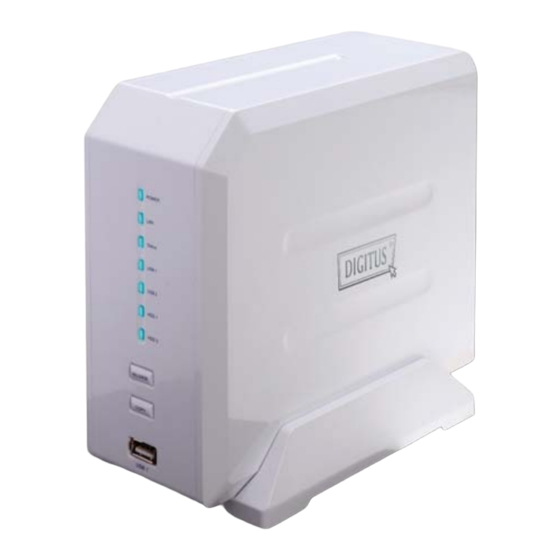
- Page 1 2-PORT NAS SATA HDD ENCLOSURE Quick Installation Guide...
-
Page 2: Getting Started
Getting started This is a step-by-step instruction on how to start using the storage server. 1) Pull out the disk drawer from the case of storage server as shown in the setup diagram below. 2) Fix your SATA hard disk driver in the drawer by screws as shown in the setup diagram below. - Page 3 Note: Please make sure the disk drawer is safely installed. For example, please DO NOT install hard disk by the way showed in the following pictures. The disk drawer is not safely installed 4) Plug the power adaptor to the storage server and connect the storage server to your network as shown in the setup diagram below.
- Page 4 7) The default IP address of storage server is 192.168.2.5. The PC to setup the storage server should be in the same subnet as the storage server. If the IP address of your PC is not in the range of 192.168.2.1~254, please modify the Windows IP address of your PC as following diagram.
-
Page 5: Quick Setup
9) The login screen below will appear. Enter the “User Name” and “Password” and then click <OK> to login. Note: By default the user name is “admin” and the password is “1234”. Quick Setup The Quick Setup section is designed to get you using the storage server as quickly as possible. In the Quick Setup you are required to fill in only the information necessary to simply share the storage in your network. - Page 6 Parameter Description Set Time Zone Select the time zone of the country you are currently in. The router will set its time based on your selection. Time Server Address You can manually assign time server address if the default time server does not work. Enable Daylight Savings The router can also take Daylight savings into account.
-
Page 7: Step 2) Setup Network
Step 2) Setup Network A suitable IP address is required to make the storage server work well in your network. The IP address used by the storage server should be of the same subnet as your network. If there is an active DHCP server in your network and you do not need the FTP server function, you can set the storage server to obtain an IP address automatically. -
Page 8: Gateway Address
Gateway Address Please enter the default gateway IP address of this storage server. Usually, it is the LAN IP address of the router that you are using to access the Internet. DNS Address Please enter at least one DNS address. DNS address is the IP address of DNS server which provides domain name service to you. - Page 9 Step 3) Partition and format internal hard disk drive Click Tools, and in the first page Storage Tools click Auto Partition & Format button of HDD 1 Port. This function will automatically clear your hard disk drive (remove all old partitions in your hard disk drive), create one partition and format the newly created partition with ext2 format which provides the best performance.
- Page 10 During the process of partition and format, the following screen will display. It will take several minutes. The time required depends on the size of the hard disk drive. When the process of partition and format is finished, the following screen will display. Click OK to continue setup.
- Page 11 Step 4) Setup File Server Click File/FTP Server, and go to the second page File Server. The default storage name is “Storage” which will be displayed in the “My network places” list. Please make sure that the name does not conflict with other PC or devices in your network. You also can assign another name and then click Save to save the new name.
- Page 12 In the Add/Edit Shared Folder page, enter the folder name “public”. Click Browse to assign a path for the folder, then the assign folder path window pops up. In the assign folder path window, click HDD1 icon (HDD1 represent the internal SATA hard disk drive).
- Page 13 Click partition C: icon. Then the list of folders in partition C: will be displayed. Because partition C: of HDD1 is newly created by Auto Partition & Format function, there is no folders in partition C: now. So the list is empty. We have to create a new folder named “public”...
- Page 14 Enter the name of the new folder “public”, and then click New. Now you can see the newly created folder “public” displayed in the folder list of partition C:. Select folder “public” by click its icon. Then the content list of folder “public” will be displayed. Because the folder “public”...
- Page 15 Now you can see the path of newly created folder “public” is assigned as the path of the shared folder. Select Anonymous Sharing to allow users access the folder without authentication by password. Click Read & Write to allow users have the right the read and write files in the folder “public”.
- Page 16 Step 5) Restart the storage server Shut down the storage server by pressing the power button and wait until the LEDs are all turned off. And then start the storage server by pressing the power button and wait until the SATA LED is lighted.
- Page 17 Then the icon of the shared folder “public” will be displayed. You can double click the icon of the shared folder “public” to enter the folder and start to use it.
Need help?
Do you have a question about the 2-PORT NAS SATA HDD ENCLOSURE and is the answer not in the manual?
Questions and answers