Table of Contents
Advertisement
Quick Links
Advertisement
Table of Contents

Related Manuals for Baumatic BEO910BGL


Summary of Contents for Baumatic BEO910BGL
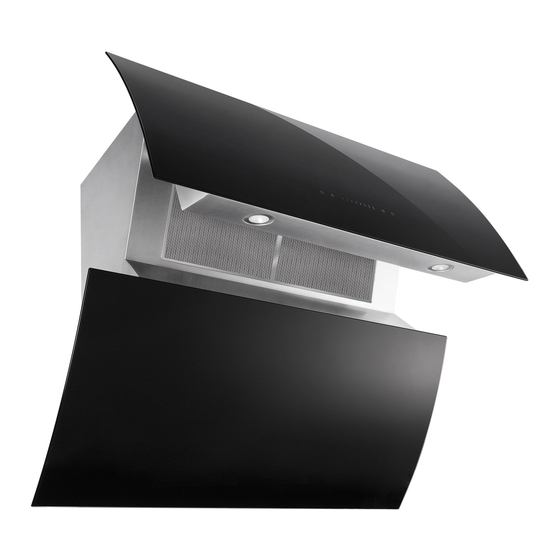
- Page 1 BEO910BGL 90 cm Glass Chimney Hood...
- Page 2 User Manual for your Baumatic BEO910BGL 90 cm Glass Chimney hood NOTE : This User Instruction Manual contains important information, including safety & installation points, which will enable you to get the most out of your appliance. Please keep it in a safe place so that it is easily available for future reference;...
-
Page 3: Table Of Contents
9 – 11 Turning on the cooker hood 9 – 10 Speed selection Light control The timer Turning off the cooker hood Cleaning your Baumatic cooker hood 12 – 13 Cleaning The grease filters 12 - 13 Maintenance 13 - 17... -
Page 4: Environmental Note
ENVIRONMENTAL NOTE Note: Before discarding an old appliance, switch off and disconnect it from the power supply. Cut off and render any plug useless. Cut the cable off directly behind the appliance to prevent misuse. This should be undertaken by a competent person. -
Page 5: Important Safety Information
IMPORTANT SAFETY INFORMATION Your safety is of the utmost importance to Baumatic. Please make sure that you read this instruction booklet before attempting to install or use the appliance. If you are unsure of any of the information contained in this booklet, please contact the Baumatic Customer Care Department. - Page 6 o The edges of the cooker hood are sharp – be mindful of this as you handle your appliance, especially during installation and cleaning. DO NOT CLEAN IN BEHIND THE GREASE FILTERS! o If the room where the cooker hood is to be used contains a fuel burning appliance such as a central heating boiler then its flue must be of the sealed or balanced flue type.
- Page 7 o Remember that when in extraction mode, your cooker hood is removing air from your room. Ensure that proper ventilation measures are being observed. o Note: Your cooker hood is designed to remove cooking odours from the room and not steam. o Warning - Always ensure that the cooker hood been...
-
Page 8: Specifications Of Your Cooker Hood
Specifications of your cooker hood PRODUCT DIMENSIONS Height: 735 mm Width: 900 mm Depth: 380 mm Your cooker hood is fitted with: o Integrated centrifugal motor o LCD display o Touch control operation o 4 Speeds o Cut-off timer o 2 x Washable aluminium grease filters o 2 x LED lights o Non-return air-flow flap o Extraction capacity: 1000 m³/hr... -
Page 9: Using Your Cooker Hood
Using your cooker hood o Make sure that it has been installed by a suitably qualified person, information contained Baumatic’s installation instructions. o There are several buttons on the control panel, which perform separate functions. Timer button Light control button... -
Page 10: Speed Selection
OR AT THE VERY LEAST WHEN YOU BEGIN COOKING. YOU SHOULD ALSO RUN YOUR HOOD FOR TEN MINUTES AFTER YOU HAVE FINISHED COOKING. Speed selection o Press the speed selection button to turn the speed selection function on and off. When you have turned the speed selection function on, you can then use the slider control to choose an operating speed for the motor. -
Page 11: The Timer
The timer o You are able to program a countdown time for the cooker hood. After the set time has elapsed the hood will automatically switch off. o After you have selected your desired speed and light brightness, press the timer button to enter the timer setting mode. -
Page 12: Cleaning Your Baumatic Cooker Hood
Cleaning your Baumatic cooker hood IMPORTANT: BEFORE CLEANING, ALWAYS ENSURE THAT HAVE SWITCHED YOUR COOKER HOOD OMNI-POLAR SWITCH, SET AT THE WALL FROM THE CABLE. Cleaning o Clean the external parts of your cooker hood with mild liquid detergent and a new damp cloth. -
Page 13: Maintenance
o DO NOT WASH THE GREASE FILTERS IN A DISHWASHER. Maintenance Removing and cleaning the grease filters o Press and hold the power button seconds open decorative cover and allow access to the grease filters. o Remove grease filters pulling down on the handle and pulling them away... -
Page 14: Changing A Light Bulb
o Repeat the process if required. o Refit the grease filters once they have dried and press and hold the power button for 3 seconds to close the decorative lid. o IMPORTANT: Let the grease filters dry thoroughly before refitting them in the cooker hood. - Page 15 o Fit the replacement bulb in the same manner as the original and reconnect the light wiring point. o IMPORTANT: Defective bulbs should be replaced immediately. o If the light or lights still do not work, make sure that the lamps are fitted properly into their housings before you call for technical assistance.
-
Page 16: Fitting The Carbon Filters
Fitting the carbon filters If the appliance is to be used in recirculation mode then it is necessary to fit carbon filters. This will help to absorb unpleasant odours caused by cooking. IMPORTANT: BEFORE ATTEMPTING TO FIT OR REMOVE THE CARBON FILTERS, YOU MUST ENSURE THAT YOU HAVE DISCONNECTED THE COOKER HOOD FROM YOUR MAINS SUPPLY. -
Page 17: Installation
o The carbon filters should be replaced every 3 - 6 months or if they show signs of damage. Installation IMPORTANT: Before installation and usage read all the instructions and make sure that the voltage (V) and the frequency (Hz) indicated on the rating plate are exactly the same as the voltage and frequency in your home. -
Page 18: Before Beginning Installation
If you only find two wires in the main’s lead (blue and brown), then neither must be connected to the earth terminal. o As the colours of the wires in the appliance’s mains lead may not correspond with the coloured markings identifying the terminals in your spur box, please proceed as follows: o The blue wire must be connected to the terminal marked “N”... -
Page 19: Extraction Mode Or Recirculation Mode
o In addition check whether there is an electrical socket available, which will be accessible after the hood is mounted. If you are going to use the appliance in extractor mode, you should also ensure that there is space to connect a fumes discharge device to the outside. -
Page 20: Installing Your Cooker Hood
Please note that the styles of cooker hood shown in the line drawings on the following pages are sometimes different to the shape of the BEO910BGL. However the installation method shown is correct and MUST be followed. -
Page 21: Connecting To External Ducting
5) Connect the cooker hood to the mains supply and turn the cooker hood on by pressing the power button for 3 seconds. This will open the decorative cover. Disconnect the cooker hood from the mains supply. The decorative cover will stay open. Remove the grease filters. 6) Screw ST4*30 screws into the holes at the back of the cooker hood as shown in the drawing below. -
Page 22: Fitting The Optional Chimney Sections (Cq4Ss)
o The other end of the ducting hose should be connected to a discharge outlet that is suitable for cooking vapours. It should have a cross section of at least 150 cm². o The maximum distance between the coupling and your discharge outlet should be 3 metres, with one 90 degree bend. - Page 23 o Mark the side measurements of both sides of chimney section (D) on the wall with a pencil and then remove chimney section (D). 11) Take the flat bracket (E) and place it between the two pencil marks that you made in step 9 o Keeping the bracket in contact with the wall, use a pencil to mark on the wall the anchoring holes that are cut out of the bracket.
-
Page 24: Completing The Installation
o Refit chimney section (C) to the hood and fix it onto the hood using the two screws that are supplied. o Secure the top of chimney section (C) to the flat bracket, using the screws provided. o Slide chimney section (D) inside of chimney section (C). Then secure the L shaped bracket to the wall, using the same method as you have just used to secure the lower bracket. -
Page 25: Troubleshooting
Troubleshooting IMPORTANT: If your cooker hood appears not to be operating properly, before contacting Baumatic Customer Care Department, please refer to the checklist below. My cooker hood will not start. o Check that the hood is connected to the electricity supply o Check that the fan speed control is set correctly. - Page 26 Or any installation other than the one specified by Baumatic Ltd. has been completed. Please refer to the conditions of guarantee that appear on the warranty card that you receive with the appliance.
-
Page 27: Baumatic Consumables
BC005 Stainless Steel Cleaner and Protector (250 ml) o BC007 E-Cloth – General Purpose Cloth o BC008 Microwave Cover To order a Baumatic consumable product please call 0123 5437 244 and quote the product code. You can also order online from eshop.baumatic.co.uk... -
Page 28: Contact Details
United Kingdom Baumatic Ltd., Czech Republic Baumatic Buildings, Baumatic CR spol s.r.o. 6 Bennet Road, Lìpovà 665 Reading, Berkshire 460 01 Liberec 4 RG2 0QX Czech Republic United Kingdom +420 483 577 200 Sales Telephone (0118) 933 6900 www.baumatic.cz Sales Fax...
Need help?
Do you have a question about the BEO910BGL and is the answer not in the manual?
Questions and answers