Table of Contents
Advertisement
Quick Links
Advertisement
Table of Contents

Related Manuals for Baumatic BEDD600SS


Summary of Contents for Baumatic BEDD600SS
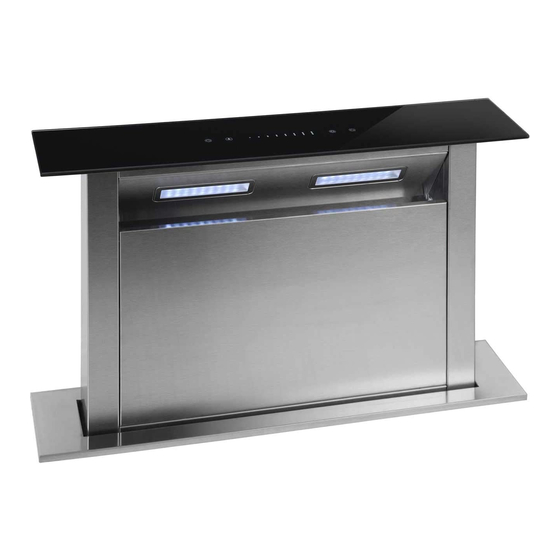
- Page 2 User Manual for your Baumatic BEDD600SS 60 cm Downdraft Cooker Hood NOTE : This User Instruction Manual contains important information, including safety & installation points, which will enable you to get the most out of your appliance. Please keep it in a safe place so that it is easily available for future reference;...
-
Page 3: Table Of Contents
Contents Page Environmental note IMPORTANT SAFETY INFORMATION 5 – 7 Specifications of your cooker hood Using your Baumatic cooker hood 9 - 12 Before first use To use your cooker hood 9 - 12 Cleaning your Baumatic cooker hood The grease filter... -
Page 4: Environmental Note
ENVIRONMENTAL NOTE Note: Before discarding an old appliance, switch off and disconnect it from the power supply. Cut off and render any plug useless. Cut the cable off directly behind the appliance to prevent misuse. This should be undertaken by a competent person. -
Page 5: Important Safety Information
IMPORTANT SAFETY INFORMATION Your safety is of the utmost importance to Baumatic. Please make sure that you read this instruction booklet before attempting to install or use the appliance. If you are unsure of any of the information contained in... - Page 6 o When the hood is being used in its extractor function, ensure that the ducting is fire retardant and that there are no bends sharper than 90 degrees as this will reduce the efficiency of the hood. o Ensure the ducting for the extractor function has the same diameter as the outlet hole all the way through.
- Page 7 o Warning - Always ensure that the cooker hood been disconnected from power supply before carrying out any work on the hood, including replacing light bulbs. o Do not connect the ducting system of this appliance to any existing ventilation system which is being used for any other purpose.
-
Page 8: Specifications Of Your Cooker Hood
Washable metallic grease filter o 2 x LED lights o Extraction only Optional extras (Available from the Baumatic Spares Department): DK5: 1 Metre length Ducting Kit 125 mm Ø. DK10: 3 Metre length Ducting Kit 125 mm Ø with flat channelling... -
Page 9: Using Your Baumatic Cooker Hood
Using your Baumatic cooker hood Before first use IMPORTANT: THIS PROCESS MUST BE FOLLOWED BEFORE THE COOKER HOOD IS USED FOR THE FIRST TIME. o You should use a good quality stainless steel cleaner and polish on ALL of the stainless steel areas of your cooker hood, before it is used for the first time. - Page 10 Switching on the cooker hood o After you have connected the cooker hood to the mains supply the backlight will switch on. The backlight will switch off after 5 seconds and the hood will enter stand-by mode. o IMPORTANT: BEFORE SWITCHING THE COOKER HOOD ON, YOU MUST ENSURE THERE ARE NO SAUCEPANS OR OBJECTS PLACED ON TOP OF THE GLASS SURFACE.
- Page 11 o When you use the slider control to choose a speed the cooker hood will operate at the selected speed. If no adjustments are made after 15 seconds the indicator lights will turn off and the hood will operate at the chosen speed. o The next time you use your cooker hood, the motor will operate at the speed which was last selected.
- Page 12 Switching off the cooker hood o Press and hold the power button for 3 seconds to switch the cooker hood off. The hood will return to the lowered position into the worktop. Cleaning your Baumatic cooker hood IMPORTANT: BEFORE CLEANING,...
-
Page 13: Cleaning Your Baumatic Cooker Hood
The grease filter o Your cooker hood is fitted with a grease filter, which help to absorb grease particles and protect your kitchen and furniture from greasy residues. o The metallic filter may become inflammable if you allow them to get saturated with this greasy residue. -
Page 14: Changing A Light Bulb
o Soak the grease filter in hot water and washing up liquid for about an hour. o Rinse it off thoroughly with hot water. o Repeat the process if required. o Switch on the cooker hood using the power button, so that it rises out of the worktop. - Page 15 o Use a screw driver to prize away the bulb holder from the main body of the hood. Then remove the bulb and attached wiring from the hood. o IMPORTANT: It is not possible to replace the bulbs individually, it will be necessary to obtain the bulbs, bulb holders and wiring as a complete part.
-
Page 16: Installation
Installation IMPORTANT: Before installation and usage read all the instructions and make sure that the voltage (V) and the frequency (Hz) indicated on the rating plate are exactly the same as the voltage and frequency in your home. The manufacturer declines all responsibility in the event of the installer failing to observe all the accident prevention regulations in force, which are necessary for normal use and the regular operation of the electric system. -
Page 17: Before Beginning Installation
Before beginning installation o Check that the product purchased is of a suitable size for the chosen installation area. In addition check whether there is an electrical socket available that will be accessible once the hood is mounted. If the product is going to be used in extraction mode, then there should also be space to connect a ducting hose to the outside. - Page 18 o Cut a hole in the worktop of the dimensions shown in the line drawing above. IMPORTANT: The long edge of the cut-out MUST be positioned a minimum of 25 mm away from the edge of the worktop. o Depending on the dimensions of the worktop, the cut-out can be made behind or to the side of a hob.
- Page 19 o Fit the air outlet to the top of the motor casing and secure it using four ST4 x 8 screws. o Connect the casing to the main body of the hood using eight M10 x 10 screws. o The side of the casing with the air outlet can be positioned in any direction, depending on the space of the cabinet.
-
Page 20: Completing The Installation
o The maximum distance between the coupling and your discharge outlet should be 3 metres, with one 90 degree bend. For each additional 90 degree bend, the maximum distance is reduced by a further metre. o Use four ST4 x 14 screws to secure the PCB box to the base of the unit. -
Page 21: Troubleshooting
Troubleshooting IMPORTANT: If your cooker hood appears not to be operating properly, before contacting Baumatic Customer Care Department, please refer to the checklist below. My cooker hood will not start. o Check that the hood is connected to the electricity supply o Check that the fan speed control is set correctly. -
Page 22: Contact Details
- like plinths, or any installation other than the one specified by Baumatic has been completed. Please refer to the conditions of guarantee that appear on the warranty card that you receive with the appliance. - Page 24 Part of the Hoover Group 11 Beacontree Plaza Gillette Way Reading RG2 0BS www.baumatic.co.uk...
Need help?
Do you have a question about the BEDD600SS and is the answer not in the manual?
Questions and answers