Table of Contents
Advertisement
Quick Links
Advertisement
Table of Contents

Subscribe to Our Youtube Channel
Related Manuals for Baumatic BESW601BGL


Summary of Contents for Baumatic BESW601BGL
- Page 1 BECW600/900SS BESW601BGL/WGL Chimney Hood BESW901BGL/WGL BESW902BGL...
- Page 2 User Manual for your Baumatic BECW600/900SS BESW601BGL/WGL BESW901BGL/WGL BESW902BGL Chimney Hood NOTE : This User Instruction Manual contains important information, including safety & installation points, which will enable you to get the most out of your appliance. Please keep it in a safe place so that it is easily available for future reference;...
-
Page 3: Table Of Contents
LCD display Setting the time of day Speed selection 14 - 15 Light control The cut-off timer Cleaning your Baumatic cooker hood Cleaning The grease filters Maintenance 17 - 20 Removing and cleaning the grease filters Changing a light bulb... -
Page 4: Environmental Note
ENVIRONMENTAL NOTE Note: Before discarding an old appliance, switch off and disconnect it from the power supply. Cut off and render any plug useless. Cut the cable off directly behind the appliance to prevent misuse. This should be undertaken by a competent person. -
Page 5: Important Safety Information
IMPORTANT SAFETY INFORMATION Your safety is of the utmost importance to Baumatic. Please make sure that you read this instruction booklet before attempting to install or use the appliance. If you are unsure of any of the information contained in... - Page 6 * On models BESW601, BESW901 and BESW902 only, to facilitate ease of access to the control panel, it is possible to reduce the minimum gap to 500 mm. o When installed between adjoining wall cabinets, the cabinets must not overhang the hob. o The edges of the cooker hood are sharp –...
- Page 7 o The manufacturer refuses to accept any responsibility for damages arising to the hood or it catching on fire, from a failure to observe the fire safety advice contained in this instruction booklet. o Remember that when in extraction mode, your cooker hood is removing air from your room.
-
Page 8: Specifications Of Your Cooker Hood
Specifications of your cooker hood BECW600SS PRODUCT DIMENSIONS Height: 548 - 1000 mm Width: 600 mm Depth: 500 mm Your cooker hood specifications are: Touch control operation LCD display 2 washable aluminum grease filters 3 speeds (+ boost) 2 LED lights Cut-off timer Grease filter cleaning reminder Perimetre extraction... - Page 9 BECW900SS PRODUCT DIMENSIONS Height: 548 - 1000 mm Width: 900 mm Depth: 500 mm Your cooker hood specifications are: Touch control operation LCD display 3 washable aluminum grease filters 3 speeds (+ boost) 2 LED lights Cut-off timer Grease filter cleaning reminder Perimetre extraction Energy efficiency class: A Extraction or recirculation...
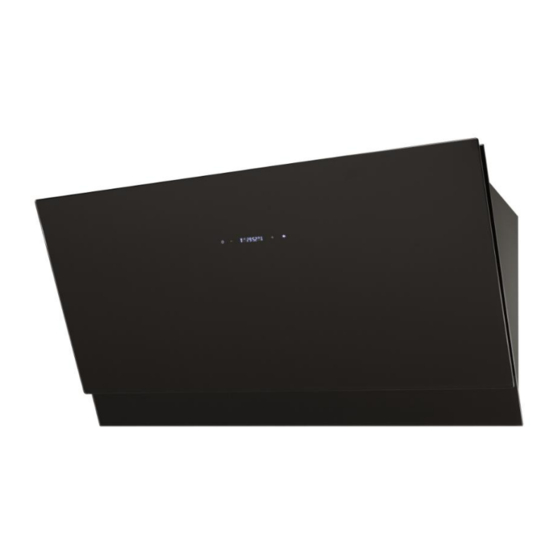
- Page 10 BESW601BGL/WGL PRODUCT DIMENSIONS Height: 585 mm Width: 600 mm Depth: 420 mm Your cooker hood specifications are: Touch control operation LCD display Washable aluminium grease filter 3 speeds (+ boost) 2 LED lights Cut-off timer Grease filter cleaning reminder Perimetre extraction...
- Page 11 BESW901BGL/WGL PRODUCT DIMENSIONS Height: 585 mm Width: 900 mm Depth: 420 mm Your cooker hood specifications are: Touch control operation LCD display Washable aluminium grease filter 3 speeds (+ boost) 2 LED lights Cut-off timer Grease filter cleaning reminder Perimetre extraction Energy efficiency class: A Extraction or recirculation 150 mm with 120 mm adapter...
- Page 12 BESW902BGL PRODUCT DIMENSIONS Height: 585 mm Width: 900 mm Depth: 420 mm Your cooker hood specifications are: Touch control operation LCD display Washable aluminium grease filter 3 speeds (+ boost) 2 LED lights Cut-off timer Grease filter cleaning reminder Perimetre extraction Energy efficiency class: A Extraction or recirculation 150 mm with 120 mm adapter...
-
Page 13: Using Your Cooker Hood
Make sure that it has been installed by a suitably qualified person, information contained Baumatic’s installation instructions. o When you initially connect the cooker hood to the electricity supply, the appliance will enter stand-by mode automatically. o When you connect the cooker hood to the power supply, the cleaning reminder symbol will appear on the LCD display. -
Page 14: Setting The Time Of Day
Setting the time of day o It is not possible to set the time of day when the cleaning reminder symbol is lit. o Whilst the appliance is in stand by mode, press and hold the timer button until it enters time setting mode and the hour digits begin to flash. -
Page 15: Light Control
IMPORTANT: IDEALLY YOU SHOULD TURN ON YOUR HOOD A FEW MINUTES BEFORE YOU START TO COOK, OR AT THE VERY LEAST WHEN YOU BEGIN COOKING. YOU SHOULD ALSO RUN YOUR HOOD FOR TEN MINUTES AFTER YOU HAVE FINISHED COOKING. Light control o Press the light button briefly to switch the hood lights on. -
Page 16: Cleaning Your Baumatic Cooker Hood
Cleaning your Baumatic cooker hood IMPORTANT: BEFORE CLEANING, ALWAYS ENSURE THAT YOU HAVE SWITCHED YOUR COOKER HOOD OMNI-POLAR SWITCH, SET AT THE WALL FROM THE CABLE. Cleaning o Clean the external parts of your cooker hood with mild liquid detergent and a new damp cloth. -
Page 17: Maintenance
Maintenance Removing and cleaning the grease filters o First lift up the cover screen and then remove the grease filters by pulling down on the handle and pulling them away from the cooker hood as shown in the diagram above. o Soak the grease filters in hot water and washing up liquid for at least 3 minutes. -
Page 18: Changing A Light Bulb
Changing a light bulb IMPORTANT: BEFORE ATTEMPTING TO CHANGE A LIGHT BULB, YOU MUST ENSURE THAT YOU HAVE DISCONNECTED THE COOKER HOOD FROM YOUR MAINS SUPPLY. o Prior to touching the light bulbs ensure they are cooled down. o Using a screwdriver, gently prise the edge of the light unit out of the fixture, as shown in the picture below. -
Page 19: Fitting The Carbon Filter
o IMPORTANT: It is not possible to replace the bulbs individually. It will be necessary to obtain the bulbs, bulb holders and wiring complete part. This available from Spares Department. o Fit the replacement light unit and wiring in the reverse order, first by attaching the wires to the connectors, and then by inserting the light unit back into the light fixture. -
Page 20: Installation
o Refit the grease filters. o The carbon filters should be replaced every 3 - 6 months or if they show signs of damage. Installation IMPORTANT: Before installation and usage read all the instructions and make sure that the voltage (V) and the frequency (Hz) indicated on the rating plate are exactly the same as the voltage and frequency in your home. -
Page 21: Before Beginning Installation
o As the colours of the wires in the appliance’s mains lead may not correspond with the coloured markings identifying the terminals in your spur box, please proceed as follows: o The blue wire must be connected to the terminal marked “N” (neutral), or coloured black. -
Page 22: Extraction Mode Or Recirculation Mode
o In addition check whether there is an electrical socket available, which will be accessible after the hood is mounted. If you are going to use the appliance in extractor mode, you should also ensure that there is space to connect a fumes discharge device to the outside. -
Page 23: Installing Your Cooker Hood
Installing your cooker hood o We recommend that at least two people install this hood. IMPORTANT: YOUR COOKER HOOD SHOULD BE CONNECTED TO YOUR MAINS SUPPLY AFTER THE REST OF THE INSTALLATION PROCESS HAS BEEN COMPLETED. When installing hood, ensure that following recommended distances are observed between the highest point on the hob top... - Page 24 2) Open the cover screen and remove the grease filters (as previously described). 3) Position the cooker hood against the wall and mark out the position of the three screw holes in the wall bracket. IMPORTANT: The wall bracket needs to be located at a sufficient height to allow the minimum clearance distance stipulated on page 23.
-
Page 25: Connecting To External Ducting
8) Insert rawl plugs into all of the holes that you have drilled. IMPORTANT: Rawl plugs are provided to secure the hood to most types of walls and ceilings. However a qualified technician must verify the suitability of the materials, in accordance with the type of wall and ceiling. -
Page 26: Fitting The Chimney
Fitting the chimney If you have purchased the BECW600 or BECW900, then you should fit the chimney sections that are supplied with these models. For the sloped cooker hoods, no chimney sections are supplied, however you can purchase the CQ5SS chimney sections as an optional extra. 18) Locate the lower chimney section into the gap at the top of the cooker hood body, with the upper chimney section sitting inside of it. -
Page 27: Completing The Installation
22) Remove the chimney sections from the main body of the cooker hood. 23) Using a drill bit with an 8 mm diametre, make two holes in the wall on the positions that you have marked in step 18 (for the flat bracket). -
Page 28: Troubleshooting
Troubleshooting IMPORTANT: If your cooker hood appears not to be operating properly, before contacting Baumatic Customer Care Department, please refer to the checklist below. My cooker hood will not start. o Check that the hood is connected to the electricity supply o Check that the fan speed control is set correctly. - Page 29 - like plinths, or any installation other than the one specified by Baumatic has been completed. Please refer to the conditions of guarantee that appear on the warranty card that you receive with the appliance.
-
Page 30: Technical Data
Technical Data Domestic Range Hood - Product fiche As per the Commission Delegetated Reguation(EU) Nr 65/2014 Trade mark Baumatic Commercial code BECW600SS Annual Energy Consumption-AEChood 43.5 kWh/a Energy Efficiency Class of the model Fluid Dynamic Efficiency-FDEhood 28.4 Fluid Dynamic Efficiency class... - Page 31 Domestic Range Hood - Product fiche As per the Commission Delegetated Reguation(EU) Nr 65/2014 Trade mark Baumatic Commercial code BECW900SS Annual Energy Consumption-AEChood 43.5 kWh/a Energy Efficiency Class of the model Fluid Dynamic Efficiency-FDEhood 28.4 Fluid Dynamic Efficiency class Light Efficiency-Lehood...
- Page 32 Domestic Range Hood - Product fiche As per the Commission Delegetated Reguation(EU) Nr 65/2014 Trade mark Baumatic BESW601BGL/WGL Commercial code Annual Energy Consumption-AEChood 44.2 kWh/a Energy Efficiency Class of the model Fluid Dynamic Efficiency-FDEhood 28.9 Fluid Dynamic Efficiency class Light Efficiency-Lehood 20.9...
- Page 33 Domestic Range Hood - Product fiche As per the Commission Delegetated Reguation(EU) Nr 65/2014 Trade mark Baumatic BESW901BGL/WGL Commercial code BESW902BGL Annual Energy Consumption-AEChood 44.2 kWh/a Energy Efficiency Class of the model Fluid Dynamic Efficiency-FDEhood 28.9 Fluid Dynamic Efficiency class Light Efficiency-Lehood 19.1...
-
Page 35: Contact Details
Customer Care Telephone 0844 692 3605 Spare Part Telephone 0844 692 3606... - Page 36 Part of the Hoover Group 11 Beacontree Plaza Gillette Way Reading RG2 0BS www.baumatic.co.uk...
Need help?
Do you have a question about the BESW601BGL and is the answer not in the manual?
Questions and answers