Table of Contents
Advertisement
Advertisement
Table of Contents

Subscribe to Our Youtube Channel
Related Manuals for Ozito MCS-355


Summary of Contents for Ozito MCS-355
-
Page 2: Specifications
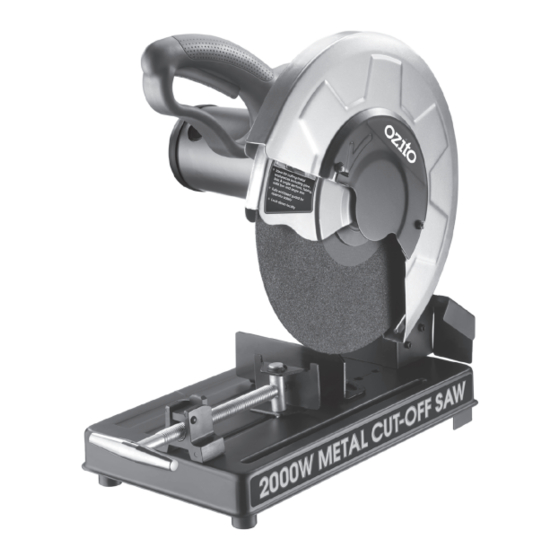
SPECIFICATIONS MODEL NO. MCS-355 Motor size: 2000W Input: 230-240V~50Hz No load speed: 3,000/min Cutting disc max. diameter: 355 x 3mm (14" x Arbour size: 25.4mm Cutting angle capacity: 0 - 45º Left, 0 - 30º Right Maximum cutting capacities: @90º - 100mm, @45º - 70mm... -
Page 3: Table Of Contents
TABLE OF CONTENTS -SPECIFICATIONS ……………………………………….. Page 1 INTRODUCTION………………………………………… Page 3 ELECTRICAL SAFETY…………….……………………… Page 3 GENERAL POWER TOOL SAFETY WARNINGS……… Page 4 ADDITIONAL SAFETY RULES FOR CUT-OFF SAW……. Page 6 OPERATION……………………………………………… Page 8 MAINTENANCE…………….…………………………… Page 14 SPARE PARTS …………….……………………………... Page 15 DESCRIPTION OF SYMBOLS …………………………. -
Page 4: Introduction
We hope you will enjoy using this tool for many years. Your Metal Cut-Off Saw MCS-355 is used for cutting steel such as pipe, box section, rectangular, angle iron and steel bars. The saw can cut at angles from 0 to 45º... -
Page 5: General Power Tool Safety Warnings
GENERAL POWER TOOL SAFETY WARNINGS WARNING! Read all safety warnings and all instructions. Failure to follow the warnings and instructions may result in electric shock, fire and/or serious injury. Save all warnings and instructions for future reference. The term “power tool" in all of the warnings refers to your mains-operated (corded) power tool or battery-operated (cordless) power tool. - Page 6 GENERAL POWER TOOL SAFETY WARNINGS d) Remove any adjusting key or wrench before turning the power tool on. A wrench or a key left attached to a rotating part of the power tool may result in personal injury. e) Do not overreach. Keep proper footing and balance at all times. This enables better control of the power tool in unexpected situations.
-
Page 7: Additional Safety Rules For Cut-Off Saw
ADDITIONAL SAFETY INSTRUCTIONS FOR CUT-OFF SAW This appliance is not intended for use by young or infirm persons unless supervised by a responsible person to ensure that they can use the appliance safely. Young children should be supervised to ensure that they do not play with the appliance. - Page 8 ADDITIONAL SAFETY INSTRUCTIONS FOR CUT-OFF SAW (cont.) Never cut magnesium with this tool. The dust generated when cutting magnesium is highly flammable and may be explosive under certain conditions. Regularly clean the tool's air vents with compressed air. Excessive accumulation of powered metal inside the motor housing may cause electrical failures.
-
Page 9: Operation
OPERATION WARNING! Always ensure that the metal cutting saw is switched off and unplugged from the power supply before making any adjustment. Adjusting the vice WARNING! Ensure the vice securing bolts and vice is firmly tightened before use to prevent the work piece moving and risk of personal injury. The vice (14) can be adjusted quickly by lifting the quick Fig. - Page 10 OPERATION (cont.) Adjusting the fence The original spacing as supplied, is between the vice (14) and the fence (15) is 175mm. When cutting wider materials the rear fence (15) will need to be adjusted to the rear position. When cutting narrow work pieces the fence (15) should be positioned in the most forward position.
- Page 11 OPERATION (cont.) Replacing a cutting disc WARNING! Always ensure that the saw is switched off and unplugged from the power supply before installing or removing a disc. WARNING! Ensure the cutting disc maximum cutting speed is rated higher than the rated speed of the metal cutting saw. Caution: Ensure the depth stop (18) is adjusted to the correct height prior to assembly of the new cutting disc (7) Loosen the wing nut on the blade access cover (5) (Fig.
- Page 12 OPERATION (cont.) Whilst holding the spindle lock button (8) use the Fig. 12 17mm side of the double ended spanner (19) to remove the cutting disc bolt Note: The cutting disc bolt unscrews in an anti- clockwise direction (Fig. 12). Remove the cutting disc bolt and washer (Fig.
- Page 13 OPERATION (cont.) Depth Stop Note: Ensure that the depth stop (18) is adjusted to the correct height before commencing operation. The adjustable depth stop (18) is threaded into the base of the machine at the rear. The travel of the cutting disc (7) can be controlled by raising and lowering the depth stop bolt (18).
- Page 14 OPERATION (cont.) Some helpful tips when using the chop saw • Cutting disc selection. The cutting disc must match the material to be cut. There are a wide variety of cutting discs and careful selection will assist in the correct and safe operation of the saw. For example, select a bar cutting disc for cutting solid metal section and a metal stud cutting disc for cutting steel sections.
-
Page 15: Maintenance
Always replace both carbon brushes at the same time. Note: Ozito Industries will not be responsible for any damage or injuries caused by the repair of the cut-off aw by an unauthorised person or by mishandling of the cut-... -
Page 16: Spare Parts
SPARE PARTS Limited spare parts are available subject to availability. Please contact your local Bunnings Special Orders Desk to order the required spare parts. Most common spare parts listed below Spare Part Part No. Flange Bolt M10 x 20 SPMCS355-43 Main Gear SPMCS355-60 Carbon Brush (Pair) -
Page 17: Pack Contents
Please recycle packaging where facilities exist. Check with your local council authority for recycling advice. PACK CONTENTS 1 x Metal Cut-Off Saw MCS-355 1 x Cutting disc (fitted) 1 x Double ended spanner (17mm & 13mm) 1 x Spare brush (set) -
Page 18: Warranty
PURCHASED FROM: ________________________________________________ DATE PURCHASED: ________________________________________________ 3 YEAR REPLACEMENT WARRANTY Your Ozito tool is guaranteed for a period of 36 months from the original date of purchase and is intended for DIY (Do it yourself) use only. WARNING The following actions will result in the warranty being void.
Need help?
Do you have a question about the MCS-355 and is the answer not in the manual?
Questions and answers