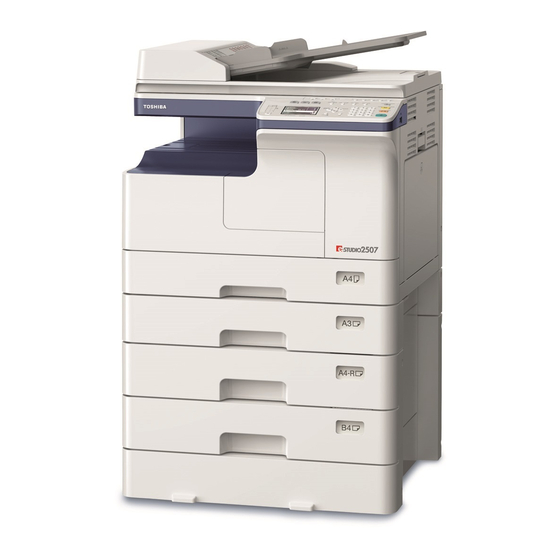
Toshiba e-studio2505f Fax Manual
Hide thumbs Also See for e-studio2505f:
Table of Contents

Advertisement

MULTIFUNCTIONAL DIGITAL SYSTEMS
Fax Guide
(with GD-1330)

Advertisement

Table of Contents
loading

Summary of Contents for Toshiba e-studio2505f

  • Page 1 MULTIFUNCTIONAL DIGITAL SYSTEMS Fax Guide (with GD-1330)
  • Page 2 ©2013 TOSHIBA TEC CORPORATION All rights reserved Under the copyright laws, this manual cannot be reproduced in any form without prior written permission of TTEC.
  • Page 3: Preface

    Preface Thank you for purchasing TOSHIBA Multifunctional Digital Systems. This Fax Guide describes how to use the fax functions, troubleshooting and its maintenance, etc. Be sure to read this manual before using this equipment. Keep this manual handy and retain it for future reference.
  • Page 4: Notice To Users

    Warning: Changes or modification made to this equipment, not expressly approved by Toshiba TEC or parties authorized by Toshiba TEC could void the user’s authority to operate the equipment. WARNING FCC Notice: Part 68 This equipment complies with Part 68 of the FCC rules and the requirements adopted by the ACTA.
  • Page 5 If trouble is experienced with this equipment, for repair or warranty information, please contact Toshiba America Business Solutions Electronic Imaging Division at 1-800-468-6744. If the equipment is causing harm to the telephone network, the telephone company may request that you disconnect the equipment until the problem is resolved.
  • Page 6 CAUTION: Users should not attempt to make such connections themselves, but should contact the appropriate electric inspection authority, or electrician, as appropriate. The Ringer Equivalence Number of your facsimile is 0.2 NOTICE: The Ringer Equivalence Number (REN) assigned to each terminal device provides an indication of the maximum number of terminals allowed to be connected to a telephone interface.
  • Page 7 TOSHIBA OF CANADA LIMITED Office Product Group 191 McNABB STREET MARKHAM, ONTARIO L3R 8H2 For NEW ZEALAND only The grant of a Telepermit for any item of terminal equipment indicates only that Telecom has accepted that the item complies with minimum conditions for connection to the network. It indicates no endorsement of the product by Telecom, nor does it provide any sort of warranty.
  • Page 8: Before Reading This Manual

    Before Reading This Manual  How to read this manual  Symbols in this manual In this manual, some important items are described with the symbols shown below. Be sure to read these items before using this equipment. Indicates a potentially hazardous situation which, if not avoided, could result in death, serious injury, or serious damage, or fire in the equipment or surrounding objects.
  • Page 9  About the defaults shown in this manual  The defaults shown in this manual are the values in the standard operating environment. The values may have been changed from these defaults. The defaults for your model may differ from the defaults shown. ...
  • Page 10: Lineup Of Our Manuals

     Lineup of our manuals These manuals are provided for the operation of the e-STUDIO2505F or e-STUDIO2507 Series. Select and read the manual best suited to your needs. This manual is the Fax Guide.
  • Page 11 Help menu for client software To run the following client software, refer to the Help menu of each:  Printer driver  Scan driver  N/W-Fax driver  To read manuals in the PDF file format This manual in the PDF (Portable Document Format) can be displayed/printed using Adobe Reader or Adobe Acrobat Reader.
  • Page 12: General Precautions

    Products. 3. TOSHIBA TEC CORPORATION shall not be liable for any loss, cost, expense, claim or damage whatsoever caused by any of the following:...
  • Page 13: Table Of Contents

    CONTENTS Preface ..................... 1 Notice to Users................2 Before Reading This Manual............6 General Precautions ..............10 Chapter 1 BEFORE USING FAX Description of Each Component ..........16 Control panel................... 16 Fax screen ..................18 Connecting Cables ............... 19 Chapter 2 SENDING A FAX Basic Procedures................
  • Page 14 Dial list..................... 56 Printing Lists & Reports Automatically ........57 List/Report Samples ..............58 Activity Report (transmission and reception journal)....... 58 Memory Data List (reservation list) ..........58 TX Result Report (memory transmission report)......59 Dial list..................... 60 Chapter 5 SENDING A N/W-FAX Features and Functions ...............
  • Page 15: Contents

    Managing the Address Book ............. 105 Registering or modifying a Speed Dial number ......106 Registering or modifying a Group Dial number ......108 Registering or modifying a One Touch Dial key number....111 Setting SECURE RECEIVE ............113 Chapter 7 TROUBLESHOOTING AND SPECIFICATIONS Troubleshooting................
  • Page 16 CONTENTS...
  • Page 17 BEFORE USING FAX This chapter describes the basics of this equipment you should know before you start using it. Description of Each Component ............16 Control panel........................16 Fax screen ........................18 Connecting Cables................19...
  • Page 18: Chapter 1 Before Using Fax

     Control panel This section describes the buttons on the control panel used for the fax functions. For any details of the control panel not covered in this document, refer to the User’s Guide. e-STUDIO2505F e-STUDIO2507 Series 1. [RESOLUTION] button Use this button to change the scanning resolution.
  • Page 19 1 BEFORE USING FAX 1.BEFORE USING FAX 5. [MULTI] button Use this button to create a manual grouping for multi-address transmission. 6. [ADDRESS BOOK] button Use this button to display the Address Book screen and specify the recipient. 7. [JOB STATUS] button Use this button to view the job status or its history.
  • Page 20: Fax Screen

    1 BEFORE USING FAX  Fax screen When you press the [FAX] button on the control panel, the screen shown below is displayed. :INPUT FAX NUMBER 01/01 12:01 M:100% 100% AUTO EXPOSURE TEXT/PHOTO 1. Message Displays the current status or error messages. 2.
  • Page 21: Connecting Cables

    1 BEFORE USING FAX Connecting Cables Be sure that the power of this equipment is turned OFF before connecting the cables. e-STUDIO2505F e-STUDIO2507 Series 1. LINE Connect a telephone line. 2. TEL Connect an external telephone.  Do not connect this equipment and the external telephone to a telephone outlet in parallel.
  • Page 23: Sending A Fax

    SENDING A FAX This chapter describes how to send a fax. Basic Procedures.................. 22 Setting an original ......................24 Setting the transmission conditions ................31 Specifying the recipient ....................35 Checking and Canceling the Transmissions........43 Checking Transmission Status (log) ................43 Checking and canceling the reserved transmissions.............
  • Page 24: Basic Procedures

    Series Check the original size and scanning range, etc. Place the original(s) on the original glass, ADF (Automatic Document Feeder : Only for e-STUDIO2505F), or RADF (Reversing Automatic Document Feeder : Only for e-STUDIO2507 Series) in the correct direction. (The illustration above shows the original placed on the original glass.)
  • Page 25: Redial Function

    2 SENDING A FAX 2.SENDING A FAX Specify the recipient. :0123456789_ 01/01 12:01 100% M:100% AUTO EXPOSURE TEXT/PHOTO  P.35 “Specifying the recipient” Press [START]. The originals are scanned and the fax, reserved.  If memory becomes full during scanning in the memory transmission mode, that original will not be stored in memory.
  • Page 26: Setting An Original

    Breaking the glass could injure you. Raise the Original Cover, ADF, or RADF, and place the original with its face down on the glass. e-STUDIO2505F e-STUDIO2507 Series Raise it 60 degrees or more to detect the original size with AUTO SIZES function (this function is only available for e-STUDIO2507 Series).
  • Page 27 2 SENDING A FAX 2.SENDING A FAX Align the original against the left inner corner of the glass. e-STUDIO2505F e-STUDIO2507 Series  Different size originals can also be sent in one transmission. The original size is the size that you have set initially. When sending an original of a size larger than the set size, make sure that all contents are scanned and no portions are left out.
  • Page 28 2 SENDING A FAX  Setting originals on ADF This section describes how to set originals on the ADF (Automatic Document Feeder). When the originals are placed on the ADF, the uppermost page is the first to be scanned and sent. After aligning the originals, place them with their face up and slide the guides to rest against the edges of the originals.
  • Page 29 2 SENDING A FAX 2.SENDING A FAX  Setting originals on RADF This section describes how to set originals on the RADF (Reversing Automatic Document Feeder). When the originals are placed on the RADF, the uppermost page is the first to be scanned and sent.
  • Page 30 2 SENDING A FAX Sending same width originals The RADF allows for sending originals of mixed sizes but the same width. Available combinations of the original size are as follows.  A/B format: A3/A4, B4/B5  LT format: LD/LT, LG/LT-R To send same width originals, you need to enable “MIXED SIZE ORIGINAL”...
  • Page 31 2 SENDING A FAX 2.SENDING A FAX  Precautions for using the ADF and RADF Do not use the types of originals 1 to 9 shown below because such originals may cause misfeeding or damage to the equipment. 1. Badly wrinkled, folded or curled originals 2.
  • Page 32 2 SENDING A FAX  Acceptable size of originals This equipment can send a fax of the following originals. You can place 1-sided or 2-sided originals of the media types, such as standard paper, recycled paper and paper with holes (2, 3 or 4 holes) for filing, on the RADF (Reversing Automatic Document Feeder).
  • Page 33: Setting The Transmission Conditions

    2 SENDING A FAX 2.SENDING A FAX  Original scanning range The following figures show the original scanning area. Any information in the shaded area is not printed on the paper. Feed direction 2 mm (0.08 inch) 2 mm (0.08 inch) 2 mm 2 mm (0.08 inch)
  • Page 34: Original Mode

    2 SENDING A FAX  Settings EXPOSURE Set the density at which the original is to be scanned. AUTO: This equipment automatically detects the contrast of the original, and scans it with the optimum density. Manual: Press to set the desired contrast. ORIGINAL MODE Set the scanning mode based on the type of the original.
  • Page 35: Original Size

    The original is scanned at the preset size regardless of its actual size. This item is only available for e-STUDIO2507 Series, and e-STUDIO2505F with the ADF installed. With e-STUDIO2507 Series, if the size of an original placed on the original glass cannot be determined, it is set to LD/A3.
  • Page 36: Mixed Size Original

    2 SENDING A FAX MIXED SIZE ORIGINAL Switch Mixed Size Original ON or OFF. When this mode is set to ON, you can mix originals of different length. The size of the original is automatically determined before the original is scanned.
  • Page 37: Specifying The Recipient

    2 SENDING A FAX 2.SENDING A FAX  Specifying the recipient There are various ways to specify the recipient, such as Direct entry with the control panel and Address Book entry. To use the address book, you need to register recipients’ fax numbers to the book in advance.
  • Page 38: One Touch Key Dialing

     You can confirm the One Touch Dial keys already registered.  P.61 “One Touch Dial key list” Press any one of the One Touch Dial keys (1 to 5). e-STUDIO2505F e-STUDIO2507 Series  Pressing multiple One Touch Dial keys consecutively sets as destination the key pressed last.
  • Page 39 M:100% 100% AUTO EXPOSURE TEXT/PHOTO  Multi-address transmission (Broadcasting) You can specify multiple recipients to send the same document at once. Press [MULTI]. e-STUDIO2505F e-STUDIO2507 Series MULTI 100% INPUT FAX No. OR PRESS ADDRESS BOOK OR ONE TOUCH KEY Specify the recipients.
  • Page 40 2 SENDING A FAX To add a recipient, press MULTI INPUT FAX No :0123456789_ Repeat steps 2 through 4 until all the recipients are specified. The number of recipients you can simultaneously specify is limited to 220.  Select [REVIEW LIST] and then press to confirm/delete the specified recipients.
  • Page 41  It is required to register the address book beforehand.  P.105 “Managing the Address Book”  You can confirm the address book from the dialer list.  P.56 “Dial list” Press [ADDRESS BOOK]. e-STUDIO2505F e-STUDIO2507 Series ADDRESS BOOK SEARCH SPEED DIAL GROUP DIAL Specify the recipient.
  • Page 42: Searching The Recipient In The Address Book

    2 SENDING A FAX Searching the recipient in the address book You can search for a specific recipient in the address book. Press to select [SEARCH], and then press ADDRESS BOOK SEARCH SPEED DIAL GROUP DIAL Press to select the character string to use as the search key. The search keys are displayed in the following order.
  • Page 43: Speed Dial

    2 SENDING A FAX 2.SENDING A FAX Speed Dial You can specify the recipient using a Speed Dial number from 1 to 200.  It is required to register the Speed Dial numbers beforehand.  P.105 “Managing the Address Book” ...
  • Page 44: Group Entry

    2 SENDING A FAX Group entry You can specify the group to which you want to send a fax from the address book.  It is required to register the groups beforehand.  P.105 “Managing the Address Book”  You can confirm the registration of groups from the Group number list. ...
  • Page 45: Checking And Canceling The Transmissions

    2 SENDING A FAX Checking and Canceling the Transmissions  Checking Transmission Status (log) Check the fax transmission log from the Transmission/Reception Journal. For details, see the following page.  P.58 “Activity Report (transmission and reception journal)”  Checking and canceling the reserved transmissions Press [JOB STATUS].
  • Page 46: Canceling Transmission When An Original Is Being Scanned

    2 SENDING A FAX Press to select the row to confirm. COMFIRM 100% 0001 ABC_FAX 0005 02345678 0006 MULTI The transmission status is listed in the reverse chronological order from top to bottom. Press to display the transmission status. 0001 ABC_FAX 100% 20130324 13:15 TRANSMISSION...
  • Page 47 RECEIVING A FAX This chapter describes how to receive a fax. Reception Mode ..................46 AUTO reception ......................46 Checking Reception Status (log)..................46 Originals and Paper ................47 Acceptable size of paper....................47 Default setting for RX printing ..................47 Paper priority when there is no same size paper............
  • Page 48: Chapter 3 Receiving A Fax

    3 RECEIVING A FAX Reception Mode This section describes how to receive a fax. Refer to the appropriate section for your current reception mode.  AUTO reception Faxes are automatically received during an incoming call. There is no need do not have to do anything when receiving a fax.
  • Page 49: Originals And Paper

    LD, LG, LT, LT-R, ST-R, COMP, A3, A4, A4-R, A5-R, B4, B5, B5-R, FOLIO, 8K, 16K, and 16K-R size paper can be used. Acceptable sizes of paper are different between e-STUDIO2505F and e-STUDIO2507 Series. See the following page for details.
  • Page 50: Paper Priority When There Is No Same Size Paper

    Ledger Ledger Ledger Ledger Acceptable sizes of paper are different between e-STUDIO2505F and e-STUDIO2507 Series. See the following page for details.  P.120 “Specifications of Fax”  When the corresponding paper size is not available, in most cases, the scanned original is printed on paper of a larger size.
  • Page 51 Reduced to 75% Reduced to 75% Reduced to 75% Acceptable sizes of paper are different between e-STUDIO2505F and e-STUDIO2507 Series. See the following page for details.  P.120 “Specifications of Fax”  When the corresponding paper size is not available, in most cases, the scanned original is printed on paper of a larger size.
  • Page 52: Setting A Fax Drawer

    3 RECEIVING A FAX  Setting a Fax drawer A drawer exclusive for fax can be set for Fax reception. In this setting, only the paper in the Fax drawer is used for printing received data. When the incoming original is larger than the recording paper, it is printed according to the setting of "RXPRINT - REDUCTION"...
  • Page 53: Printing Secure Receive Fax Jobs

    3 RECEIVING A FAX Printing SECURE RECEIVE Fax Jobs When the [Fax] button on the control panel blinks, there is a received SECURE RECEIVE fax job. You can print the fax data by entering your PRINT PASSWORD.  P.16 “Control panel” Press [JOB STATUS].
  • Page 55 PRINTING LISTS AND REPORTS This chapter explains how to print lists and reports. Printing Lists & Reports Manually............54 Journal (transmission and reception journal) ..............54 Reservation list ......................55 Dial list ........................... 56 Printing Lists & Reports Automatically..........57 List/Report Samples ................
  • Page 56: Chapter 4 Printing Lists And Reports

    4 PRINTING LISTS AND REPORTS Printing Lists & Reports Manually You can print lists and reports (journals) manually. For samples of lists and reports, see the following page.  P.58 “List/Report Samples”  Lists and reports are printed on LT/A4-size paper. If this equipment has run out of LT/ A4-size paper, lists and reports will be printed on larger sized paper.
  • Page 57: Reservation List

    4 PRINTING LISTS AND REPORTS 4.PRINTING LISTS AND REPORTS  Reservation list You can print a list of the reserved transmissions. Press [JOB STATUS]. JOB STATUS JOBS SECURE RX RESERVATION LIST Press to select [RESERVATION LIST]. JOB STATUS JOBS SECURE RX RESERVATION LIST Press [OK] to start printing.
  • Page 58: Dial List

    4 PRINTING LISTS AND REPORTS  Dial list You can print the list of Speed Dial numbers, Group Dial numbers, and One Touch Dial key numbers that are registered in the Address Book. Press [USER FUNCTIONS]. USER FUNCTIONS GENERAL COPY SCAN Press to select [LIST], and then press...
  • Page 59: Printing Lists & Reports Automatically

    4 PRINTING LISTS AND REPORTS Printing Lists & Reports Automatically You can print lists and reports automatically. For samples of lists and reports, see the following page.  P.58 “List/Report Samples”  Lists and reports are automatically printed according to the settings that the administrator made, so no user operation is required.
  • Page 60: List/Report Samples

    4 PRINTING LISTS AND REPORTS List/Report Samples  Activity Report (transmission and reception journal) Sender’s Fax number Terminal ID Outputting date and time Page Number Activity Report Page Date 2013/04/14 20:05 Name Aaabbb L.A. Fax Number 2131235678 File No. Date Time Duration Pages...
  • Page 61: Tx Result Report (Memory Transmission Report)

    4 PRINTING LISTS AND REPORTS 4.PRINTING LISTS AND REPORTS  TX Result Report (memory transmission report) TX Result Report Page Date 2013/04/14 20:05 Name Aaabbb L.A. Fax Number 0131235678 File No. Date Time Pages Destination Unsent Status 0001 04/14 16:59 12345678901234567890 ABCD 17:33...
  • Page 62: Dial List

    4 PRINTING LISTS AND REPORTS  Dial list  Speed Dial number list Speed Dial List Page Date 2013/5/15 11:48 Name ABCDEFGHI Fax Number 01234567890 Speed Dial No. Name Number / Address ABCDEFGHIJKLMNOPQRST 0P00*1234567890 01234567 1234QRST 03456789012345 ZZXX@aaa.bbb.ccc 01234567890123 3F-MFP 012345678901234 4F-MFP 0123456789012345...
  • Page 63 4 PRINTING LISTS AND REPORTS 4.PRINTING LISTS AND REPORTS  One Touch Dial key list One Touch Dial List Page Date 2013/5/15 11:48 Name ABCDEFGHI Fax Number 01234567890 One Touch No. Name Number ABCDEFGHIJKLMNOPQRST 0P00*1234567890 01234567 1234QRST 03456789012345 OneTouch4 01234567890123 Recipient's Fax/telephone number One Touch Dial key number Recipient's terminal ID or type of registration...
  • Page 65: Sending A N/W-Fax

    SENDING A N/W-FAX This chapter describes the Network Fax function. Features and Functions................ 64 Features......................... 64 Functions ........................64 Faxing from Applications ..............65 How to fax using the N/W-Fax driver ................65 Specifying recipients ...................... 68 Setting up the network fax options................. 72 Sending with extended fax functionality.................
  • Page 66: Features And Functions

    The N/W-Fax driver allows you to make fax transmission of documents created in your computer. In a normal procedure, select the [Print] menu in the application in which the documents were created, select this driver (TOSHIBA e-STUDIO2507Series Fax), and then start printing. The documents are then transmitted to this equipment. This equipment then transmits the documents to outside fax machines through public switched telephone networks.
  • Page 67: Faxing From Applications

    5 SENDING A N/W-FAX Faxing from Applications The N/W-Fax driver allows you to fax document data from your computer to several destinations. It also enables the setup of the fax properties and editing of the sender’s information.  P.65 “How to fax using the N/W-Fax driver” ...
  • Page 68 5 SENDING A N/W-FAX Select [TOSHIBA e-STUDIO2507Series Fax] and click [Print]. The [Destination Tool] dialog box appears. Display the [Address Book] tab and specify the recipients.  P.68 “Specifying recipients” Faxing from Applications...
  • Page 69 5 SENDING A N/W-FAX 5.SENDING A N/W-FAX Display the [Cover Sheet] tab and specify the cover sheet properties if you want to send a document with a fax cover sheet.  P.74 “Setting up the cover sheet properties” Click [Send] to send the document. Faxing from Applications...
  • Page 70: Specifying Recipients

    5 SENDING A N/W-FAX  Specifying recipients You can specify the recipients using the following methods:  P.68 “Specifying recipients from address book”  P.70 “Entering a fax number manually” Also you can remove the recipients added to the [List of Destination] field. ...
  • Page 71 5 SENDING A N/W-FAX 5.SENDING A N/W-FAX After selecting a contact from the contact list, click [Set as Destination]. The selected recipients are listed in the [List of Destination] field. You can also select a recipient by the following operations: Selecting a contact by double-clicking on it Double click the contact in the contact list to include it in the [List of Destination] field.
  • Page 72 5 SENDING A N/W-FAX  Entering a fax number manually Enter a fax number in the [Fax Number] field and then click [Set as Destination]. The entered fax number is added to the [List of Destination] list.  You can enter up to 128 numbers and symbols in the [Fax Number] field. Symbols you can use are “T”, “*”, “#”, and “-”.
  • Page 73 5 SENDING A N/W-FAX 5.SENDING A N/W-FAX  Removing recipients from the [List of Destination] field Select the recipient you want to remove from the [List of Destination] field, and then click [Delete from List]. The selected recipient is removed from the [List of Destination]. Faxing from Applications...
  • Page 74: Setting Up The Network Fax Options

    5 SENDING A N/W-FAX  Setting up the network fax options Network fax options are the attributes you set to define the way a fax job is transmitted. For example, you can specify such as the recipients and cover sheet. ...
  • Page 75 5 SENDING A N/W-FAX 5.SENDING A N/W-FAX 2) [Edit Address Book] Click to open the Edit Address Book window. 3) [Set as Destination] Click to add a recipient or fax number to the [List of Destination] field. 4) [Delete from List] Select a recipient in the [List of Destination] field and click this button to remove the recipient from the list.
  • Page 76: Setting Up The Cover Sheet Properties

    5 SENDING A N/W-FAX  Setting up the cover sheet properties In the [Cover Sheet] tab of the network fax properties dialog box, you can specify the fax cover sheet to be sent. If you enable the cover sheet, the cover sheet is attached in the first page of the document and sent to the recipients.
  • Page 77: Sending With Extended Fax Functionality

    5 SENDING A N/W-FAX 5.SENDING A N/W-FAX  Sending with extended fax functionality The N/W-Fax driver allows users to perform the following operations.  P.75 “Sending with a cover sheet”  P.77 “Setting up the fax driver options”  Sending with a cover sheet You can choose to send a cover sheet with your fax transmission.
  • Page 78 5 SENDING A N/W-FAX Enter the sender information in the [Sender Information] fields if [Sender Information] box is checked. You can enter up to 64 characters in each field. Enter the message to appear on the cover sheet if the [With a Message] box is checked.
  • Page 79 [Printing Preferences] from a shortcut menu.  When using Windows XP / Windows Vista / Windows Server 2003 / Windows Server 2008, select [TOSHIBA e-STUDIO2507Series Fax], click the [File] menu and then select [Printing Preferences].  If [File] menu is not displayed, press [Alt].
  • Page 80: Managing Address Book

    5 SENDING A N/W-FAX Managing Address Book You can add or edit the contacts and groups in the address book as you desire. The address book data is stored in your client computer. It can be used to manage the contacts and groups for sending a fax using the N/W-Fax driver.
  • Page 81 5 SENDING A N/W-FAX 5.SENDING A N/W-FAX Opening the address book from a CSV file Click [New/Open]. The [Open] dialog box appears. Locate the folder where the CSV file is stored, and select the file type in the [Files of types] box. Then select the file and click [Open]. You can enter the name of the file in "File name"...
  • Page 82 5 SENDING A N/W-FAX The address book data is opened and contact names are displayed in the Contact list. Up to three most recently opened address books are listed in the [Address Book] box. Managing Address Book...
  • Page 83: Managing Contacts And Groups

    5 SENDING A N/W-FAX 5.SENDING A N/W-FAX  Managing contacts and groups You can manage contacts or groups in an address book. The address book allows you to register up to 150 contacts and sort them into groups arbitrarily created. You can create up to 10 groups per address book and register up to 100 contacts in each group.
  • Page 84 5 SENDING A N/W-FAX Click “<<New>>” in [Contact Name] field and enter contact details in [Contact Name] and [Fax Number].  You can enter up to 20 characters in the [Contact Name] field.  You can not use “,” in the [Contact Name] field. ...
  • Page 85 5 SENDING A N/W-FAX 5.SENDING A N/W-FAX Click [Add]. The contact is added to the address book. If you want to edit information on existing contact, click [Update] after editing the information in the Destination Information field. Managing Address Book...
  • Page 86 5 SENDING A N/W-FAX Removing a contact from address book You can remove contacts from an address book. Open the address book that contains the contact you want to remove. Select the contact you want to remove in the [Contact Name] field and click [Delete].
  • Page 87: Managing Groups

    5 SENDING A N/W-FAX 5.SENDING A N/W-FAX  Managing groups You can add groups to an address book. Groups can be used for multi-address transmission.  P.85 “Creating groups” Also you can modify or delete groups in the address book. ...
  • Page 88 5 SENDING A N/W-FAX Click [New]. The New Group dialog box appears. Enter a group name in the [Group Name] field.  You can enter up to 20 characters in the [Group Name] field.  You can not use “,” and “|” as a group name. Click [OK].
  • Page 89 5 SENDING A N/W-FAX 5.SENDING A N/W-FAX Modifying a group name You can change the group name of groups in the address book. Properties cannot be modified when they have been opened from the address book. Select the group whose name you want to modify from the [Group List] field.
  • Page 90 5 SENDING A N/W-FAX Removing group You can delete groups in the address book. When you delete a group, contacts registered in the group are also deleted. Select the group that you want to remove from the [Group List] field. Click [Delete].
  • Page 91: Cover Sheet Samples

    5 SENDING A N/W-FAX Cover Sheet Samples  Standard cover page Reference Number: 0000000000000000 00000000001 From: MFP-00C67861 Subject: N/W-Fax Document Message: This is a N/W-Fax Document. Cover Sheet Samples...
  • Page 92: Business Cover Page

    5 SENDING A N/W-FAX  Business cover page Reference Number: 0000000000000000 00000000001 From: MFP-00C67861 Subject: N/W-Fax Document Message: This is a N/W-Fax Document. Cover Sheet Samples...
  • Page 93: Professional Cover Page

    5 SENDING A N/W-FAX 5.SENDING A N/W-FAX  Professional cover page Reference Number: 0000000000000000 00000000001 From: MFP-00C67861 Subject: N/W-Fax Document Message: This is a N/W-Fax Document. Cover Sheet Samples...
  • Page 95: Setting Items

    SETTING ITEMS This chapter describes the user and administrator settings related to the fax function. Operating the USER FUNCTIONS Menu ..........94 Character Entry ..................96 Switching the input mode....................96 Entering characters......................96 Relationship between the digital keys and the input character ........97 User Functions Menu Items ..............
  • Page 96: Operating The User Functions Menu

    6 SETTING ITEMS Operating the USER FUNCTIONS Menu If you press [USER FUNCTIONS], you can specify default settings and make settings concerning the address book. Follow the procedure below to operate the USER FUNCTIONS menu.  Press [FUNCTION CLEAR] to cancel the menu operation while making settings. ...
  • Page 97 6 SETTING ITEMS 6.SETTING ITEMS Press to select the value to set. DISCARD Press [OK] to confirm the set value. Operating the USER FUNCTIONS Menu...
  • Page 98: Character Entry

    6 SETTING ITEMS Character Entry The Character Entry screen is for entering characters when you are setting and entering items. You can enter the following: Alphabet characters, numbers and symbols. Enter the characters using the digital keys and , or , after switching the type of the character with the [ ] digital key.
  • Page 99: Relationship Between The Digital Keys And The Input Character

    6 SETTING ITEMS 6.SETTING ITEMS Similarly, you can enter the following characters using the digital keys. SINGLE ENTER NAME(MAX20) Chicago After you have entered the last character, Press [OK]. Press [CLEAR/STOP] to delete an alphanumeric character.  Relationship between the digital keys and the input character The character entered by each digital key differs depending on the input mode.
  • Page 100: User Functions Menu Items

    6 SETTING ITEMS User Functions Menu Items The table below shows the functions and reference pages available in the “User Functions” menu.  User functions menu items Menu Functions Reference Pages TERMINAL ID ID NAME  P.99 “FAX” FAX NUMBER INITIAL SETUP RESOLUTION ORIGINAL MODE...
  • Page 101: Fax

    6 SETTING ITEMS 6.SETTING ITEMS  FAX Menu Functions Settings Descriptions / Reference Pages TERMINAL ID ID NAME  P.103 “Registering the Terminal ID” FAX NUMBER INITIAL RESOLUTION STANDARD, FINE, Sets the resolution based on the fineness SETUP ULTRA FINE of the original.
  • Page 102 6 SETTING ITEMS Menu Functions Settings Descriptions / Reference Pages INITIAL ON, OFF Switch the ECM (Error Correction Mode) SETUP communication ON or OFF. ECM is an internationally standardized communication mode that automatically corrects errors that occur during fax transmissions. With this setting option ON, even when the transmitted data have been affected by noise during communication, this mode allows good...
  • Page 103 6 SETTING ITEMS 6.SETTING ITEMS Menu Functions Settings Descriptions / Reference Pages INITIAL DIAL TYPE DP, MF When you first install this equipment or SETUP you change the connected telephone line, set this according to the telephone line type. Setting this item may not be required since it may not be displayed on the screen (it depends on your country or region).
  • Page 104: Report Setting

    6 SETTING ITEMS  REPORT SETTING Menu Functions Settings Descriptions / Reference Pages AUTO JOURNAL When the number of transmissions and receptions reaches 60, the Transmission/Reception Journal is printed automatically. The Transmission/Reception Journal is not printed automatically. MEMORY TX Press this button to disable printing of MULTI TX communication report.
  • Page 105: Registering The Terminal Id

    6 SETTING ITEMS Registering the Terminal ID This section describes how to register the terminal ID of this equipment. If the terminal ID is registered in advance, sender information can be printed on the leading edge of the transmitted original, and receiver information on the trailing edge of the received fax. From the USER FUNCTIONS menu, select [FAX] ...
  • Page 106 6 SETTING ITEMS Example of how sender information is printed on paper The sender information is printed at the top of the original. 2013/12/20 15:08 1234567890 FROM-AABBCC #0001 P001/006 File number Date sent Number of pages Sender’s Fax number Sender's terminal ID (automatically attached) Pages sent/Total pages Example of how receiver information is printed on originals you receive...
  • Page 107: Managing The Address Book

    6 SETTING ITEMS Managing the Address Book Register the Speed Dial numbers, Group dial numbers, and One Touch Dial key numbers in the address book. The recipients registered in the address book are displayed as a list of recipients when [Address Book] is pressed.
  • Page 108: Registering Or Modifying A Speed Dial Number

    6 SETTING ITEMS  Registering or modifying a Speed Dial number You can register a combined total of 200 Speed Dial numbers between telephone numbers and e-mail addresses. This information is stored into Speed Dial numbers labeled from 001 to 200. ...
  • Page 109 6 SETTING ITEMS 6.SETTING ITEMS Enter the name (up to 20 characters) using the digital keys, and then press [OK].  P.96 “Character Entry” SPEED DIAL ENTER NAME(MAX20) XX company_ Press to select [FAX NUMBER], and then press SPEED DIAL COMPLETE NAME FAX NUMBER...
  • Page 110: Registering Or Modifying A Group Dial Number

    6 SETTING ITEMS  Registering or modifying a Group Dial number Register the recipients to whom an original is to be sent at once as a group.  Specify the recipients to be registered in the group from among those registered under speed dial and one touch dial.
  • Page 111 6 SETTING ITEMS 6.SETTING ITEMS Enter the name (up to 20 characters) using the digital keys, and then press [OK].  P.96 “Character Entry” GROUP DIAL ENTER NAME(MAX20) Group B2 Press to select [FAX NUMBER], and then press GROUP DIAL COMPLETE NAME FAX NUMBER...
  • Page 112 6 SETTING ITEMS To add the next number, select [ADD] using , and then press GROUP DIAL REVIEW LIST COMPLETE Repeat steps 5 and 6 as many times as needed. To confirm/delete a recipient registered in the Group Dial number, press select [REVIEW LIST], and then press ...
  • Page 113: Registering Or Modifying A One Touch Dial Key Number

    6 SETTING ITEMS 6.SETTING ITEMS  Registering or modifying a One Touch Dial key number You can register up to five telephone numbers for One Touch dialing.  You can also register the One Touch Dial key numbers by using the Web-based utility TopAccess.
  • Page 114 6 SETTING ITEMS Enter the name (up to 20 characters) using the digital keys, and then press [OK].  P.96 “Character Entry” ONE TOUCH ENTER NAME(MAX20) 4F-MFP_ Press to select [FAX NUMBER], and then press ONE TOUCH COMPLETE NAME FAX NUMBER Enter the telephone number (up to 50 digits) using the digital keys, and then press [OK].
  • Page 115: Setting Secure Receive

    6 SETTING ITEMS Setting SECURE RECEIVE The SECURE RECEIVE function allows you to store received fax jobs in the equipment without printing them. With this function, you can prevent the leaking of confidential information in a fax received when no people are present in your office, such as nighttime or holidays, or when an unspecified number of people visit your office.
  • Page 117 TROUBLESHOOTING AND SPECIFICATIONS This chapter describes troubleshooting and specifications of Fax. Troubleshooting .................. 116 Error messages......................116 Transmission/reception trouble ..................118 Specifications of Fax ................120...
  • Page 118: Troubleshooting

    7 TROUBLESHOOTING AND SPECIFICATIONS Troubleshooting  Error messages When the following messages appear on the LCD screen, press the [FUNCTION CLEAR] button to clear the error message and perform the appropriate remedy for the error. If you encounter an error code not listed here, see the User’s Guide. Never attempt to repair, disassemble or modify the equipment by yourself.
  • Page 119 7 TROUBLESHOOTING AND SPECIFICATIONS Message Cause Remedy FAX ERROR xxxx A communication error occurred Send or receive again. during transmission/reception. PUT ORIGINAL ON Original detected in ADF/RADF feed Remove original from ADF/RADF GLASS. tray when "NEXT ORIGINAL?" was feed tray. displayed.
  • Page 120: Transmission/Reception Trouble

    7 TROUBLESHOOTING AND SPECIFICATIONS  Transmission/reception trouble Below is a list of trouble you might encounter during the transmission/reception. Transmission troubles Trouble Check Point TRANSMIT is not displayed even if the  Is the modular cord disconnected? [START] button is pressed. ...
  • Page 121 7 TROUBLESHOOTING AND SPECIFICATIONS 7.TROUBLESHOOTING AND SPECIFICATIONS Reception troubles Trouble Check Point Originals cannot be received even if  Is the modular cord disconnected? the [START] button is pressed.  Is there a problem at the sender's Fax? Check this with the party trying to send the original.
  • Page 122: Specifications Of Fax

    Applicable Network Public Switched Telephone Network (PSTN) With e-STUDIO2505F, originals of this size can be scanned only by using the ADF. Only for e-STUDIO2507 Series. When the total time that the power is turned off for 8 hours a day becomes about 5 years, the battery will expire.
  • Page 123: Index

    INDEX [FUNCTION CLEAR] button ......17 address book ..........72 Address Book box ........73 Group Name ........86, 87 [ADDRESS BOOK] button ......17 ADF (Automatic Document Feeder) ..22, 26 Alarm lamp ..........17 [JOB STATUS] button ........17 AUTO JOURNAL ........102 Journal ............54 Business cover page .........
  • Page 124 Professional cover page ......91 [UP/DOWN/LEFT/RIGHT] buttons .....17 [USER FUNCTIONS] button ......16 QUALITY TX ..........32 With a Message ........74, 76 RADF (Reversing Automatic Document Feeder) ............22, 27 Receiver information ....... 103, 104 Receiving AUTO reception ........46 Memory reception ........46 Remote reception ........
  • Page 125 Printed in China DP-2505F DP-2007/2307/2507 (with GD-1330) OME12023100...
  • Page 126 MULTIFUNCTIONAL DIGITAL SYSTEMS Fax Guide (with GD-1330) 1-11-1, OSAKI, SHINAGAWA-KU, TOKYO, 141-8562, JAPAN 6LJ82255000 R120620M0100-TTEC ©2013 TOSHIBA TEC CORPORATION All rights reserved Ver00 F3 2013-05...

Table of Contents