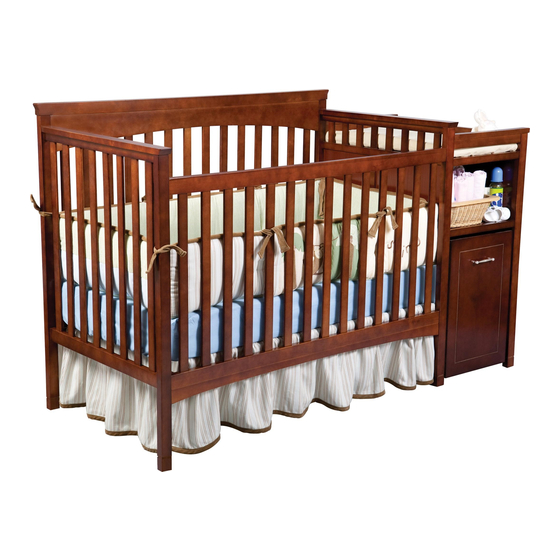
Summary of Contents for Delta pandora
- Page 9 Step 1 Hamper Assembly Parts & Hardware Needed: (S) Hamper (x1) (ff) (Y) Hamper Handle (x1) Screwdriver (ff) Handle Screw (x2) HARDWARE SHOWN AT Continue to Step 2... ACTUAL SIZE...
- Page 10 Step 2 Hamper Assembly - continued Parts & Hardware Needed: Bottom Panel (x1) Screwdriver (ee) Hamper Screw (x1) (ee) HARDWARE SHOWN AT ACTUAL SIZE Continue to Step 3...
- Page 11 Step 3 Hamper Assembly - continued Parts & Hardware Assembly using four (4) Hamper Screws (ee). Needed: Side (x1) (ee) Screwdriver (ee) Hamper Screw (x4) HARDWARE SHOWN AT ACTUAL SIZE Continue to Step 4...
- Page 12 Step 4 Hamper Assembly - continued Parts & Hardware Attach Hamper Left Side (T) to the Hamper Assembly using four (4) Hamper Screws (ee). Needed: Hamper Left Side (x1) (ee) Screwdriver (ee) Hamper Screw (x4) HARDWARE SHOWN AT ACTUAL SIZE Continue to Step 5...
- Page 13 Step 5 Hamper Assembly - continued Parts & Hardware Assembly Needed: right. (x1) (ee) Screwdriver (ee) Hamper Screw (x9) HARDWARE SHOWN AT (ee) ACTUAL SIZE Continue to Step 6...
- Page 14 Step 6 Hamper Assembly - continued Parts & Hardware Needed: Hamper Liner (Z) into the Hamper Assembly. Hamper (X) Hamper (x4) Liner (x1) rench Bottom View Continue to Step 7...
- Page 17 Step 9 Dresser Assembly - continued Parts & Hardware Assembly (D) to Dresser Needed: Bolt (gg) as shown. Dresser Assembly complete. Assembly (x1) (dd) (dd) (dd) “L” Allen rench (dd) (gg) (gg) (x1) (dd) (x4) HARDWARE SHOWN AT ACTUAL SIZE Continue to Step 10...
- Page 18 Step 10 Crib Assembly Parts & Hardware Needed: ( A) Side (x1) (dd) Left Side (x1) (dd) “L” Allen rench (dd) (x2) HARDWARE SHOWN AT ACTUAL SIZE Continue to Step 11...
- Page 19 Assembly - continued Parts & Hardware Needed: Assembly to the Dresser “L” Bolts (dd). Allen rench (dd) (x2) L SIZE (dd) (dd) Continue to Step 12...
- Page 21 Step 13 Crib Assembly - continued Parts & Hardware Needed: Bolts (cc) and two (2) Barrel Nuts (bb) as shown. Side (x1) (dd) “L” Allen rench (dd) Screwdriver (cc) (bb) Barrel Nuts (x2) (dd) (cc) (dd) (dd) (dd) (bb) (cc) (bb) (cc) Continue to Step 14...
- Page 22 Step 14 Crib Assembly - continued Parts & Hardware Needed: (aa) (x2) (aa) (cc) as shown. Screwdriver NOTE: Tighten all clip screws to hold Shelves in place. Continue to Step 15...
- Page 23 Step 15 Crib Assembly - continued Parts & Hardware Important: If changing pad and safety belt are already assembled, make sure warnings are facing up and Needed: visible. If not, reassemble them. Top. Insert safety belt through slit in changing pad from back of pad. .
- Page 24 Assembly Parts & Hardware set aside for later use. Needed: Assembly insert (aa) (x16) top illustration. (aa) Insert - Hamper (x2) er both ’ complete. Tighten all clip screws to hold Shelves in place TANT: used to prevent damage and allow reuse.
- Page 25 Warranty: Your Delta Baby Gear is warranted to be free from defects for a period of 90 days from the date of purchase under normal use. This warranty extends only to the original retail purchaser and is only valid when supplied with proof of purchase, or if received as a gift, when the registration is on file with Delta.
- Page 27 Step 19 Toddler Bed and Daybed Assembly Parts & Hardware Needed: THE ST A GAP AND THE BED THAT...
- Page 28 Assembly Parts & Hardware Needed: Screwdriver removed in order to complete step 24. Shelf Inserts (N) as shown. Loosen all clip screws to remove Shelves. Side Assembly (D) back leg as shown.
- Page 29 Step 21 Full Size Bed Assembly - continued Parts & Hardware Assembly as shown. Needed: “L” Allen rench...
- Page 30 Assembly - continued Parts & Hardware Needed: (E) Extra Assembly (D). Bolt (x1) (dd) “L” Allen rench Bolt (dd) Bolt (dd) Assembly using the four previously. Bolt (dd)
- Page 31 Assembly - continued Parts & Hardware Needed: Stationary Side (A) as shown. “L” Allen rench Bolt Bolt (dd) (dd)


Need help?
Do you have a question about the pandora and is the answer not in the manual?
Questions and answers