Advertisement
Advertisement
Table of Contents

Related Manuals for Delta 25001 TBV1


Summary of Contents for Delta 25001 TBV1
- Page 1 TRAVEL BASSINET Model # 25001 TBV1...
-
Page 2: Care And Maintenance
NEVER use this product if there are any loose or missing fasteners, loose joints, broken parts, or torn mesh/fabric. Check before assembly and periodically during use. Contact Delta Children’s Product Costumer Service Department at 212-645-9033 (8:00am ~ 4:30pm PST) for replacement parts, repair or instructions. - Page 3 Parts IMPORTANT! Please remove all parts from the package and identify them before assembly. Canopy Bassinet Mattress Pad Storage Basket Mattress Support Frame Wheels (X4) Bow (X2) Ribbon Customer Service www.DeltaChildrensProducts.com Tel. (212) 645-9033...
- Page 4 To Open Frame • Turn frame over and locate wheel holes on the bottom of the frame legs. • To attach wheels, insert wheels fully into legs, repeat on all four leg frames. • Test to make sure all wheels are fully secure by pulling outward. •...
- Page 5 Assemble Bassinet • Snap all 6 female fabric button snaps onto the corresponding male button snaps on the mattress board. • Once all buttons are fully snapped in place, pull upward on fabric around button snaps to be sure all are securely fastened. •...
- Page 6 Bassinet Assembly • Snap clips into the locked position onto the frame. • Once in place, rotate plastic latch locks until they are in a fully locked position. • Align clips under the bassinet body with the top of the frame. •...
- Page 7 To Attach Hood Frame Canopy Ratchet • Pull bottom back side of canopy over the bassinet top rail. • Position the canopy over the top end of the bassinet opposite the warning label. • Open the hook and loop fasteners on the liner and push aside foam to expose metal.
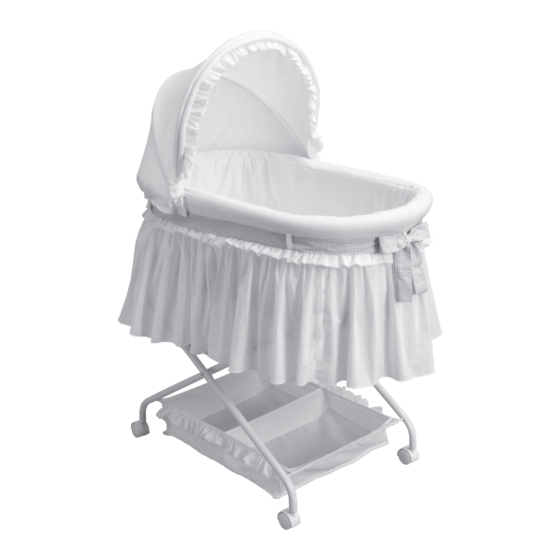
- Page 8 Attaching the Bow and Ribbon loops • To attach ribbon, pull the ribbon through the 6 loops around the bassinet bumber. • Fasten hook and loop patches at ribbon end. • This illustration represents your fully assembled bassinet. Manufactured for Customer Service and distributed by: Tel.
Need help?
Do you have a question about the 25001 TBV1 and is the answer not in the manual?
Questions and answers