Sign In
Upload
Download
Table of Contents
Contents
Add to my manuals
Delete from my manuals
Share
URL of this page:
HTML Link:
Bookmark this page
Add
Manual will be automatically added to "My Manuals"
Print this page
×
Bookmark added
×
Added to my manuals
Manuals
Brands
Epson Manuals
Printer
AcuLaser M2000D
Service manual
Epson AcuLaser M2000D Service Manual
A4 monochrome laser printer
Hide thumbs
Also See for AcuLaser M2000D
:
Specifications
(2 pages)
1
2
3
4
5
6
7
8
9
10
11
12
13
14
15
16
17
18
19
20
21
22
23
24
25
26
27
28
29
30
31
32
33
34
35
36
37
38
39
40
41
42
43
44
45
46
47
48
49
50
51
52
53
54
55
56
57
58
59
60
61
62
63
64
65
66
67
68
69
70
71
72
73
74
75
76
77
78
79
80
81
82
83
84
85
86
87
88
89
90
91
92
93
94
95
96
97
98
99
100
101
102
103
104
105
106
107
108
109
110
111
112
113
114
115
116
117
118
119
120
121
122
123
124
125
126
127
128
129
130
131
132
133
134
135
136
137
138
139
140
141
142
143
144
145
146
147
148
149
150
151
152
153
154
155
156
157
158
159
160
161
162
163
164
165
166
167
168
169
170
171
172
173
174
175
176
177
178
179
180
181
182
183
184
185
186
187
188
189
190
191
192
193
194
195
196
197
198
199
200
201
202
203
204
205
206
207
208
209
210
211
212
213
214
215
216
217
218
219
220
221
222
223
224
225
226
227
228
Table Of Contents
229
page
of
229
Go
/
229
Contents
Table of Contents
Troubleshooting
Bookmarks
Table of Contents
Service Manual
Manual Configuration
Symbols Used in this Manual
Safety
Safety System Wiring Schematic
Laser Beam
Laser Opening Location
Prohibited Matters
Revision History
Table of Contents
Product Description
Product Specifications
Basic Specifications
Product View and Parts Identification
Dimensions and Weight
Installation Space Requirements
Paper Specifications
Unsuitable Papers
Printable Area
Envelope Orientation
Postcard Orientation
Paper Eject/Capacity
Replacement Parts
Controller Specifications
List of Printer Messages
Operating Principles
Chapter 2 OPERATING PRINCIPLES
Electrical Parts Layout
Power Writing Boards
Switches and Sensors
Other Electrical Components
Option Paper Feeder
Technical Explanation of Print Process
Charging
Drum Section
Main Charger Unit
Exposure
Laser Scanner Unit (LSU)
Development
Transfer/Separation
Cleaning
Fusing
Paper Exit Section
Duplex/Conveying Section
Paper Feed
Cassette Paper Feed Section
MP Tray Paper Feed Section
Paper Conveying Section
Optional Cassette Paper Feed Section
Troubleshooting
Initial Checks
Troubleshooting Flowchart
Symptoms
Errors Indicated by the Leds
Print Quality Problems
Electrical Problems
Mechanical Problems
Paper Jam Error
Chapter 1PRODUCT DESCRIPTION 3.4 Troubleshooting
Troubleshooting Troubleshooting
Jammed Point
LED Indication
Controller-Related Service Call Errors
Bands or Smudges that Appear at Regular Intervals
Completely Blank
Image Quality Problems
Areas of Images Are Missing
Completely Black
Black Dots
Horizontal Line
Light or Faint Image
Vertical Line
Dirt on the Background
Toner Smudges
Wavy Image
Electrical Problems Troubleshooting
Mechanical Problems Troubleshooting
Disassembly and Assembly
Parts/Units that Should Not be Disassembled
Chapter 4DISASSEMBLY AND ASSEMBLY 4.1 Preliminary Check
Tool List
How to Read this Chapter
List of Disassembly/Reassembly Parts/Units
Main Unit Disassembly/Reassembly
Group 1
Toner Cartridge
Front Cover
Rear Cover
Paper Feed Roller (MP Tray)
Controller Cover
Group 2
Left Cover
LVPS Unit
HVPS Unit
Group 3
Developing Unit
Photoconductor Unit
Charging Unit
Transfer Roller
Group 4
Paper Cassette
Paper Feed Roller (Paper Cassette)
Paper Sensor
Separation Roller (Paper Cassette)
Group 5
Right Cover
Right Cooling Fan Motor
MP Paper Feed Solenoid
Main Board Assy
Main Motor
Gear Unit
Group 6
Main Motor + Gear Unit
Gear Box
Registration Clutch / Paper Feed Clutch / Developing Clutch
Paper Feed Unit
Toner Sensor
MP Paper Sensor
RFID Board
Group 7
Fuser Unit
Top Cover
Paper Eject Unit
Group 8
Control Panel
Control Panel Board
Left Cooling Fan Motor
Group 9
Laser Scanner Unit
Eraser Lamp
Group 10
Middle Roller
Paper Feed Roller
Separation Roller
Group 11
PF Paper Feed Motor
PF Paper Feed Clutch
PF Paper Conveyance Clutch
Chapter 3TROUBLESHOOTING 4.3.12 Group 12
PF Main Board
PF Paper Feed Sensor
PF Main Board
PF Paper Feed Sensor
Adjustment
Chapter 5 ADJUSTMENT
Adjustment Item
Writing USB ID Adjustment
Updating Firmware
Controller Firmware Update
Adjustment Adjustment
Engine Controller Firmware Update
Chapter 6 Maintenance
Cleaning Instructions
Connection Diagram
Chapter 7 APPENDIX
Connection Summary
Board Connection Summary
Control Panel Special Operations
Operation Method & Functions
Special Menu
Printer Adjustment Function
Information Sheet
Status Sheet
Engine Status Sheet
Print Log Report
Exploded Diagram / Parts List
Advertisement
Quick Links
1
Errors Indicated by the Leds
Download this manual
SERVICE MANUAL
A4 monochrome Laser Printer
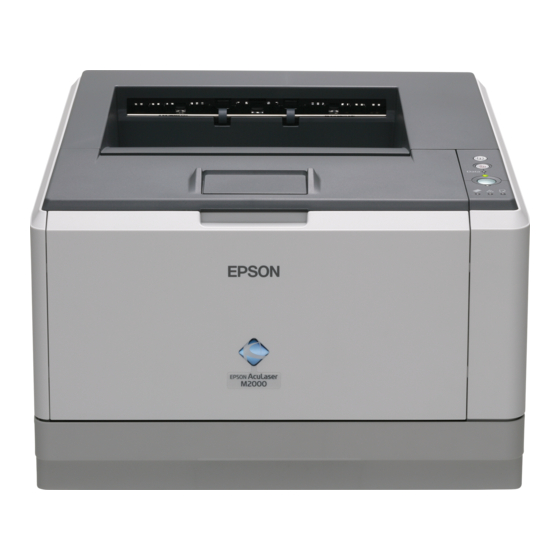
EPSON AcuLaser M2000D
M2000DN
M2010D
M2010DN
Confidential
SEPG07006
Table of
Contents
Previous
Page
Next
Page
1
2
3
4
5
Advertisement
Table of Contents
Troubleshooting
Troubleshooting
41
Initial Checks
42
Paper Jam Error
46
troubleshooting troubleshooting
47
Electrical Problems Troubleshooting
70
Mechanical Problems Troubleshooting
72
Chapter 3TROUBLESHOOTING 4.3.12 Group 12
145
Need help?
Do you have a question about the AcuLaser M2000D and is the answer not in the manual?
Ask a question
Questions and answers
Related Manuals for Epson AcuLaser M2000D
Printer Epson AcuLaser M2000 Series Specifications
High performance a4 mono laser printer (2 pages)
Printer Epson B-310N Setup Manual
Fast business printer (2 pages)
Printer Epson Aculaser M2000 series User Manual
(169 pages)
Printer Epson AcuLaser M2300D series User Manual
Reliable mono desktop printer (167 pages)
Printer Epson AcuLaser M2300 Series User Manual
Epson aculaser (2 pages)
Printer Epson AcuLaser M2010D Service Manual
A4 monochrome laser printer (229 pages)
Printer Epson AcuLaser M2010DN Service Manual
A4 monochrome laser printer (229 pages)
Printer Epson M200 User Manual
(194 pages)
Printer Epson M205 Start Here
(2 pages)
Printer Epson M200 Series Service Manual
Color (85 pages)
Printer Epson M200 Start Here
(4 pages)
Printer Epson M2140 User Manual
(184 pages)
Printer Epson EcoTank ET-M2140 Series User Manual
(130 pages)
Printer Epson ET-M2120 Series User Manual
(231 pages)
Printer Epson M201 Service Manual
Color (85 pages)
Printer Epson M2050 Series User Manual
(184 pages)
This manual is also suitable for:
Aculaser m2000dn
Aculaser m2010d
Aculaser m2010dn
Table of Contents
Save PDF
Print
Rename the bookmark
Delete bookmark?
Delete from my manuals?
Login
Sign In
OR
Sign in with Facebook
Sign in with Google
Upload manual
Upload from disk
Upload from URL


Need help?
Do you have a question about the AcuLaser M2000D and is the answer not in the manual?
Questions and answers