
Related Manuals for BNF Carbon-Z Cub


Summary of Contents for BNF Carbon-Z Cub
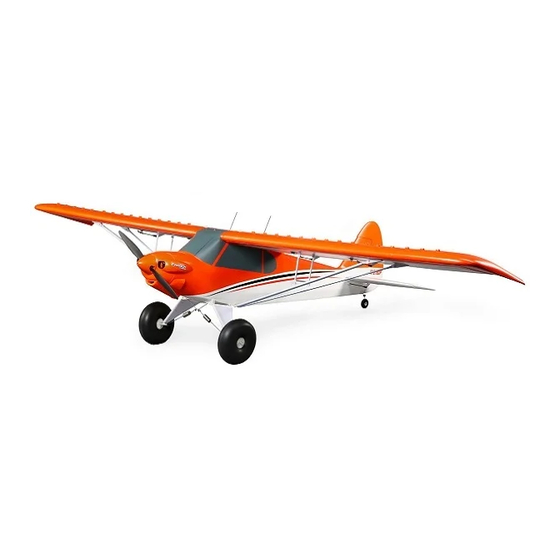
- Page 1 ® Carbon-Z Instruction Manual Bedienungsanleitung Manuel d’utilisation Manuale di Istruzioni IMAA Legal...
- Page 2 NOTICE All instructions, warranties and other collateral documents are subject to change at the sole discretion of Horizon Hobby, Inc. For up-to-date product literature, visit www.horizonhobby.com and click on the support tab for this product. Meaning of Special Language: The following terms are used throughout the product literature to indicate various levels of potential harm when operating this product: NOTICE: Procedures, which if not properly followed, create a possibility of physical property damage AND little or no possibility of injury.
-
Page 3: Table Of Contents
Plus, you can make your Carbon-Z Cub even more versatile by adding the optional Carbon-Z Cub Float Set to the hard points already built into the airframe that allow you to make virtually any place in the world a viable fl... -
Page 4: As3X System
AS3X System Horizon Hobby has always made RC sport, scale and unique aircraft with The outstanding control agility delivers an ultra smooth, locked-in feel that the kind of performance experts appreciate. First used in Blade ® ultra micro obeys your every command with performance that’s natural feeling. It’s so fl... -
Page 5: Transmitter And Receiver Binding
Transmitter and Receiver Binding WARNING AGAINST COUNTERFEIT PRODUCTS: If you ever need to replace your Spektrum receiver found in a Horizon Hobby product, always purchase from Horizon Hobby, Inc. or a Horizon Hobby authorized dealer to ensure authentic high-quality Spektrum product. Horizon Hobby, Inc. disclaims all support and warranty with regards, but not limited to, compatibility and performance of counterfeit products or products claiming compatibility with DSM or Spektrum. -
Page 6: Battery Installation
Battery Installation Battery Selection • We recommend the E-fl ite 3200mAh 22.2V 6S Li-Po battery (EFLB32006S30). Refer to the Optional Parts List for other E-fl ite batteries. If using a battery other than those listed, the battery should be within the range of capacity, dimensions and weight of the E-fl... -
Page 7: Arming The Esc And Receiver
Arming the ESC and Receiver Arming the ESC also occurs after binding as previously described, but subse- quent connection of a fl ight battery requires the steps below. AS3X The AS3X system will not activate until the throttle stick or trim is increased for the fi... -
Page 8: Landing Gear Installation
Landing Gear Installation Required Adhesives: Thread Lock Assembly 1. Install 2 tundra tires (A) on the main strut (B) using 4 wheel collars (C) as shown. Ensure the set screws (D) are aligned with the fl at spots on the strut. -
Page 9: Rudder Installation
Rudder Installation Required Adhesives: Thin CA Assembly 1. Slide the rudder’s CA hinges (A) in the hinge slots (B) of the vertical tail. 2. Install the screw (C) in the rudder mount. 3. Rest the aircraft on its nose, holding the tail up so the thin CA (cyanoacrylate adhesive) will flow into the slots. -
Page 10: Horizontal Tail Installation
Horizontal Tail Installation 1. Slide the horizontal tail tube (A) into the hole in the rear of the fuselage. 2. Install the 2 piece (left and right) horizontal tail as shown. Ensure the control horn faces down. 3. Install 4 screws (B) in the front and rear holes in the bottom of the horizontal tail. -
Page 11: Motor And Propeller Installation
Motor and Propeller Installation 1. Correctly align and connect the motor wire colors with the ESC wires. 2. Install the motor (A) with pre-installed X-mount (B) on the fuselage using 4 screws (C) and 4 lockwashers (D). 3. Install the collet (E), and back plate (F) on the motor shaft (G). 4. -
Page 12: Wing Installation
Wing Installation Before each fl ight, ensure all wing connectors and fasteners are secure. Assembly Assemble both wings using the following steps. (Only the right wing shown) A A A 1. Install 6 vortex generators (A) in the wing channels (B) by using double- sided tape (C). - Page 13 Wing Installation continued Installation 1. Slide the wing tube (A) into the fuselage. 2. Install the left and right wing (B and C) over the wing tube and into the wing slot of the fuselage. 3. Connect the servo connectors (D) to the respective connectors on the fuselage (connectors are marked AIL or FLAP).
-
Page 14: Center Of Gravity (Cg)
Center of Gravity (CG) The CG location is measured from the leading edge of the wing at the root. This CG location has been determined with the recommended Li-Po battery (EFLB32006s30) installed in the middle of the battery compartment. 120mm back from leading edge at the root. -
Page 15: Control Surface Centering
Control Surface Centering IMPORTANT: Perform the Control Direction Test before performing control • Turn the linkage clock- surface centering. wise or counterclockwise until the control surface is Control Surface Centering and Adjusting a Linkage centered. While AS3X is inactive (before advancing the throttle), mechanically center the •... -
Page 16: Transmitter Setup
Transmitter Setup IMPORTANT: The AR635 receiver’s default setting in this aircraft is normal Transmitter Setup Checklist mode. We recommend that you do not change this setup. Refer to the receiver manual for more information. Before binding for Computerized Transmitters (DX6i, DX7/DX7se, DX7s, DX8, DX10t, DX18): A programmable DSM2/DSMX six-channel (or better) transmitter with Dual 1. -
Page 17: Flying Tips And Repairs
Flying Tips and Repairs Consult local laws and ordinances before choosing a fl ying location. When deploying the fl aps, slow the aircraft down to 1/4 throttle. If the fl aps are deployed when the aircraft is at a higher speed, the aircraft will pitch up. Flying Field Set your down elevator to fl... -
Page 18: Post Flight Maintenance
Post Flight Maintenance 1. Disconnect fl ight battery from ESC (Required for Safety and battery life). 5. Repair or replace all damaged parts. 2. Power off transmitter. 6. Store fl ight battery apart from aircraft and monitor the battery charge. 3. -
Page 19: Optional Camera Mount Installation
Optional Camera Mount Installation The optional camera mount (EFL1045023) is sold separately. IMPORTANT: Consult local laws and ordinances before installing and operating any type of photograph-capable or video recording device in this product. 1. Carefully cut a slot (the size of the tab on the camera mount) in the top of the fuselage centered between the wings as shown. -
Page 20: Ama National Model Aircraft Safety Code
AMA National Model Aircraft Safety Code Effective January 1, 2011 B. RADIO CONTROL A. GENERAL 1. All pilots shall avoid fl ying directly over unprotected people, vessels, vehicles or structures and shall avoid endangerment of life and property A model aircraft is a non-human-carrying aircraft capable of sustained fl ight of others. -
Page 21: Troubleshooting Guide As3X
Troubleshooting Guide AS3X Problem Possible Cause Solution Flying over recommended Reduce air speed airspeed Damaged propeller or Replace propeller or spinner spinner Balance the propeller. For more information, view John Redman’s propeller balancing video at www. Imbalanced propeller horizonhobby.com Adjust gain to current fl ight conditions (wind, updrafts, local conditions [elevation, humidity, Flight condition variations temperature, etc.]) Motor vibration... -
Page 22: Troubleshooting Guide
Troubleshooting Guide Problem Possible Cause Solution Throttle not at idle and/or throttle trim too high Reset controls with throttle stick and throttle trim at lowest setting Aircraft will not re- Throttle servo travel is lower than 100% Make sure throttle servo travel is 100% or greater spond to throttle but responds to other Throttle channel is reversed... -
Page 23: Limited Warranty
Limited Warranty What this Warranty Covers Horizon Hobby, Inc. (“Horizon”) warrants to the original purchaser that the Inspection or Services product purchased (the “Product”) will be free from defects in materials and If this Product needs to be inspected or serviced and is compliant in the workmanship at the date of purchase. -
Page 24: Contact Information
Compliance Information for the European Union Declaration of Conformity Declaration of Conformity (in accordance with ISO/IEC 17050-1) (in accordance with ISO/IEC 17050-1) No. HH2013081601 No. HH2013081602 Product(s): EFL Carbon-Z Cub BNF Basic Product(s): EFL Carbon-Z Cub PNP Item Number(s): EFL10450 Item Number(s): EFL10475 Equipment class:... -
Page 25: Replacement Parts
Tundra Tires: Carbon-Z Cub E-fl ite Carbon-Z Cub: Tundrareifen Carbon-Z Cub - Roues Tundra Gomme tundra: Carbon-Z Cub 15x5.5 Electric Propeller: E-fl ite Carbon-Z Cub: 15,5 x 5,5 Elektro Carbon-Z Cub - Hélice électrique 15x5.5 elica per elettrico: EFLP1555E Carbon-Z Cub Propeller 15x5.5... -
Page 26: Optional Parts
Description Descrizione Numéro | Codice Set completo galleggianti: EFL1045016 Float Set Complete: Carbon-Z Cub E-fl ite Carbon-Z Cub: Schwimmer Set Carbon-Z Cub - Set de fl otteurs complet Carbon-Z Cub EFL1045023 Camera Mount: Carbon-Z Cub E-fl ite Carbon-Z Cub: Kamerahalter Carbon-Z Cub - Support de caméra... - Page 27 © 2013 Horizon Hobby, Inc. E-fl ite, AS3X, Blade, Celectra, EC3, DSM, DSM2, DSMX, the DSMX logo, Z-Foam, Carbon-Z, Bind-N-Fly, the BNF logo, Plug- N-Play and ModelMatch are trademarks or registered trademarks of Horizon Hobby, Inc. The Spektrum trademark is used with permission of Bachmann Industries, Inc.
Need help?
Do you have a question about the Carbon-Z Cub and is the answer not in the manual?
Questions and answers