
Related Manuals for Thermal Dynamics PakMaster XLPLUS 50


Summary of Contents for Thermal Dynamics PakMaster XLPLUS 50
-
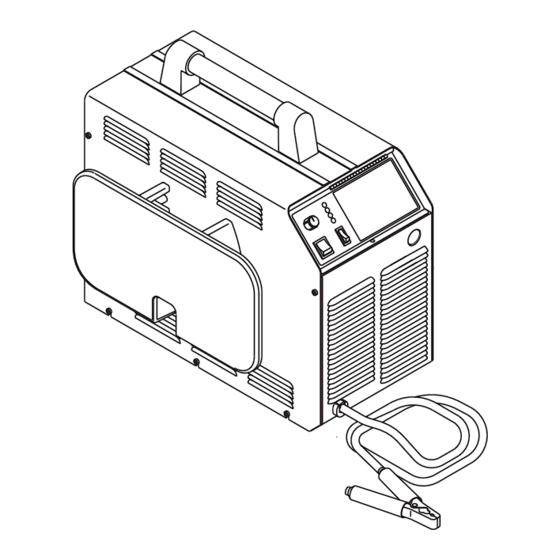
Page 1: Power Supply
Air Plasma Cutting Power Supply A-02464 Service Manual Manual No. 0-2745 August 12, 1999... - Page 2 While the information contained in this Service Manual repre- WARNING sents our best judgement, Thermal Dynamics Corporation assumes no liability for its use. ® Pak Master 50XL PLUS Air Plasma Cutting Power Supply...
- Page 3 Record Serial Numbers For Warranty Purposes...
-
Page 5: Table Of Contents
TABLE OF CONTENTS SECTION 1: GENERAL INFORMATION ....................1 1.01 Notes, Cautions and Warnings ..............1 1.02 Important Safety Precautions ................ 1 1.03 Publications ....................2 1.04 Note, Attention et Avertissement ..............3 1.05 Precautions De Securite Importantes ............3 1.06 Documents De Reference ................ - Page 6 TABLE OF CONTENTS (continued) SECTION 6: PARTS LISTS ........................39 6.01 Introduction ....................39 6.02 Ordering Information ..................39 6.03 Major External Replacement Parts List ............40 6.04 Access Panel Replacement Parts List ............42 6.05 Front Panel Replacement Parts List ............. 44 6.06 Left Side Internal Component Replacement Parts List ........
-
Page 7: General Information
SECTION 1: GASES AND FUMES GENERAL INFORMATION Gases and fumes produced during the plasma cutting process can be dangerous and hazardous to your health. 1.01 Notes, Cautions and Warnings • Keep all fumes and gases from the breathing area. Throughout this manual, notes, cautions, and warnings Keep your head out of the welding fume plume. -
Page 8: Publications
• Install and maintain equipment according to NEC • To protect your eyes, always wear a welding hel- code, refer to item 9 in Subsection 1.03, Publica- met or shield. Also always wear safety glasses with tions. side shields, goggles or other protective eye wear. •... -
Page 9: Note, Attention Et Avertissement
8. NFPA Standard 51, OXYGEN-FUEL GAS SYSTEMS FOR WELDING, CUTTING AND ALLIED PRO- AVERTISSEMENT CESSES, obtainable from the National Fire Protection Association, Batterymarch Park, Quincy, MA 02269 9. NFPA Standard 70, NATIONAL ELECTRICAL CODE, Toute procédure pouvant provoquer des blessures obtainable from the National Fire Protection Asso- de l’opérateur ou des autres personnes se trouvant ciation, Batterymarch Park, Quincy, MA 02269... - Page 10 • Les sortes de gaz et de fumée provenant de l’arc de plasma dépendent du genre de métal utilisé, des INCENDIE ET EXPLOSION revêtements se trouvant sur le métal et des différents procédés. Vous devez prendre soin lorsque vous Les incendies et les explosions peuvent résulter des scories coupez ou soudez tout métal pouvant contenir un chaudes, des étincelles ou de l’arc de plasma.
-
Page 11: Documents De Reference
• Utilisez la nuance de lentille qui est suggèrée dans 4. Norme ANSI Z87.1, PRATIQUES SURES POUR LA le recommendation qui suivent ANSI/ASC Z49.1: PROTECTION DES YEUX ET DU VISAGE AU TRAVAIL ET DANS LES ECOLES, disponible de Nuance Minimum Nuance Suggerée Courant Arc Protective Numéro... - Page 12 14. Norme AWSF4.1 de l’Association Américaine de Soudage, RECOMMANDATIONS DE PRA- TIQUES SURES POUR LA PRÉPARATION À LA COUPE ET AU SOUDAGE DE CONTENEURS ET TUYAUX AYANT RENFERMÉ DES PRODUITS DANGEREUX , disponible auprès de la American Welding Society, 550 N.W. LeJeune Rd., Miami, FL 33126 15.
-
Page 13: Declaration Of Conformity
Rigorous testing is incorporated into the manufacturing process to ensure the manufactured product meets or exceeds all design specifications. Thermal Dynamics has been manufacturing products for more than 30 years, and will continue to achieve excellence in our area of manufacture. -
Page 14: Statement Of Warranty
None Warranty repairs or replacement claims under this limited warranty must be submitted by an authorized Thermal Dynamics® repair facility within thirty (30) days of the repair. No transportation costs of any kind will be paid under this warranty. Transportation charges to send products to an authorized warranty repair facility shall be the responsibility of the customer. -
Page 15: Introduction
C. Customer/Operator Responsibilities It is the customer/operator's responsibility to maintain the equipment and peripheral accessories provided by Thermal Dynamics in good operating order in accordance with the procedures outlined in the Operating Manual, and to protect the equipment from accidental or mali- cious damage. - Page 16 SECTION 2: INTRODUCTION Manual 0-2745...
-
Page 17: Description
NOTE SECTION 3: Refer to Section 3.04 for list of power supply op- DESCRIPTION tions and accessories. 3.03 Specifications/Design Features 3.01 Scope A. Power Supply Technical Specifications The information in this section has two purposes: The following specifications apply to the Power Supply •... -
Page 18: Power Supply Options And Accessories
10. Overall Dimensions C. High Pressure Regulators Overall dimensions are with Handle, Lead Wrap High pressure regulators are available for air and ni- Bracket, and Gas Regulator/Filter Assembly installed. trogen. The regulators are used to set the proper pres- sure for the type gas being used. 19"... -
Page 19: Service Troubleshooting Diagnostics
SECTION 4: CAUTION SERVICE Sparks from the cutting process can cause damage TROUBLESHOOTING to coated, painted, and other surfaces such as glass, plastic and metal. DIAGNOSTICS NOTE Handle torch leads with care and protect them from 4.01 Introduction damage. A. Piloting This section provides service diagnostics for the Pak Master 50XL PLUS Power Supply, allowing the Techni- Piloting is harder on parts life than actual cutting be-... -
Page 20: Troubleshooting Guide - General Information
Incorrect torch parts for the operation Subsection 4.09 includes specific test procedures and LED status identification tables. The subsection is referenced g. Non-Genuine Thermal Dynamics parts used by the troubleshooting guide for the specific test to be performed. The troubleshooting guide has six subsections as follows: Section 4.05 - Circuit Fault Isolation... -
Page 21: Circuit Fault Isolation
C. How to Use the Troubleshooting Guide 3. Set the Power Supply controls as follows: ON/OFF switch to OFF The following information is a guide to help the Service Technician determine the most likely causes for various RUN/SET/LATCH switch to SET symptoms. -
Page 22: Main Input And Internal Power Problems
a. Replace main power line Fuses D. Main Arc Test 4. Defective input power cable Press the Torch Switch to establish a pilot arc. a. Replace input power cable Bring the torch to within 1/8"-3/8" (3.2 - 9.5 mm) of the workpiece to establish the main cutting arc, and note the 5. - Page 23 a. Wait for fans to cool unit and refer to Operating Manual 0-2744, Section 2.03, for proper Duty Rear Panel Cycle 3. Faulty Fan or Logic/Gate PC Board Gas Solenoid Measure for 115 VAC on the Logic/Gate PC Board from J2-2 to J2-8 and J2-3 to J2-9. •...
-
Page 24: Pilot Arc Problems
a. Replace Pilot Output PC Board if reading is not 4.07 Pilot Arc Problems open. Locate your symptom below: A. AC indicator ON; TEMP indicator off; No gas flow; GAS and DC indicators OFF (Torch Switch Pilot Output PC Board must be pressed) 1. -
Page 25: Main Arc Problems
a. If voltage is less than 2VDC replace CD PC Board. Pilot Output PC Board CD PC Board Pin 4 Pin 5 A-01188 A-01400 Wire #16 D. AC indicator ON; TEMP indicator off; Gas flows; Wire #17 GAS and DC indicators ON; Spark at gap on CD PC Board and CD enable indicator (D2) on Logic/ Gate PC Board ON;... -
Page 26: Test Procedures
2. Faulty Logic Gate 4.09 Test Procedures Check the following indicators inside the power The test procedures in this subsection are referenced in supply: the troubleshooting section. • Pilot Indicator (D39) on the Logic/Gate PC Board A. Safety Precautions is ON during the pilot then OFF during the main arc transfer 1. - Page 27 A-00307 0.75 Left Side Panel Forward Bias Diode Conducting Diode Test Symbol VR COM A-01326 Anode Ground Wire Screws (5 Places) Cathode 2. Carefully pull the left side panel from the Power Sup- Testing Diode Forward Bias ply a short distance (see note). 6.
- Page 28 D. Input PC Board/Input Diode Test Meter (+) Meter (-) Indication Check Input PC Board for shorted input diode. Open Open Solder Side of PC Board Open If any test has resistance, then replace the Main Contac- tor also. E. Main Contactor (MC1) Test Reconnect power and observe proper start-up procedure.
- Page 29 F. Temperature Circuit Test TP1 (GND) Test the temperature circuit per the following: 1. Place the front panel ON/OFF switch to the OFF position. 2. Disconnect ribbon cable from the Upper FET/ Heatsink Assembly at J6. FET/Heatsink and A-01421 Capacitor PC Board Assembly A-02546 Logic/Gate PC Board...
- Page 30 If shorted, replace Pilot/Output PCB. 2. Measure between E9 to E8 and E24 on Pilot/Out- put PC Board. If shorted, remove wires on E8 E9 and E24 and re-check PCB. If shorted, replace Pilot/Output PCB. If no longer measures shorted, check for short in torch or leads.
- Page 31 b. Connect a jumper between TP1 and TP8 on the Pilot Output PC Board A-01401 Logic/Gate PC Board in the unit. NOTE Before pressing the trigger, make sure no faults were found on the Pilot Board and in the torch. Logic/Gate PC Board A-02552 2.
- Page 32 Use a digital meter, diode or ohms function, to check Spring the forward and reverse bias of the output rectifiers Clip on the FET/Heatsink Assemblies per the following MOSFET procedure: a. Remove the wire from E16 and E18 on the Upper and Lower FET/Heatsink Assemblies.
- Page 33 Replace the FET/Heatsink Assembly if any of the above tests are open or shorted. 5. FET Output Clamp Diodes Check Use an ohmmeter to check the resistance of the out- put clamp diodes, (+ out) E17 and (- out) E18, per the following procedure: NOTE The wires on E16 and E18 should still be discon-...
- Page 34 SECTION 4: SERVICE TROUBLESHOOTING Manual 0-2745...
-
Page 35: Repairs & Replacement Procedures
2. Unroll the rest of the band and peel the liner from SECTION 5: the copper foil at the opposite end. REPAIRS & REPLACEMENT 3. Attach the copper foil to a convenient and exposed electrical ground. PROCEDURES 4. Connect the equipment primary cable ground to the same electrical ground as the wrist strap. -
Page 36: Major External Parts Replacement
Before disassembling any part of the Power Supply first 4. Remove the four screws securing the Leads Wrap read the procedure for the part to be replaced, then pro- to the old Left Side Panel. ceed with the disassembly. 5. Install the replacement Left Side Panel by revers- ing the above procedure noting the following: 5.04 Major External Parts •... -
Page 37: Access Panel Parts Replacement
4. Unlatch the Access Panel to gain access to the Pot/ 5.05 Access Panel Parts LED PC Board. Replacement 5. Remove the Pot/LED PC Board from the four stand- NOTE offs. Refer to Section 6.04 for parts list and overall detail draw- 6. -
Page 38: Left Side Internal Component Parts Replacement
9. Pull the Work Cable from the unit. e. On the right side remove the three nuts and washers securing the internal chassis to the bot- 10. Install the replacement Work Cable by reversing tom of the unit. the above procedure. 7. - Page 39 NOTE 5. Install the replacement Logic/Gate PC Board by reversing the above procedure. Failure to properly tighten the seven screws secur- ing the Input PC Board to the Diode Bridge will F. FET/Heatsink Assembly Replacement cause damage to the unit. NOTE •...
-
Page 40: Rear Panel Parts Replacement
5. Disconnect the wiring from wire lug connections C. Solenoid Valve Replacement on the Capacitor PC Board at '+' and '-' terminals. 1. Remove the Right Side Panel per Section 5.04-C. 6. Remove the two screws securing the Heatsink 2. Disconnect the two wires connected to the Pres- Mounting Bracket to the chassis. -
Page 41: Right Side Internal Component Parts Replacement
NOTES 5.09 Right Side Internal Component Parts Replacement Before removing any connection mark each wire with the connection designation. When reassem- NOTE bling this makes sure the wires go to the proper terminals. Refer to Section 6.08 for parts list and overall de- tail drawing. - Page 42 4. Disconnect the lead wire on terminal E17 of the top FET/Heatsink Assembly. A-02561 5. Remove the four mounting screws securing the Out- 460V put Inductor Assembly to the chassis. (brown wire) 6. Remove the Output Inductor Assembly from the unit.
- Page 43 3. Disconnect the gas tube from the fitting at the end of the Bulkhead Adapter. 4. Remove the fitting. 5. Remove the first nut from the Bulkhead Adapter. 6. Carefully remove the wire from the Bulkhead Adapter that comes from the CD Transformer Coil. 7.
- Page 44 SECTION 5: REPLACEMENT PROCEDURES Manual 0-2745...
-
Page 45: Parts Lists
Parts listed without item numbers are not shown, but may be ordered by the catalog number shown. B. Returns If a Thermal Dynamics product must be returned for ser- vice, contact your Thermal Dynamics distributor. Mate- rials returned to Thermal Dynamics without proper au- thorization will not be accepted. -
Page 46: Major External Replacement Parts List
6.03 Major External Replacement Parts List Item # Description Catalog # TUBE, LIFTING HANDLE,1.125 OD,11.85 LG 9-7505 MOUNT, LIFTING HANDLE 9-7506 COVER, LEFT SIDE Includes: 9-8001 COVER LEFT SIDE LABEL, WARNING, ENGLISH LEADS WRAP Includes: 9-8002 PANEL, LEADS WRAP, MOLDED OVERLAY LH SIDE PANEL COVER, RIGHT SIDE Includes: 9-8003... - Page 47 23x4479 23x4496 A-02615 HARDWARE #10-32 Regular Nylon Lock Nut #10-32 x 2" PPH HDMS #10-32 x 0.5" PPH Sw ageform Stl Zn Screw 1/4-20 x 3" Screw , Soc HD #6-32 x 3 1/2" THD Screw #10-32 x 3/4" PPH Sw ag Screw #6-32x3/8 PPH STL ZN Screw Rubber Feet NOTE: Illustration may vary slightly...
-
Page 48: Access Panel Replacement Parts List
6.04 Access Panel Replacement Parts List Items Description Ref. # Catalog # ASSEMBLY, POT/LED PCB 9-8004 KNOB,INNER CONCENTRIC 9-8007 SWITCH, ROCKER, SPST, CENTER OFF 8-3259 ON/OFF ROCKER SWITCH, DPST 8-3258 PANEL, ACCESS Includes: 9-8005 PANEL, ACCESS OVERLAY, ACCESS PANEL LABEL, ACCESS PANEL SECTION 6: PARTS LISTS Manual 0-2745... - Page 49 A-02532 HARDWARE #10-32 Regular Nylon Lock Nut #10-32 x 2" PPH HDMS #10-32 x 0.5" PPH Sw ageform Stl Zn Screw 1/4-20 x 3" Screw , Soc HD #6-32 x 3 1/2" THD Screw #10-32 x 3/4" PPH Sw ag Screw #6-32x3/8 PPH STL ZN Screw Rubber Feet #6-32x3 3/4 LG PH Screw...
-
Page 50: Front Panel Replacement Parts List
6.05 Front Panel Replacement Parts List Item #Qty Description Ref. # Catalog # PANEL, BASE/FRONT Includes: 9-8006 BASE/FRONT, UNIT GROUND TAG OVERLAY, FRONT PANEL W/USA LABEL CONTACTOR, 3P, 40 FLA, 600V, 115VAC COIL 9-7554 STRAIN RELIEF, FOR #6 STRANDED WIRE 8-5537 WORK CABLE, #6 AWG/WCLAMP - 20 FT 9-8008... - Page 51 A-02533 HARDWARE #10-32 Regular Nylon Lock Nut #10-32 x 2" PPH HDMS #10-32 x 0.5" PPH Sw ageform Stl Zn Screw 1/4-20 x 3" Screw , Soc HD #6-32 x 3 1/2" THD Screw #10-32 x 3/4" PPH Sw ag Screw NOTE: Illustration may vary #6-32x3/8 PPH STL ZN Screw slightly from actual unit.
-
Page 52: Left Side Internal Component Replacement Parts List
6.06 Left Side Internal Component Replacement Parts List Item # Description Ref # Catalog # INSULATOR, INPUT PCB See Note 1 CABLE ASS’Y, 10 CIR RIBBON, 15"LG 9-5922 LOGIC/GATE DRIVE PCB ASSEMBLY 9-8010 ASS’Y, FET HEATSINK 9-8009 ASSEMBLY, FET HEATSINK PCB DUST COVER, FET ASS’Y FUSE BLOCK 9-5562... - Page 53 21x108 21x150 23x4007 A-02617 HARDWARE #10-32 Regular Nylon Lock Nut #10-32 x 2" PPH HDMS #10-32 x 0.5" PPH Sw ageform Stl Zn Screw Note: Illustration may vary slightly from 1/4-20 x 3" Screw , Soc HD actual unit. #6-32 x 3 1/2" THD Screw #10-32 x 3/4"...
-
Page 54: Rear Panel Replacement Parts List
6.07 Rear Panel Replacement Parts List Item # Description Ref. Catalog # PRESSURE SWITCH-35 PSI 9-1044 VALVE, SOLENOID 1/8 NPT 8-3370 REGULATOR, AIR LINE 9-7514 FLEX CONNECTOR 8-4289 1/4 NPT STREET ELBOW 9-2184 1/8 NPT STR.TEE 8-0352 1/4-1/8 NPT REDUCER 9-2023 FITTING, 1/8 NPT X 2"... - Page 55 Part of #4 A-02535 HARDWARE #10-32 Regular Nylon Lock Nut #10-32 x 2" PPH HDMS #10-32 x 0.5" PPH Sw ageform Stl Zn Screw 1/4-20 x 3" Screw , Soc HD #6-32 x 3 1/2" THD Screw #10-32 x 3/4" PPH Sw ag Screw #6-32x3/8"...
-
Page 56: Right Side Internal Component Replacement Parts List
6.08 Right Side Internal Component Replacement Parts List Item # Description Ref #. Catalog # BULKHEAD ADAPTER, O2B - 1/8 NPT 9-4045 9/16-18 JAM NUT, BRASS 8-2149 CHASSIS, CENTER See Note 1 PANEL, PILOT ASS’Y MOUNTING See Note 1 BRKT, BULKHEAD MOUNTING See Note 1 INSULATOR, BULKHEAD See Note 1... - Page 57 A-02618 HARDWARE #10-32 Regular Nylon Lock Nut #10-32 x 2" PPH HDMS #10-32 x 0.5" PPH Sw ageform Stl Zn Screw 1/4-20 x 3" Screw , Soc HD #6-32 x 3 1/2" THD Screw #10-32 x 3/4" PPH Sw ag Screw #6-32x3/8"...
-
Page 58: Options And Accessories
6.09 Options and Accessories Description Catalog # SMART CART 7-7777 575V TRANSFORMER 9-7500 CUTTING GUIDE KIT 7-8910 FILTER KIT “DRY AIR” – INCLUDES FILTER AND HOSE - OPTIONAL 7-7507 REPLACEMENT FILTER BODY “DRY AIR” 9-7740 REPLACEMENT FILTER ELEMENT “DRY AIR” 9-7741 REPLACEMENT FILTER HOSE “DRY AIR”... -
Page 59: Appendix I: Input Wiring Requirements
APPENDIX I: INPUT WIRING REQUIREMENTS In p u t P o w er In p u t C u r r en t S u g g ested S iz es (S ee N o tes) V o ltag e F r eq . -
Page 60: Appendix Ii: Sequence Of Operation (Block Diagram)
APPENDIX II: SEQUENCE OF OPERATION (BLOCK DIAGRAM) LATCH ACTION ACTION ACTION ACTION ON/OFF switch Close external RUN/SET/LATCH RUN/SET/LATCH switch to ON. disconnect switch. switch to RUN. to SET. RESULT RESULT RESULT RESULT AC indicator blinks for 8 Power to system. Gas flow stops. -
Page 61: Appendix Iii: Pot/Led Pc Board Layout
APPENDIX III: POT/LED PC BOARD LAYOUT A-01206 Pot/LED PC Board Signals J14-1 +10 vdc from Logic PC Board (J3-7) J14-2 Current Control to Logic PC Board (J3-8) J14-3 Return for Current Control from Logic PC Board (J3-9) J14-4 18VDC Unregulated VDC from Logic PC Board (J3-10) J14-5 Logic Low Signal for AC OK Indicator to Logic PC Board (J3-11) -
Page 62: Appendix Iv: Logic/Gate Pc Board Layout
APPENDIX IV: LOGIC/GATE PC BOARD LAYOUT TP24 TP25 TP21 TP18 TP23 Logic/Gate PC Board A-02528 TP26 TP22 TP20 Logic/Gate PC Board Signals J1-1 36 VAC from Auxiliary Transformer J1-2 115 VAC from Auxiliary Transformer J1-3 Center Tap from Auxiliary Transformer (36VAC) J1-4 Not Used J1-5... - Page 63 J3-1 36 VAC to ON/OFF Switch J3-2 36 VAC from ON/OFF Switch to Logic/Gate PC Board J3-3 36 VAC to ON/OFF Switch J3-4 36 VAC from ON/OFF Switch to Logic/Gate PC Board J3-5 Logic Low - From RUN/SET/LATCH Switch on Front Panel (RUN) J3-6 PCB Common J3-7...
-
Page 64: Appendix V: Pilot Output Pc Board Layout
APPENDIX V: PILOT OUTPUT PC BOARD LAYOUT CGND A-01389 Pilot Output PC Board Signals J12-1 Torch Switch Filter in from J22-3 Torch Control J12-2 Not Used J12-3 Torch Switch Filter Return from J22-4 Torch Control J12-4 Not Used J12-5 Pilot Return Shield to J22-1 Torch Control J12-6 Torch Switch Shield to J22-2 Torch Control J12-7... - Page 65 CGND Chassis Gnd PS(-) C4 Rtn for Pilot Voltage Twisted with Pilot RTN to E23 PS(-) (Stud) from Output Inductor L1 to CD Xfmr PS(+) to E18 Upper Fet Module PS(+) to E18 Upper Fet Module From E22 to PCR Pin 2 From Pilot Choke to E20 C4 Rtn for Pilot Voltage Twisted with Pilot RTN from E7 Pilot RTN from Standoff on bulk head and Torch Cable...
-
Page 66: Appendix Vi: Cd Pc Board Layout
APPENDIX VI: CD PC BOARD LAYOUT A-01208 CD PC Board Signals J11-1 36 VAC from Logic PC Board (J5-1) J11-2 Return from Logic PC Board (J5-2) 36VAC centertap J11-3 36 VAC from Logic PC Board (J5-3) J11-4 Logic Low CD Enable Signal from Logic PC Board (J5-4) J11-5 Return for CD Enable Signal from Logic PC Board (J5-5) J11-6... -
Page 67: Appendix Vii: Input Pc Board Layout
APPENDIX VII: INPUT PC BOARD LAYOUT 2-position connector Solder Side of PC Board Component Side of PC Board Input PC Board A-02551 CGND Input PC Board Signals J16-1 Logic low inrush signal from Logic PCB J10-1 J16-2 Unregulated +18VDC to inrush Relay K11 J16-3 Not used J16-4... -
Page 68: Appendix Viii: Fet Pc Board Layout
APPENDIX VIII: FET PC BOARD LAYOUT Component Side of PC Board A-02631 Solder Side of PC Board APPENDIX Manual 0-2745... - Page 69 FET PC Board Signals (Upper and Lower Assemblies) J6-1 +12VDC from Logic/Gate PCB, upper J7-1, lower J8-1 J6-2 PCB common, GND, from Logic Gate PCB, upper J7-2, lowerJ8-1 J6-3 Pwm Output from the Logic/Gate Board upper J7-3 Lower J8-3 J6-4 Pwn Output RTN J6-2 from the Logic/Gate Board upper J7-4 Lower J8-4 J6-5 PRI CURRENT SENSE to the Logic/Gate Board upper J7-5 Lower J8-5...
-
Page 70: Appendix Ix: Capacitor Pc Board Layout
APPENDIX IX: CAPACITOR PC BOARD LAYOUT A-02632 Capacitor PC Board Signals Positve Rail to FET Board Positve Rail to FET Board Negative Rail to FET Board Negative Rail to FET Board Positive Input from Input Board (+) Negative Input from Input Board (-) Rectifier (-) APPENDIX Manual 0-2745... -
Page 71: Appendix X: 36Vac Circuit Diagram
APPENDIX X: 36VAC CIRCUIT DIAGRAM CD PC Board Logic/Gate 12 VDC Drive PC Circuit Board Auxiliary 36 VAC Transformer Outputs 115 VAC A-02527 ON/OFF Switch Manual 0-2745 APPENDIX... -
Page 72: Appendix Xi: System Schematic
APPENDIX XI: SYSTEM SCHEMATIC INRUSH INRUSH A-02503 APPENDIX Manual 0-2745... - Page 73 OK TO MOVE 8/11/99 A-02503 Manual 0-2745 APPENDIX...
- Page 74 APPENDIX Manual 0-2745...
Need help?
Do you have a question about the PakMaster XLPLUS 50 and is the answer not in the manual?
Questions and answers