Table of Contents
Advertisement
Quick Links
HOW TO ORDER REPLACEMENT PARTS
To order replacement parts, contact the ICON Health & Fitness, Ltd. office, or write:
ICON Health & Fitness, Ltd.
Customer Service Department
Unit 4, Revie Road Industrial Estate
Revie Road
Beeston
Leeds, LS118JG
UK
Tel:
08457 089 009
Outside the UK: (44) 113 387 7133
Fax: (44) 113 387 7125
To help us assist you, please be prepared to give the following information:
• The MODEL NUMBER of the product (PETL50133)
• The NAME of the product (PROFORM
®
560 HR treadmill)
• The SERIAL NUMBER of the product (see the front cover of this manual)
• The KEY NUMBER AND DESCRIPTION OF THE PART(S) (see the PART LIST on pages 30 and 31 and the
EXPLODED DRAWING attached in the centre of this manual)
Part No. 223171 R0105A
Printed in USA © 2005 ICON IP, Inc.
Class HC Fitness Product
Model No. PETL50133
Serial No.
Write the serial number in the space
above for future reference.
Serial Number Decal
QUESTIONS?
As a manufacturer, we are com-
mitted to providing complete
customer satisfaction. If you
have questions, or if there are
missing or damaged parts,
please call:
08457 089 009
Or write:
ICON Health & Fitness, Ltd.
Unit 4
Revie Road Industrial Estate
Revie Road, Beeston
Leeds, LS11 8JG
UK
email: csuk@iconeurope.com
CAUTION
Read all precautions and instruc-
tions in this manual before using
this equipment. Save this man-
ual for future reference.
USER'S MANUAL
Advertisement
Table of Contents

Subscribe to Our Youtube Channel
Related Manuals for Pro-Form 560 HR


Summary of Contents for Pro-Form 560 HR
-
Page 1: How To Order Replacement Parts
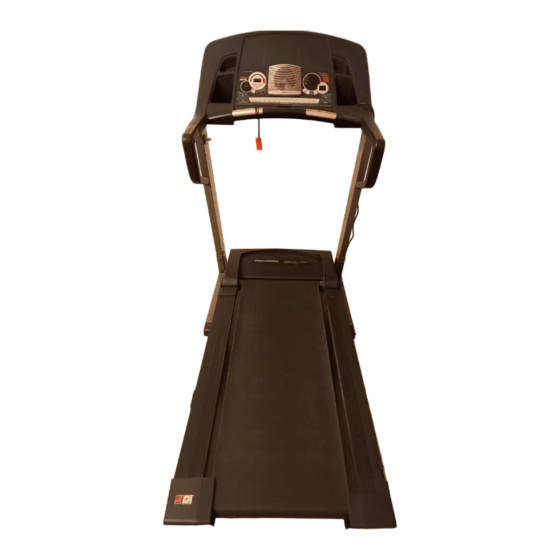
• The MODEL NUMBER of the product (PETL50133) QUESTIONS? • The NAME of the product (PROFORM ® 560 HR treadmill) As a manufacturer, we are com- • The SERIAL NUMBER of the product (see the front cover of this manual) mitted to providing complete customer satisfaction. - Page 2 Key No. Qty. Description Key No. Qty. Description Clevis Pin Electronics Bracket Hairpin Cotter Choke Cage Nut Filter 1 1/4” Bolt Circuit Breaker Rear Base Pad Motor Fan Wheel Housing Ferrite Box Wheel Bolt Splitter TABLE OF CONTENTS Wheel Optic Disk Base Photo Switch Incline Stop Bracket...
- Page 3 IMPORTANT PRECAUTIONS PART LIST—Model No. PETL50133 R0105A To locate the parts listed below, see the EXPLODED DRAWING attached in the centre of this manual. WARNING: To reduce the risk of burns, fire, electric shock, or injury to persons, read the Key No.
- Page 4 SUGGESTED STRETCHES 19. Whilst using iFIT.com CDs and videos, an 22. Inspect and properly tighten all parts of the The correct form for several basic stretches is shown at the right. Move slowly as you stretch—never bounce. electronic “chirping” sound will alert you treadmill every three months.
-
Page 5: Exercise Guidelines
® using the treadmill. If you have questions after read- ergy. Only after the first few minutes does your body HR treadmill. The 560 HR treadmill offers an impres- ing this manual, please call our Customer Service WARNING: begin to use stored fat calories for energy. If your goal... - Page 6 PROBLEM: The walking belt is off-centre or slips when walked on ASSEMBLY SOLUTION: a. If the walking belt is off-centre, first remove the key and UNPLUG THE POWER CORD. If the walking belt has Assembly requires two persons. Set the treadmill in a cleared area and remove all packing materials. Do not shifted to the left, use the allen wrench to turn the left dispose of the packing materials until assembly is completed.
-
Page 7: Troubleshooting
2. Open part bag C. See drawing 2a. Attach a Wheel (108) TROUBLESHOOTING to each Wheel Housing (106) with a Wheel Bolt (107) and a Wheel Nut (21) as shown. Do not overtighten the Wheel Nuts. Most treadmill problems can be solved by following the steps below. Find the symptom that applies, and follow the steps listed. - Page 8 5. Hold the Pulse Bar (125) near the Console Base (85). HOW TO LOWER THE TREADMILL FOR USE Connect the Pulse Wire (124) on the Pulse Bar to the in- dicated wire on the Console Base. The connectors 1. Hold the treadmill firmly with your right hand. Pull the should slide together easily and snap into place.
-
Page 9: How To Fold And Move The Treadmill
If you purchase the optional chest pulse sensor (see page 23), follow the steps below to install the re- HOW TO FOLD AND MOVE THE TREADMILL ceiver and the short jumper wire included with the chest pulse sensor. HOW TO FOLD THE TREADMILL FOR STORAGE 1. -
Page 10: Treadmill Operation
THE INFORMATION MODE/DEMO MODE console is in the demo mode, the power cord can be TREADMILL OPERATION plugged in, the key can be removed from the console, The console features an information mode that keeps and the displays and indicators on the console will au- track of the total number of hours that the treadmill has tomatically light in a preset sequence, although the THE PERFORMANT LUBE... - Page 11 Hold the handrails, step onto the walking belt, and HOW TO USE PROGRAMS DIRECTLY FROM begin walking. During the program, an electronic OUR WEB SITE “chirping” sound will alert you when the speed and/or incline of the treadmill is about to change. CAUTION: Always listen for the “chirp”...
- Page 12 • Make sure that the audio cable is properly the Speed + and – but- If the speed or incline settings are too high or too HOW TO TURN ON THE POWER tons. Each time a button low, you can manually override the settings at any connected, that it is fully plugged in, and that is pressed, the speed time by pressing the Speed or Incline buttons on...
- Page 13 HOW TO CONNECT YOUR VCR Heart Rate display— Measure your heart rate if desired. HOW TO USE IFIT.COM CD AND VIDEO This display shows PROGRAMS Note: If your VCR has an unused AUDIO OUT jack, your heart rate when To use the hand- see instruction A below.
- Page 14 HOW TO CONNECT YOUR HOME STEREO HOW TO CONNECT YOUR COMPUTER The speed setting for the HOW TO USE PRESET PROGRAMS Current Segment first segment is shown in the flashing Current Note: If your stereo has an unused LINE OUT jack, Note: If your computer has a 3.5 mm LINE OUT see instruction A below.
- Page 15 HOW TO CONNECT YOUR PORTABLE STEREO To stop the program at any time, press the Stop Turn on the fan if desired. HOW TO CONNECT THE TREADMILL TO YOUR button. The Pace/Time display will begin to flash. CD PLAYER, VCR, OR COMPUTER Note: If your stereo has an RCA-type AUDIO OUT To restart the program, press the Start button or See step 7 on page 13.
- Page 16 During heart rate pro- Press the Start button or the Speed + button to the current target heart rate, the speed and/or in- HOW TO USE HEART RATE PROGRAMS grams, the matrix will cline of the treadmill may automatically change to start the program.
- Page 17 EXPLODED DRAWING—Model No. PETL50133 R0105A To identify the parts shown on this EXPLODED DRAWING, see the PART LIST on pages 30 and 31 of the user’s manual. 5 14...
- Page 18 EXPLODED DRAWING—Model No. PETL50133 R0105A...
Need help?
Do you have a question about the 560 HR and is the answer not in the manual?
Questions and answers