Samsung CLP-600 Series Service Manual
Color laser printer
Hide thumbs
Also See for CLP-600 Series:
- User manual (115 pages) ,
- Brochure & specs (8 pages) ,
- Service manual (246 pages)
Table of Contents
Advertisement
Quick Links
SERVICE
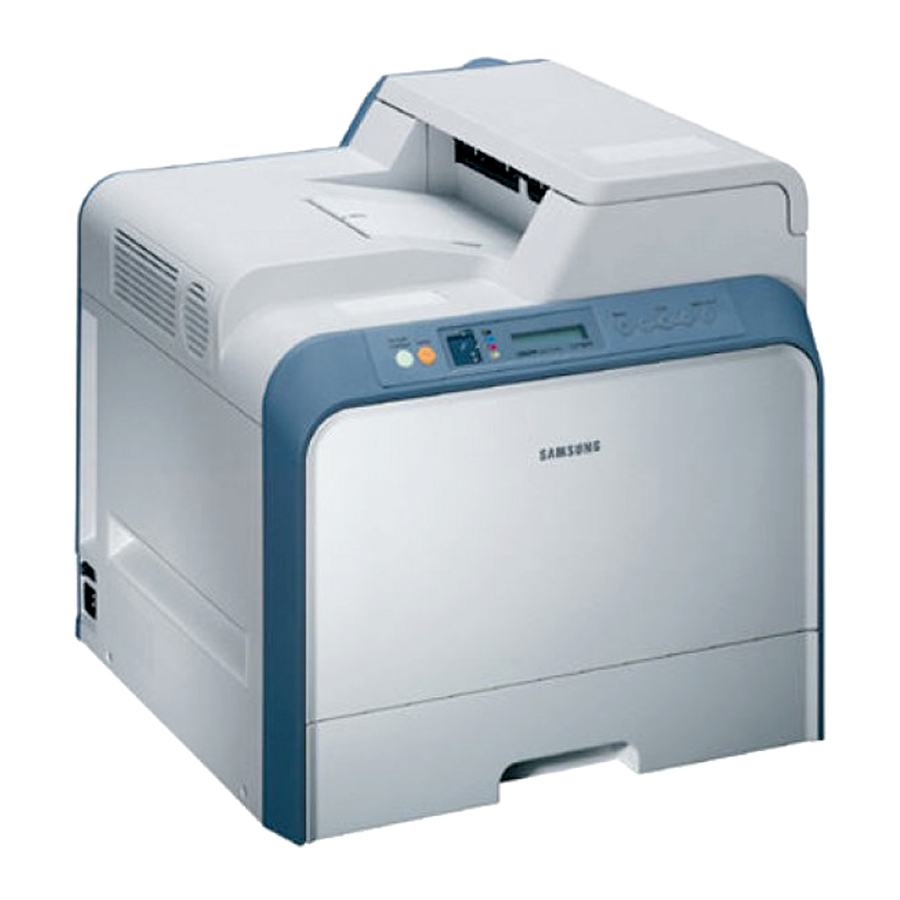
Samsung Color Laser Printer
CLP-600
Color Laser Printer
CLP-600 Series
CLP-600/CLP-600N
Basic Model : CLP-600
Manual
The keynote of Product
- Speed: A4, 20/20ppm(Color/Mono)
1200dpi x 1200dpi
- Paper Path: FISO(Front-Inm Side-Out),
Single Pass(Tandem)
- Emulation: SPL-C(GDI)
- System Controller: V320
- Processor: PMC RM5231A 250MHz
- Memory: Standard SDRAM capacity is 32MB
- Cassette: 250Sheet(Settable Type/A4, Ltr)
- SCF: 500Sheet Second Cassette Feeder
(option)
- Toner Cartridge: 4K/4K(Color/Mono)
- Fuser Type: 1 E-coil Roller(heat roller)
- I/O: USB 2.0
- Machine Life: 150,000images/400, 000pages
Advertisement
Table of Contents
Troubleshooting

Related Manuals for Samsung CLP-600 Series


Summary of Contents for Samsung CLP-600 Series
-
Page 1: Service Manual
Color Laser Printer CLP-600 Series CLP-600/CLP-600N Basic Model : CLP-600 SERVICE Manual Samsung Color Laser Printer The keynote of Product - Speed: A4, 20/20ppm(Color/Mono) 1200dpi x 1200dpi - Paper Path: FISO(Front-Inm Side-Out), Single Pass(Tandem) - Emulation: SPL-C(GDI) - System Controller: V320... - Page 2 ELECTRONICS * This service manual is a property of Samsung Electronics Co., Ltd. Any unauthorized use of Manual can be punished under applicable international and/or domestic law. Samsung Electronics Co.,Ltd. Oct. 2005 * This service manual is also provided on the web, the ITSELF Printed in Korea.
-
Page 3: Table Of Contents
Contents 1. Precautions 1.1 Safety Warning 1.2 Caution for safety 1.3 ESD Precautions 1.4 Super Capacitor or Lithium Battery Precautions 2. Product Specification 2.1 Product Overview 2.2 Specifications 2.3 Model Comparison Table 3. System Overview 3.1 System Structure 3.2 H/W Structure and Descriptions 3-13 3.3 Driver Board 3-15... -
Page 4: Table Of Contents
Continued 4. S/W Structure and Descriptions 4.1 Architecture 4.2 Language Monitor 4.3 Status Monitor 4.4 Network Interface 4.5 Printer Driver <-> Status Monitor 4.6 System F/W Flow 4.7 Alarm Shortage 4.8 Error status 4.9 CRUM Overview 4.10 FW Upgrade 5. Disassembly and Reassembly 5.1 Precautions When Replacing Parts 5.2 Parts for Maintenance and Repair 5.3 Information Related in Disassembly and Assembly... - Page 5 Continued...
-
Page 6: Table Of Contents
8.1 Exploded Views and Parts List 9. Block diagram 9.1 21ppm Block Diagram 9.2 GID H/W Block Diagram 9.3 N/C & Wireless Block Diagram 10. Connection Diagram 10.1 CLP-600/600N Connection Diagram 10-1 10.2 Power Distribution Diagram 10-2 10.3 Main SMPS 10-3 10.4 Main(Driver) HVPS 28 pin... -
Page 7: Safety Warning
High voltages and lasers inside this product are dangerous. This printer should only be serviced by a suitably trained and qualified service engineer. (2) Use only Samsung replacement parts There are no user serviceable parts inside the printer. Do not make any unauthorized changes or additions to the printer, these could cause the printer to malfunction and create electric shock or fire hazards. -
Page 8: Caution For Safety
Take care not to cut or damage the power cable or plugs when moving the machine. (9) Use caution during thunder or lightening storms. Samsung recommend that this machine be disconnected from the power source when such weather conditions are expected. Do not touch the machine or the power cord if it is still connected to the wall socket in these weather conditions. -
Page 9: Handling Precautions
1.2.4 Assembly / Disassembly Precautions Replace parts carefully, always use Samsung parts. Take care to note the exact location of parts and also cable routing before dismantling any part of the machine. Ensure all parts and cables are replaced correctly. -
Page 10: Disregarding This Warning May Cause Bodily Injury
Failure to do so could cause the printer to tip or fall possibly causing personal injury or damaging the printer. (5) Do not install the printer on a sloping or unstable surface. After installation, double check that the printer is stable. Service Manual Samsung Electronics... -
Page 11: Esd Precautions
2. Be sure to replace the battery with the same or equivalent type recommended by the manufacturer. 3. Super capacitor or Lithium batteries contain toxic substances and should not be opened, crushed, or burned for disposal. 4. Dispose of used batteries according to the manufacture’s instructions. Service Manual Samsung Electronics... -
Page 12: Product Overview
Paper Transfer Unit : 35K - FRU : Fuser : 50K Other Roll : 50K 4. Controller - SPL model(CLP-600) : SPL-C, Std. 64MB - PDL model(CLP-650) : PCL6/PS3, Std. 128MB(Max. 640MB) 5. Control/UI - LCD : SPLC-LED(7), 3Keys PDL-LCD, 6Keys... -
Page 13: Specifications
Mono : More than 400,000 pages, Color : More than 100,000 pages * Print speed will be affected by Operating System used, computing performance, application software, connecting method, media type, media size and job complexity. * Cardstock/Envelope : Half Speed ** Sound Pressure Level, ISO 7779 Service Manual Samsung Electronics... -
Page 14: Controller Specification
180-264 VAC/ 90~132VAC Input frequency 50/60 MHz Frequency tolerance +3Hz Power Consumption Printing : 55Wh(AVG) Power Save : Less than 35Wh 2.2.4 Environmental Range Items Operating Storage Temperature 15~32.5 ˚C(50-90 ˚F) -20~40 ˚C (-4~104 ˚F) Humidity 20~80%RH 10~80%RH Service Manual Samsung Electronics... - Page 15 Replace method 2 steps for install/replacing Dime screw Pick-up Roller Yield 50,000 pages None Life detect None Replace method 3 steps for install/replacing Options CLP-600 CLP-600N Memory Second Cassette Network Option Standard Wireless Network Dealer option Hard Disk Duplex Unit...
-
Page 16: Paper Handling Specifications
O : Supported 2.2.6.2 Input Capacity Items Descriptions Remarks Cassette(FCT) 250 sheets Paper 100 sheets Transparencies 30 sheets Envelopes 10 sheets Labels 10 sheets Option Cassette(SCT) 500 sheets 2.2.6.3 Output Capacity Items Descriptions Remarks Face Down 250 sheets Service Manual Samsung Electronics... -
Page 17: Model Comparison Table
SuSE 8.2~9.2 and Fedora Core 1~3) Mac OS X 10.3 and above Mac OS X 8.6 and above Default Driver SPL-C (Samsung Printer Language Color) SPL-C (Samsung Printer Language Color) for Win WHQL Windows 2000/XP/2003 Windows 2000/XP/2003 Language SPL-C: Win(English, German, French, Spanish, Italian,... -
Page 18: System Structure
Fuser Color Regi Color Regi Sensor Sensor DEV. - Black LSU:4Beam LSU:4Beam Waste Tank Waste Tank MPF Path Paper Paper SMPS SMPS Charge Roll Charge Roll Feeder Feeder Cassette Path Cassette Path Cassette Cassette SCF Path Service Manual Samsung Electronics... - Page 19 System Overview 3.1.2 Sensor Exit Thermostat Thermistor Color Regi (2EA) CRUM (4EA) Toner Full CRUM Humidity Paper Regi Temperature MPF paper empty FCF paper empty Service Manual Samsung Electronics...
- Page 20 * Capacity : 500 Sheets (Standard paper 75mg/m 20lb) * Paper Size : A4, Letter * Paper Weight (average) : 60~90g/m (16~24lbs) * Paper Type : General Printing Paper * Additional Function : Paper Empty Sensor Service Manual Samsung Electronics...
- Page 21 * Ready Temp : 165 * Printing Temp : 180 (over shoot : 200 ) Service Manual Samsung Electronics...
- Page 22 These are activated in sequence as required by the printing process. 19) DEVE CRUM PBA This detects new or used toner cartridges and also checks that cartridges are approved parts. If a toner cartridge is not suitable for the machine an error message is displayed. Service Manual Samsung Electronics...
- Page 23 Non eraser system 2)Exposing One polygon motor ( 8 facet ) Dual beam LD (2ea) LD wavelength : 785nm Polygon motor rpm : ~ 21600 LSU energy : ~ 0.5uJ/cm^2 OPC exposed potential : ~ 50V Service Manual Samsung Electronics...
- Page 24 Transfer voltage : 0.5 ~ 2.0kV (controllable) Roller diameter : •’14mm Roller resistivity : ~ 10^7 ohm-cm Belt resistivity : 10^9 ~ 10^11 ohm-cm Paper sensing by attraction roller Environment sensing by Y-transfer roller Transfer unit life : 35K Service Manual Samsung Electronics...
- Page 25 System Overview 5)Fusing E-coil fusing system -> short warm-up time (45sec) Service Manual Samsung Electronics...
-
Page 26: Toner Cartridge
System Overview 3.1.4 Toner Cartridge Developing method: Non-magnetic 1 element non-contacting method Toner: Non magnetic 1 element shatter type toner (Averag Dia. 0.8ß≠) The life span of toner cartridge : 4,000 Sheets (N/N, Simplex,ISO 5% Coverage Pattern) Service Manual Samsung Electronics... - Page 27 Method of Toner supply : Toner is transported to the developing roller by supply belt Regulating Toner level : Regulating Toner level by Sus. Blade Maintenace of developing gap : Maintenace of developing gap by Gap-ring which is located at the ends of developing roller Service Manual 3-10 Samsung Electronics...
- Page 28 Belt Driving Method : Friction Driving by Drive Roller The Life Span : Print over 35,000 sheets (in 15~30 °…) Belt Cleaning : Collect the toner by using Rubber Blade Management of waste toner : The Waste Toner Tank Be equipped Service Manual 3-11 Samsung Electronics...
- Page 29 System Overview Transfer Voltage Control : ADC Control on Electric Sponge Roller Accomplishing Auto Color Registration By sensor in Handle-Unit Service Manual 3-12 Samsung Electronics...
-
Page 30: H/W Structure And Descriptions
Standard SDRAM capacity is 32MB 5. Interface USB 2.0 6. Option Interface PCI ETHERNET 10/100BASE-TX by SAMSUNG PCI ETHERNET 10/100BASE-TX + W-LAN(IEEE 802.11b) by SAMSUNG 7. Control Panel 16 x 2 LCD Panel LED7+Key3 8. H/W RM7065 - 466MHz, CPU BUS 64-BIT 100MHz... - Page 31 BITSTREAM ENGLISH for PCL5C None for KOREAN 18. OPTION None 19. HOST INTERFACE IEEE1284(including ECP) B-TYPE STANDARD PARALLEL 20. SERIAL USB2.O 21. OPTION PCI-Based Ethernet 10/100BASE-TX by SAMSUNG NETWORK PCI-Based Ethernet 10/100BASE-TX + W-LAN(IEEE 802.11b) Service Manual 3-14 Samsung Electronics...
-
Page 32: Driver Board
It also activates sensors and transmits their signals to the main board. Driver Board Fan Driver Fuser/ SMPS Fan Solenoid Pickup/MP/DUP Driver Solenoid Clutch Feed/Y_DEVE Clutch Driver Stepping Stepping Motor Main Motor Driver MP_EMPT/ Sensor EXIT/EMPT/ Driver FEED Sensor Service Manual 3-15 Samsung Electronics... -
Page 33: Description Of Operation
3.3.2.4 FAN Drive The driver board drives the fans for Fuser and SMPS. 3.3.2.5 Sensor Activation The driver board activates MP_EMPT / EXIT / EMPT / FEED Sensors and transmits their signals to the Main Board. Service Manual 3-16 Samsung Electronics... -
Page 34: Deve Crum
- Through "device select code" and "chip enable input", it judges whether a correct developer with correct color is mounted or not. 3.4.2.3 Measurement of the amount of toner used - The Deve CRUM records the information of dot count into EEPROM, informing the amount of toner used and left over. Service Manual 3-17 Samsung Electronics... -
Page 35: Belt Crum
3.5.2.2 Measurement of belt usage - By recording the rotation number of the belt into EEPROM, the belt CRUM lets you know the number used and the number that may be used. Service Manual 3-18 Samsung Electronics... - Page 36 System Overview Developer CRUM Interface Board DEVE CRUM Main Service Manual 3-19 Samsung Electronics...
- Page 37 System Overview Developer CRUM Interface Board DEVE CRUM Main Service Manual 3-20 Samsung Electronics...
- Page 38 System Overview HRS, 2.0mm,2R, 22PIN, Straight Service Manual 3-21 Samsung Electronics...
- Page 39 System Overview Fusible +24V +24VF Cover S/W Fusible +5VL +24VF GNDA Service Manual 3-22 Samsung Electronics...
- Page 40 AC_Duty,f PWM AC_Enable ENB_Deve_AC_K PWM_Deve_DC_K AC_Enable PWM_Charger PWM_Charger PWM_Trasfer PWM_T_Y PWM_T_M PWM_Trasfer PWM_Trasfer PWM_T_C PWM_T_K PWM_Trasfer PWM_Attraction PWM_ATTR+ ENB_ATTR- ENB_Attraction Description Description Trasfer_Read A_READ_T_Y A_READ_Charger Charger_Read_BK Charger_Read_Color DGND A_READ_ATTR Attraction_Read Ground DGND DGND Ground Power Power Service Manual 3-23 Samsung Electronics...
- Page 41 System Overview HVPS +24V Engine Board Pull Up /PWM_T ? DM7407N /PWM_Attr DM7407N /PWM_Deve DM7407N /PWM_Charge DM7407N /PWM_AC DM7407N /PWM_AC Vp-p DM7407N 73.7§Á Service Manual 3-24 Samsung Electronics...
- Page 42 System Overview HVPS +24V Pull Up Engine Board /Enb_Attr(-DC) DM7407N /Enb_Deve AC DM7407N Service Manual 3-25 Samsung Electronics...
- Page 43 System Overview Service Manual 3-26 Samsung Electronics...
- Page 44 S/W Structure and Descriptions 4. S/W Structure and Descriptions Printer Driver Language Monitor Status Monitor Printer F/W Network Card F/W Service Manual Samsung Electronics...
-
Page 45: Printer Driver
Status Monitor Request Job Status Job Table Status Monitor Data Flow Set option value enable/disable Set last error status polling interval System Status Monitor Printer Driver Registry Get option value Get last error status enable/disable polling interval Service Manual Samsung Electronics... - Page 46 Auto Color Registration ACR module pattern printing H Sync. Video data Color Registration adjustment P Sync. Page Sync. modify Video signal L Sync. Line Sync. modify generator clock Video Clock Freq. modify temperat SMPS Fan temperature control sensor Service Manual Samsung Electronics...
- Page 47 100 ~ 110 % 110 %~ Toner (C,M,Y,K) Ready Yellow Toner Low Replace Yellow Toner Yellow Toner Empty Transfer Belt Replace Transfer Belt Soon Replace Transfer Belt Fuser Replace Fuser Soon Replace Fuser Pickup Rollers Replace MP Pick-Roller (MP/Tray1/Tray2) Service Manual Samsung Electronics...
- Page 48 S/W Structure and Descriptions Service Manual Samsung Electronics...
-
Page 49: Power Supply
5.4.10 HVPS (High Voltage Power Supply) page(5-29) 5.4.11 Main PBA page(5-32) 5.4.12 PBA Sub-Driver page(5-35) 5.4.13 CRUM Unit page(5-37) 5.4.14 SMPS page(5-39) 5.4.15 Holder AC Unit page(5-40) 5.4.16 LSU page(5-41) 5.4.17 MPF Unit page(5-43) 5.4.18 Housing-M-Pick up page(5-46) Service Manual Samsung Electronics... -
Page 50: Precautions When Replacing Parts
5.1.1 Precautions when assembling and disassembling * Use only approved Samsung spare parts. Ensure that part number, product name, any voltage, current or temperature rating are correct. Failure to do so could result in damage to the machine, circuit overload, fire or electric shock. -
Page 51: Parts For Maintenance And Repair
When a part is replaced it is necessary to reset the 'life used' that is stored in memory. * How to initialize a the value of part's life span: From the control panel, select the following items in order: Menu-Setup - Maintenance - Check other - (Select a desired part) - Reset Service Manual Samsung Electronics... -
Page 52: Printer Cleaning
* Do not touch transfer roller when cleaning inside of machine. If transfer roller gets dirty, printing quality could be low. * Please refer to the User Manual for cleaning instructions. Service Manual Samsung Electronics... -
Page 53: Information Related To Disassembly And Assembly
(hot water sets the toner). Do not ing the fuser. touch the developer roller surface as cont- amination will reduce print quality. Take care not to damage the roller's surface when installing or removing a toner car- tridge. Service Manual Samsung Electronics... -
Page 54: Screws Used In The Printer
The screws listed in the table below are used in this printer. Please ensure that, when you disassemble the printer, you keep a note of which screw is used for which part and that, when reassembling the printer, the correct screws are used in the appropriate places. Service Manual Samsung Electronics... - Page 55 Disassembly and Reassembly Service Manual Samsung Electronics...
- Page 56 Disassembly and Reassembly Service Manual Samsung Electronics...
- Page 57 Disassembly and Reassembly Service Manual Samsung Electronics...
-
Page 58: Opening Covers And Replacing Consumable Parts
1. Pull the side handle to open the Right Cover Ass'y and then press down firmly unit the Toner Cartridges are ejected. Right Cover Ass’y 2. Removing a Toner Cartridge(K, C, M, Y) NOTICE : Take care not to damage the rollers. Keep the Toner Cartridge on the flat surface. Service Manual 5-10 Samsung Electronics... - Page 59 3. The Toner Cartridges are located, as shown below. Black Toner Cartridge Cyan Toner Cartridge MargentaToner Cartridge YellowToner Cartridge 4. PTB Unit by releasing the PTB Lock Lever on left side of the Right Cover Ass'y. PTB Unit Lock Lever Service Manual 5-11 Samsung Electronics...
- Page 60 Disassembly and Reassembly 5. Take out the PTB Unit, as shown below. Service Manual 5-12 Samsung Electronics...
-
Page 61: Disassembly Procedure
Disassembly and Reassembly 5.4 Disassembly Procedure 5.4.1 Front Cover Ass'y 1. Pull the Cassette out of the printer. Cassette 2. Carefully release the three Hooks using a flat bladed screwdriver, as shown below. Hook Service Manual 5-13 Samsung Electronics... - Page 62 Disassembly and Reassembly 3. Remove the Cover-M-Front in the direction of arrow, as shown below. Cover-M-Front 4. Remove the three screws located inside the Cover-M-Deco. Screw Screw Screw Service Manual 5-14 Samsung Electronics...
- Page 63 5. First lift the printer, carefully release the Hooks on the both side using a flat bladed screwdriver and then remove the Cover- M-Deco. Cover-M-Deco 6. Take care to unplug the one connector from the LCD PBA. Connector (LCD PBA) Cover-M-Deco Service Manual 5-15 Samsung Electronics...
-
Page 64: Op Cover Ass'y
1. Remove the four screws from the OP Cover Ass'y and remove it. OP Cover Ass’y 2. Remove the nine screws from the LCD PBA and then remove the Keys and LCD PBA, as shown below. Cap2 LCD PBA OPE Key2 Cap1 OPE Key1 Service Manual 5-16 Samsung Electronics... -
Page 65: Rear Cover
1. Remove the four screws, as shown below. Rear Cover Screw Screw Screw Screw 2. First lift the printer, carefully release the Left Side Hook using a flat bladed screwdriver, as shown below. Left Side Hook Service Manual 5-17 Samsung Electronics... - Page 66 Disassembly and Reassembly 3. Release the Middle Hook and then carefully release the Right Side Hook in the direction of arrow, as shown below. Right Side Hook Middle Hook Service Manual 5-18 Samsung Electronics...
-
Page 67: Right Cover
* Remove the Rear Cover (Refer to 5.4.3) 1. Remove the one screw from the left side hinge, as shown below. Right Cover Ass’y Screw 2. Remove the one screw from the right side hinge, as shown below. Hinge Screw Service Manual 5-19 Samsung Electronics... - Page 68 Disassembly and Reassembly 3. First lift the left side of the Right Cover Ass'y and then pull the right side of the Right Cover Ass'y in the direction of arrow, as shown below. Right Cover Ass’y Service Manual 5-20 Samsung Electronics...
-
Page 69: Left Cover
* Remove the Rear Cover (Refer to 5.4.3) 1. Remove the four screws, as shown below. Screw Screw Screw Screw 2. Release the Left Cover in the direction of arrow, as shown below. Left Cover Service Manual 5-21 Samsung Electronics... - Page 70 >> Before disassembling it : * open the Right Cover Ass'y (Refer to 5.3.3) 1. Open the Exit Cover. Exit Cover 2. Release the two Handle-Fix-Fuser on the both end, as shown below. Handle-Fix-Fuser Handle-Fix-Fuser Service Manual 5-22 Samsung Electronics...
- Page 71 Disassembly and Reassembly 3. Pull the Fuser out of the Printer. Fuser Service Manual 5-23 Samsung Electronics...
-
Page 72: Top Cover
* Remove the Left Cover (Refer to 5.4.5) 1. Open the Exit Cover. Exit Cover 2. Remove the two screws located left side the Top Cover Ass'y, as shown below. Top Cover Ass’y Screw Screw Service Manual 5-24 Samsung Electronics... - Page 73 Disassembly and Reassembly 3. Remove the three screws located top and right side the Top Cover Ass'y, as shown below. Then remove the Top Cover Ass'y. Top Cover Ass’y Screw Screw Screw Service Manual 5-25 Samsung Electronics...
-
Page 74: Exit Cover
Disassembly and Reassembly 5.4.8 Exit Cover >> Before disassembling it : * Remove the Top Cover Ass'y (Refer to 5.4.7) 1. If necessary, remove the Exit Cover in the direction of arrow, as shown below. Exit Cover Service Manual 5-26 Samsung Electronics... -
Page 75: Main Drive Ass'y
NOTICE : Be aware of the E-Ring and Pin to ensure they are not lost. 2. Unplug the four connectors from the two OPC Drive Motors, Fuser Drive Motor and DEVE Drive Motor, as shown below. OPC Drive Fuser Drive Motor Motor DEVE Drive Motor OPC Drive Motor Service Manual 5-27 Samsung Electronics... - Page 76 Disassembly and Reassembly 3. Remove the six screws from the Main Drive and then pull the Main Drive Ass'y, as shown below. Main Drive Ass’y Screw Screw Screw Screw Screw Screw Service Manual 5-28 Samsung Electronics...
-
Page 77: Hvps (High Voltage Power Supply)
* Remove the Front Cover Ass'y (Refer to 5.4.1) 1. Remove the five screws from the HVPS. HVPS Screw Screw Screw Screw Screw 2. Unlatch the four Hooks in the direction of arrow, as shown below. Hook Hook Hook Hook Service Manual 5-29 Samsung Electronics... - Page 78 Disassembly and Reassembly 3. Unplug the one connector from the HVPS. HVPS 4. Carefully remove the HVPS from the Main Frame. Main Frame Service Manual 5-30 Samsung Electronics...
- Page 79 Disassembly and Reassembly 5. The connectors are located, as shown below. To Main PBA <HVPS> Service Manual 5-31 Samsung Electronics...
-
Page 80: Main Pba
1. Remove the five screws from the Bracket Conn and remove it, as shown below. Bracket-Conn Screw Screw Screw Screw Screw 2. Unplug the all connectors and then remove the four screws from the Main PBA. Main PBA(with PCB Sub-PCI NPC) Screw Screw Screw Screw Service Manual 5-32 Samsung Electronics... - Page 81 3. Remove the two screws securing the Bracket-NPC from the Bracket-Cont Lower and then remove the Main PBA(with PCB Sub-PCI NPC), as shown below. Screw Bracket-Cont Lower Bracket-NPC Screw 4. Pull the PCB Sub-PCI NPC from the Main PBA, as shown below. Main PBA PCB Sub-PCI NPC Service Manual 5-33 Samsung Electronics...
- Page 82 CRUM BD BLDC DEVE YM PTB Drawer Con Driver To PCI NPC CN200 Cover Open n24V_EN_Out Temp_Out SMPS <Main PBA> 6. The connectors are located PCB Sub-PCI NPC. To Main PBA Line <PCB Sub-PCI NPC> Service Manual 5-34 Samsung Electronics...
-
Page 83: Pba Sub-Driver
1. Remove the three screws from the Bracket-Cont Lower and then remove it. Braket-Cont Lower Screw Screw Screw 2. Unplug the all connectors and remove the three screws from the PBA Sub-Driver and then remove it, as shown below. Screw Screw Screw PBA Sub-Driver Service Manual 5-35 Samsung Electronics... - Page 84 Disassembly and Reassembly 3. The connectors are located, as shown below. Exit SMPS Step Motor Fan Fuser To Main PBA Sol_MP Sol_Pickup Feed MP EMPT EMPT <PBA Sub-Driver> Service Manual 5-36 Samsung Electronics...
-
Page 85: Crum Unit
* Remove the Bracket Conn (Refer to 5.4.11) 1. Unplug the connector from the Main PBA. CRUM BD Main PBA 2. First release the Hook and then remove the CRUM Unit in the direction of arrow. CRUM Unit Hook Service Manual 5-37 Samsung Electronics... - Page 86 Disassembly and Reassembly 3. Remove the PBA Sub-DEVE_CRUM from the Cover-CRUM BD, as shown below. PBA Sub-DEVE_CRUM Cover-CRUM BD Service Manual 5-38 Samsung Electronics...
- Page 87 * Remove the Top Cover Ass'y (Refer to 5.4.7) 1. Remove the two screws from the SMPS and then pull the SMPS. Screw Screw SMPS 2. Unplug the all connectors from the SMPS and then remove the SMPS, as shown below. Service Manual 5-39 Samsung Electronics...
-
Page 88: Holder Ac Unit
1. Remove the two screws securing the Holder AC Unit and then remove the Holder AC Unit in the direction of arrow. Holder AC Harness Holder AC Unit Screw Screw 2. Unplug the Holder AC Unit connector from the SMPS, as shown below. Connector(Holder AC Unit) SMPS Service Manual 5-40 Samsung Electronics... - Page 89 1. Remove the four screws from the Housing-Middle Part and then remove it(with Duct Left Ass'y). Housing-Middle Part (with Duct Left Ass’y) Screw Screw Screw Screw 2. Remove the two screws from the LSU. Screw Screw Service Manual 5-41 Samsung Electronics...
- Page 90 Disassembly and Reassembly 3. Unplug the three connectors from the LSU, as shown below. 4. Remove the LSU in the direction of arrow. Service Manual 5-42 Samsung Electronics...
-
Page 91: Mpf Unit
* Open the Right Cover Ass'y (Refer to 5.3.3) 1. Unplug the Solenoid connector from the PBA Sub-Driver. PBA Sub-Driver MP Solenoid Connector 2. Remove the one screw from the Gear Cover and then remove it, as shown below. Screw Gear Cover Service Manual 5-43 Samsung Electronics... - Page 92 Disassembly and Reassembly 3. Remove the four screws from the MPF Unit and then remove it. Screw Screw Screw Screw MPF Unit 4. Remove the one screw securing the Solenoid-MP and then remove it. MPF Unit Solenoid-MP Service Manual 5-44 Samsung Electronics...
- Page 93 5. When if only remove the Pick up Unit, first push the Idle toward the ends of shaft and take out the Pick up Unit in the direction of arrow, as shown below. Pickup Unit Idle Pickup Unit Service Manual 5-45 Samsung Electronics...
-
Page 94: Housing-M-Pick Up
1. First turning over, remove the Extension Spring using a Pincette, as shown below. Exension Spring 2. Pull the Housing-M-Pick up from the Bushing Feed and then remove it in the direction of arrow. Housing-M-Pickup Bushing Bushing Service Manual 5-46 Samsung Electronics... - Page 95 Disassembly and Reassembly NOTICE : When you reassemble the Housing-M-Pick up make sure that the let and of the Housing-M-Pick up fits into the Pick up Shaft, as shown below. Pickup Shaft Housing-M-Pickup Service Manual 5-47 Samsung Electronics...
-
Page 96: Paper Path And Paper Jam
Fuser Color Regi Color Regi Sensor Sensor DEV. - Black LSU:4Beam LSU:4Beam Waste Tank Waste Tank MPF Path Paper Paper SMPS SMPS Charge Roll Charge Roll Feeder Feeder Cassette Path Cassette Path Cassette Cassette SCF Path Service Manual Samsung Electronics... - Page 97 * The paper drive motor has been driving for longer than the time needed for the longest paper size and the exit sensor is not off. MPF Path Service Manual Samsung Electronics...
- Page 98 * Paper could not be picked up from the MPF tray. * After pickup, a paper has been fed, but it doesn't reach the feed sensor in a certain time. * Feed sensor is faulty and does not detect paper. MPF Path Service Manual Samsung Electronics...
-
Page 99: Jam Removal
By selecting the correct paper types, most paper jams can be avoided. If a paper jam occurs, follow the steps outlined below: • Ensure that the adjustable guides are positioned correctly. • Do not overload the tray. Ensure that the paper is below the paper capacity mark on the right inside the tray. Service Manual Samsung Electronics... - Page 100 Close the access door should the installation paper which may be jammed in other parts of need to be halted for any reason. the printer. 7. Close the access door firmly. The printer will resume printing. Service Manual Samsung Electronics...
- Page 101 2. Remove the jammed paper by pulling in the CAUTION: direction shown. To avoid tearing the paper, pull If the access door is not completely closed, the it out gently and slowly. printer will not operate. Service Manual Samsung Electronics...
- Page 102 6. Close the access door firmly. The printer will resume printing. The fuser is hot! CAUTION: • If the top cover and access door are not completely closed, the printer will not operate. Service Manual Samsung Electronics...
- Page 103 • If you leave the access door open for more than a few minutes, the OPC drum can be exposed to light. This will cause damage to the OPC drum. Close the access door should the installation need to be halted for any reason. Service Manual Samsung Electronics...
- Page 104 6. After making sure that the access door is open, close the top cover. Make sure that it is secure- ly latched. CAUTION: • Do not touch the green surface, the OPC drum, Service Manual Samsung Electronics...
- Page 105 • If you leave the access door open for more than a few minutes, the OPC drum can be exposed to light. This will cause damage to the OPC drum. Close the access door should the installation need to be halted for any reason. Service Manual 6-10 Samsung Electronics...
- Page 106 5. Open the inner cover of Tray2. 7. Close the two jam covers. If you cannot find the jammed paper, or if there is any resistance removing the paper, stop pulling and continue. Service Manual 6-11 Samsung Electronics...
- Page 107 12. After making sure that the access door is open. Close the top cover. 9. If you see the jammed paper, remove the paper from the printer by gently pulling it straight out as shown below. Service Manual 6-12 Samsung Electronics...
- Page 108 Alignment and Adjustmens 13. Close the access door firmly. The printer will resume printing. CAUTION: If the top cover and access door are not completely closed, the printer will not operate. Service Manual 6-13 Samsung Electronics...
-
Page 109: Sample Pattern
Menu. 3. Press the scroll button until you see “Configuration ” on the bottom line. 4. Press the Enter button A demo page showing the printer ’s features and capabilities prints out. Service Manual 6-14 Samsung Electronics... -
Page 110: Checking The Remaining Toner And Others
10. Press the Upper Level button to return to step 7 and select a different choice or press it a second time to return to step 6 and choose a different item. 11. To return to the Ready condition press the Upper Level button several times until 'Ready' appears in the display. Service Manual 6-15 Samsung Electronics... -
Page 111: Understanding The Control Panel
•The printer is in Power Save mode, using less power.When a print job is received from the computer or if any button is pressed,the printer switches to on-line. •To deactivate the Power Save mode or change the power-saving time. Service Manual 6-16 Samsung Electronics... - Page 112 Or, if you have installed an invalid toner cartridge, a corresponding lamp turns on. Install only Samsung toner cartridges, designed for your printer. Otherwise, if you have installed the toner cartridge into improper cartirdge slot, a corresponding lamp turns on. Install the toner cartridge into each proper cartridge slot.
- Page 113 If you want to ignore this warning, press this button. • The printer is off-line and cannot print. • The printer is in Power Save mode. When data is received, it switches to on-line automatically. Service Manual 6-18 Samsung Electronics...
-
Page 114: Using Control Panel Menus
Print PS Error Typeface LCD Language Calibration Reset Network Symbol Emulation Custom Color Default Set Lines Power Save Print Net CFG itch Auto Continue Point Size Jam Recovery Courier Altitude Adj. Auto CR Job Time Out Maintenance Service Manual 6-19 Samsung Electronics... -
Page 115: Periodic Defective Image
Transfer Roller 43.90 mm periodic band Gap-ring 39.00 mm periodic band Pressure Roller 114.6 mm white/black spot Cleaning blade 1. OPC drum 2. Charger roller Doctor blade 4. Developing roller 3. Supply roller Service Manual 6-20 Samsung Electronics... -
Page 116: How To Use Edc (Engine Diagnostic Control) Mode
6.6.1.2 LCD Function and Directions Upper Line : Upper Line messages mainly show the current test menu or sub-menu. [Main Menu] or [Function] is displayed. Lower Line : Lower Line messages mainly the current test and status. Service Manual 6-21 Samsung Electronics... - Page 117 Cyan Dev DC Print Menu Map Black Dev DC Yellow Dev AC Magenta Dev AC Cyan Dev AC Black Dev AC Yellow Tr Magenta Tr Cyan Tr Black Tr Paper Charger + Paper Charger - Service Manual 6-22 Samsung Electronics...
-
Page 118: How To Operate
Press the "Enter" key to run the test. The test is stopped by pressing the "Upper Level" key. e) Pressing the "Upper Level" key when the test is already stopped will return to step 'c' above. f) Pressing the "Upper Level" key again will return to the EDC main menu. Service Manual 6-23 Samsung Electronics... - Page 119 Press the "Enter" key to run the test. The test is stopped by pressing the "Upper Level" key. e) Pressing the "Upper Level" key when the test is already stopped will return to step 'c' above. f) Pressing the "Upper Level" key again will return to the EDC main menu. Service Manual 6-24 Samsung Electronics...
- Page 120 Press the "Enter" key to display the sensor status. If the sensor actuator is moved the displayed status will change to reflect the new sensor position.. e) Pressing the "Upper Level" key will return to step 'c' above. f) Pressing the "Upper Level" key again will return to the EDC main menu. Service Manual 6-25 Samsung Electronics...
- Page 121 • The LSU Motor Lock Time is a maximum 15 seconds depending on the environment. It may take over 15 seconds until the <Succeed> or <Failed> message is displayed. • For safety - after printing a test pattern if you need to return to EDC mode turn the printer off and then re-enter EDC. Service Manual 6-26 Samsung Electronics...
- Page 122 For safety - after printing a test pattern if you need to return to EDC mode turn the printer off and then re-enter EDC Mode by turning power on whilst holding in the "Enter" key. Service Manual 6-27 Samsung Electronics...
- Page 123 Pressing the "Upper Level" key again will return to the EDC main menu. * The allowed tolerance is commonly +/- 3%, this is the value Displayed, in case of "Dev AC", it is the value of Vpp. Service Manual 6-28 Samsung Electronics...
-
Page 124: Procedure Of Checking The Symptoms
"7.1.1 Basic Check List" OP Panel - No Power - LCD Module - Main PBA Ready Indicate Refer to "Error Message" Power Save "7.5 Error Message" Print Printing Refer to guality is "7.2 Solution of Image Problem" normal? Service Manual Samsung Electronics... -
Page 125: Basic Check List
--> Refer to section 7.2 6. Check consumables (toner etc.). •Using the keys print the Information Page. --> Refer to 7.1.4 below for expected life of various consumable parts, compare this with the figures printed and replace as required Service Manual Samsung Electronics... -
Page 126: Initial Inspection
1. Use only paper which is of a suitable quality, weight and size? See the user guide. 4. Check the overall condition of the printer 1. Is the printer properly maintained ? Clean the Paper Transport Passages. Any rollers with dirt surfaces should be cleaned or replaced. Service Manual Samsung Electronics... - Page 127 2. In order to calculate the number of images printed 1 is added to the appropriate counter every 30 seconds. The amount of waste toner is calculated based on the number of pixels in the image. 3. When the user replaces any of the consumable parts and resets the appropriate counter it starts again from 0. Service Manual Samsung Electronics...
-
Page 128: Solution Of Image Problem
Replace the Toner Cartridge. toner cartridge OPC Drum surface contaminated or damaged. Replace the Toner Cartridge. PTB Unit belt is contaminated or damaged. Replace the PTB Unit Belt. Fuser Unit is contaminated. Clean or replace the Fuser Unit. Service Manual Samsung Electronics... - Page 129 If problem persists replace the OPC Drum Poor toner transfer to PTB Unit Check and clean PTB Unit contacts. Re-install or replace the PTB Unit. PTB Bias voltage incorrect. Check and clean PTB Unit contact. Replace the HVPS. Service Manual Samsung Electronics...
- Page 130 Open the covers, check and clean the Paper Path. Problem transferring intermediate image onto Check and clean T2 roller contacts paper Check T2 Solenoid and cam operation - ensure T2 comes properly into contact when solenoid operates. Service Manual Samsung Electronics...
- Page 131 1) Creases : Replace the Guide Input. 2) Replace the Fuser Unit. 3) Check OPC, Drum, Toner Cartridge and PTB Unit for contamination and replace as required. Fault occurs in the MPF Tray Printing only. Replace the MPF Tray Unit. Service Manual Samsung Electronics...
- Page 132 Replace T2 roller - Mark every 27.00 mm Replace Toner cartridge Laser Unit damaged Line repeats every 1~2 mm- Replace the LSU Unit. Damage or contemination of OPC drum Random line spacing- Replace the OPC Drum. Service Manual Samsung Electronics...
-
Page 133: Paper Feeding Problems And Troubleshooting
Roller with IPA or water. 4. Check the Feed Sensor is not 4. Replace the main PBA or Sensor. sticking by using the EDC Mode (When “JAM-0” occurs even though the paper feeds into the printer.) Service Manual 7-10 Samsung Electronics... - Page 134 • Check that the Exit unit is assem- bled properly and full functioning 4. If the Exit Sensor is defective. a and replace if necessary. Jam In Exit Area will occur and printing will stop. 4. Replace the Exit Sensor. Service Manual 7-11 Samsung Electronics...
- Page 135 Exit Roller. 3. If the Bearing - Fuser or Gear - Fuser is damaged or 3. Check the SMPS and Main PBA if the Bearing Gear melted by excessive heat. is melted. Service Manual 7-12 Samsung Electronics...
-
Page 136: Fuser Error
The fuser gears melt and the roller drive fails. Check and Cause Solution 1. The Fuser makes a noise and fails to operate, rollers - Replace the Fuser. may not rotate. - Replace the Main PBA. - Replace the SMPS. Service Manual 7-13 Samsung Electronics... -
Page 137: Paper Empty
2. Check the Cover Open sensor, connectors and cable 2. Replace the harness or microswitch as necessary. harness. Ensure that a signal reaches the main PBA 3. Use the EDC mode to test the actuator. 3. Replace the Sensor Board. Service Manual 7-14 Samsung Electronics... -
Page 138: Defective Motor
2. Replace cables or LCD Panel Ass'y. Replace the work check the display connectors and cable harness Main PBA. 3. Check if +24VDC or other Power Supplies are shorted 3. Replace the components used for +24VDC. out. Service Manual 7-15 Samsung Electronics... - Page 139 1. Replace the OPC Drum. Image Count value is over 50,000. Image Density may be reduced. It is possible to continue to print one Page at a time by pressing the “On-Line” button when it flashes. Service Manual 7-16 Samsung Electronics...
-
Page 140: Treatment Of Error Message
[Color] installed. designed for your printer. Or install the toner cartridge into each proper cartridge slot. Invalid An invalid paper transfer belt has been Only install Samsung paper transfer belts, Transfer Belt installed. designed for your printer. Service Manual 7-17... - Page 141 The printer is waiting for the user’s Load a sheet of print material and press the action before printing from the On Line/Continue button. You need to press Multi-purpose Tray using the manual the button for each page. feed mode. Service Manual 7-18 Samsung Electronics...
- Page 142 After turn the printer off and then back on, installed or connected to the printer. reinstall the optional Tray2. Tray2 Jam Cover The optional Tray2 jam cover is open. Close the Tray2 cover firmly. Open Service Manual 7-19 Samsung Electronics...
-
Page 143: Exploded Views And Parts List
This format is used throughout Samsung on all product ranges. Typically it is used for small components and electronic parts. This format is controlled by individual Samsung Divisions and is used on specific products, typically for mechanical parts. Type 2 format part numbers fall into 2 categories: Assemblies consisting of 2 or more parts. - Page 144 Exploded Views & Parts List 8.1 Main Service Manual...
- Page 145 Exploded Views & Parts List Main Parts List SA : Service Available O : Service available X : Service not available SEC.Code Description Remark 7.1-1 JC97-02187A MEA UNIT-FRAME BASE;CLP-600,SEC,EXPORT,- M0013 7.1-2 JC97-02151A MEA UNIT-FRAME MAIN;CLP-600,SEC,EXPORT,- M0015 7.1-3 JC63-00585A COVER-_M_GEAR;CLP-600,HIPS,T2.0,W37.1,L9 C0031 7.1-4...
- Page 146 7.1-37 JC97-02194A MEA HOU-COVER TOP;CLP-600,SEC,EXPORT,-,- M0006 7.1-38 JC97-02242A MEA HOU-COVER REAR;CLP-600,SEC,EXPORT,-, M0002 7.1-38-1 JC63-00575A COVER-_M_REAR;CLP-600,HIPS,2.5,464.9,437 C0036 7.1-38-2 JC63-00192B COVER-M MAIN REAR DUMMY;CLP-600,HIPS,-,W C0043 7.1-39 JC97-02191A MEA HOU-COVER RIGHT 7.1-40 JC97-02192A MEA UNIT-CASSETTE;CLP-600,SEC,EXPORT,-,- M0009 7.1-41 CLP-600S5 SCF UNIT 7.1-42 6043-001097 PIN-SPRING;W,D2,L14,-,SUS304 CSP 1/2H,T0 P0015 7.1-43...
- Page 147 Exploded Views & Parts List 8.2. Front Cover (CLP-600N) (CLP-600) Service Manual...
- Page 148 SHEET-COVER OP LCD;CLP-600,PC SHEET,T0.5 S0011 7.2-5 JC72-01199B PMO-OPE KEY 2;CLP-510,ABS,36024,-,-,HB,- P0047 7.2-6 JC72-01200A PMO-OPE KEY 2 CAP;CLP-500,PMMA,MILKY WHI P0046 7.2-7 JC72-01197C PMO-M OPE KEY 1;CLP-600,ABS,SOLITARY BLU P0045 7.2-8 JC72-01198C PMO-M OPE KEY 1 CAP;CLP-600,ABS,SOLITARY P0044 7.2-9 JC92-01675A PBA SUB-LCD_PANEL Service Manual...
- Page 149 Exploded Views & Parts List 8.3. Top Cover Service Manual...
- Page 150 Exploded Views & Parts List Top Cover Parts List SA : Service Available O : Service available X : Service not available SEC.Code Description Remark 7.3-0 JC97-02194A MEA HOU-COVER TOP;CLP-600,SEC,EXPORT,-,- M0006 7.3-1 JC63-00574A COVER-_M_TOP;CLP-600,HIPS,2.5,386.7,465. C0041 7.3-2 JC63-00588A COVER-_M_STACKER;CLP-600,ABS,T2.5,W119.5 C0040 7.3-3 JC63-00590A COVER-_M_VENT;CLP-600,HIPS,T2.5,W215.0,L...
- Page 151 Exploded Views & Parts List 8.4. Right Cover Service Manual...
- Page 152 O : Service available X : Service not available SEC.Code Description Remark 7.4-0 JC97-02191A MEA HOU-COVER RIGHT 7.4-1 JC63-00589A COVER-_M_RIGHT;CLP-600,HIPS,T2.5,W370.0, C0037 7.4-2 JC97-02405A MEA UNIT-COVER MPF;CLP-600,SEC,EXPORT,-, M0010 7.4-2-1 JC63-00584A COVER-_M_MP;CLP-600,HIPS,T2.5,257.4,L160 C0034 7.4-2-2 JC63-00586A COVER-_M_INNER MP;CLP-600,HIPS,T2.0,W252 C0033 7.4-2-3 JC61-01043A GUIDE-_M_SIDE MP L;CLP-600,HIPS,-,W131.9 G0049 7.4-2-4...
- Page 153 Exploded Views & Parts List 8.5. Base Frame Service Manual 8-11...
- Page 154 Exploded Views & Parts List Base Frame Parts List SA : Service Available O : Service available X : Service not available SEC.Code Description Remark 7.5-0 JC97-02187A MEA UNIT-FRAME BASE;CLP-600,SEC,EXPORT,- M0013 7.5-1 JC61-01005A FRAME-_M_BASE BOTTOM;CLP-600,HIPS,HR-136 F0004 7.5-2 JC70-00390A IPR-CHANNEL FRAME BASE;CLP-500,SECC,-,T1 I0003 7.5-3...
- Page 155 Exploded Views & Parts List 8.6. Main Frame Service Manual 8-13...
- Page 156 SPRING ETC-OPC F;CLP-600,SUS304 ,1.5,6.5 S0026 7.6-17 JC97-02403A MEA UNIT-DEV TERMINAL;CLP-600,SEC,EXPORT M0011 7.6-17-1 JC61-01008A GUIDE-_M_TERMINAL UPPER;CLP-600,ABS,2.0, G0055 7.6-17-2 JC70-00505A ELECTRODE-HV C;CLP-600,SUS304 WPB DU NI- E0023 7.6-17-3 JC70-00504A ELECTRODE-HV B;CLP-600,SUS304 WPB DU NI- E0022 7.6-17-4 JC70-00503A ELECTRODE-HV A;CLP-600,SUS304 WPB DU NI- E0021 7.6-17-5 JC61-01009A GUIDE-_M_TERMINAL LOWER;CLP-600,ABS,2.0,...
- Page 157 0604-001154 PHOTO-INTERRUPTER;TR,0.2-1.0MA,80MW,DIP, P0012 7.6-26 JC39-00428A CBF HARNESS-MP_1;CLP-600,CBF HARNESS,UL1 C0018 7.6-27 JC61-01020A PLATE-P-GROUND FUSER;CLP-600,SUS304,T0.2 P0023 7.6-28 JC39-00302A CBF HARNESS-100M_GND;CLP-500,-,-,1 PIN,5 C0007 7.6-29 JC61-01267A SPRING ETC-OPC R;CLP-600,SUS304 ,1.5,6.5 S0027 7.6-30 JC61-01014A PLATE-P-GROUND OPC;CLP-600,SECC,T0.5,W15 P0024 7.6-31 JC61-01015A PLATE-P-GROUND DRIVE;CLP-600,SUS304,T0.2 P0022 Service Manual 8-15...
- Page 158 Exploded Views & Parts List 8.7. Fuser Service Manual 8-16...
-
Page 159: Fuser Parts List
GEAR-_M_EXIT IDLE;CLP-600,PBT,M1.0,Z22,- G0004 7.7-27 JC61-01070A BRACKET-P-IDLE GEAR;CLP-600,SECC,T1.0,W3 B0012 7.7-28 JC63-00647A GROUND-P-FUSER B;CLP-600,SUS304,T0.3,W17 G0037 7.7-29 JC63-00648A GROUND-P-FUSER BALL;CLP-600,SUS304,T0.3, G0038 7.7-30 JC63-00643A COVER-M-CARBON BRUSH;CLP-600,PET GF 30%, C0045 7.7-31 JC67-00104A BRUSH-CARBON;ML-3560,SM190,-,D9,9.5,-,- B0020 7.7-32 6107-001172 SPRING-CS;SUS304,-,PI0.5,D6.7,L17.5,-,-, S0035 7.7-33 1404-001359 THERMISTOR-NTC ASSY;1KOHM,-,4537K,0.25MW T0001 7.7-35 JC66-00799A ROLLER-HEAT;CLP-600,AL5052+RUBBER,D36.4,... - Page 160 HOLDER-_M_FUSER GEAR;CLP-600,PPS+PTEE+GF H0007 7.7-46 JC68-01581A LABEL(P)-CAUTION HOT;COMMON,SAMSUNG,PET, L0001 7.7-47 JC68-00407A LABEL(R)-HV FUSER;ML-6060,PVC,-,220V,-,, L0006 7.7-47 JC68-00408A LABEL(R)-LV FUSER;COMMON,PVC,-,110V,-,,, L0006 7.7-48 JC63-00592A COVER-_M_SIDE L;CLP-600,PET GF30%,T2.5,W C0038 7.7-49 JC63-00593A COVER-_M_SIDE R;CLP-600,PET GF30%,T2.5,W C0039 7.7-50 JC61-01063A FRAME-_M_LOWER FUSER;CLP-600,PET+GF30%,B F0006 7.7-51 JC61-01066A GUIDE-_M_INPUT;CLP-600,PET+GF30%,5V,T3.0 G0041 7.7-52 JC61-01069A BRACKET-P-GUIDE FRAME;CLP-600,SECC,T0.8,...
- Page 161 Exploded Views & Parts List 8.8. Main Drive Service Manual 8-19...
- Page 162 Exploded Views & Parts List Main Drive Parts List SA : Service Available O : Service available X : Service not available SEC.Code Description Remark 7.8-0 JC96-03369A ELA UNIT-DRIVE MAIN;CLP-600,SEC,EXPORT,- E0011 7.8-1 JC61-00996A BRACKET-P-MAIN FRONT;CLP-600,SECC,T1.2,W B0013 7.8-2 JC61-00997A BRACKET-P-MAIN REAR;CLP-600,SECC,T1.2,W1 B0014 7.8-3...
- Page 163 Exploded Views & Parts List 8.9. MPF Service Manual 8-21...
- Page 164 R0019 7.9-7 JC66-00775A LEVER-_M_ACTUATOR EMPTY;CLP-600,ABS,T3.0 L0009 7.9-8 JC72-00772A PMO-HOLDER SENSOR,MP;SCX-5100,ABS,BLACK, P0039 7.9-9 JC92-01662A PBA SUB-MP_EMP_SENSOR;CLP-600,SEC,KOREA, P0006 7.9-10 JC39-00431A CBF HARNESS-MP_EMP2;CLP-600,CBF HARNESS, C0019 7.9-11 JC61-01060A PLATE-P-GROUND BRACKET;CLP-600,SUS304,T0 P0021 7.9-12 JC72-00382B PMO-BUSHING FEED;ML-1710,POM(DERLIN 8903 P0034 7.9-13 JC66-00836A ROLLER-FEED MPF;CLP-600,SUM24L+EPDM,°ÕO6/S R0010 7.9-14 JC72-41191B PMO-BEARING SHAFT;ML-2150,POM,BLK,-,DE89...
- Page 165 Exploded Views & Parts List 8.10. Pick Up Service Manual 8-23...
- Page 166 S0009 7.10-33 JC66-00761A GEAR-M-PICK UP;CLP-600,POM,M0.8,SPUR,Z50 G0032 7.10-34 JC61-01029A GUIDE-P-GEAR BRACKET;CLP-600,SECC,T1.2,1 G0059 7.10-35 JC66-00759A GEAR-M-MAIN;CLP-600,POM,M0.8,SPUR,Z31,-, G0028 7.10-36 JC66-00763A GEAR-M-PICK UP IDLE;CLP-600,POM,M0.8,SPU G0031 7.10-37 JC66-00762A GEAR-M-PICK UP IDLE 2;CLP-600,POM,M0.8,S G0030 7.10-38 JC66-00760A GEAR-M-MP IDLE;CLP-600,POM,M0.8,SPUR,Z20 G0029 7.10-39 JC33-00012B SOLENOID-MAIN;DLH-34L080-10,CLP-600,24V, S0015 Service Manual 8-24...
- Page 167 Exploded Views & Parts List 8.11. Guide Paper Service Manual 8-25...
- Page 168 Exploded Views & Parts List Guide Paper Parts List SA : Service Available O : Service available X : Service not available SEC.Code Description Remark 7.11-0 JC97-02404A MEA UNIT-GUIDE PAPER;CLP-600,SEC,EXPORT, M0016 7.11-1 JC61-01013A GUIDE-_M_SCT PAPER UPPER;CLP-600,HIPS,2. G0048 7.11-2 JC66-00903A ROLLER-SHAFT FEED;CLP-600,SUM24L+EPDM,°ÕOS R0018 7.11-3...
- Page 169 Exploded Views & Parts List 8.12. Cassette Unit Service Manual 8-27...
- Page 170 JC61-01026A GUIDE-M-REAR;CLP-600,HIPS,HB,3.0,128.0,4 G0057 7.12-8 JC68-01527A LABEL(R)-CASSETTE;COMMON,KOREA,YUPO,T0.2 L0004 7.12-9 6107-001200 SPRING-CS;SUS304-WPB,-,PI0.85,D21.85,L55 S0039 7.12-10 JC61-01030A PLATE-P-KNOCK UP;CLP-600,SECC,T1.0,206.2 P0027 7.12-11 JC61-01129A PLATE-KNOCK UP PAD;CLP-600,URETHANE SPON P0017 7.12-12 JG66-40003A GEAR-PINION;SF4000,POM,WHT,M1,Z16 G0035 7.12-13 JC61-01027A GUIDE-P-SIDE LEFT;CLP-600,SECC,T1.2,52.5 G0060 7.12-14 6031-001255 WASHER-PLAIN;NYLON,CUTTING,ID5,OD9,T0.5, W0004 7.12-15 JC61-00653A BUSH-M-FINGER,F;ML-2150,POM,-,-,-,BLK,- B0028 7.12-16...
- Page 171 Exploded Views & Parts List 8.13. Cassette(SCF) => Option Cassette Service Manual 8-29...
- Page 172 7.13-8 JC70-00377A IPR-PLATE LOCKER(L);MLC-500,SUS301 CSP,-,T0.5,-,-,-,-,- 7.13-9 JC70-00378A IPR-PLATE LOCKER(R);MLC-500,SUS301 CSP,-,T0.5,-,-,-,-,- 7.13-10 JC33-00007A SOLENOID-PICK UP;-,SCX-5100,DC 24V,80,36.5*17.7*1.2,-,300MA,-,-,- 7.13-11 JC70-11028A IPR-GROUND TOP;ML-6000,SUS304CSP3/4H,-,T0.2,-,-,-,-,- 7.13-12 JC61-01087A GUIDE-P-SIDE LEFT SCF;CLP-600,SECC,T1.2,W121.2,L112.4,-,- 7.13-13 JC61-01031A PLATE-P-FINGER LEFT;CLP-600,SUS,T1.2,71.1,21.0,-,- 7.13-14 JC72-41364A PMO-BUSHING_P/U,MP;ML-6100,POM,BLACK,-,CF-620,-,-,-,- 7.13-15 6031-001255 WASHER-PLAIN;NYLON,CUTTING,ID5,OD9,T0.5,NTR 7.13-16 JC63-00609A COVER-_M_GUIDE SIDE L;CLP-600,POM,T1.2,W42.2,L7.5,HB,-,M90-44,NTL 7.13-17 JC61-01081A GUIDE-M-SIDE LOCK SCF;CLP-600,ABS,HB,T2.0,W89.4,L79.9,G71312,HF-0660I...
- Page 173 Exploded Views & Parts List 8.14. SCF => Option Cassette Service Manual 8-31...
- Page 174 COVER-M-CST SCF;CLP-600,ABS,T2.5,W433.0,L111.0,V0,-,G71312,VH-0810 7.14-3 JC61-01085A GUIDE-M-REAR SCF;CLP-600,HIPS,HB,T3.0,W127.0,L71.8,C75064,HR-1360T 7.14-4 JC61-01082A GUIDE-M-FRONT SCF;CLP-600,HIPS,HB,T3.0,W204.0,L71.1,G71312,HR1360T 7.14-5 6107-001213 SPRING-CS;SWP-B,-,PI1.1,D23.7,L93.2,-,-,ID22.6,OD24.8 7.14-6 JC61-01089A PLATE-P-KNOCK UP SCF;CLP-600,SECC,T1.0,W227.4,L283.0,-,- 7.14-7 JC61-01129A PLATE-KNOCK UP PAD;CLP-600,URETHANE SPONGE,T0.9,W24.0,L24.0,BLK,- 7.14-8 JG66-40003A GEAR-PINION;SF4000,POM,WHT,M1,Z16 7.14-9 JC61-01037A STOPPER-M-GUIDE SIDE;CLP-600,POM,OD12.0,-,20.0,NTR,M90-44 7.14-10 JG61-70531A SPRING ETC-LOCKER,PLATE;SF6000,STS304WPB,D4.0,-,33.3,33.3,-,-,-,-,- 7.14-11 JC72-41210A PMO-LOCKER PLATE;ML-6000,POM,WHT,HB,- 7.14-12-1 JC61-01087A GUIDE-P-SIDE LEFT SCF;CLP-600,SECC,T1.2,W121.2,L112.4,-,-...
- Page 175 Exploded Views & Parts List 8.15. Guide Upper(SCF) => Option Cassette Service Manual 8-33...
- Page 176 O : Service available X : Service not available SEC.Code Description Remark 7.15-0 JC97-02250A MEA HOU-LOWER SCF;CLP-600S5,SEC,EXPORT,SCF,-,-,- 7.15-1 JC61-01083A GUIDE-M-LOWER SCF;CLP-600,PC+ABS,HB,T3.0,W227.5,L71.4,BK701,C6600 7.15-2 JC61-01084A GUIDE-M-LOWER RAIL SCF;CLP-600,HIPS,HB,T2.5,W350.8,L74.0,G71312,HR1360T 7.15-3 JC72-00659A PMO-IDLE ROLLER SCF16;ML-7250,DIA15,POM,WHITE,HB,-,- 7.15-4 JC72-00658A PMO-BUSH IDLE ROLL-SCF16;ML-7250,DIA9,POM,WHITE,HB,-,- 7.15-5 6107-001222 SPRING-CS;SUS304WPB,ZN PLATE,PI0.4,D3.8,D4.8,L25,-,-,-,- 7.15-6 JC72-00660A PMO-HOLDER IDLE ROLL16;ML-7250,ABS,BLACK,81*17,-,V0,-,-,-...
- Page 177 Exploded Views & Parts List 8.16. Guide Lower(SCF) => Option Cassette Service Manual 8-35...
- Page 178 K2897 JC39-00366A CBF HARNESS-SCF GND;SCX-4920N,CBF,UL1007 H1231 JC39-00398A CBF HARNESS-PANEL;CLP-600,WIRE HARNESS,U H2133 JC39-00423A CBF HARNESS-STEPMOTOR;CLP-600,CBF HARNES JC39-00432A CBF HARNESS-BLDC;CLP-600,CBF HARNESS,UL1 JC39-00503A CBF HARNESS-M_FUSER;CLP-600,CBF-HARNESS, JC39-00561A CBF HARNESS-FUSER3;CLP-600,CBF HARNESS,U JC61-01639A BUSH-M-RELEASE LEVER;CLP-600,PET GF 30%, JC61-01678A SPRING ETC-DEV_FRONT;CLP-600,SWP-B,0.65, JC61-01685A SPRING ETC-DUMMY;CLP-600,SUS,0.5,-,-,20. Service Manual 8-36...
- Page 179 COVER-M_OP FRAME LCD;CLP-600N,HIPS,T2.5, JC63-01029A SHEET-PTB CLEANING;CLP-600,PET,T0.188,W1 JC66-00746B GEAR-M_DEVE DRV2_Z21;CLP-600,POM,M0.8,Z2 JC66-01200A LEVER-M-RELEASE;CLP-600,PC,-,W36.0,L20.0 JC68-01584A LABEL(P)-BLANK 90*25;CLP-510,SEE,ART 100 JC96-03655A ELA UNIT-CARBON&SP;ML-3560,SEC,USA,BRUSH K3054 JC96-03839A ELA UNIT-HR 220V;CLP-600,SEC,EXPORT,-,-, JC96-03933A ELA UNIT-DUCT SMPS;CLP-600,SEC,EXPORT,-, JC97-02617A MEA UNIT-PR;CLP-600,SEC,EXPORT,-,-,-,- 0501-000294 TR-SMALL SIGNAL;KSA708-Y,PNP,800mW,TO-92 0601-000003 LED;ROUND,RED/GRN,3.1MM,650/563NM,3.8X5. 0601-001619 LED;CBI,RED/GRN,3MM,635/568NM,6.35X7X6MM 0601-001830 LED;SMD,GRN,1.6x0.8x0.4mm,570nm,1.6x0.8x 0803-003263 IC-CMOS LOGIC;74LCX07,HEX BUFFER,SOIC,14...
- Page 180 JACK-MODULAR;8P/8C,STANDARD,Y,ANGLE,INVE 6003-000269 SCREW-TAPTITE;BH,+,-,S,M3,L6,ZPC(YEL),SW 6003-001086 SCREW-TAPTITE;BH,+,B,M3,L12,ZPC(BLK),SWR JC07-00008A LCD-DISPLAY(XIL);VHX12323ASR,SCX-4521F,1 JC13-00029A IC ASIC-DAVINCI;LPEC2,CLP-600,208,3.3V,- JC13-00030A IC ASIC-HYPER_C;HYPER-C,CLP-600,256,3.3V JC39-00306A CBF HARNESS-LCD;CLP-500,WIRE,UL2877,14-1 JC39-00425A CBF HARNESS-SET_CR2;CLP-600,CBF HARNESS, JC39-00429A CBF HARNESS-TH_NEW;CLP-600,CBF HARNESS,U JC39-00442A CBF HARNESS-NEW_FUSER;CLP-600,CBF HARNES JC39-00508A CBF HARNESS-GND2;CLP-600,CBF HARNESS,UL1 JC63-00896A FILTER-TONER;CLP-600,POLYESTERE,10.0T,W2 JC63-00904A SHEET-FILTER TONER;CLP-600,PET,T0.125,W2 0402-000129 DIODE-RECTIFIER;1N4003,200V,1A,DO-41,TP 0407-000101 DIODE-ARRAY;DA204K,20V,100mA,C2-3,SOT-23...
- Page 181 Exploded Views & Parts List Guide Lower(SCF) Parts List => Option Cassette SA : Service Available O : Service available X : Service not available SEC.Code Description Remark 0903-001355 IC-MICROCONTROLLER;S3C2510A,32BIT,BGA,41 1003-001535 IC-MOTOR DRIVER;A3977SLP,TSSOP,28P,9.6X4 1105-001357 IC-DRAM;K4S281632,4X2MX16BIT,TSOP(II),54 1203-002220 IC-POSI.ADJUST REG.;LD1117,DPAK,3P,240MI 1205-002339 IC-CLOCK GENERATOR;CY25811SC,SOIC,8P,150 2005-000168 R-WIRE WOUND,NON;0.22ohm,5%,2W,AA,BK,4x1 2007-000033...
- Page 182 Exploded Views & Parts List Guide Lower(SCF) Parts List => Option Cassette SA : Service Available O : Service available X : Service not available SEC.Code Description Remark JC39-00421A CBF HARNESS-SOLENOID;CLP-600,CBF HARNESS JC39-00422A CBF HARNESS-SET_CR;CLP-600,CBF HARNESS,U JC39-00505A CBF HARNESS-FUSER_AC;CLP-600,CBF HARNESS JC39-00575A CBF HARNESS-FAN;CLP-600,CBF-HARNESS,UL10 JC39-00588A HARNESS-TEMP;CLP-600,WIRE HARNESS,UL1061...
- Page 183 Block Diagram 9. Block Diagram 9.1 System Block Diagram Service Manual Samsung Electronics...
-
Page 184: Ppm Block Diagram
Block Diagram 9.2 16ppm Block Diagram Service Manual Samsung Electronics... -
Page 185: Gid H/W Block Diagram
Block Diagram 9.3 GID H/W Block Diagram Service Manual Samsung Electronics... -
Page 186: N/C & Wireless Block Diagram
Block Diagram 9.4 N/C & Wireless Block Diagram Service Manual Samsung Electronics... - Page 187 Connection Diagram 10 10 10. Connection Diagram 10.1 CLP-600/600N connection diagram Service Manual 10-1 Samsung Electronics...
-
Page 188: Power Distribution Diagram
Connection Diagram 10.2 Power distribution diagram Service Manual 10-2 Samsung Electronics... -
Page 189: Main Smps
Connection Diagram 10.3 Main SMPS Service Manual 10-3 Samsung Electronics... - Page 190 Connection Diagram 10.4 Main(Driver) HVPS 28 pin Service Manual 10-4 Samsung Electronics...
- Page 191 Connection Diagram 10.5 Main(Driver) HVPS 8 pin Service Manual 10-5 Samsung Electronics...
-
Page 192: Main Driver Df11 28 Pin
Connection Diagram 10.6 Main Driver DF11 28 pin Service Manual 10-6 Samsung Electronics... - Page 193 Connection Diagram 10.7 Main System thermistor 2 pin Service Manual 10-7 Samsung Electronics...
-
Page 194: Main Set Ctd, Cr, Crum Sensor
Connection Diagram 10.8 Main SET CTD, CR, CRUM sensor Service Manual 10-8 Samsung Electronics... - Page 195 Connection Diagram 10.9 Main Temp/Hum sensor 4 pin Service Manual 10-9 Samsung Electronics...
-
Page 196: Main Lsu 24 Pin
Connection Diagram 10.10 Main LSU 24 pin Service Manual 10-10 Samsung Electronics... - Page 197 Connection Diagram 10.11 Main LSU 5 pin motor Service Manual 10-11 Samsung Electronics...
- Page 198 Connection Diagram 10.12 Main LSU 24 pin-idea mock up SET Service Manual 10-12 Samsung Electronics...
- Page 199 Connection Diagram 10.13 Joint LSU 6 pin-idea mock up SET Service Manual 10-13 Samsung Electronics...
- Page 200 Connection Diagram 10.14 Main BLDC 10 pin Service Manual 10-14 Samsung Electronics...
- Page 201 Connection Diagram 10.15 Driver OPC Step motor 8 pin Service Manual 10-15 Samsung Electronics...
- Page 202 Connection Diagram 10.16 Driver Exit, FCF Empt, Feed sensor Service Manual 10-16 Samsung Electronics...
- Page 203 Connection Diagram 10.17 Driver MP Empt sensor Service Manual 10-17 Samsung Electronics...
- Page 204 Connection Diagram 10.18 Main OP Panel 5 pin Service Manual 10-18 Samsung Electronics...
- Page 205 Connection Diagram 10.19 Main Deve CRUM I/F 3 pin Service Manual 10-19 Samsung Electronics...
- Page 206 Connection Diagram 10.20 SMPS +24V micro switch 2 pin Service Manual 10-20 Samsung Electronics...
- Page 207 Connection Diagram 10.21 Main/SMPS Fuser Drawer Connector Service Manual 10-21 Samsung Electronics...
- Page 208 LSU CONN, LVDS SMPS, HVPS1,2,3 BLDC DEVE YMC, BLDC OPC, IH BOARD DRIVER CONN TEMP, ANALOG-MUX TH-FUSER DC-DC converter 05.04.01 CLP-600 daVinci Main GDI Rev 0.4 1/21 INDEX Service Manual 11-1 Samsung Electronics This Document can not be used without Samsung’s authorization.
-
Page 209: Power On Reset
Check High DGND nRESET R249 C208 05.04.01 * 1st POR : 189ms DGND DGND CLP-600 Power On Reset daVinci MAIN GDI Rev 0.4 2/21 ICS9248-81& RESET Service Manual 11-2 Samsung Electronics This Document can not be used without Samsung’s authorization. - Page 210 * VccP and VssP must be connected DGND to Vss through a filter circuit CLP-600 * Place as close as possible to the CPU daVinci MAIN GDI Rev 0.4 RM5231A 3/21 Service Manual 11-3 Samsung Electronics This Document can not be used without Samsung’s authorization.
- Page 211 MAD1 IOC8 nWRi MAD(0) V_MD(0) R507 MAD0 IOC9 IOC10 CLP-600 SDA_V320 IOC11 SCL_V320 daVinci MAIN GDI nWRI nRD Rev 0.4 V320 & BOOT ROM 4/21 DGND Service Manual 11-4 Samsung Electronics This Document can not be used without Samsung’s authorization.
- Page 212 MAD(31) R289 nFLASH_OE nWR_ROM_FBOUT nWR_ROM_FBIN R290 nWR_FBOUT nWR_FBIN 74LCX373MTC C283 C284 10pF 10pF DGND DGND DGND LATCH 05.04.01 CLP-600 daVinci main GDI Rev 0.4 Latch&PLD 5/21 Service Manual 11-5 Samsung Electronics This Document can not be used without Samsung’s authorization.
- Page 213 DQM3 UDQM VSS2 C252 C158 C170 VSS3 VSSQ1 VSSQ2 SDRCLK0 VSSQ3 CLKE VSSQ4 K4S561632B-TC1L DGND 1105-001384 05.04.01 SDRAM CLP-600 daVinci MAIN GDI Rev 0.4 Memory 6/21 Service Manual 11-6 Samsung Electronics This Document can not be used without Samsung’s authorization.
- Page 214 *for davinci network Model LPEC2_RX R534 C511 DGND CN21-1 R298 R299 C328 C327 FGND DGND DGND DEBUG CONN 05.04.01 CLP-600 daVinci MAIN GDI Rev 0.4 UART 7/21 Service Manual 11-7 Samsung Electronics This Document can not be used without Samsung’s authorization.
- Page 215 R331 OSC2 R160 FGND XIN_USB C112 DGND FGND DGND 3722-001101 2203-000476|R2012_CAP DGND AGND_USB cf) 2.2uF,2012, 2203-001598 DGND DGND 05.04.01 CLP-600 daVinci MAIN GDI Rev 0.4 8/21 Service Manual 11-8 Samsung Electronics This Document can not be used without Samsung’s authorization.
- Page 216 PAD(5) PAD(4) PAD(3) R238 R603 PCLK_LAN PAD(2) nLOCK PAD(1) PAD(0) Check 30MHz? 05.04.01 C544 DGND CLP-600 daVinci MAIN GDI LGND Rev 0.4 DGND PCI Network 9/21 Service Manual 11-9 Samsung Electronics This Document can not be used without Samsung’s authorization.
- Page 217 05.04.01 RA163 nLSYNC_2 C456 nLSYNC_3 C455 nLSYNC_4 220pF DGND 63mW C517 C516 C515 C514 CLP-600 AGND daVinci MAIN GDI DGND Rev 0.4 DGND HYPER-C 10/21 Service Manual 11-10 Samsung Electronics This Document can not be used without Samsung’s authorization.
- Page 218 PWM_POWER PWM_DEVE_DC_2 PWM_CR_1 PWM_DEVE_DC_3 PWM_CR_2 CLP-600 PWM_DEVE_DC_4 BLDC_CLOCK2 PWM_AC_1 BLDC_CLOCK1 daVinci MAIN GDI PWM_AC_2 PWM_ATTR+ PWM_AC_3 PWM_CHARGER Rev 0.4 PWM_AC_4 PWM_T_4 PWM_T_3 PWM_T_2 LPEC2 11/21 PWM_T_1 Service Manual 11-11 Samsung Electronics This Document can not be used without Samsung’s authorization.
- Page 219 CN26-11 SDA_DEV DGND R546 SCL_DEV R548 R549 R550 FGND C554 SCL_S0 SCL_S1 DGND 05.04.01 DGND CLP-600 daVinci MAIN GDI Rev 0.4 SCF & CRUM IF 12/21 Service Manual 11-12 Samsung Electronics This Document can not be used without Samsung’s authorization.
- Page 220 BLDC_CLOCK2 nENB_DEVE_AC_4 RA164 NRA4 nLSYNC_4 R304 PWM_CR_2 nLSYNC_3 R305 nFAN_FUSER PWM_CR_1 nLSYNC_2 nFAN_SMPS nLSYNC_1 CLP-600 RA13 daVinci MAIN GDI DGND Rev 0.4 RESET & CLOCK 13/21 Service Manual 11-13 Samsung Electronics This Document can not be used without Samsung’s authorization.
- Page 221 GND seperation : 10 mils U10-1 DGND DGND CLK_LSU_4 nRDY_LSU_4 U10-2 DGND DGND DGND DGND nSTART_LSU_4 +24VF 05.04.01 FGND U10-3 CLP-600 DGND FGND daVinci MAIN GDI Rev 0.4 14/21 Service Manual 11-14 Samsung Electronics This Document can not be used without Samsung’s authorization.
- Page 222 [FUSER_CONTROL] nS_5V_OFF R101 CN201-1 +24VF AN_READ_CHA 05.04.01 nS_5V_OFF nHEATER_ON AN_READ_T_1 R151 C102 nHEATER_ON AN_READ_ATTR CLP-600 daVinci MAIN GDI Rev 0.4 DGND DGND SMPS & HVPS 15/21 Service Manual 11-15 Samsung Electronics This Document can not be used without Samsung’s authorization.
- Page 223 +3.3V C507 C506 DGND DGND DGND DGND DGND R360 R361 05.04.01 STS_IH2 STS_IH1 DGND DGND DGND DGND CLP-600 daVinci MAIN GDI Rev 0.4 BLDC,IH INTERFACE 16/21 Service Manual 11-16 Samsung Electronics This Document can not be used without Samsung’s authorization.
- Page 224 C151 DGND CN18-25 CN18-26 SM_DEV_K_A 05.04.01 DGND CN18-27 CN18-28 DGND DGND SM_DEV_K_B CN18-29 CN18-30 nSM_DEV_K_EN0 nSM_DEV_K_AM CLP-600 daVinci MAIN GDI Rev 0.4 DRIVER INTERFACE 17/21 Service Manual 11-17 Samsung Electronics This Document can not be used without Samsung’s authorization.
- Page 225 LSU CONN, LVDS SMPS, HVPS1,2,3 BLDC DEVE YMC, BLDC OPC, IH BOARD DRIVER CONN TEMP, ANALOG-MUX TH-FUSER DC-DC converter 05.04.01 CLP-600 daVinci Main GDI Rev 0.4 1/21 INDEX Service Manual 11-18 Samsung Electronics This Document can not be used without Samsung’s authorization.
- Page 226 SMW200-04P GNDA TP838 A_TH_FUSER1 TP839 +3.3V +24VF +24VF GNDA A_VBE R555 nS_NEW_FUSER R565 nCUT_FUSER DGND DGND DGND 05.04.01 CLP-600 daVinci MAIN GDI Rev 0.4 FUSER 19/21 Service Manual 11-19 Samsung Electronics This Document can not be used without Samsung’s authorization.
- Page 227 R158 R343 GNDA R157 COVER_CLOSED PWM_CR_2 C312 C108 GNDA 05.04.01 GNDA GNDA R346 R347 CLP-600 daVinci MAIN GDI GNDA GNDA Rev 0.4 COLOR REGI I/F 20/21 Service Manual 11-20 Samsung Electronics This Document can not be used without Samsung’s authorization.
- Page 228 U176 DGND 2007-000309 R577 475KOHM , 1% R579 C541 C543 R572 2007-000100 2203-000189 DGND 1203-PR0576 DGND DGND 05.04.01 CLP-600 daVinci Main GDI Rev 0.4 INDEX 21/21 Service Manual 11-21 Samsung Electronics This Document can not be used without Samsung’s authorization.
- Page 229 KEY7 29 CN1-3 CN1-2 HT48R50 22pF 22pF 22pF DGND DGND 100nF CN1-1 DGND DGND MMSD914T1 MMSD914T1 04.11.22 DATE J.I.Kim SIGN Davinci Panel rev 0.2 Panel REF NO Service Manual 11-22 Samsung Electronics This Document can not be used without Samsung’s authorization.
- Page 230 KSA1182-Y LED6 LED7 LED8 LED9 DGND 100nF DGND MMBT2222ALT1 DGND KSA1182-Y LED10 SAM5270-B DGND 04.11.22 DATE J.I.Kim SIGN KSA1182-Y Davinci Panel rev 0.2 Panel REF NO Service Manual 11-23 Samsung Electronics This Document can not be used without Samsung’s authorization.
- Page 231 KEY2 KEY3 25 LCD_D7 SENSOR KEY4 D_DET KEY5 D_SCAN KEY6 KEY7 29 HT48R50 DGND MMSD914T1 04.11.22 DATE J.I.Kim SIGN Davinci Panel rev 0.1 Panel REF NO Service Manual 11-24 Samsung Electronics This Document can not be used without Samsung’s authorization.
- Page 232 KSA1182-Y LED6 LED7 LED8 LED9 DGND 100nF DGND MMBT2222ALT1 DGND KSA1182-Y LED10 SAM5270-B DGND 04.11.22 DATE J.I.Kim SIGN KSA1182-Y Davinci Panel rev 0.1 Panel REF NO Service Manual 11-25 Samsung Electronics This Document can not be used without Samsung’s authorization.
- Page 233 11.4 CR Sensor Schematic Diagram Service Manual 11-26 Samsung Electronics This Document can not be used without Samsung’s authorization.
- Page 234 11.5 DEVE-CRUM IF Schematic Diagram Service Manual 11-27 Samsung Electronics This Document can not be used without Samsung’s authorization.
- Page 235 11.6 DEVE-CRUM IF Schematic Diagram Service Manual 11-28 Samsung Electronics This Document can not be used without Samsung’s authorization.
- Page 236 11.7 Driver(1/3) Schematic Diagram Service Manual 11-29 Samsung Electronics This Document can not be used without Samsung’s authorization.
- Page 237 Driver(2/3) Schematic Diagram Service Manual 11-30 Samsung Electronics This Document can not be used without Samsung’s authorization.
- Page 238 Driver(3/3) Schematic Diagram Service Manual 11-31 Samsung Electronics This Document can not be used without Samsung’s authorization.
- Page 239 11.8 SMPS (1/2) Schematic Diagram Service Manual 11-32 Samsung Electronics This Document can not be used without Samsung’s authorization.
- Page 240 6,10 6.8_C2012 10KF_C2012 CON4-#18,20,22,24,26 FGND PC72-1 43_C2012 68pF_2012 LTV817 (3216) C2012 +5V1_4A 35V47uF +5V2_2A EER2525 T12 FS1M 1K_C2012 STANDBY 50V 1uF 35V100uF FGND KA431 AGND 1K_C2012 Service Manual 11-33 Samsung Electronics This Document can not be used without Samsung’s authorization.
- Page 241 11.9 HVPS(1/9) Schematic Diagram Service Manual 11-34 Samsung Electronics This Document can not be used without Samsung’s authorization.
- Page 242 HVPS(2/9) HVPS(2/9) Schematic Diagram Service Manual 11-35 Samsung Electronics This Document can not be used without Samsung’s authorization.
- Page 243 HVPS(3/9) Schematic Diagram Service Manual 11-36 Samsung Electronics This Document can not be used without Samsung’s authorization.
- Page 244 HVPS(4/9) Schematic Diagram Service Manual 11-37 Samsung Electronics This Document can not be used without Samsung’s authorization.
- Page 245 HVPS(5/9) Schematic Diagram Service Manual 11-38 Samsung Electronics This Document can not be used without Samsung’s authorization.
- Page 246 HVPS(6/9) Schematic Diagram Service Manual 11-39 Samsung Electronics This Document can not be used without Samsung’s authorization.
- Page 247 HVPS(7/9) Schematic Diagram Service Manual 11-40 Samsung Electronics This Document can not be used without Samsung’s authorization.
- Page 248 HVPS(8/9) Schematic Diagram Service Manual 11-41 Samsung Electronics This Document can not be used without Samsung’s authorization.
- Page 249 HVPS(9/9) Schematic Diagram Service Manual 11-42 Samsung Electronics This Document can not be used without Samsung’s authorization.
-
Page 250: Reference Information
• Brush • Tweezers Standard : For general home use, small type. • Cotton Swab Standard : For general home use, for medical service. • Software (Driver) installation CD ROM Install Driver CD Network S/W CD Service Manual 12-1 Samsung Electronics... -
Page 251: Acronyms And Abbreviations
Enhanced Capability Port Inter Process CommunicationEPP Enhanced parallel Port Engine Control Unit Images Per Minute EEPROM Electronically Erasable Programmable Read Only Memory Image Transfer Belt Electro Magnetic Interference local area network Electro photographic Laser Beam Printer Service Manual 12-2 Samsung Electronics... - Page 252 SCF/SCT Second Cassette Feeder/Second Purpose Tray Cassette Tray Network Interface Card SMPS Switching Mode Power Supply Network Printer Card SPGP Samsung Printer Graphic Processor NVRAM Nonvolatile Random Access Memory Samsung Printer Language Organic Photo Conductor SPL-C Samsung Printer Language-Color Printed Board Assembly...
-
Page 253: Select A Location For The Printer
• Provide the proper environment : - A firm, level surface - Away from the direct airflow of air conditioners, heaters, or ventilators - Free of extreme fluctuations of temperature, sunlight, or humidity - Clean, dry, and free of dust Service Manual 12-4 Samsung Electronics... -
Page 254: A4 Iso 19752 Standard Pattern
Reference Information 12.4 A4 ISO 19752 Standard Pattern This test page is reproduced at 70% of the normal A4 size Service Manual 12-5 Samsung Electronics... -
Page 255: Wireless Lan
Most of the main wireless networking companies are attending including such companies as Lucent Technologies, Cisco, Intel/Symbol, 3Com, Enterasys (Cabletron), Compaq, IBM, Nokia, Dell, Philips, Samsung Electronics, Sony, Intersil, etc.. This mark certifies mutual compatibility amongst the product of these companies. Wi-Fi (IEEE 802.1) is certified as a standard of the wireless LAN market.
Need help?
Do you have a question about the CLP-600 Series and is the answer not in the manual?
Questions and answers