Summary of Contents for BIO RAD PowerPac
- Page 1 PowerPac ™ Basic Power Supply Instruction Manual Catalog Number 164-5050 For Technical Service Call Your Local Bio-Rad Office or in the U.S. Call 1-800-424-6723...
-
Page 3: Table Of Contents
Table of Contents Page Safety.........................i Section 1 Introduction ......................1 Overview ......................1 Unpacking ......................2 Section 2 Control Features ....................3 Section 3 Setup and Operation..................4 Section 4 Maintenance and Troubleshooting..............7 Maintenance.....................7 Troubleshooting....................7 Replacing a Fuse ....................9 Firmware Version Number .................9 Appendix A Specifications ....................10 Appendix BWarranty and Ordering Information ...............11 List of Figures... -
Page 5: Safety
These plugs have been EN 61010* certified for safety compliance for use with PowerPac power supplies. Use of other plugs or banana jacks is done at the user's own risk and is not recommended by Bio-Rad. -
Page 7: Introduction
Introduction 1.1 Overview The PowerPac Basic provides constant voltage or constant current to instruments used in electrophoresis. The power supply operates at the values specified for the constant parameter. However, to prevent damage to the electrophoresis cell, the PowerPac Basic provides automatic crossover to constant current or constant voltage, depending on which set value is first reached. -
Page 8: Unpacking
Bio-Rad Laboratories. After unpacking the PowerPac Basic, remove the plastic film from the translucent green top case. The plastic film may leave a residue. If so, clean with a soft, damp cloth. -
Page 9: Control Features
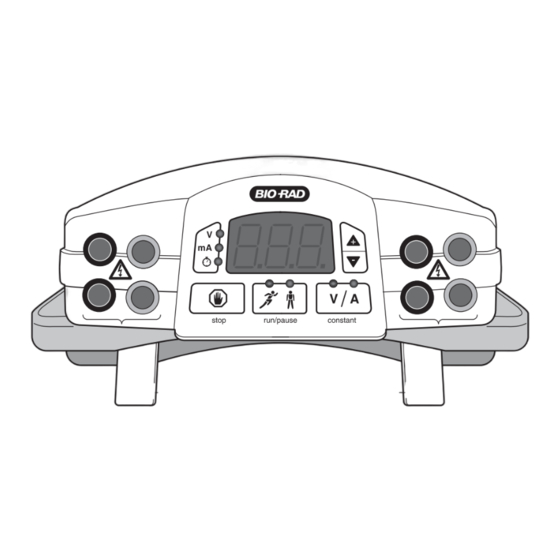
Section 2 Control Features 3 DIGIT LED DISPLAY MODE KEY SCROLL KEYS STOP KEY CONSTANT PARAMETER KEY RUN AND PAUSE KEY Fig. 3. Front Panel. Description Constant Parameter Key: • Selects either constant voltage or current. • The LED indicates the selected parameter. During a run, maximum power is indicated when both LED’s are lit. -
Page 10: Setup And Operation
Section 3 Setup and Operation STEP PROCEDURE DESCRIPTION Turn power on. Press the power switch located on the right side of the unit to the on position. The default setting is constant V, and the LED display shows zero value. To display firmware version number, hold down constant parameter key while turning the power switch to the on position. - Page 11 STEP PROCEDURE DESCRIPTION Programming a timed run Use the parameter key to select time. The display will show a zero value. Use the scroll key to enter the desired time up to 999 min.. If no time is entered the run will continue until the run is terminated by pressing the stop key.
- Page 12 STEP PROCEDURE DESCRIPTION Start the run Press the run/pause key to start the run. The run LED is lit. Viewing and editing options • Viewing: Press the parameter key to during a run. view the corresponding value on the display •...
-
Page 13: Maintenance And Troubleshooting
Section 4 Maintenance and Troubleshooting 4.1 Maintenance The PowerPac Basic requires little maintenance to assure reliable operation. To clean the case, first unplug the power supply. Use a damp cloth to wipe down the outer case. 4.2 Troubleshooting Problem Cause... - Page 14 Unacceptable value(s) Clear the code by pressing any key displayed entered other than the run/pause key. Then, enter values within range of PowerPac Basic and press the run/pause key E12 error code Internal Over Current Possible power supply malfunction. displayed...
-
Page 15: Replacing A Fuse
4.3 Replacing a Fuse If there is no display, lights, or fan, and the PowerPac Basic is plugged into a working AC power outlet with the power switch in the on position, the fuse may need to be replaced. 1. Disconnect the power cord from the electrical outlet. -
Page 16: Appendix A Specifications
Appendix A Specifications and Ordering Information Input Power nominal 100–120/220–240 VAC, 50 or 60 Hz actual 90–132 or 198–264 VAC, 50 or 60 Hz Fuses 2.5 A, 250 VAC, 5mm x 20mm, Type T Input Power Cord 3-wire; grounded Output (Programmable) Voltage 10 V to 300 V, fully adjustable in 1 V steps Voltage Accuracy... -
Page 17: Appendix Bwarranty And Ordering Information
Warranty and Ordering Information Warranty The PowerPac Basic power supply is covered by a standard Bio-Rad Laboratories warranty. Contact your local Bio-Rad representative for details of the warranty. If any defects should occur during this warranty period, Bio-Rad Laboratories will replace the defective parts without charge. - Page 20 Bio-Rad Laboratories, Inc. Web site www.bio-rad.com USA 800 424 6723 Australia 61 2 9914 2800 Austria 01 877 89 01 Belgium 09 385 55 11 Brazil 55 11 5044 5699 Life Science Canada 905 364 3435 China 86 21 6169 8500 Czech Republic 420 241 430 532 Denmark 44 52 10 00 Finland 09 804 22 00 Group France 01 47 95 69 65 Germany 089 31 884 0 Greece 30 210 9532 220 Hong Kong 852 2789 3300 Hungary 36 1 459 6100 India 91 124 4029300 Israel 03 963 6050 Italy 39 02 216091 Japan 03 6361 7000 Korea 82 2 3473 4460 Mexico 52 555 488 7670 The Netherlands 0318 540666...


Need help?
Do you have a question about the PowerPac and is the answer not in the manual?
Questions and answers