Table of Contents
Advertisement
Quick Links
Advertisement
Table of Contents

Related Manuals for Max ER-1500


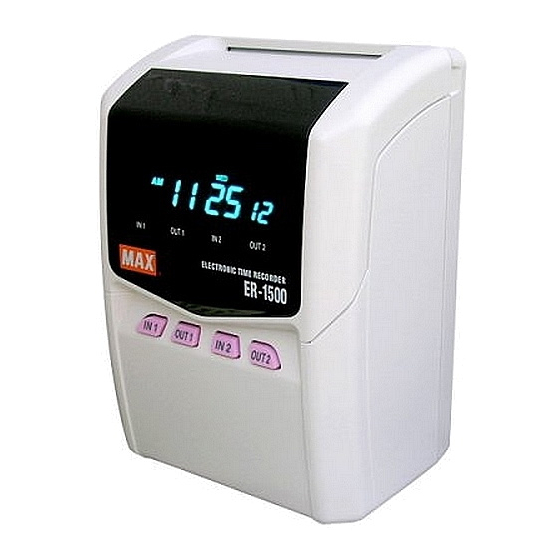
Summary of Contents for Max ER-1500
-
Page 2: Table Of Contents
CONTENTS BEFORE USE .........................2 SAFETY INSTRUCTIONS ....................2 ACCESSORIES ......................3 MAIN FEATURES ......................5 PARTS DESCRIPTIONS....................5 OPENING AND CLOSING THE FRONT COVER ............5 KEYBOARD AND DISPLAY ...................6 KEYBOARD LAYOUT.....................6 DISPLAY LAYOUT......................7 USING THE MACHINE ....................7 SETTING OR CHANGING DATA..................8 SETTING MACHINE MODE, PAY CLOSING DATE, 60 or 100 SCALE AND DAILY TOTAL TIME (MODE 1) ....................9 SETTING YEAR, MONTH, DATE, HOUR, AND MINUTE (MODE 2)......13 SETTING LINE SHIFT TIME, IN/OUT AND DAYLIGHT SAVING TIME (MODE 3) ..14... -
Page 3: Before Use
BEFORE USE SAFETY INSTRUCTIONS ■INDICATIONS This instruction manual and the product use various indications to help you use this instrument safely and properly. The following describes those indications. Negligence could lead to serious injury or death. WARNING: Negligence could lead to an injury, damage of your property, or CAUTION: cause loss of created data. -
Page 4: Accessories
CAUTION The data stored in the internal memory or the memory card cannot be stored permanently. We will not be responsible for damages and lost profits caused by loss of data attributed to battery consumption, trouble, repair, and so on. Never disassemble or modify this instrument. - Page 5 ◆ Do not drop or hit the instrument. ◆ Install this instrument away from the following places: 1. Any place that is not level or that is subject to vibration. 2. Any place that has dust or high humidity. Keep beverages and liquid containers away from this instrument.
-
Page 6: Main Features
MAIN FEATURES 1. Printing the daily total time for regular working time or overtime(Excluding ER-1500E). 2. Can select fully automatic or manual operation. 3. Printing regular minutes (1/60) or 1/100 of an hour. 4. Printing up to 4 columns (If using daily total printing, up to 5 columns). 5. -
Page 7: Keyboard And Display
KEYBOARD AND DISPLAY KEYBOARD LAYOUT ⑤ ① ② ③ ④ ⑥ ⑦ ⑧ ⑨ Functions of keys Description Functions ① FORWARD KEY To increase the number when changing settings. ② BACKWARD KEY To decrease the number when changing settings. ③ SET KEY To register figures. -
Page 8: Display Layout
Do not install on or near a place subject to vibration. AUTOMATIC OPERATION ER-1500 shifts the column for printing automatically in the order of IN1, OUT1, IN2 and OUT2 without the user pressing any external keys. 1. Insert time card to the position where automatic feed starts. -
Page 9: Setting Or Changing Data
SETTING OR CHANGING DATA When setting or changing any data, the “Key-Card” must be used to initiate the change. Operation Insert the “Key-Card.” The symbol appears on the display. After setting or changing data, insert the “Key-Card” again. symbol disappears. Keep the “Key-Card”... -
Page 10: Setting Machine Mode, Pay Closing Date, 60 Or 100 Scale And Daily Total Time (Mode 1)
SETTING MACHINE MODE, PAY CLOSING DATE, 60 or 100 SCALE AND DAILY TOTAL TIME (MODE 1) General Operating Procedure Insert the “Key-Card.” The symbol appears on the display to indicate the setting mode is on. Press the “IN1” key. The symbol appears at “MODE 1”... - Page 11 Specific Setting Procedures Setting Machine Mode (Code No: 01) Press the key to select the desired “Machine Mode” from the following table. Pay Period 12/24-Hour Format Machine Mode Monthly Weekly Bi-weekly 1. The time is printed only in 24-hour format. 2.
- Page 12 1/100 of an hour 1. When “1” or ”2” is selected, ER-1500 does not print the Daily Total Time. 2. When using Daily Total Time, the capacity of employees in a day/month is up to 50. 3. ER-1500E cannot set “3”, “4” or “5.”...
- Page 13 Overtime work 1. If “2(Overtime work)” is set but the Starting time of Overtime Work is not set in “MODE 3,” ER-1500 prints “0:00” or”0.00” as the Daily Total Time in the 5 column. 2. If time is not printed in the 4 column, the Daily Total Time is not printed.
-
Page 14: Setting Year, Month, Date, Hour, And Minute (Mode 2)
SETTING YEAR, MONTH, DATE, HOUR, AND MINUTE (MODE 2) Procedure Insert the “Key-Card.” The symbol appears on the display to indicate the setting mode. Press the “OUT1” key. The symbol appears at “MODE 2” on the display. Press the key to change the Year, Month, Date, Hour and Minute. Press the “SET”... -
Page 15: Setting Line Shift Time, In/Out And Daylight Saving Time (Mode 3)
SETTING LINE SHIFT TIME, IN/OUT AND DAYLIGHT SAVING TIME (MODE 3) Procedure Insert the “Key-Card.” The symbol appears on the display to indicate the setting mode. Press the “IN2” key. The symbol appears at “MODE 3” on the display. Press the key to change each item. - Page 16 Procedure Setting IN & OUT and starting time of Overtime Work [Example] Line Shift Time (Day change time) 4 : 00 Starting time of work 9 : 00 Starting time of lunch : 12 : 00 Ending time of lunch : 13 : 00 Ending time of work : 17 : 00...
- Page 17 Setting Daylight Saving Time After setting “Starting time of Overtime work,” the display moves to “Starting Date of Daylight Saving Time.” Setting the day of the week (Position for the month) (Position for the week) (Code No.) When setting the last week of the month, set “L” for the last week even if the last week is the 4th week.
-
Page 18: Late-In, Early-Out, Overtime Working And Next Day Overtime Symbols
LATE-IN, EARLY-OUT, OVERTIME WORKING AND NEXT DAY OVERTIME SYMBOLS ER-1500 can automatically print the symbols Late-In ( ), Early-Out ( ), Overtime Work ) at the right position, in accordance with the set time of IN1 ~ OUT2 (Code No. 02 ~ 05) and the start time of Overtime Work (Code No. -
Page 19: Replacing The Ink Ribbon Cassette
REPLACING THE INK RIBBON CASSETTE Use only ER-IR100 or ER-IR100E ink ribbon cassettes. Replace the ink ribbon cassette using the following procedure, if the printing is too light. CAUTION Never touch the printer head. It is very hot just after printing and you could get burned. -
Page 20: Wall Mounting And Laid-Down Position Installation
Do not use other materials. Disconnect the power cord before installing on wall. Wall Mounting If hanging ER-1500 on a wall, use the following procedure. 1. Remove screw (A) and the attached wall mounting plate as illustrated. 2. Fix the wall mounting plate to the wall with the included 2 screws (accessories). -
Page 21: Error Codes
● Improper print was made by manual operation. 150 or 50 time cards have been (ER-1500 can handle up to 150 or 50 time already inserted in a day/month. cards a day/month.) When setting ER-1500, invalid Input correct value. -
Page 22: Trouble Shooting
TROUBLE SHOOTING CAUTION Never disassemble the instrument by yourself. Contact your dealer or distributor if you could not solve the problem after checking the following table. Problem Points to Check No display Is the power cord connected to the plug socket correctly? No print out on time card Is the ink ribbon cassette inserted correctly? Card insertion obstructed... -
Page 23: Specifications
SPECIFICATIONS Product description Max Electronic Time Recorder ER-1500 Power supply North America AC120V +6% -10% 60Hz Europe AC230V +6% -10% 60Hz Other countries AC220~240V +6% -10% 50/60Hz 200 (H) × 150 (W) × 100 (D) mm [7 7/8”・(H) × 5 7/8”・(W) Outside dimensions ×... - Page 24 - 23 -...
- Page 25 WARNING This equipment has been verified to comply with the limits for a Class B personal digital device, pursuant to Subpart B of Part 15 of FCC Rules. Only peripherals (computer input/output devices, terminals printers, etc.) certified or verified to comply with the Class B limits may be attached to this equipment.
- Page 26 • This instruction manual is subject to change without notice due to functional enhancement 6-6, NIHONBASHI HAKOZAKI-CHO, CHUO-KU, TOKYO, JAPAN POST CODE: #103-8502 TELEPHONE: 81-3-3669-8131 FAX: 81-3-3669-7104 URL: http://www.max-ltd.co.jp/int/ (GLOBAL Site) http://www.maxusacorp.com (USA Site) 02 • 10 Vol.1 PRINTED IN JAPAN...
Need help?
Do you have a question about the ER-1500 and is the answer not in the manual?
Questions and answers