Advertisement
Table of Contents
- 1 Installing the Unit
- 2 Upflow Application
- 3 Brazing Connections
- 4 Installing the Condensate Drain
- 5 Making Electrical Connections
- 6 Use Copper Conductors Only
- 7 Inspecting and Replacing Filters
- 8 Sealing the Unit
- 9 Air Volume Adjustment
- 10 Repairing or Replacing Cabinet Insulation
- Download this manual
E2009 Lennox Industries Inc.
Dallas, Texas, USA
WARNING
Improper
installation,
service or maintenance can cause personal injury,
loss of life, or damage to property.
Installation and service must be performed by a
licensed professional installer (or equivalent) or a
service agency.
CAUTION
Physical contact with metal edges and corners
while applying excessive force or rapid motion can
result in personal injury. Be aware of, and use
caution when working near these areas during
installation or while servicing this equipment.
IMPORTANT
The Clean Air Act of 1990 bans the intentional
venting of refrigerant (CFCs, HCFCs and HFCs) as
of July 1, 1992. Approved methods of recovery,
recycling or reclaiming must be followed. Fines
and/or
incarceration
noncompliance.
IMPORTANT INFORMATION TO INSTALLER
BLOWER MOTOR
SHIPPING BOLT
A
TOP CAP SHIPPING BRACKET (REPLACE
SCREWS IN TOP CAP AFTER REMOVAL)
C
REFRIGERANT LINE PLUGS [SEE
BRAZING CONNECTIONS ON PAGE 7]
05/09
*2P0509*
adjustment,
alteration,
may
be
levied
for
CHECK FOR AND REMOVE THE FOLLOWING ITEMS BEFORE OPERATING UNIT.
BLOWER MOTOR SHIPPING
BRACKET
D
F
INSTALLATION
INSTRUCTIONS
®
Elite
Series CBX32M Units
AIR HANDLER
506150−01
05/09
Supersedes 12/08
RETAIN THESE INSTRUCTIONS
FOR FUTURE REFERENCE
Table of Contents
CBX32M Upflow/Downflow Unit Dimensions
CBX32M Horizontal LH/RH Unit Dimensions
General Information
Shipping and Packing List
Requirements
. . . . . . . . . . . . . . . . . . . . . . . . . . . . . . . . .
Installing the Unit
Brazing Connections
Installing the Condensate Drain
Inspecting and Replacing Filters
Making Electrical Connections
Sealing the Unit
. . . . . . . . . . . . . . . . . . . . . . . . . . . . . . .
Adjusting the Blower Speed
Repairing or Replacing Cabinet Insulation
BLOWER HOUSING SUPPORT PAD
B
HORIZONTAL DRAIN PAN (SEE UPFLOW
APPLICATIONS ON PAGE 4 AND
DOWNFLOW APPLICATIONS ON PAGE 6)
E
Page 1
. . . . . . . . . . . . . . . . . . . . . . . . . . .
. . . . . . . . . . . . . . . . . . . . . .
. . . . . . . . . . . . . . . . . . . . . . . . . . . . . .
. . . . . . . . . . . . . . . . . . . . . . . . . . .
. . . . . . . . . . . . . . . . .
. . . . . . . . . . . . . . . . .
. . . . . . . . . . . . . . . . . .
. . . . . . . . . . . . . . . . . . . .
. . . . . . . . .
506150−01
*P506150-01*
Litho U.S.A.
. . . . . .
2
. . . . . .
3
3
3
3
4
7
8
9
9
14
14
18
Advertisement
Table of Contents

Related Manuals for Lennox CBX32M Elite Series


Summary of Contents for Lennox CBX32M Elite Series
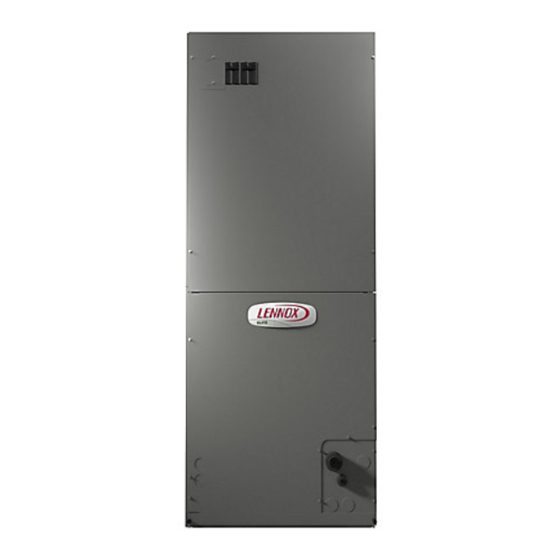
- Page 1 INSTALLATION INSTRUCTIONS E2009 Lennox Industries Inc. Dallas, Texas, USA ® Elite Series CBX32M Units WARNING AIR HANDLER Improper installation, adjustment, alteration, 506150−01 service or maintenance can cause personal injury, Litho U.S.A. 05/09 loss of life, or damage to property. Supersedes 12/08...
- Page 2 CBX32M Upflow and Downflow Unit Dimensions − Inches (mm) CBX32M Model Dimensions (for Upflow, Downflow, LH and RH Horizontal Applications) −018/−024 −030 −036 −042 −048/−060 inches inches inches inches inches Dimension 45−1/4 1149 49−1/4 1251 1295 52−1/2 1333 58-1/2 1486 16−1/4 21−1/4 21-1/4...
- Page 3 In addition to conforming to manufacturer’s installation indoor installation only. instructions and local municipal building codes, installation of Lennox air handler units (with or without optional electric These instructions are intended as a general guide and do heat), shall conform with the following National Fire not supersede local or national codes in any way.
-
Page 4: Installing The Unit
14" from the floor for current to pass through to the outer metal cabinet. proper air return. Lennox offers an optional upflow unit While the current produced may not be enough to stand as listed in table 1. - Page 5 2. Remove drain plugs from back drain holes on ANGLE IRON OR ELECTRICAL INLET SHEET METAL CLEARANCE 4 IN. (102 MM) horizontal drain pan and reinstall them on front holes. 1/2 IN. SCREWS IMPORTANT MAX. After removal of drain pan plug(s), check drain hole(s) to verify that drain opening is fully open and free of any debris.
- Page 6 TOP CAP DETAIL B COIL SHOWN IN UPFLOW TOP CAP ROTATED TO SCREWS (TOP CAP) POSITION FOR EASY CORRECT POSITION CONVERSION CABINET DETAIL A SUPPORT (DRAIN PAN) BEND PLUGGED ORIGINAL PLUG OPEN END FOR COIL LOCATION CONDENSATION ASSEMBLY DRAIN NEW PLUG LOCATION DETAIL C ALIGN HOLES WITH...
-
Page 7: Brazing Connections
OPENING The CBX32M/CB30M air handler’s coil line sizes are listed 2 (51) in table 2. Use Lennox L15 (sweat) series line sets (refer to SIDE VIEW the outdoor unit Engineering Handbook for proper size, type and application). For field−fabricated refrigerant lines, see the piping section of the Lennox Unit Information Service Manual. -
Page 8: Installing The Condensate Drain
ABOVE AUXILIARY DRAIN LINE FINISHED ALWAYS RUN AN OVERFLOW DRAIN LINE. IF NOT SPACE? POSSIBLE TO ROUTE OVERFLOW DRAIN LINE, INSTALL FLOAT SWITCH. WIRE LOW VOLTAGE TO SHUT DOWN COMPRESSOR PER INSTRUCTIONS. VENT CLEAN OUT EZ−TRAP® VENT MUST EZT−226 PRESS IN (DO EXTEND ABOVE NOT GLUE) HEIGHT OF COIL... -
Page 9: Making Electrical Connections
It is recommended that the auxiliary drain be connected to Reusable filters supplied with some units can be washed a drain line for all units. If auxiliary drain is not connected, it with water and mild detergent. Some units are equipped must be plugged with provided cap. - Page 10 NOTE − USE COPPER CONDUCTORS ONLY. REFER TO UNIT RATING PLATE FOR MINIMUM CIRCUIT AMPACITY AND MAXIMUM OVERCUR- RENT PROTECTION SIZE. LINE VOLTAGE FIELD INSTALLED CLASS 2 VOLTAGE FIELD INSTALLED CIRCUIT 1 NEC/CEC NOTE − ALL REMAINING WIRES ARE FACTORY INSTALLED CIRCUIT BREAKERS OR TERMINAL BLOCK...
- Page 11 O Y1 CIR- CUIT 1 CIRCUIT BREAKERS OR TERMINAL BLOCK CIRCUIT BREAKER OR FUSE LINE VOLTAGE FIELD INSTALLED CLASS 2 VOLTAGE FIELD INSTALLED NEC/CEC NOTE − ALL REMAINING WIRES ARE FACTORY INSTALLED THERMOSTAT HEAT ANTICIPATION SETTING 0.4 AMP ELECTRIC HEAT FACTORY INSTALLED JUMPERS WHEN OUTDOOR THERMOSTAT IS USED, CONNECT LEADS TO...
- Page 12 Figure 15. Typical Wiring Diagram − Single Phase Page 12 506150−01 05/09...
- Page 13 Figure 16. Typical Wiring Diagram − Three Phase Page 13 CBX32M SERIES...
-
Page 14: Sealing The Unit
units with electric heat, refer to the ECB29 installation Sealing the Unit instructions. WARNING AIR VOLUME ADJUSTMENT There must be an airtight seal between the bottom Blower speed selection is accomplished by changing the of the air handler and the return air plenum. Use taps at the harness connector at the Blower motor as fiberglass sealing strips, caulking, or equivalent illustrated in figure 17. - Page 15 Table 5. CBX32M-030 Air Handler Performance (208/230V) Air Volume and Motor Watts at Specific Blower Taps High External Static Pressure in. w.g. Watts Watts 1120 1525 1150 1520 1170 1510 1180 1495 1190 1475 1185 1450 1175 1415 1135 1335 1060 1230 1100...
- Page 16 Table 8. CBX32M-042 Air Handler Performance (208/230V) Air Volume and Motor Watts at Specific Blower Taps External Static Medium High Pressure in. w.g. Watts Watts Watts 1325 1600 1825 1335 1585 1790 1335 1565 1750 1330 1540 1710 1320 1505 1660 1300 1470...
- Page 17 Table 10. CBX32M−048 Air Handler Performance (460V − 1 ph) Air Volume and Motor Watts at Specific Blower Taps High External Static Pressure in. w.g. Watts Watts 1775 1870 1775 1875 1765 1870 1750 1850 1720 1825 1685 1790 1645 1745 1530 1625...
-
Page 18: Repairing Or Replacing Cabinet Insulation
If such repair is not possible, Lennox Industries Inc. replace the insulation. If using foil-faced insulation, any P.O. Box 799900 cut, tear, or separations in the insulation surface must be Dallas, TX 75379−9900...
Need help?
Do you have a question about the CBX32M Elite Series and is the answer not in the manual?
Questions and answers