JVC XL-R5000BK Instructions Manual
Jvc cd/cdr multiple compact disc recorder instructions
Hide thumbs
Also See for XL-R5000BK:
- Instructions manual (48 pages) ,
- Service manual (8 pages) ,
- Service manual (60 pages)
Table of Contents
Advertisement
CD/CDR MULTIPLE COMPACT DISC RECORDER
XL-R5000BK
POWER
CD REC
SYNCHRO
DISPLAY
CD EDIT
FINALIZE
MENU
CD 1
1
2
3
CD 2
4
5
6
CD 3
7
8
9
CONTROL
10
+10
CD
CDR
PLAY MODE REPEAT
SET
CANCEL
PITCH
+
PITCH 0
REC
–
PITCH
SHIFT
REC MUTING
REMOTE CONTROL
RM-SXLR5000J
XL - R5000 CD/CDR MULTIPLE COMPACT DISC RECORDER
CD CONTROL
CLOCK/
PLAY
MODE
CD EDIT
CD REC
TIMER
DISPLAY
MENU
STANDBY
CANCEL
SET
POWER
INSTRUCTIONS
REC SOURCE SELECTOR
3
-
CD
DIGITAL
PLAY & EXCHANGE
EJECT
CD
LINE
MIC
FINALIZE
MIXING
CDR CONTROL
MIX BALANCE
REC
SYNCHRO
REC
MUTING
MULTI JOG
LINE
–
+
MIC
MIC
For Customer Use:
Enter below the Model No. and Serial No.
which are located on the rear, bottom or
side of the cabinet. Retain this information
for future reference.
Model No.
Serial No.
LVT0452-001C
REC LEVEL
MIN
MAX
PHONES LEVEL
MIN
MAX
CD
LINE
PHONES
[ J/C/B/U ]
Advertisement
Table of Contents

Related Manuals for JVC XL-R5000BK


Summary of Contents for JVC XL-R5000BK
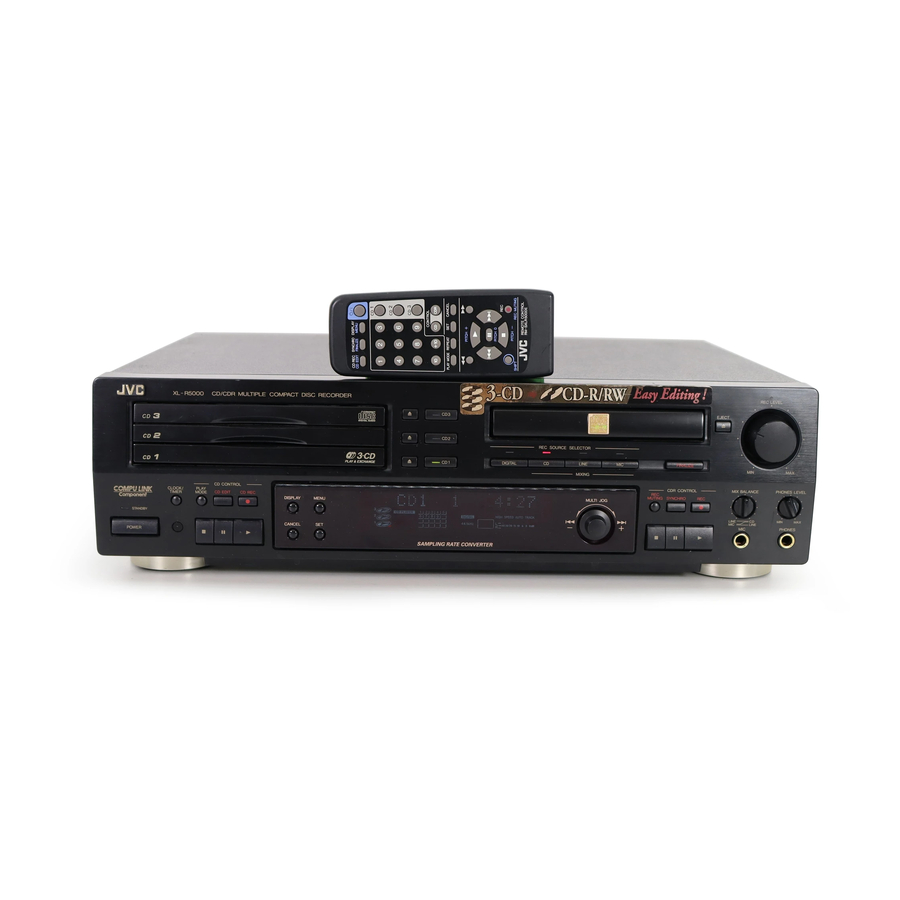
- Page 1 CD/CDR MULTIPLE COMPACT DISC RECORDER XL-R5000BK POWER CD REC SYNCHRO DISPLAY CD EDIT FINALIZE MENU CD 1 XL - R5000 CD/CDR MULTIPLE COMPACT DISC RECORDER CD 2 CD 3 CONTROL PLAY MODE REPEAT CANCEL CLOCK/ TIMER PITCH STANDBY POWER PITCH 0 –...
- Page 2 For U.S.A. This equipment has been tested and found to comply with the limits for a Class B digital device, pursuant to part 15 of the FCC Rules. These limits are designed to provide reasonable protection against harmful interference in a residential installation. This equipment generates, uses and can radiate radio frequency energy and, if not installed and used in accordance with the instructions,...
- Page 3 For Canada & USA Caution –– POWER switch! Disconnect the mains plug to shut the power off completely. The POWER switch in any position does not disconnect the mains line. The power can be remote controlled. Attention –– Commutateur POWER! Déconnecter la fiche de secteur pour couper complètement le courant.
- Page 4 REPRODUCTION OF LABELS (Except for Canada & USA) 1 CLASSIFICATION LABEL, PLACED ON REAR ENCLOSURE 2 WARNING LABEL, PLACED INSIDE THE UNIT CAUTION: Invisible laser radiation when open and interlock failed or defeated. AVOID DIRECT EXPOSURE TO BEAM. IMPORTANT FOR LASER PRODUCTS IMPORTANT POUR LES PRODUITS LASER (For Canada &...
- Page 5 No obstructions in 5 cm from the top. Back: No obstructions in 15 cm from the back Bottom: No obstructions, place on the level surface. Spacing 15 cm or more Wall or obstructions Front XL-R5000BK Stand height 15 cm or more Floor...
-
Page 6: Table Of Contents
Table of Contents Introduction ... 1 Table of Contents ... 1 Precautions ... 2 Features ... 2 Connections ... 3 Analog Connections ...3 Digital Connections...4 Names of the Parts ... 5 Main Unit ...5 Display Window...7 Remote Control ...8 Using the Remote Control ... 9 Installing the batteries ...9 How to use the remote control correctly ...9 Power ON/STANDBY Operations ... -
Page 7: Precautions
Precautions Thank you for purchasing this JVC product. Please read these instructions through carefully before starting operation to ensure that you will derive the optimum performance and a long service life from your unit. Safeguarding against electric shocks, fire hazards... -
Page 8: Connections
MODE • For further details on the COMPU LINK function, see page 37. Optional connecting cable CD player, cassette deck or other component made by JVC COMPU LINK - 4 SYNCHRO XL-R5000 CD/CDR MULTIPLE COMPACT DISC RECORDER • When connected with... -
Page 9: Digital Connections
Digital Connections Before proceeding, check whether the optical digital cable can be connected. • Connect a receiver or amplifier with digital audio capability to the DIGITAL OPTICAL connectors on this unit. • One connecting cable is used to transmit the stereo signals (L/ R) as a digital signal. -
Page 10: Names Of The Parts
Names of the Parts Main Unit XL - R5000 CD/CDR MULTIPLE COMPACT DISC RECORDER CD CONTROL CLOCK/ PLAY TIMER MODE CD EDIT CD REC STANDBY STANDBY POWER STANDBY/ON POWER button and STANDBY lamp (for Canada and U.S.A) button and STANDBY lamp (for other countries) Press to turn the power on or to put in standby. - Page 11 CD CONTROL operation buttons PLAY MODE: Press repeatedly to select one of the play modes for the 3-CD changer. (See page 15 and 16.) CD EDIT: Press to select either the Listening Edit or Program Edit recording modes. (See page 21 and 22.) CD REC: Press to perform synchronized recording of the currently selected CD in the 3-CD changer.
-
Page 12: Display Window
Display Window PROGRAM RANDOM REPEAT ALL 1CD CD PLAYER LISTENING EDIT PROGRAM EDIT CD REC 1CD CD numbers and play status displays Indicate whether discs are loaded in any of the 3-CD changer disc trays, which disc is currently selected, and the operation status of the current disc. -
Page 13: Remote Control
Remote Control POWER CD REC SYNCHRO DISPLAY CD EDIT FINALIZE MENU CD 1 CD 2 CD 3 CONTROL + 10 PLAY MODE REPEAT CANCEL PITCH + PITCH 0 PITCH – SHIFT REC MUTING REMOTE CONTROL RM-SXLR5000J When performing the procedures in this manual, the buttons on the remote control have the same function as the corresponding buttons on the main unit. -
Page 14: Using The Remote Control
Using the Remote Control Installing the batteries Press down on the point shown by the arrow at the top of the compartment cover, and pull up the cover to open the compartment. Place the two accessory AA (15F), R6, SUM-3 batteries in the remote control making sure to align the polarity markings (“+”... -
Page 15: Power On/Standby Operations
Power ON/STANDBY Operations Turning the power on and putting in standby CD1, CD2, CD3 XL - R5000 CD/CDR MULTIPLE COMPACT DISC RECORDER MULTI JOG STANDBY – POWER POWER POWER CD REC SYNCHRO DISPLAY CD EDIT FINALIZE MENU POWER ( CD 1 CD 2 CD1, CD2, CD3 CD 3... -
Page 16: Listening To Cds
Listening to CDs Continuous Playback of the 3- CD Changer (playing the loaded discs through once each) 1, 2 3 XL - R5000 CD/CDR MULTIPLE COMPACT DISC RECORDER MULTI JOG STANDBY – POWER Example: When starting playback at CD1. Press the CD1 0 button to open the CD tray. •... -
Page 17: Cdr Playback Operations
Concerning the CD numbers and play status display The display shows for each CD tray whether or not a CD has been inserted as well as the play status of the CD. While a CD is playing, this lights in sequence, and blinks in the pause mode. -
Page 18: Direct Playback From A Specific Track
• Pressing the CD 1, CD 2, or CD 3 buttons automatically sets the main unit to the CD function and starts playback of the disc in the selected tray. • When the CD function is selected, the CD PLAYER indicator lights in the display. -
Page 19: Skipping Tracks
Skipping Tracks To skip forward or backward to different tracks on the currently selected CD, use the MULTI JOG dial on the unit or the 4 or ¢ buttons on the remote control. XL - R5000 CD/CDR MULTIPLE COMPACT DISC RECORDER STANDBY –... -
Page 20: Random Playback
Random Playback The random play mode can be selected by pressing the PLAY MODE button repeatedly on the main unit or remote control when the function is in the CD stop mode. XL - R5000 CD/CDR MULTIPLE COMPACT DISC RECORDER STANDBY –... -
Page 21: Program Playback
Program Playback Up to 32 tracks can be programmed. Any tracks on CD1, CD2 and CD3 can be selected. XL - R5000 CD/CDR MULTIPLE COMPACT DISC RECORDER STANDBY – POWER 7 3,4,5 Insert CDs that contain tracks to be programmed. •... -
Page 22: Program Playback Using The Remote Control
Program playback using the remote control POWER CD REC SYNCHRO DISPLAY CD EDIT FINALIZE MENU CD 1 CD 2 CD 3 CONTROL PLAY MODE REPEAT CANCEL 3,4,5 PITCH + PITCH 0 PITCH – SHIFT REC MUTING REMOTE CONTROL RM-SXLR5000J Load the CDs whose tracks are to be programmed into the 3-CD changer. -
Page 23: Recording Onto Cd-R And Cd-Rw
Recording onto CD-R and CD-RW Notes on Recording • Do not use CD-R or CD-RW with dust and/or small scratches on the surface as this may cause the recorded sound to jump and may even cause this unit to malfunction. •... - Page 24 When analog signals are to be recorded, adjust the recording level. • Adjust the volume in such a way that REC LEVEL the 0 dB display is not exceeded when the loudest sound is supplied. 40 30 The OVER indicator should not be made to light as this may cause distortion in the recording.
-
Page 25: Synchronized Recording Of 3-Cd Changer Playback
To add track marks manually In the procedure above, set the automatic track setting to “AUTO TR OFF”. During recording, press the SET button to apply a track mark. Notes • Even if automatic track marking is turned off, automatic track marking will be performed during synchronized one-button recording. -
Page 26: Listening Edit Recording
Insert a recordable CD-R or CD-RW in the CDR disc tray. While the disc is playing back the track you want to record or if that track is being paused, press CD REC on the main unit or CD REC/CD EDIT on the remote control. -
Page 27: Program Edit Recording
When the first track has been stored in memory Remaining recording time on a Play time of second track CD-R or CD-RW (pre-calculated) CD PLAYER LISTENING EDIT HIGH SPEED AUTO TRACK 9 10 DIGITAL CD-R CD REC 44.1 – “1” is cleared from the music calendar. Note •... -
Page 28: 3-Cd Changer To Cdr Recording Options
Select and enter the program source. MULTI JOG 1. Select the source. 2. Enter the Selection • The source can be selected in either direction using the MULTI JOG dial on the main unit or the 4 and ¢ buttons on the remote control. -
Page 29: Setting The Auto Track Spacing Function
Turn the MULTI JOG dial or press the 4/¢ button on the remote control to select “DUB- SPEED 2X” or “DUB-SPEED 1X”. • If “DUB-SPEED 2X” is selected, the HIGH SPEED indicator lights in the display. • Press the CANCEL button to cancel the procedure and return to the normal display. -
Page 30: Synchronized Start Recording Of External Components
Synchronized Start Recording of External Components Perform synchronized start recording of sources such as DAT and CD connected to either the DIGITAL IN OPTICAL connector or LINE IN (REC) connectors on this unit. Recording is automati- cally started when the unit detects audio signal input. XL - R5000 CD/CDR MULTIPLE COMPACT DISC RECORDER STANDBY POWER... -
Page 31: Mixed Input Recording
Mixed Input Recording XL - R5000 CD/CDR MULTIPLE COMPACT DISC RECORDER STANDBY POWER Load a recordable CD-R or CD-RW in the CDR disc tray. Press the REC ¶ button on the main unit to put the CDR in the record pause mode. •... -
Page 32: Special Recording Edit Operations
Special Recording Edit Operations Skipping a Recorded Track on a CD-R or CD-RW (Track Skip) Occasionally, there may be tracks on a disc that are partial, repeated, or are otherwise unwanted . Before a CD-R or CD-RW is finalized, it is possible to put a skip marker for that track, which is then recorded in the TOC information at must 21 tracks per disk. -
Page 33: Erasing All The Tracks (Disc Erase Function)
Press the SET button. • “ERASE (start track) – (last track)” appears in the display. (Ini- tially, the start track and the last track are both the last track number recorded on the CD-RW.) • Press the CANCEL button if you do not wish to perform this procedure. -
Page 34: Finalization
Finalization Finalization marks the final process in recording on a CD-R or CD- RW in which the TOC (Table Of Contents) is written to the disc. When this procedure is completed, it will be possible to play CD- R/CD-RW on CD players compatible with CD-R/CD-RW. •... -
Page 35: Making Recording Possible Again On A Finalized Cd-Rw (Unfinalize Function)
Making recording possible again on a finalized CD-RW (UNFINALIZE function) Once a CD-R has been finalized, further recording on that disc can- not be performed. However, by erasing the TOC (Table of Con- tents) on a CD-RW, the disc can be recorded on again. XL - R5000 CD/CDR MULTIPLE COMPACT DISC RECORDER STANDBY –... -
Page 36: Setting Up Synchronized Start Recording For External Digital Sources (Cd, Md, And Dat Only)
Turn the MULTI JOG on the main unit or press the 4 and ¢ buttons on the remote control until “CONVERTER” appears in the display. Press the SET button. • The current setting appears in the display. (The setting is ON by default.) •... -
Page 37: Resetting The Unit To The Factory Default Settings
Resetting the Unit to the Factory Default Settings By performing the following procedure, all menu settings stored in the unit are cleared and the unit is reset to the factory default set- tings. XL - R5000 CD/CDR MULTIPLE COMPACT DISC RECORDER STANDBY –... -
Page 38: Setting The Clock
Setting the Clock Setting the Present Time (To be performed when the unit is to be used for the first time) XL - R5000 CD/CDR MULTIPLE COMPACT DISC RECORDER STANDBY POWER CANCEL Example: Setting the time to 1:15 PM (while the power is switched to STANDBY). -
Page 39: Timer Operations
Timer Operations Timer Play (wake-up play) Before proceeding with timer programming, make sure that the present time has been set correctly. (See page 33.) XL - R5000 CD/CDR MULTIPLE COMPACT DISC RECORDER STANDBY – POWER 3 ~ 8,10 4 ~ 7,9 1,11 2 Example: Setting the unit to turn on and play a CD from 7:15 AM to 8:15 AM. -
Page 40: Timer Recording (Unattended Recording Of The Sound From A Broadcast Receiver Or Other Component)
While “PLAY” is flashing, press the SET button Turn the MULTI JOG dial to set the function to CD or CDR. Press the SET button. • This display appears when the DAILY TIMER play mode is set. The timer programming is DAILY displayed once, and then the function display is restored. - Page 41 Notes • Match the timer of the connected source with the unit’s setting. (In the case of the mic input, ensure that the microphone has been connected to the unit.) • Recording starts at the programmed start time, and the power will be switched to STANDBY at the programmed end time.
-
Page 42: Compu Link Function
Accessory connecting cables Amplifier CD player The COMPU LINK functions provided with JVC products come in the form of COMPU LINK-4, COMPU LINK-3 or COMPU LINK-1. They are compatible, and the difference between them is that COMPU LINK-3 has the functions of COMPU LINK-1 with some additional functions as well. -
Page 43: Cd And Cdr Messages
CD and CDR Messages CD Messages Message CD * NO DISC (* indicates the disc tray number) CD * DISC NG (* indicates the disc tray number) ALL SKIP TR CDR Messages Message OPC ERROR OPC FULL CDR NO DISC BLANK DISC CDR DISC NG PMA FULL... - Page 44 Message CD-ROM DISC DISC FULL TNO FULL CANNOT REC NO REC SOURCE UNLOCK SCMS PROTECT NOT AUDIO IN NOT REC MUTE SHORT REMAIN CANNOT FIN NO RW DISC CANNOT ERASE CANNOT UNFIN DAO DISC SKIP FULL Significance The inserted disc is a CD-ROM. Record and erase functions are not possible.
-
Page 45: Restriction On Copying Digital Material
Restriction on Copying Digital Material Due to copyright and other considerations, the following restriction is now in place for CD-R and CD onto which the digital signals of CDs have been copied. SCMS (Serial Copy Management System) The digital quality of CDs and other digital media can be recorded to CD-R and CD-RW using the CDR function of this unit. -
Page 46: Troubleshooting
Troubleshooting Symptom No sound. The time display flashes in the dis- play window. Play fails to start Specific parts are not played properly. Recording is not possible Timer fails to start. No remote control operations. If the unit fails to operate properly even when the remedial action suggested above has been taken: This unit uses a microcomputer to perform a large number of operations. -
Page 47: Main Specifications
Main Specifications The unit’s specifications and exterior are subject to change without notice due to improvements. CD Player Section System Compact disc digital audio system Pitch control ±12% Signal-to-noise ratio 94 dB Dynamic range (1 kHz) 91 dB Frequency response 20 Hz ~ 20 kHz Wow and flutter Less than measurable limit... - Page 48 Mains (AC) Line Instruction (not applicable for Europe, U.S.A., Canada, Australia and U.K.) DIGITAL IN OPTICAL DIGITAL OUT OPTICAL LINE IN REC OUT PLAY LEFT RIGHT CAUTION for mains (AC) line BEFORE PLUGGING IN, do check that your mains (AC) line voltage corresponds with the position of the voltage selector switch provided on the outside of this equipment and, if different, reset the voltage selector switch, to prevent...