
Related Manuals for Allied Vision Technologies Oscar


Summary of Contents for Allied Vision Technologies Oscar
- Page 1 AVT Cameras FireWire Hardware Installation Guide V8.0.0 13 August 2012 Allied Vision Technologies GmbH Taschenweg 2a D-07646 Stadtroda / Germany...
-
Page 2: Legal Notice
IEEE 1394 Standards Association. Apple is a trademark of Apple Inc., registered in the U.S. and other countries. Unless stated otherwise, all trademarks appearing in this document of Allied Vision Technologies are brands protected by law. Warranty The information provided by Allied Vision Technologies is supplied without any guarantees or warranty whatsoever, be it specific or implicit. -
Page 3: Table Of Contents
FireWire hot-plug and screw-lock precautions..............19 Changing filters safety instructions................... 20 Guppy: changing filters safety instructions ..............20 Pike/Oscar: changing filters safety instructions .............. 21 Marlin/Stingray/Guppy PRO: changing filters safety instructions........21 Cautions: Connecting a camera ..................22 Pike/Stingray GOF connectors ..................22 Safety instructions for board level cameras................. - Page 4 Board level camera (Stingray): IEEE 1394b port pin assignment ......... 42 Pike/Stingray fiber infos and cautions ................43 Camera I/O connectors (12 pin) order numbers and cables: Guppy PRO, Stingray, Pike, Marlin, Oscar . Camera I/O connectors (8 pin) order numbers and cables: Guppy ..........46 Stingray camera interfaces ....................
- Page 5 Marlin delay ......................80 Marlin data......................81 Marlin power......................81 Oscar camera interfaces....................82 Oscar camera I/O connector pin assignment ..............82 Oscar input description ....................83 Oscar input block diagram ..................83 Oscar delay and minimum pulse width ..............84 Oscar output description ....................
-
Page 6: Contacting Allied Vision Technologies
38 Washington Street Newburyport, MA 01950, USA Toll Free number +1-877-USA-1394 Tel: +1 978-225-2030 Fax: +1 978-225-2029 e-mail: info@alliedvisiontec.com Allied Vision Technologies Asia Pte. Ltd. 82 Playfair Road #07-02 D’Lithium Singapore 368001 Tel: +65 6634-9027 Fax: +65 6634-9029 e-mail: info@alliedvisiontec.com... -
Page 7: Introduction
Introduction Introduction This FireWire Hardware Installation Guide describes the hardware installation procedures for the following 1394 AVT cameras: Oscar, Marlin, Guppy, Pike, Stingray and Guppy PRO. The FireWire Hardware Installation Guide answers questions about putting AVT cameras into operation, about safety warnings, pin assignments on I/O connectors and 1394a/b connectors. - Page 8 Figure 8: Example: Rear view of Stingray camera (2x 1394b copper) on page 37 New photos of Dolphin, Oscar, Marlin, Guppy, Pike, Stingray (with HIROSE and 1394 copper) in Table 5: Rear view of AVT cam- eras (HIROSE and 1394 copper)
- Page 9 Marlin: see Chapter Marlin delay and minimum pulse width on page 78 • Oscar: see Chapter Oscar delay and minimum pulse width on page 84 to be continued on next page Table 1: Document history FireWire Hardware Installation Guide V8.0.0...
- Page 10 • Pike delay on page 60 Discontinuation of Marlin F-131C New links to new AVT website • Chapter Contacting Allied Vision Technologies on page 6 to be continued on next page Table 1: Document history FireWire Hardware Installation Guide V8.0.0...
- Page 11 (Guppy PRO, Pike, Stingray) on page 41 • Added Guppy PRO in Chapter Camera I/O connectors (12 pin) order numbers and cables: Guppy PRO, Stingray, Pike, Marlin, Oscar on page 45 • Added Chapter Guppy PRO input block diagram on page 63 •...
-
Page 12: Manual Overview
Table 1: Document history Manual overview The manual overview describes each chapter of this manual shortly. • Chapter Contacting Allied Vision Technologies on page 6 lists AVT contact data for both: technical information / ordering and commercial informa- tion. •... -
Page 13: Conventions Used In This Manual
Introduction – Follow all safety instructions, especially the cautions when con- necting cameras. – Take special care when operating board level cameras (Caution-ESD, general warnings, loading and dirty environments). Read all notes and safety instructions before operating any AVT board level cam- era. -
Page 14: Symbols
In this chapter you get more information on AVT accessories, available AVT software and the AVT Technical Manuals. AVT accessories Note Allied Vision Technologies offers a wide range of accessories for the use of AVT Cameras and the easy integration in already existing applications. -
Page 15: Avt Software
Introduction For more information on accessories and on ordering accessories online (by clicking the article and sending an inquiry) go to: http://www.alliedvisiontec.com/emea/products/ accessories.html AVT software Note AVT cameras are compliant to IIDC V1.30/V1.31. Moreover AVT cameras offer many more functions than specified in the ... -
Page 16: Avt Technical Manuals
AVT cameras in the so-called Technical Manuals (one for each AVT camera family): • Oscar Technical Manual • Marlin Technical Manual • Guppy Technical Manual • Guppy PRO Technical Manual •... -
Page 17: Safety Instructions
Safety instructions Safety instructions This chapter describes safety instructions/cautions valid for all AVT camera fam- ilies and special safety instructions/cautions depending on the camera family/ model used. General safety instructions Note • There are no switches or parts inside the camera that require adjustment. -
Page 18: Sensor Safety Instructions
Safety instructions Sensor safety instructions Caution Sensor may be damaged Light intensity or exposure time exceeding the saturation of the sensor may damage the sensor irreparably. This may occur in following situations: • Laser light hitting the sensor directly •... -
Page 19: Firewire Safety Instructions
Safety instructions FireWire safety instructions FireWire hot-plug and screw-lock precautions Caution Hot-plug precautions • Although FireWire devices can theoretically be hot- plugged without powering down equipment, we strongly recommend turning the computer power off, before connecting a digital camera to it via a FireWire cable. •... -
Page 20: Changing Filters Safety Instructions
Safety instructions Changing filters safety instructions Caution • Mount/dismount lenses and filters in a dust-free envi- ronment, and do not use compressed air (which can push dust into cameras and lenses). • Use only optical quality tissue/cloth if you must clean a lens or filter. -
Page 21: Pike/Oscar: Changing Filters Safety Instructions
Safety instructions Pike/Oscar: changing filters safety instructions Note • Pike/Oscar models only: Changing filters is achieved by changing back focus rings with the appropriate filter already mounted. Please be advised that back focus adjustment will be necessary in order to match C-Mount distance of 17.526 mm. -
Page 22: Cautions: Connecting A Camera
Safety instructions Cautions: Connecting a camera Caution ALL CAMERAS • Do not touch the shield of the camera cable connected to a computer and the ground terminal of the lines at the same time. • If you are charged: before touching the shield of the cam- era cable, make sure to discharge first (by touching the ground terminal of the lines). -
Page 23: Safety Instructions For Board Level Cameras
Safety instructions Safety instructions for board level cameras Note Read the Guppy Technical Manual or Stingray Technical Man- ual and this safety instructions before use. Abuse or misapplication of the camera may result in limited warranty or cancelation of warranty. Caution-ESD Board level cameras: ESD warnings •... - Page 24 Safety instructions Caution Board level cameras: General Warnings • Be sure that all power to your board level cameras is switched off, before mounting the sensor board or making connections to the camera. • Do not connect or disconnect any cables during an elec- trical storm.
-
Page 25: Avt Camera Cleaning Instructions
AVT camera cleaning instructions AVT camera cleaning instructions This section describes safety instructions/cautions valid for all AVT camera fam- ilies in case of cleaning lenses, optical filters/protection glass or sensors. Note • Please read these instructions before you contact your AVT camera dealer for assistance. -
Page 26: Avoiding The Necessity Of Camera Cleaning
AVT camera cleaning instructions Caution-ESD ESD warnings Image sensors are easily damaged by static discharge (ESD). • Please use anti-static gloves, clothes and materials. Also use conductive shoes. • Install a conductive mat on the floor and/or working table to prevent the generation of static electricity. Avoiding the necessity of camera cleaning When changing camera lenses please follow these procedures: •... -
Page 27: Is It An Impurity? - Identifying Impurities
AVT camera cleaning instructions Is it an impurity? – Identifying impurities If you observe any image artefacts in your video preview of your AVT camera you may have impurities either on the lens, filter/protection glass or, theoretically on the sensor protection glass, although every AVT camera gets cleaned prior to sealing and shipment. - Page 28 E9020001) and clean it on both sides using the techniques explained below. Camera Tool to be used Description type Oscar 1.3 mm hex key Loosen both countersunk screws. Remove chromatic flange: Take (Allen key) care, C-Mount adjustment spacers may fall out. Put them back AVT order number...
-
Page 29: Cleaning Instructions
AVT camera cleaning instructions Note • Taking out the filter requires special care. The customer is fully responsible for all actions of changing/removing filter by himself. • Ask your dealer to help you if you are not confident with the procedure. - Page 30 AVT camera cleaning instructions Figure 4: Medical-grade sterile optical cotton The cotton or lens tissue should be moist, but not dripping. Please hold the camera away from your body to avoid falling particles like flakes from skin on the sensor. Hold the camera sensor diagonally upwards. 3.
- Page 31 AVT camera cleaning instructions Figure 6: Don’t use compressed air 6. If despite warnings you want to clean your camera with compressed air: Caution • Use an air blower/compressed air only if you are familiar with cleaning a camera with this instrument. ...
-
Page 32: Avt Cameras: Installing Hardware
AVT cameras: installing hardware AVT cameras: installing hardware This chapter describes the hardware installation of 1394a/b AVT cameras, 1394 adapters (PC or laptop) and the necessary cabling. Note For software/driver installation read the documentation of the corresponding AVT software package. ... -
Page 33: Hardware Conditions
AVT cameras: installing hardware Hardware conditions • AVT IEEE 1394a or 1394b camera (1394a: Oscar, Marlin, Guppy; 1394b: Guppy PRO, Pike, Stingray) with corresponding lens • 1394 cable • PC or laptop with built-in IEEE 1394 interface • IEEE 1394 adapter (OHCI) card for PCI bus or PCI Express bus or PC card or... -
Page 34: Firewire Hot-Plug And Screw-Lock Precautions
AVT cameras: installing hardware FireWire hot-plug and screw-lock precautions Caution Hot-plug precautions • Although FireWire devices can theoretically be hot- plugged without powering down equipment, we strongly recommend turning the computer power off, before connecting a digital camera to it via a FireWire cable. •... -
Page 35: Installing Ieee 1394 Adapter
AVT cameras: installing hardware For more information see AVT Software Selector Guide: http://www.alliedvisiontec.com/emea/support/downloads/ software.html Installing IEEE 1394 adapter 1. PC: Install the IEEE 1394 adapter according to the instructions you got from your adapter manufacturer. Laptop: Insert the IEEE 1394 PC Card into your laptop. Connect external power supply to the adapter to power the camera or power the camera via Hirose connector. - Page 36 AVT cameras: installing hardware Caution Hot-plug precautions • Although FireWire devices can theoretically be hot- plugged without powering down equipment, we strongly recommend turning the computer power off, before connecting a digital camera to it via a FireWire cable. •...
-
Page 37: Camera Interfaces
IEEE 1394 bus and thus makes it possible to control the camera and output frames. – Oscar, Marlin and Guppy provide one 1394a connector. – Pike and Stingray provide 2x 1394b connectors. – Guppy PRO provides one 1394b connector. - Page 38 Camera interfaces Oscar Marlin Guppy HIROSE and 1x 1394a HIROSE and 1x 1394a HIROSE and 1x 1394a Pike Stingray Guppy PRO HIROSE and 2x 1394b HIROSE and 2x 1394b HIROSE and 1x 1394b Table 5: Rear view of AVT cameras (HIROSE and 1394 copper)
-
Page 39: Ieee 1394A Port Pin Assignment (Oscar, Marlin, Guppy)
Camera interfaces IEEE 1394a port pin assignment (Oscar, Marlin, Guppy) The IEEE 1394a connector is designed for industrial use and has the following pin assignment as per specification: Signal Cable power Cable GND TPB- TPB+ TPA- TPA+ Figure 9: IEEE 1394a connector... -
Page 40: Board Level Camera (Guppy): Ieee 1394A Port Pin Assignment
Camera interfaces Board level camera (Guppy): IEEE 1394a port pin assignment Board level Guppies have two 1394a ports to allow daisy chaining of cameras. The IEEE 1394a pin header (2.54 mm connector: FireWire connector 1) is designed for adding a 1394a adapter cable of: e.g. -
Page 41: Ieee 1394B Port Pin Assignment (Guppy Pro, Pike, Stingray)
Camera interfaces IEEE 1394b port pin assignment (Guppy PRO, Pike, Stingray) The IEEE 1394b connector is designed for industrial use and has the following pin assignment as per specification: Signal TPB- TPB+ TPA- 6 7 8 TPA+ TPA (Reference ground) VG (GND) N.C. -
Page 42: Board Level Camera (Stingray): Ieee 1394B Port Pin Assignment
Camera interfaces Board level camera (Stingray): IEEE 1394b port pin assignment Board level Stingray cameras have two 1394b ports to allow daisy chaining of cameras. They have the same pin assignment as the Stingray housing cameras. 13-pole I/O connector: [Molex 1.25mm Pitch PicoBlade Wire-to-Board Header (53047-1310)] ---------------------------------------------------------------------------------- 7 = GND (for Inputs) 1 = GND (for RS232, Ext PWR) -
Page 43: Pike/Stingray Fiber Infos And Cautions
Camera interfaces Pike/Stingray fiber infos and cautions All Pike and Stingray cameras are also available as fiber version with 1 x GOF connector and 1x copper connector. The GOF connector is of the following type: 2 x optical fiber on LCLC The GOF transmission uses MMF (multi-mode fiber at 850 nm). - Page 44 Camera interfaces IEEE 1394b connector GOF IEEE 1394b connector (2x optical fiber on LCLC) (copper) Figure 15: Rear view of Pike camera (1394b: 1 x GOF, 1 x copper) (Stingray similar) Caution Special warning for all Pike/Stingray models with GOF con- nectors: ...
- Page 45 Guppy PRO, Stingray, Pike, Marlin, Oscar The 12-pin camera I/O connector (Guppy PRO, Stringray, Pike, Marlin, Oscar) is also designed for industrial use and, in addition to providing access to the inputs and outputs on the camera, it also provides a serial interface for e.g. the firmware update.
-
Page 46: Camera I/O Connectors (8 Pin) Order Numbers And Cables: Guppy
Camera interfaces Camera I/O connectors (8 pin) order numbers and cables: Guppy The 8-pin camera I/O connector (only Guppy cameras) is designed for industrial use. It provides: • access to the inputs and outputs on the camera • a serial interface AVT also supplies various I/O cables of different lengths. -
Page 47: Stingray Camera Interfaces
Camera interfaces Stingray camera interfaces Stingray camera I/O connector pin assignment (For board level see Chapter Stingray board level camera: I/O pin assignment page 53) Signal Direction Level Description External GND GND for RS232 and External Ground for RS232 ext. power and external power External Power +8 ... -
Page 48: Stingray Input Description
Camera interfaces Stingray input description Stingray input block diagram external internal GPIn1 GPInX InGND Figure 17: Stingray input block diagram The inputs can be connected directly up to max. +24 V. If you want to use volt- ages from +24 V...+36 V you have to place an external resistor of 1.5 k (1/10 watt) in series with your voltage source. -
Page 49: Stingray Delay And Minimum Pulse Width
Camera interfaces Stingray delay and minimum pulse width The cycle delay for all Stingray cameras is: tpdLH 1.0 μs and tpdHL 1.5 μs The minimum pulse width for all Stingray cameras is: tp 1.6 μs Test conditions The input signal was driven with 12 V and a 2.2 k... -
Page 50: Stingray Output Description
Camera interfaces Stingray output description Stingray block diagram internal external OutVCC GPOut1 GPOutX Figure 18: Stingray: output block diagram Caution Stingray • Max. 15 mA per output • OutVCC 36 V may damage the camera OutVCC Resistor value 1 k... -
Page 51: Stingray Delay
Camera interfaces Stingray delay Optocoupler input (internal) Optocoupler output (external) 100% delay time storage time rise time fall time turn-on time turn-off time Figure 20: Stingray output switching times For all Stingray models: Parameter and value 1 μs 26 μs ... -
Page 52: Stingray Data
Camera interfaces Stingray data The RS232 data interface has a typical output voltage from 4.2 V. Stingray power In accordance to IEEE 1394b specification the power supply (+8 V … +36 V) should deliver a current of at least 1.5 A. Note If using daisy chain the camera has to supply further compo- nents with also 1.5 A. -
Page 53: Stingray Board Level Camera: I/O Pin Assignment
Camera interfaces Stingray board level camera: I/O pin assignment The following diagram shows the 13-pole I/O pin connector of a Stingray board level camera: 13-pole I/O connector: [Molex 1.25mm Pitch PicoBlade Wire-to-Board Header (53047-1310)] ---------------------------------------------------------------------------------- 7 = GND (for Inputs) FFC45 cable length: 1 = GND (for RS232, Ext PWR) 8 = RxD 9 = TxD... -
Page 54: Pike Camera Interfaces
Camera interfaces Pike camera interfaces Pike camera I/O connector pin assignment Signal Direction Level Description External GND GND for RS232 and ext. External Ground for RS232 power and external power External Power +8 ... +36 V DC Power supply Camera Out 4 Open emitter Camera Output 4 (GPOut4) -
Page 55: Pike Input Description (Not Pike F-505)
Camera interfaces Pike input description (not Pike F-505) (for Pike F-505 see Chapter Input description of Pike F-505 on page 57) Pike input block diagram external internal GPIn1 GPInX InGND Figure 23: Pike input block diagram The inputs can be connected directly to +5 V. If a higher voltage is used, an external resistor must be placed in series. -
Page 56: Pike Delay And Minimum Pulse Width
Camera interfaces Parameter Value Initial on-current 5 mA Flux voltage of the LED (@ 10 mA) 1.5 V Maximum off-current 0.25 mA Maximum input current 15 mA Table 11: Pike: input parameters Pike delay and minimum pulse width The cycle delay for all Pike cameras (except Pike F-505) is: tpdLH ... -
Page 57: Input Description Of Pike F-505
Camera interfaces Input description of Pike F-505 Pike F-505 has a different input wiring compared to the other Pike models. The inputs of Pike F-505 are the same as the inputs of Stingray. Pike F-505 input block diagram external internal GPIn1 GPInX InGND... -
Page 58: Pike F-505 Delay And Minimum Pulse Width
Camera interfaces Pike F-505 delay and minimum pulse width The cycle delay for the Pike F-505 is: tpdLH 2.2 μs and tpdHL 2.8 μs The minimum pulse width for the Pike F-505 is: tp 2.0 μs Pike F-505 test conditions The input signal was driven with 12 V and a 2.2 k... -
Page 59: Pike Output Description
Camera interfaces Pike output description Pike output block diagram internal external OutVCC GPOut1 GPOutX Figure 25: Pike: output block diagram Caution Pike • Max. 20 mA per output • OutVCC 36 V may damage the camera. OutVCC Resistor value 1 k... -
Page 60: Pike Delay
Camera interfaces Pike delay Optocoupler input (internal) Optocoupler output (external) 100% delay time storage time rise time fall time turn-on time turn-off time Figure 27: Pike output switching times For all Pike models: Parameter and value 1 μs 30 μs ... -
Page 61: Pike Data
Camera interfaces Pike data The RS232 data interface has a typical output voltage from 4.2 V. Pike power In accordance to IEEE 1394b specification the power supply (+8 V…+36 V) should deliver a current of at least 1.5 A. Note If using daisy chain the camera has to supply further compo- nents with also 1.5 A. -
Page 62: Guppy Pro Camera Interfaces
Camera interfaces Guppy PRO camera interfaces Guppy PRO camera I/O connector pin assignment Signal Direction Level Description External GND GND for ext. power External Ground for external power External Power +8 ... +36 V DC Power supply Camera In 1 (high) = 3 V...24 V Camera Input 1 (GPIn1) -
Page 63: Guppy Pro Input Description
Camera interfaces Guppy PRO input description Guppy PRO input block diagram external internal GPIn1 GPInX InGND Figure 29: Guppy PRO input block diagram The inputs can be connected directly up to max. +24 V. If you want to use volt- ages from +24 V... -
Page 64: Guppy Pro Delay And Minimum Pulse Width
Camera interfaces Guppy PRO delay and minimum pulse width The cycle delay for all Guppy PRO cameras is: tpdLH 1.0 μs and tpdHL 1.5 μs The minimum pulse width for all Guppy PRO cameras is: tp 1.6 μs Test conditions The input signal was driven with 12 V and a 2.2 k... -
Page 65: Guppy Pro Output Description
Camera interfaces Guppy PRO output description Guppy PRO block diagram internal external OutVCC GPOut1 GPOutX Figure 30: Guppy PRO: output block diagram Caution Guppy PRO • Max. 15 mA per output • OutVCC 36 V may damage the camera. OutVCC Resistor value 1 k... - Page 66 Camera interfaces Note Guppy PRO F-503: IntEna is high, when all pixels are integrated simultaneously. Using IntEna with electronic rolling shutter and global reset release shutter: see Guppy PRO Technical Manual, Chapter Trigger modi. FireWire Hardware Installation Guide V8.0.0...
-
Page 67: Guppy Pro Delay
Camera interfaces Guppy PRO delay Optocoupler input (internal) Optocoupler output (external) 100% delay time storage time rise time fall time turn-on time turn-off time Figure 32: Guppy PRO output switching times For all Guppy PRO models: Parameter and value 1 μs ... -
Page 68: Guppy Pro Data
Camera interfaces Guppy PRO data Currently RS232 data interface is not implemented. Guppy PRO power In accordance to IEEE 1394b specification the power supply (+8 V … +36 V) should deliver a current of at least 1.5 A. FireWire Hardware Installation Guide V8.0.0... -
Page 69: Guppy Camera Interfaces
Camera interfaces Guppy camera interfaces Guppy camera I/O connector pin assignment Guppy (housing) Signal Direction Level Description Camera Out 1 (high) = 2.4 V...5 V Camera Output 1 (GPOut1) (low) = 0 V...0.4 V default: IntEna Camera Out 2 (high) = 2.4 V...5 V Camera Output 2 (GPOut2) (low) = 0 V...0.4 V... -
Page 70: Guppy (Board Level)
Camera interfaces Guppy (board level) The following diagram shows the I/O pin header (2.54 mm connector) of a board level camera as viewed in pin direction: Signal Direction Level Description External GND GND for RS232, GPIOs External Ground for RS232, and ext. -
Page 71: Guppy Input Description
Camera interfaces Guppy input description Guppy (housing) input block diagram (For board level see Chapter Stingray board level camera: I/O pin assignment page 53) external internal GPIn1 Figure 35: Guppy (housing) input block diagram The inputs can be connected directly to +5 V. If a higher voltage is used, an external resistor must be placed in series. -
Page 72: Guppy Delay And Minimum Pulse Width
Camera interfaces Guppy delay and minimum pulse width The cycle delay for all Guppy cameras is: tpdLH 3.0 μs and tpdHL 1.5 μs The minimum pulse width for all Guppy cameras is: tp 2.2 μs Test conditions The input signal was driven with 12 V and a 2.2 k... -
Page 73: Guppy Output Description
Camera interfaces Guppy output description Guppy output block diagram (For board level see Chapter Guppy (board level) IO block diagram on page 75) internal external GPOut1 GPOutX Figure 36: Guppy: output block diagram Caution Guppy Max. 20 mA per output ... -
Page 74: Guppy Delay
Camera interfaces Guppy delay 100% delay time storage time rise time fall time turn-on time turn-off time Figure 38: Guppy output switching times For all Guppy models: Parameter and value < 0.5 μs < 0.5μs < 0.5 μs < 0.5 μs = 1μs = ... -
Page 75: Guppy (Board Level) Io Block Diagram
Camera interfaces Guppy (board level) IO block diagram external internal GPInOut1 GPInOutx Figure 39: Guppy (board level) input block diagram The GPIOs of the board level Guppy have the same electrical characteristics as the GPIOs of the standard (housing) Guppy. Guppy data Currently RS232 data interface is not implemented. -
Page 76: Marlin Camera Interfaces
Camera interfaces Marlin camera interfaces Marlin camera I/O connector pin assignment Signal Direction Level Description External GND GND for RS232 and ext. External ground for RS232 power and external power External Power +8 ... +36 V DC Power supply (CCD models only) Camera In 1 (high) = 2 V...U Camera Input 1... -
Page 77: Marlin Input Description
Camera interfaces Marlin input description Marlin input block diagram external internal GPIn1 GPInX InGND Figure 41: Marlin: input block diagram The inputs can be connected directly to +5 V. If a higher voltage is used, an external resistor must be placed in series. Caution Marlin Voltages above +36 V may damage the camera. -
Page 78: Marlin Delay And Minimum Pulse Width
Camera interfaces Marlin delay and minimum pulse width The cycle delay for all Marlin cameras is: tpdLH 1 μs and tpdHL 1 μs The minimum pulse width for all Marlin cameras is: tp 2.2 μs Test conditions The input signal was driven with 12 V and a 2.2 k... -
Page 79: Marlin Output Description
Camera interfaces Marlin output description Marlin output block diagram internal external OutVCC GPOut1 GPOutX Figure 42: Marlin: output block diagram Caution Marlin • Max. 200 mA per output • OutVCC 36 V may damage the camera. OutVCC Resistor value 1 k... -
Page 80: Marlin Delay
Camera interfaces Marlin delay Optocoupler input (internal) Optocoupler output (external) 100% delay time storage time rise time fall time turn-on time turn-off time Figure 44: Marlin output switching times For all Marlin models: Parameter and value 1 μs 55 μs ... -
Page 81: Marlin Data
Camera interfaces Marlin data The RS232 data interface has a typical output voltage from 4.2 V. Marlin power In accordance to IEEE 1394a specification the power supply (+8 V ... +36 V) should deliver a current of at least 1.5 A. FireWire Hardware Installation Guide V8.0.0... -
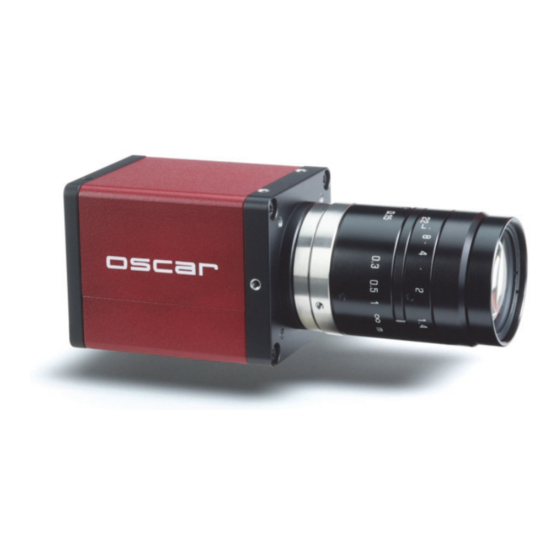
Page 82: Oscar Camera Interfaces
(high) = 2 V...U Camera Input 2 inVCC (GPIn2) (low) = 0 V...0.8 V default: - Camera Out 2 Open emitter Camera Output 2 (GPOut2) default: - Figure 45: Oscar: Camera I/O connector pin assignment FireWire Hardware Installation Guide V8.0.0... -
Page 83: Oscar Input Description
12 V 0.82 k 24 V 2.2 k 36 V 3.3 k Table 21: Oscar: external resistors for voltages higher than 5 V Parameter Value Initial on-current 5 mA Flux voltage of the LED (@ 10 mA) 1.5 V Maximum off-current 0.25 mA... -
Page 84: Oscar Delay And Minimum Pulse Width
Oscar delay and minimum pulse width The cycle delay for all Oscar cameras is: tpdLH 1 μs and tpdHL 1 μs The minimum pulse width for all Oscar cameras is: tp 2.2 μs Test conditions The input signal was driven with 12 V and a 2.2 k pull down resistor to GND. -
Page 85: Oscar Output Description
• OutVCC 36 V may damage the camera. OutVCC Resistor value 1 k 5 mA load 12 V 2.4 k recommended 24 V 4.7 k Figure 48: Oscar: OutVCC and external resistor FireWire Hardware Installation Guide V8.0.0... -
Page 86: Oscar Delay
100% delay time storage time rise time fall time turn-on time turn-off time Figure 49: Oscar output switching times For all Oscar models: Parameter and value 1 μs 55 μs 1 μs 75 μs 2 μs ... -
Page 87: Oscar Data
Camera interfaces Oscar data The RS232 data interface has a typical output voltage from 4.2 V. Oscar power In accordance to IEEE 1394a specification the power supply (+8 V ... +36 V) should deliver a current of at least 1.5 A. -
Page 88: Firmware Update
Firmware update Firmware update Firmware updates can be carried out without opening the camera. Note For further information read the application note: How to update Guppy/Guppy PRO/Pike/Stingray firmware. This application note and the firmware itself is only accessible for distributors. End customers have to contact technical sup- port. -
Page 89: Index
IEEE 1394a board level ......40 Guppy PRO ........64 IEEE 1394b ........41 Marlin ..........78 TPB- Oscar ..........84 IEEE 1394a ........39 Pike ..........56 IEEE 1394a board level ......40 Stingray ........... 49 IEEE 1394b ........41 TPB (Reference ground) optical filter ........... - Page 90 Index TPB+ IEEE 1394a ........39 IEEE 1394a board level ......40 IEEE 1394b ........41 IEEE 1394b ........41 VG (GND) IEEE 1394b ........41 IEEE 1394b ........41 VP (Power, VCC) IEEE 1394b ........41 FireWire Hardware Installation Guide V8.0.0...
Need help?
Do you have a question about the Oscar and is the answer not in the manual?
Questions and answers