Advertisement
Advertisement
Table of Contents

Related Manuals for L.B. White Pilot Light Ignition


Summary of Contents for L.B. White Pilot Light Ignition
- Page 1 Pilot Light Ignition Agricultural Animal Confinement Building Heaters Installation and Service Guide 150-22003...
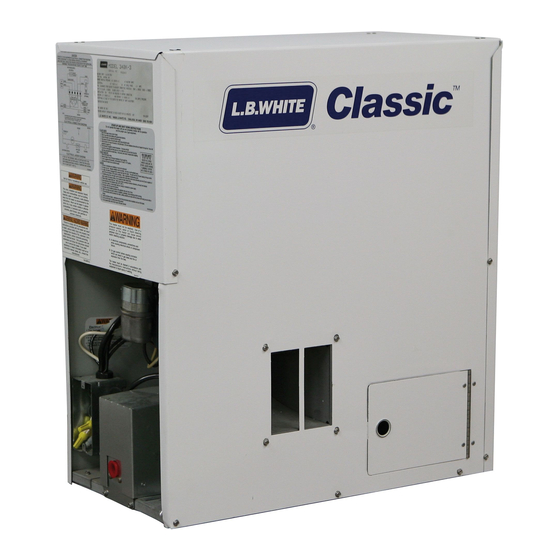
- Page 2 Parts illustrations and information for all L.B. White pilot ignition heaters is included. Illustrations in the various sections may not necessarily depict the actual heater model and are intended for reference only.
- Page 3 — Electrical shock Read this Service Guide before installing or servicing this heater. Only properly-trained service people should repair or install L.B. White heaters. Replacement labels are available at no charge. For assistance, contact L.B. White at 1-800-345-7200. WARNING Proper gas supply pressure must be provided to the inlet of the heater.
-
Page 4: Table Of Contents
Table of Contents Section 1 General Information Section/Page Basic Unit Description and Application ........1.1 Key Markings;... -
Page 5: Basic Unit Description And Application
Interior or exterior of burner end access panel. AGRICULTURAL BUILDING HEATER Part No.: L. B. WHITE CO., INC. W6636 L.B. WHITE ROAD ONALASKA, WI 54650 608/783-5691 Varies with design sequence and model number. Contact L.B. White Co. B. Start Up and Shut Down Procedures... -
Page 6: Heater Specifications
General Information Heater Specifications M M o o d d e e l l SPECIFICATIONS AS040 L.P. Natural L.P. Natural L.P. Natural L.P. Natural Maximum Input (BTUH) 60,000 115,000 170,000 40,000 Minimum Input (BTUH) 15,000 Ventilation Air Required 250 CFM 600 CFM 760 CFM 220 CFM... - Page 7 General Information Heater Specifications M M o o d d e e l l AB200 AB250 SPECIFICATIONS L.P. Natural L.P. Natural Maximum Input (BTUH) 200,000 250,000 Minimum Input (BTUH) 160,000 Ventilation Air Required 760 CFM 1100 CFM to Support Combustion 13.5 in.
-
Page 8: Safety Precautions
WARNING Asphyxiation H H azard Do not use this heater for heating human living quarters. the L.B. White Company to determine combustion air ventilation requirements of the heater. Do not use in unventilated areas. Lack of proper ventilation air will lead to improper The flow of combustion and ventilation air must not be combustion. -
Page 9: General
The hose assembly shall be protected from animals, 2. All installations and applications of L.B. White heaters building materials, and contact with hot surfaces must meet all relevant local, state and national codes. - Page 10 General Information Safety Precautions three-prong receptacle. Failure to use a properly 15. Non-hanging heater installations that do not use an grounded receptacle can result in electrical shock, approved gas hose assembly must conform to local personal injury, or death. gas code requirements. In absence of local codes, follow ANSI/NFPA58, Standard for Storage and 14.
-
Page 11: Gas Supply
L.P. gas liquid withdrawal system or Can c c ause p p roperty d d amage, s s evere i i njury o o r d d eath. application. If you are in doubt, contact the L.B. White Co., Inc. -
Page 12: Pipe Sizing
Installation Instructions Pipe Sizing GENERAL I I NFORMATION c. The information in the pipe sizing tables was obtained Pipe sizing is critical to the proper operation of any gas from Engineered Control International, Inc., L.P. Gas heating system. However, piping is dependent on several Serviceman’s Manual L545. - Page 13 Installation Instructions Pipe Sizing EXAMPLE (Refer to Fig 2) IMPORTANT: If exact length is not on chart, use next longer c. Section C to D must supply a load of 750,000 BTUH. length. Select the size of pipe that shows at least as much Select 3/4 inch pipe for Section C to D.
-
Page 14: Tank Sizing
Installation Instructions Tank Sizing pressure washers, water heaters, etc., that will be ATTENTION drawing vapor from the tanks. The following is supplied for informational purposes --- The heat input rating is located on the dataplate. only. The coldest outside air temperature at night that the Consult your LP gas supplier for specific requirements. -
Page 15: Tank Location And Installation
Installation Instructions Tank Location and Installation Tanks should be placed in a location pleasing to the ATTENTION customer that does not conflict with state or local regulations or NFPA 58 (Storage and Handling of Liquefied The following is supplied for informational purposes Petroleum Gases). -
Page 16: Lp Gas Tank Manifolding
Installation Instructions LP Gas Tank Manifolding ATTENTION The following is supplied for informational purposes However, when tanks are manifolded together, never use a only. first-stage regulator at each tank. If this is done, the total required capacity for the installation may not be obtained. It Tank manifolding shall only be accomplished by a is almost impossible to set all regulators at the identical qualified LP gas installation person. -
Page 17: Manual Shut-Off Valve, Hose And Regulator Assembly
Contact the regulator, under the eave of the building, or after the L.B. White Co., Inc. if you have any questions. regulator inside the building. REGULATOR... -
Page 18: Sediment Trap
Installation Instructions Sediment Trap Assemble the tee, nipples and cap together and tighten Make certain that a sediment trap is installed at the gas valve inlet to prevent foreign materials (pipe compound, pipe securely. The sediment trap assembly must always be chips and scale) from entering the gas valve. -
Page 19: Electrical Requirements
Installation Instructions Electrical Requirements Strict attention must be given to the following areas before ATTENTION connecting the heater to its electrical supply. The following is supplied for informational purposes A properly installed three-wire electrical supply only. consisting of separate hot, neutral, and ground leads shall be connected to each electrical outlet that All electrical wiring shall be accomplished by a supplies each heater. - Page 20 Installation Instructions Remote Thermostat Models 3 3 46/348, 3 3 77/379, 4 4 08/410 1. Disconnect the heater from its electrical supply and close all fuel supply valves to the inlet of the heater. 2. Locate the two wires labeled “power supply to thermostat”...
-
Page 21: As040
Installation Instructions Remote Thermostat Models 3 3 46/348, 3 3 77/379, 4 4 08/410 ( ( Cont.) 4. Remove the electrical knock-out hole located directly above the bushing that the power cord is routed through. 9. Reconnect the heater to its electrical supply and open Install a two-screw squeeze connector into this hole and the fuel supply valves to the inlet of the heater.
Need help?
Do you have a question about the Pilot Light Ignition and is the answer not in the manual?
Questions and answers