CalderaSpas Utopia Series Owner's Manual
Utopia series
Hide thumbs
Also See for CalderaSpas Utopia Series:
- Owner's manual (52 pages) ,
- Pre-delivery instructions (17 pages) ,
- Quick start manual (13 pages)
Table of Contents
Advertisement
Advertisement
Table of Contents
Troubleshooting

Related Manuals for CalderaSpas CalderaSpas Utopia Series


Summary of Contents for CalderaSpas CalderaSpas Utopia Series
- Page 2 WELCOME watkins Manufacturing Corporation congratulates you on your decision to enjoy the finest spa available... welcome to the growing family of Caldera spa owners. ® Owner’s Manual This Owner’s Manual will acquaint you with the operation and general maintenance of your new spa. We suggest that you take some time to carefully review all sections.
-
Page 3: Table Of Contents
...............12 • Methods for Testing the Spa Water ............38 • Geneva, Tahitian, Niagara, and Elation Wiring Diagram .......13 • The Watkins Spa Water Maintenance Program ........39 • 230 Volt Converted Cantabria ..............14 • SPA FROG ® Water Care System ............40 •... -
Page 4: Safety Instructions
(1.5 m) of the unit as needed to comply with local requirements. • Do not operate the main audio controls while inside the spa (if the spa is equipped with an audio component). • Do not connect any auxiliary components (for example, additional cable speakers, headphones, or other audio components) to the audio system unless approved by Watkins Manufacturing Corporation. • Do not self-service audio components by opening or removing the cover as this may expose you to dangerous voltage or other risk of injury. Only qualified service personnel should service your spa and its components. • Do not attach an external antenna to a spa audio system unless it is installed by a licensed electrician in accordance with Article 810 of the National Electric Code, ANSI/NFPA 70. -
Page 5: Unclean Water
SAFETY INSTRUCTIONS DanGer: rIsk OF eleCTrICal sHOCk • Install spa at least 5 feet (1.5 m) from all metal surfaces. A spa may be installed within 5 feet of a metal surface if each metal surface is permanently connected by a minimum No. 8 AWG (8.4 mm²) solid copper conductor attached to the wire ground connector on the terminal box that is provided for this purpose if in accordance with National Electrical Code ANSI/NMFPA70-1993. • Do not permit any electrical appliances, such as a light, telephone, radio, or television within 5 feet (1.5 m) of a spa. Failure to maintain a safe distance may result in death, or serious personal injury due to electrocution, if the appliance should fall into the spa. -
Page 6: Important Spa Instructions
SAFETY INSTRUCTIONS TO reDuCe THe rIsk OF InJurY: • The water in the spa should never exceed 104°F. Water temperatures between 100°F and 104°F are considered safe for a healthy adult. Lower water temperatures are recommended for extended use (exceeding ten minutes) and for young children. Extended use can cause hyperthermia. • Pregnant or possibly pregnant women should limit spa water temperatures to 100°F. Failure to do so may result in permanent injury to your baby. • Do not use spa immediately following strenuous exercise. aVOIDInG THe rIsk OF skIn Burns: • To reduce the risk of injury, before entering a spa, the user should measure the water temperature since the tolerance of temperature-regulating devices varies. • Test the water with your hand before entering the spa to be sure it’s comfortable. -
Page 7: Deck Installation
This weight per square foot must not exceed the structure’s rated capacity, or serious structural damage could result. InDOOr/BaseMenT InsTallaTIOn Watkins Manufacturing Corporation recommends Be aware of some special requirements if you place your spa indoors. Water will accumulate around the spa, so flooring materials... -
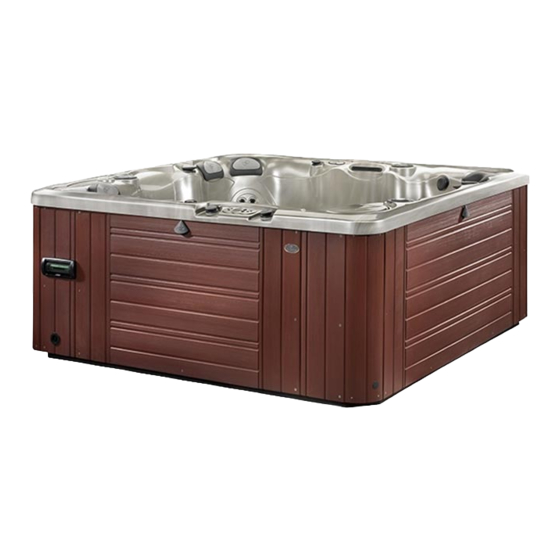
Page 8: Controls And Equipment
CONTROLS AND EqUIPMENT uTOPIa CanTaBrIa ™ OVerHeaD VIew Air Control AdaptaSsage ™ Suction Screen Filter Compartment Auxiliary Control Panel Temperature VersaSsage ® Light Grab Rail Sensor SPA FROG ® Housing Euphoria Pop-Up Speaker Air Jet ® ® Euro Directional Jet (optional) Atlas Neck Jet Valve... -
Page 9: Utopia Geneva
CONTROLS AND EqUIPMENT uTOPIa GeneVa ™ OVerHeaD VIew Air Control AdaptaSsage ™ Diverter Valve Pillow Atlas Neck Jet Pillow Euro-Pulse VersaSsage ® Suction Screen Acquarella ® Waterfall Temperature Sensor ® Euro Directional Jet OrbiSsage ® Light Auxiliary Panel Waterfall Valve Air Jet Whirlpool Jet Ozone Jet... -
Page 10: Utopia Niagara
CONTROLS AND EqUIPMENT uTOPIa nIaGara ® OVerHeaD VIew Air Control VersaSsage ® Suction Screen Filter Compartment Temperature Sensor Euro-Pulse ® OrbiSsage ® Light Auxiliary Panel Waterfall Valve Euro Directional Jet Whirlpool Jet Ozone Jet Grab Rail Acquarella ® Waterfall Air Jet Euphoria ®... -
Page 11: Utopia Tahitian
CONTROLS AND EqUIPMENT uTOPIa TaHITIan ® OVerHeaD VIew Air Control AdaptaFlo Diverter Valve Pillow Atlas ® Neck Jet Pillow ™ Temperature Sensor VersaSsage ® Suction Screen Filter Compartment Atlas Neck Jet Valve Euro Directional Jet OrbiSsage ® Light Auxiliary Panel Acquarella ®... -
Page 12: Utopia Elation
CONTROLS AND EqUIPMENT uTOPIa elaTIOn ® OVerHeaD VIew ® Air Control AdaptaFlo ™ Diverter Valve Pillow Atlas Neck Jet Valve Temperature Sensor VersaSsage ® Suction Screen Filter Compartment Atlas Neck Jet Pillow ® ® Euro Directional Jet OrbiSsage Light Grab Rail Acquarella Waterfall ®... -
Page 13: Electrical Installation
ELECTRICAL INSTALLATION eleCTrICal reQuIreMenTs anD PreCauTIOns Your Caldera ® spa has been carefully designed to give you maximum safety against electrical shock. Connecting the spa to an improperly wired circuit will negate many of the spa’s safety features. Improper wiring may also cause electrocution, risk of fire, and other risks of injuries. Please read and follow the electrical installation requirements and instructions for your spa completely! 230 VOlT PerManenTlY COnneCTeD CALDERA SPAS MUST BE WIRED IN ACCORDANCE WITH ALL APPLICABLE LOCAL ELECTRICAL CODES. ALL ELECTRICAL WORK SHOULD BE DONE BY AN... -
Page 14: Cantabria Wiring Diagram
ELECTRICAL INSTALLATION CanTaBrIa ™ IMPORTANT: If you ever need to move or relocate your Caldera ® spa, it is essential that you understand and apply these installation requirements. Your Caldera spa has been carefully engineered to provide maximum safety against electric shock. Remember, connecting the spa to an improperly wired circuit will negate many of its safety features. -
Page 15: Geneva, Tahitian, Niagara, And Elation Wiring Diagram
ELECTRICAL INSTALLATION GeneVa TaHITIan nIaGara anD elaTIOn ® ® ® ™ IMPORTANT: If you ever need to move or relocate your Caldera ® spa, it is essential that you understand and apply these installation requirements. Your Caldera spa has been carefully engineered to provide maximum safety against electric shock. Remember, connecting the spa to an improperly wired circuit will negate many of its safety features. -
Page 16: Volt Converted Cantabria
ELECTRICAL INSTALLATION eleCTrICal reQuIreMenTs anD PreCauTIOns Your Caldera ® spa has been carefully designed to give you maximum safety against electrical shock. Connecting the spa to an improperly wired circuit will negate many of the spa’s safety features. Improper wiring may also cause electrocution, risk of fire, and other risks of injuries. Please read and follow the electrical installation requirements and instructions for your spa completely! 230 VOlT COnVerTeD CanTaBrIa ™... -
Page 17: Cantabria (Converted) Wiring Diagram
ELECTRICAL INSTALLATION CanTaBrIa (COnVerTeD) ™ ® IMPORTANT: If you ever need to move or relocate your Caldera spa, it is essential that you understand and apply these installation requirements. Your Caldera spa has been carefully engineered to provide maximum safety against electric shock. Remember, connecting the spa to an improperly wired circuit will negate many of its safety features. -
Page 18: Start-Up And Refill Procedures
(all Utopia series spas). Reinstall the skimmer basket, weir, filter and filter lid once the spa is filled. IMPORTANT: Watkins Manufacturing Corporation does not recommend that the spa be filled with “softened” water, as this may damage the spa’s equipment. -
Page 19: Customizing Your Massage
CUSTOMIZING YOUR MASSAGE Your Caldera ® spa offers numerous ways for you to customize your massage experience. Experiment to find what feels best to you. Try sitting in different seats, adjusting the diverter valves, air controls, and jet nozzles and turning each pump on or off. DIVerTer ValVes The diverter valves on your spa allow you to direct the flow of water from the pumps to various combinations of jets. -
Page 20: Air Jets
CUSTOMIZING YOUR MASSAGE euro Directional Jet ® euro-Pulse Euro Directional and Euro-Pulse Jets - The Euro Directional jets, with eyeball nozzles, deliver a direct, more focused massage. The Euro-Pulse jets feature a special insert that creates a soft, pulsating, rotary massage. The Euro-Pulse jet cap assemblies may be removed if you want a more powerful, direct massage in the wrist locations. -
Page 21: Jet Menus
JET MENU CanTaBrIa ™ JeT PuMP 1 - JeT sYsTeM 1 JeT PuMP 1 - JeT sYsTeM 2 Located on back wall: Located in footwell: Located in back right: Located in footwell: • 2 Euro-Directional jets • 10 Euro-Directional jets •... -
Page 22: Utopia Geneva
JET MENU uTOPIa GeneVa ™ JeT PuMP 1 – JeT sYsTeM 2 JeT PuMP 1 – JeT sYsTeM 1 ™ jets on left wall • 2 AdaptaSsage Located in EcstaSeat ® – back left: ™ jet on back wall • 1 AdaptaFlo •... -
Page 23: Utopia Niagara
JET MENU uTOPIa nIaGara ® JeT PuMP 1 – JeT sYsTeM 2 JeT PuMP 1 – JeT sYsTeM 1 • 1 AdaptaFlo jet on right wall Located in EcstaSeat ® – back left: ™ • 2 VersaSsage ® jets on front left wall •... -
Page 24: Utopia Tahitian
JET MENU uTOPIa TaHITIan ® JeT PuMP 1 – JeT sYsTeM 1 JeT PuMP 1 – JeT sYsTeM 2 Located in EcstaSeat ® – back left: • 4 Directional Neck jets • 12 Euro Directional jets • 2 AdaptaSsage ™ jet on left wall •... -
Page 25: Utopia Elation
JET MENU uTOPIa elaTIOn ® JeT PuMP 1 – JeT sYsTeM 1 JeT PuMP 1 – JeT sYsTeM 2 ™ jet on right wall • 4 Sole Soothers in back center • 1 AdaptaFlo ® ™ jets on left wall •... -
Page 26: Operating Instructions
OPERATING INSTRUCTIONS CONTROL PANELS LIGHT button Cantabria ™ Activates the interior and exterior lighting Main Control Panel TEMP ▲ button Increases the temperature JETS 1 button Activates jet pump 1 and waterfall SET button JETS 2 button Used to initiate advanced Activates jet pump 2 panel features. -
Page 27: Elation Control Panels
OPERATING INSTRUCTIONS CONTROL PANELS ® Elation Main Control Panel JETS 1 button TEMP ▲ button Activates jet pump 1 Increases the temperature CLEAN button Activates a ten-minute clean-up cycle SET button Used to initiate advanced panel features. LIGHT button Activates the interior & exterior lighting TEMP ▼... -
Page 28: Jets Button
OPERATING INSTRUCTIONS JeTs BuTTOn There are two buttons which affect the jet pumps (three buttons on the Cantabria ). Pressing any JETS button once will illuminate the jets symbol ™ on the control panel display. The symbol will remain lit until the jet pump is turned off (see chart below), or after one hour of continuous operation when the pumps are automatically shut off by the control system. -
Page 29: Locking Features
OPERATING INSTRUCTIONS NOTE: Whenever power is disconnected, and then reconnected to the spa, the Summer Mode timer will reset starting with the eight-hour shutdown mode. If a different eight-hour shut down time is desired, deactivate the Summer Mode, then reactivate at the beginning of the desired eight-hour shut down time. IMPORTANT: The Summer Mode will not lower the spa’s water temperature below the ambient air temperature. -
Page 30: Ultramasseuse ™ Control Panel Buttons
OPERATING INSTRUCTIONS If the external sconce lights are left on, they will automatically be turned off by the control system after six hours of continuous operation. The light symbol on the control panel will also turn off when the lights are deactivated. If the light will not turn on, make sure SPA LOCK is deactivated. SPA LOCK disables the controls on both the main and auxiliary control panel. (See the SPA LOCK section for more information on the SPA LOCK feature.) MODe BuTTOn... -
Page 31: Music Systems
OPERATING INSTRUCTIONS sPeeD BuTTOn The Speed button determines the amount of time between steps in a jet sequence. This button only functions when you have selected a sequence. The Speed indicator light corresponds to the speed chosen. Press once: 15 seconds between each step (indicator light blinks slowly) Press twice: 10 seconds between each step (indicator light blinks at medium speed) Press a third time: 5 seconds between each step (indicator light blinks fast) Pause BuTTOn... -
Page 32: Equipment Compartments
EqUIPMENT COMPARTMENT COnTrOls sIDe CanTaBrIa ™ Advent ® System Control Box ® EnergyPro Circulating Pump EnergyPro Flow-Through Heater Jet Pump #3... -
Page 33: Jet Pump Side
EqUIPMENT COMPARTMENT JeT PuMP sIDe CanTaBrIa ™ 4b - Discharge 4a - Suction Jet Pump #1 Jet Pump #2 Jet Pump #3 Unions - A (suction) and B (discharge) Monarch ® CD Ozone Generator Air Blower Pump Drain Plug... -
Page 34: Geneva, Niagara, Tahitian, And Elation
EqUIPMENT COMPARTMENT COnTrOls sIDe GeneVa , nIaGara , TaHITIan , anD elaTIOn ® ® ® ™ Advent ® System Control Box ® EnergyPro Circulating Pump EnergyPro Flow-Through Heater ® Monarch CD Ozone Generator SpaGlo ® multi-zone light controller... - Page 35 EqUIPMENT COMPARTMENT JeT PuMP sIDe GeneVa , nIaGara , TaHITIan , anD elaTIOn ® ® ® ™ 3b - Discharge 3a - Suction Jet Pump #1 Jet Pump #2 Unions - A (suction) and B (discharge) Air Blower* Pump Drain Plug * Air Blower available on Geneva, Niagara, and Tahitian spas only.
-
Page 36: Maintenance
MAINTENANCE FIlTer MaInTenanCe At least once a week, check and clean the skimmer basket and weir to ensure proper filter flow. Remove leaves, foreign matter, and debris. It is very important to keep your spa filter cartridge clean and free of particles to ensure proper water flow. A clean filter enables the hydrotherapy system to function properly and allows for more efficient filter cycles. -
Page 37: Versassage ® And Orbissage
MAINTENANCE VersassaGe anD OrBIssaGe JeT MaInTenanCe ® ® If you notice that the VersaSsage or OrbiSsage jet spins slower than when the spa was new, or the jets are sticking, the cause may be built-up deposits inside the jet bearings. To remove the deposits, use the following instructions: With the spa off, rotate the VersaSsage/OrbiSsage jet face counter-clockwise until it stops. -
Page 38: Care Of The Spa Pillows
MAINTENANCE Drain your spa following the Draining Your Spa section in the owner’s manual. Remove the filter cartridge, clean and store in a dry place. IMPORTANT: These additional instructions must be utilized when draining and winterizing your spa in climates where the temperature falls below 32°F (0°C). A five (5) gallon combination (vacuum/blower) wet/dry shop vac must be used to effectively remove water that is trapped inside the plumbing lines. -
Page 39: Care Of The Exterior
• DO NOT use any lifting mechanisms, chemicals or cleaners except those recommended by Watkins Manufacturing Corporation or its Authorized Sales and Service Dealer. -
Page 40: Water Quality And Maintenance
• WaTer saniTaTiOn Water sanitation is the responsibility of the spa owner. To properly sanitize the spa, Watkins highly recommends the SPA FROG ® water care system. This system will chemically control the bacteria and viruses present in the fill water or introduced during use of the spa. Bacteria and viruses can grow quickly in undersanitized spa water. -
Page 41: The Watkins Spa Water Maintenance Program
THe waTkIns sPa waTer MaInTenanCe PrOGraM Each step in your water maintenance program is dependent on the completion of the previous steps. Omitting a step or failing to reach the recommended range may cause an imbalance in your water’s chemistry. -
Page 42: Spa Frog Water Care System
Sodium Dichloro-s-Triazinetrione (sodium dichlor or chlorine) • Biguanide WARNING: DO NOT use tri-chlor chlorine or any type of compressed bromine or chlorine, acid or any type of sanitizer which is not recommended by Watkins Manufacturing Corporation. THe waTkIns waTer MaInTenanCe QuICk reFerenCe GuIDe... -
Page 43: Bromine
1.0 - 2.0 ppm. If you are not using the SPA FROG system, your bromine level should be between 3 - 5 ppm. B. Watkins Manufacturing Corporation recommends the use of granulated bromine for sanitizing the water. Granulated bromine is preferred because it is totally soluble, dissolves quickly and is nearly pH neutral. -
Page 44: Supplemental Water Maintenance Program
WILL cause damage to your spa. Use of a liquid, or any type of compressed bromine or chlorine, acid, or any type or sanitizer which is not recommended by Watkins Manufacturing Corporation, WILL damage your spa and is specifically not covered under the terms of the limited warranty. - Page 45 IMPORTANT: Watkins Manufacturing Corporation does not recommend the use of any floating chemical dispenser. Damage to the spa shell or components caused by a floating chemical dispenser is specifically not covered under the terms of the limited warranty.
-
Page 46: Common Water Chemistry Questions
Answer: The chemical levels and water quality of the water in the spa are under your direct control. With proper basic care, the spa will provide many years of hot water relaxation. If you are unsure about any chemical or its usage in the spa, contact your Authorized Caldera Dealer or Watkins Manufacturing Corporation. -
Page 47: Spa Water Maintenance Troubleshooting Guide
WATER qUALITY AND MAINTENANCE Corrosion: The gradual wearing away of metal spa parts, usually caused by chemical action. Generally, corrosion is caused by low pH or by water with levels of TA, CH, pH or sanitizer which are outside the recommended ranges. DPD: The preferred reagent used in test kits to measure the Free Available Chlorine. -
Page 48: Miscellaneous Service Information
(this may cause solar heating distress in warm weather regions). These are considered abuses and may invalidate this warranty. *Operation of the spa does not mean “use” of the spa! Watkins Manufacturing Corporation does not recommend using the spa if the water temperature is above or below the spa’s control panel temperature range. -
Page 49: Spa Troubleshooting
SPA TROUBLESHOOTING If your spa doesn’t seem to be working the way you believe it should, please review the “start-up” and “operation” instructions in this manual. If this doesn’t help you correct the problem, follow the appropriate instructions below. If the problem still is not resolved, call your Caldera ®... -
Page 50: Comfort Guard
® OMFORT UARD Watkins Manufacturing Corporation (“Watkins”) warrants to the original consumer purchaser (“you”) the following about your new Utopia Series spa, when purchased from an authorized dealer/service provider (“dealer”). 10 YEAR NO LEAK SHELL WARRANTY EXTENT OF WARRANTY Watkins warrants against water loss due to defects in the Utopia series spa shell This warranty extends only to the original consumer purchaser of the for ten years. -
Page 51: Stonescape Front Panel Screw Location
Miscellaneous stonescape Front Panel (equipment Compartment) screw location Use the illustration below to locate the screws holding the equipment compartment door to the spa (the locations below are approximate). Remove the 12 screws followed by removing the StoneScape front panel to access the equipment compartment. Reverse procedure to replace panel. NOTE: This illustration applies only to spas that have the StoneScape cabinet. - Page 52 CAUTION: Watkins Manufacturing Corporation suggests a structural engineer or contractor be consulted before the spa is placed on an elevated deck. * NOTE: The “Filled weight” and “Dead weight” of the spa includes the weight of the occupants (assuming an average occupant weight of 175 lbs).
Need help?
Do you have a question about the CalderaSpas Utopia Series and is the answer not in the manual?
Questions and answers