Table of Contents
Advertisement
Quick Links
Advertisement
Table of Contents

Related Manuals for Dodge Ram 2010 Truck


Summary of Contents for Dodge Ram 2010 Truck
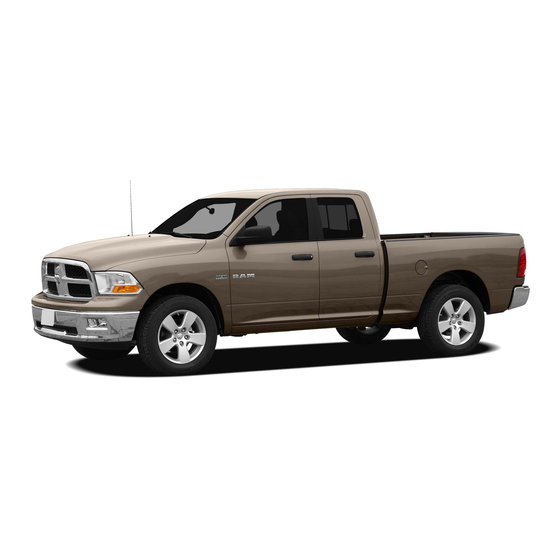
- Page 1 2010...
- Page 2 IMPORTANT: This User Guide is intended to familiarize you with the important features of your vehicle. The DVD enclosed contains your Owner’s Manual, Navigation Radio or Multimedia Radio Manual, Warranty Booklets, Tire Warranty and 24-Hour Towing Assistance (new vehicles purchased in the U.S.) or Roadside Assistance (new vehicles purchased in Canada) in electronic format.
-
Page 3: Table Of Contents
TABLE OF CONTENTS INTRODUCTION/WELCOME UTILITY WELCOME FROM CHRYSLER GROUP LLC . 2 EASY-OFF TAILGATE ... 38 ® RAMBOX ....39 CONTROLS AT A GLANCE TRAILER TOWING WEIGHTS (MAXIMUM DRIVER COCKPIT . -
Page 4: Introduction/Welcome
INTRODUCTION/WELCOME WELCOME FROM CHRYSLER GROUP LLC Congratulations on selecting your new Chrysler Group LLC vehicle. Be assured that it represents precision workmanship, distinctive styling, and high quality - all essentials that are traditional to our vehicles. IMPORTANT: This User Guide is intended to familiarize you with the important features of your vehicle. - Page 5 Never park your vehicle over dry grass or other combustible materials. The heat from your vehicle exhaust system could cause a fire. CHRYSLER, DODGE, JEEP, ATF+4, MOPAR and uconnect are registered trademarks of Chrysler Group LLC. COPYRIGHT ©2009 CHRYSLER GROUP LLC...
-
Page 6: Controls At A Glance
CONTROLS AT A GLANCE DRIVER COCKPIT... - Page 7 CONTROLS AT A GLANCE...
-
Page 8: Instrument Cluster
CONTROLS AT A GLANCE INSTRUMENT CLUSTER Warning Lights - Low Fuel Warning Light - Charging System Light** - Oil Pressure Warning Light** - Anti-Lock Brake (ABS) Light** - Airbag Warning Light** - Electronic Throttle Control (ETC) Light - Tire Pressure Monitoring System (TPMS) Light - Engine Temperature Warning Light - Transmission Temperature Warning Light - Seat Belt Reminder Light... - Page 9 CONTROLS AT A GLANCE Indicators - Turn Signal Indicators - Electronic Stability Program (ESP)/Traction Control System - High Beam Indicator (TCS) Indicator - Front Fog Light Indicator - Cargo Lamp On Indicator - Vehicle Security Indicator* - Exhaust Brake Indicator (Diesel - TOW/HAUL Indicator Only) - Four-Wheel Drive LOW Mode...
-
Page 10: Getting Started
GETTING STARTED KEY FOB Locking And Unlocking The Doors • Press the LOCK button once to lock all the doors. Press the UNLOCK button once to unlock the driver’s door only and twice within five seconds to unlock all the doors. •... -
Page 11: Theft Alarm
GETTING STARTED Express Window Feature • To remotely lower both front door windows at the same time, press and release the UNLOCK button and then immediately press and hold the UNLOCK button until the windows lower to the level desired or until they lower completely. Emergency Key •... - Page 12 GETTING STARTED Manual Seat Adjustment Forward/Rearward • Lift up on the adjusting bar located at the front of the seat near the floor and release at the desired position. Recliner • Lift the recliner lever located on the outboard side of the seat, lean back and release at the desired position.
-
Page 13: Power Lumbar
GETTING STARTED Eight-Way Driver Power Seat • The seat switch controls forward/backward and up/down. • The seatback switch controls the angle of the seatback. Push switch forward or rearward and the seatback will move in either direction. Power Lumbar • The lumbar controls are located on the outboard side of the seat cushion. -
Page 14: Rear Heated Seats
GETTING STARTED WARNING! • Persons who are unable to feel pain to the skin because of advanced age, chronic illness, diabetes, spinal cord injury, medication, alcohol use, exhaustion or other physical condition must exercise care when using the seat heater. It may cause burns even at low temperatures, especially if used for long periods of time. -
Page 15: Heated Steering Wheel
GETTING STARTED HEATED STEERING WHEEL • The steering wheel contains a heating element that heats the steering wheel to one temperature setting. • The heated steering wheel switch is located on the center instrument panel below the climate controls. • Once the heated steering wheel has been turned on, it will operate for approximately 58 to 70 minutes before automatically shutting off. -
Page 16: Power Sliding Rear Window
GETTING STARTED CAUTION! Do not place any article under the adjustable pedals or impede its ability to move, as it may cause damage to the pedal controls. Pedal travel may become limited if movement is stopped by an obstruction in the adjustable pedal's path. POWER SLIDING REAR WINDOW •... -
Page 17: Programmable Features
GETTING STARTED Cold Start Procedure • Turn the ignition switch to the ON position. If the Wait To Start light appears in the cluster, wait for the light to turn off before starting. • In extremely cold conditions, when the engine temperature may be below 0°F (-18°C), cycle the manifold heaters twice with a five-second pause between cycles. - Page 18 GETTING STARTED Auto Unlock Doors On Exit • To have all of the vehicle doors unlock when any door is opened: • Enter your vehicle, close all the doors and fasten your seat belt. • Within 15 seconds, cycle the ignition switch from the OFF position to the ON position a minimum of four times ending in the OFF position (do not start the engine).
-
Page 19: Operating Your Vehicle
OPERATING YOUR VEHICLE TURN SIGNALS/WIPER/WASHER/HIGH BEAMS LEVER Turn Signals/Lane Change Assist • Tap the lever up or down once and the turn signal (right or left) will flash three times then automatically turn off. Wipers Intermittent, Low And High Operation •... -
Page 20: Headlight Switch
OPERATING YOUR VEHICLE HEADLIGHT SWITCH Automatic Headlights/Parking Lights/Headlights • Rotate the headlight switch to the first detent for parking lights and to the second detent for headlights • Rotate the headlight switch to “A” for AUTO headlights. • When set to “A” (AUTO), the system automatically turns the headlights on or off based on ambient light levels. - Page 21 OPERATING YOUR VEHICLE WARNING! Leaving the Electronic Speed Control system on when not in use is dangerous. You could accidentally set the system or cause it to go faster than you want. You could lose control and have an accident. Always leave the Electronic Speed Control system off when you are not using it.
-
Page 22: Manual Climate Controls
OPERATING YOUR VEHICLE MANUAL CLIMATE CONTROLS Air Recirculation /Max A/C • Rotate the Temperature Control to the MAX A/C position to automatically turn on both Air Conditioning and Recirculation. • For window defogging, turn the recirculation button off. • Recirculation is not allowed in defrost, floor, defrost/floor (mix) modes. AUTOMATIC TEMPERATURE CONTROL (ATC) •... -
Page 23: Parksense ® Rear Park Assist
OPERATING YOUR VEHICLE SYNC Temperature Button • Push the SYNC button once to control the driver and passenger temperatures simultaneously. Push the SYNC button a second time to control the temperatures individually. Air Recirculation • Use recirculation for maximum A/C operation. •... -
Page 24: Idle-Up Feature (Diesel/Automatic Transmission Only)
• The Idle-Up Feature uses the speed control switches to increase engine idle speed and quickly warm the vehicle’s interior. This feature must be enabled by your dealer. See your local Dodge dealer. • With the transmission in PARK, the parking brake applied, and the engine running, push the speed control ON/OFF switch on, then push the SET switch. -
Page 25: Wind Buffeting
OPERATING YOUR VEHICLE Manual Open/Close • Press and hold the switch rearward to open or forward to close the sunroof. Any release of the switch will stop the movement, and the sunroof will remain in a partially open or closed position until the switch is pressed again. Venting Sunroof •... -
Page 26: Electronics
ELECTRONICS NON-TOUCH-SCREEN RADIOS RES Radio RES/RSC Radio... -
Page 27: Audio Settings
ELECTRONICS NOTE: uconnect™ phone and Voice Recognition are vehicle options which must be ordered separately. The buttons on the radio will only be active if the vehicle has been equipped with the option. • The radio sales code is located on the lower right side of the radio faceplate. •... -
Page 28: Touch-Screen Radios
ELECTRONICS TOUCH-SCREEN RADIOS Navigation Radio – RER Multimedia Radio – REN... -
Page 29: Radio Mode
ELECTRONICS NOTE: uconnect™ phone and Voice Recognition are vehicle options which must be ordered separately. The buttons on the radio will only be active if the vehicle has been equipped with the option. • The radio sales code is located on the lower right side of the radio faceplate. •... - Page 30 ELECTRONICS Copy Pictures To The Hard-Drive • Insert either a CD or a USB device containing your pictures. • Touch the MY FILES soft-key, then go to the MANAGE MY FILES screen. • Touch the MY PICTURES soft-key to get an overview of the currently stored images. •...
-
Page 31: Remote Audio Controls
ELECTRONICS Change Stored Home Address • Press the MENU hard-key, then touch the MY FILES soft-key. • Touch the MY ADDRESS BOOK soft-key, then touch the HOME soft-key. • In the Home Address Information screen, touch the EDIT CONTACT soft-key, then touch the CHANGE ADDRESS soft-key in the next screen. -
Page 32: System Operation
ELECTRONICS VIDEO ENTERTAINMENT SYSTEM (VES)™ System Operation • The screen is located on the headliner behind the front seat. To lower the screen, press the release button located in the center of the console rear of the screen. • The system may be controlled by the front seat occupants using the touch-screen radio, or by the rear seat occupants using the remote control. -
Page 33: Universal Consumer Interface
ELECTRONICS SIRIUS Backseat TV™ • To view SIRIUS Backseat TV™ set the remote control channel selector switch to channel 1. Press the MODE button, then using the arrow buttons select TV and press ENTER. Auxiliary Audio/Video Input Jacks • The Aux jacks are located on the rear of the center console. •... -
Page 34: Electronic Vehicle Information Center (Evic)
ELECTRONICS ELECTRONIC VEHICLE INFORMATION CENTER (EVIC) • The EVIC features a driver interactive display that is located in the instrument cluster. Pressing the controls on the steering wheel allows the driver to select vehicle information and Personal Settings. For additional information refer to Programmable Features in this guide. -
Page 35: Power Inverter
ELECTRONICS Programming A Rolling Code System • At the garage door opener motor (in the garage), locate the “learn” or “training” button. This can usually be found where the hanging antenna wire is attached to the garage door opener motor (it is NOT the button normally used to open and close the door). •... -
Page 36: Power Outlet
ELECTRONICS POWER OUTLET • There are four 12-volt power outlets located in the vehicle. Lower left and lower right of the instrument Panel– without floor mounted shifter. Inside the top storage tray – with floor mounted shifter. Inside the upper lid of the center storage compartment. Rear of the center console storage compartment –... -
Page 37: Making A Phone Call
ELECTRONICS • You will then be prompted to give the phone pairing a name (each phone paired should have a unique name). • Next you will be asked to give this new pairing a priority of 1 thru 7 (up to seven phones may be paired). -
Page 38: Voice Recognition
ELECTRONICS VOICE RECOGNITION • The Voice Recognition (VR) system allows you to control your AM, FM radio, satellite radio, disc player, and a memo recorder. When you press the VR button , you will hear a beep. The beep is your signal to give a command. If you do not say a command within a few seconds, the system will present you with a list of options. -
Page 39: Off-Road Capabilities
OFF-ROAD CAPABILITIES FOUR-WHEEL DRIVE • This electronically shifted transfer case is designed to be driven in the OPERATION two–wheel drive position (2WD) or four-wheel drive position (4WD AUTO) Four-Position Transfer Case for normal street and highway • The transfer case provides four mode conditions on dry, hard-surfaced roads. -
Page 40: Utility
UTILITY EASY-OFF TAILGATE WARNING! • To simplify mounting of a camper unit with an overhang, the tailgate can be To avoid inhaling carbon monoxide, removed. which is deadly, the exhaust system on vehicles equipped with “Cap or NOTE: If your vehicle is equipped with Slide-In Campers”... -
Page 41: Rambox
UTILITY ® RAMBOX ® • The RamBox system is an integrated CAUTION! pickup box storage and cargo management system consisting of Failure to follow the following items three features: could cause damage to the vehicle: • Integrated box side storage bins •... -
Page 42: Rambox Safety Warning
UTILITY ® ® RamBox Safety Warning • The interior of the RamBox will automatically illuminate when the lid is • Carefully follow these warnings to help prevent personal injury or damage to opened. Pushing the switch once will your vehicle: turn off the bin lights, pushing the switch again will turn the lights back on. - Page 43 UTILITY Storage Position Extender Position • The storage position for the bed • The bed extender will add an additional extender is at the front of the truck bed. 15 in (38 cm) in the back of the truck • To install the bed extender into the when additional cargo room is needed.
-
Page 44: Trailer Towing Weights (Maximum Trailer Weight Ratings)
• Release the brake pedal for five • http:// www.dodge.com. seconds and ensure that there is no • http:// www.dodge.ca (Canada). vehicle movement. • Repeat the previous two steps with the transmission in DRIVE. • Shut OFF the engine and place the ignition key in the unlocked OFF position. -
Page 45: Brake/Transmission Interlock Manual Override
UTILITY • Attach the vehicle to the tow vehicle • The flashing NEUTRAL indicator light with the tow bar and release the indicates that shift requirements have parking brake. not been met. • Refer to your Owner's Manual on the Recreational Towing Procedure —... -
Page 46: What To Do In Emergencies
WHAT TO DO IN EMERGENCIES 24 HOUR TOWING ASSISTANCE • Dial toll-free 1-800-521-2779. • Provide your name, vehicle identification number and license plate number. • Provide your location, including telephone number, from which you are calling. • Briefly describe the nature of the problem and answer a few simple questions. •... -
Page 47: Charging System Light
WHAT TO DO IN EMERGENCIES WARNING! A hot engine cooling system is dangerous. You or others could be badly burned by steam or boiling coolant. You may want to call an authorized dealership for service if your vehicle overheats. BRAKE - Brake Warning Light •... -
Page 48: Oil Pressure Warning Light
WHAT TO DO IN EMERGENCIES - Oil Pressure Warning Light • This light indicates low engine oil pressure. If the light turns on while driving, stop the vehicle and shut off the engine as soon as possible. A chime will sound for four minutes when this light turns on. -
Page 49: If Your Engine Overheats
WHAT TO DO IN EMERGENCIES Oil Change Indicator Message • If an “oil change” message (shown as CHAngE OIL) appears and a single chime sounds, it is time for your next required oil change. Resetting The Light After Servicing • Turn the ignition switch to the ON/RUN position (do not start engine). •... -
Page 50: Jacking And Tire Changing
WHAT TO DO IN EMERGENCIES JACKING AND TIRE CHANGING WARNING! • Do not attempt to change a tire on the side of the vehicle close to moving traffic. Pull far enough off the road to avoid the danger of being hit when operating the jack or changing the wheel. -
Page 51: Preparations For Jacking
WHAT TO DO IN EMERGENCIES Preparations For Jacking • Park on a firm, level surface. Avoid ice or slippery areas. • Set the parking brake and shift the automatic transmission into PARK, or a manual transmission into REVERSE. On Four-Wheel Drive vehicles, shift the transfer case to the 4L position. - Page 52 WHAT TO DO IN EMERGENCIES Jacking And Tire Changing Instructions WARNING! Carefully follow these tire changing procedures to help prevent personal injury or damage to your vehicle: Always park on a firm, level surface as far from the edge of the roadway as possible before raising the vehicle.
- Page 53 WHAT TO DO IN EMERGENCIES • For rear wheels, place the jack under the axle between the wheel and the shock bracket with the jack drive tubes extending to the rear. • Turn the jack screw clockwise to firmly engage the jack saddle with the lift area.
- Page 54 WHAT TO DO IN EMERGENCIES 2500/3500-Series Trucks • For 4x2 front wheels, place the bottle jack under the frame rail behind the wheel. Locate the jack as far forward as possible on the straight part of the frame. • For 4x4 front wheels, place the jack under the axle as close to the tire as possible with the drive tubes extending to the front.
- Page 55 WHAT TO DO IN EMERGENCIES • For rear wheels, place the jack under the axle between the spring and the shock absorber with the drive tubes extending to the rear. CAUTION! Before raising the wheel off the ground, make sure that the jack will not damage surrounding truck parts and adjust the jack position as required.
-
Page 56: Jump-Starting
WHAT TO DO IN EMERGENCIES • Install the wheel center cap and remove the wheel blocks. Do not install chrome or aluminum wheel center caps on the spare wheel. This may result in cap damage. WARNING! A loose tire or jack, thrown forward in a collision or hard stop, could endanger the occupants of the vehicle. - Page 57 WHAT TO DO IN EMERGENCIES WARNING! • Take care to avoid the radiator cooling fan whenever the hood is raised. It can start anytime the ignition switch is ON. You can be hurt by the fan. • Remove any metal jewelry, such as watch bands or bracelets, that might make an inadvertent electrical contact.
-
Page 58: Emergency Tow Hooks
WHAT TO DO IN EMERGENCIES WARNING! During cold weather when temperatures are below the freezing point, electrolyte in a discharged battery may freeze. Do not attempt jump-starting because the battery could rupture or explode. The battery temperature must be brought up above the freezing point before attempting a jump-start. -
Page 59: Towing A Disabled Vehicle
WHAT TO DO IN EMERGENCIES... -
Page 60: Freeing A Stuck Vehicle
WHAT TO DO IN EMERGENCIES FREEING A STUCK VEHICLE • If your vehicle becomes stuck in mud, sand or snow, it can often be moved by a rocking motion. Turn your steering wheel right and left to clear the area around the front wheels. Then, move the shift lever back and forth between REVERSE and DRIVE. -
Page 61: Maintaining Your Vehicle
MAINTAINING YOUR VEHICLE OPENING THE HOOD • Pull the hood release lever located below the steering wheel at the base of the instrument panel. • Reach into the opening beneath the center of the hood and move the safety latch lever while lifting the hood at the same time. -
Page 62: Engine Compartment
MAINTAINING YOUR VEHICLE... - Page 63 MAINTAINING YOUR VEHICLE...
- Page 64 MAINTAINING YOUR VEHICLE...
- Page 65 MAINTAINING YOUR VEHICLE...
-
Page 66: Fuel Filter / Water Separator - Diesel Only
MAINTAINING YOUR VEHICLE FUEL FILTER / WATER SEPARATOR — DIESEL ONLY Draining Fuel / Water Separator • If the “Water in Fuel” indicator light is illuminated and an audible chime is heard five times, you should stop the engine and drain the water from the separator. •... -
Page 67: Exhaust Regeneration - Diesel Only
MAINTAINING YOUR VEHICLE EXHAUST REGENERATION — DIESEL ONLY Exhaust System — Regeneration Required Now • Exhaust Regeneration information will be provided by the EVIC. • “Exhaust System—Regeneration Required Now” will be displayed on the overhead console of your vehicle if the exhaust particulate filter reaches 80% of its maximum storage capacity. -
Page 68: Fluids And Capacities
MAINTAINING YOUR VEHICLE FLUIDS AND CAPACITIES Component Fluid, Lubricant, or Genuine Part Capacities ® Engine Coolant - 3.7L, MOPAR Antifreeze/Coolant Five 14 Quarts (13 Liters) 4.7L Year /100,000 Mile Formula HOAT (Hybrid Organic Additive Technology) or equivalent. ® Engine Coolant - 5.7L MOPAR Antifreeze/Coolant Five 16 Quarts (15 Liters) - Page 69 MAINTAINING YOUR VEHICLE Component Fluid, Lubricant, or Genuine Part Capacities Fuel Selection 3.7L, 4.7L 87 Octane 1500 Regular Cab Shortbed/Crew Quad Cab - 26 Gallons (98 Liters) 1500 Regular Cab Longbed/Crew Quad Cab (Optional) - 32 Gallons (121 Liters) 2500/3500 Shortbed - 34 Gallons (129 Liters) 2500/3500 Longbed - 35 Gallons (132 Liters)
- Page 70 MAINTAINING YOUR VEHICLE Component Fluid, Lubricant, or Genuine Part Capacities ® Engine Oil Filter 3.7L, MOPAR Engine Oil Filter or — 4.7L, 5.7L, 6.7L equivalent. ® Engine Fuel Filter 6.7L MOPAR Fuel Filter or equivalent. Turbo Diesel Engine Must meet 5 micron rating. Using a fuel filter that does not meet the manufacturers filtration and —...
- Page 71 MAINTAINING YOUR VEHICLE Component Fluid, Lubricant, or Genuine Part Capacities ® Brake Master Cylinder MOPAR DOT 3 and SAE J1703 should be used or equivalent. If DOT 3 is not available, then DOT — 4 is acceptable. Use only recommended Brake Fluids. ®...
-
Page 72: Maintenance Chart
MAINTAINING YOUR VEHICLE... -
Page 73: Maintenance Record
MAINTAINING YOUR VEHICLE Maintenance Record Odometer Date Signature, Authorized Service Center 6,000 Miles (10,000 km) or 6 Months 12,000 Miles (20,000 km) or 12 Months 18,000 Miles (30,000 km) or 18 Months 24,000 Miles (40,000 km) or 24 Months 30,000 Miles (50,000 km) or 30 Months 36,000 Miles... - Page 74 MAINTAINING YOUR VEHICLE...
- Page 75 MAINTAINING YOUR VEHICLE Maintenance Record Odometer Date Signature, Authorized Service Center 7,500 Miles (12,000 km) or 6 Months 15,000 Miles (24,000 km) or 12 Months 22,500 Miles (36,000 km) or 18 Months 30,000 Miles (40,000 km) or 24 Months 37,500 Miles (60,000 km) or 30 Months 45,000 Miles...
-
Page 76: Fuses
MAINTAINING YOUR VEHICLE FUSES Totally Integrated Power Module (TIPM) Gas Engine • The Totally Integrated Power Module (TIPM) is located in the engine compartment near the battery. This center contains cartridge fuses and mini fuses. Cavity Cartridge Fuse Mini Fuse Description FL01 30 Amp Pink... - Page 77 MAINTAINING YOUR VEHICLE Cavity Cartridge Fuse Mini Fuse Description MF17 25 Amp Natural Bat — Sunroof/Skylight MF18 25 Amp Natural TCM/Trans Range MF19 5 Amp Tan Ign R/ACC — Sunroof/Window Sw Illum MF20 25 Amp Natural Frt Wiper MF21 25 Amp Natural Door Locks MF22 20 Amp Yellow...
- Page 78 MAINTAINING YOUR VEHICLE Totally Integrated Power Module (TIPM)-Diesel Only • The Totally Integrated Power Module (TIPM) is located in the engine compartment near the battery. This center contains cartridge fuses and mini fuses.. Cavity Cartridge Fuse Mini Fuse Description 20 Amp Yellow Power Outlet Console 20 Amp Yellow Cabin Compartment Node (CCN)
- Page 79 MAINTAINING YOUR VEHICLE Cavity Cartridge Fuse Mini Fuse Description 30 Amp Pink Electric Brake 25 Amp Natural Power-Battery RWAL/ABS Module Feed 15 Amp Blue Park Lights Left 20 Amp Yellow Trailer Park Lights 15 Amp Blue Park Lights Right — —...
-
Page 80: Tire Pressures
MAINTAINING YOUR VEHICLE TIRE PRESSURES • Check the inflation pressure of each tire, including the spare tire, at least monthly and inflate to the recommended pressure for your vehicle. • The tire pressures recommended for your vehicle are found on the “Tire and Loading Information”... -
Page 81: Exterior Bulbs
MAINTAINING YOUR VEHICLE EXTERIOR BULBS LIGHT BULBS – Exterior Bulb Number Backup Center High-Mounted Stop Lamp (CHMSL) Fog Lamp - If Equipped 9145 Front Park/Turn Signal 3757A Front Side Marker 3757A Front Position Lamp Dual Headlamp Quad Headlamp Low Beam Quad Headlamp High Beam 9005 Side Marker (Dual Headlamp) -
Page 82: Consumer Assistance
CONSUMER ASSISTANCE CHRYSLER GROUP LLC WARNING! CUSTOMER CENTER Engine exhaust, some of its P.O. Box 21–8004 constituents, and certain vehicle components contain, or emit, Auburn Hills, MI 48321–8004 chemicals known to the State of Phone: 1–800–992–1997 California to cause cancer and birth defects, or other reproductive harm. -
Page 83: Reporting Safety Defects In The 50 United States And Washington, D.c
CONSUMER ASSISTANCE REPORTING SAFETY DEFECTS TIRE WARRANTY IN THE 50 UNITED STATES Tire Limited Warranty And AND WASHINGTON, D.C. Adjustment Policy • When a tire is removed from service • If you believe that your vehicle has a due to a covered warranty condition defect that could cause a crash or under a tire manufacturer’s “Limited cause injury or death, you should... - Page 84 CONSUMER ASSISTANCE Disclaimer: WARNING! • THE TIRE MANUFACTURER’S LIMITED WARRANTY PROGRAM, THE DETAILS OF Death, serious injury and/or property WHICH CAN BE FOUND, ON THE damage may result from: OWNERS MANUAL DVD, THE TIRE • Tire failure due to impact damage MANUFACTURER’S WEBSITE OR AT ANY and/or improper maintenance.
- Page 85 CONSUMER ASSISTANCE Using Lift Kits WARNING! • Use of lift kits with some vehicle/tire combinations can cause instability or Tires and the spare tire should be loss of control. When changing tire replaced after six years, regardless of sizes, always consult an installer for the remaining tread.
-
Page 86: Mopar Accessories
• The following highlights just some of the authentic Dodge Truck Accessories by MOPAR that have been engineered to customize your Dodge Ram. • To see the full line of accessories stop by your Dodge dealer or visit MOPAR.com. CHROME: •... - Page 88 DODGE.com This guide has been prepared to help you get quickly acquainted with your new Dodge and to provide a convenient reference source for common questions. However, it is not a substitute for your Owner’s Manual. For complete operational instructions, maintenance procedures and important safety messages, please consult your Owner’s...
Need help?
Do you have a question about the Ram 2010 Truck and is the answer not in the manual?
Questions and answers