Table of Contents
Advertisement
List of Contents
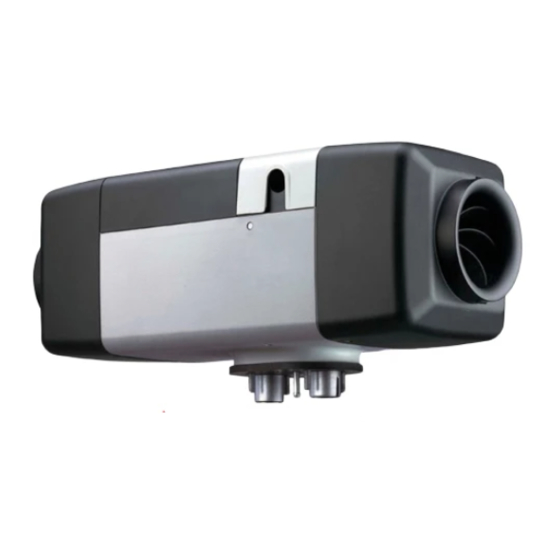
Air Heater
Air Top 2000 D (Diesel)
Air Top 2000 B (Gasoline)
Service and Repair Manual
Technical changes in this issue of the
manual compared with its previous issue
are identified with a vertical change bar on
the lefthand side of columns.
– Improper installation or repair of Webasto heating and cooling systems can cause
fire or the leakage of deadly carbon monoxide leading to serious injury or death.
– Installation and repair of Webasto heating and cooling systems requires special
Webasto training, technical information, special tools and special equipment.
– NEVER attempt to install or repair a Webasto heating or cooling system unless you
have successfully completed the factory training course and have the technical skills,
technical information, tools and equipment required to properly complete the
necessary procedures.
– ALWAYS carefully follow Webasto installation and repair instructions and heed all
WARNINGS.
– Webasto rejects any liability for problems and damage caused by the system being
installed by untrained personnel.
NOTE
Air Top 2000
Advertisement
Table of Contents

Related Manuals for Webasto Air Top 2000 D


Summary of Contents for Webasto Air Top 2000 D
- Page 1 – Installation and repair of Webasto heating and cooling systems requires special Webasto training, technical information, special tools and special equipment. – NEVER attempt to install or repair a Webasto heating or cooling system unless you have successfully completed the factory training course and have the technical skills, technical information, tools and equipment required to properly complete the necessary procedures.
-
Page 2: Table Of Contents
Air Top 2000 List of Contents List of Contents Introduction Scope and Purpose..........................101 1.1.1 Use of Air Heaters........................101 Meaning of Warnings, Cautions, and Notes .................... 101 Additional Documentation to be used...................... 101 Safety Information and Regulations ......................101 1.4.1 General Safety Notes........................ - Page 3 Air Top 2000 List of Contents Troubleshooting General..............................501 General Failure Symptoms........................501 Failure Symptoms during Operation......................502 Error Code Output (Air Top 2000 Diagnosis) ..................503 Functional Tests General..............................601 Adjustments.............................601 6.2.1 Adjustment of the CO Contents....................601 Components Testing ..........................602 6.3.1 Glow Plug Resistance Test ......................602 6.3.2 Flame Sensor Resistance Test ....................602 Circuit Diagrams...
- Page 4 Air Top 2000 List of Contents Repair General..............................901 9.1.1 Work on Components after Disassembly..................901 9.1.2 Incorporation of Modifications ..................... 901 Disassembly and Assembly........................902 9.2.1 Removal of Housing Components/Covers .................. 902 9.2.2 Replacement of Control Unit ....................... 904 9.2.3 Replacement of Temperature Limiter..................
- Page 5 24V TRS Operation with Control Element in Vehicles without Auxiliary Drive..........714 Connection Diagram, Air Top 2000 Diagnosis with Combination Timer (not TRS!)........715 Fuel Supply..............................802 Webasto Fuel Tank Tap ..........................803 Fuel Tapping from Plastic Tank (tapping via fuel drain plug)................803 Fuel Tapping from Plastic Tank (tapping via fitting plate) ................803 Pipe/Hose Connection ............................804...
-
Page 6: Introduction
Air Top 2000 Introduction Safety Information and Regulations Introduction The general safety regulations for the prevention of acci- Scope and Purpose dents and the relevant operating safety instructions have to be observed at all times."General Safety Regulations" beyond the scope of these regulations are detailed in the This repair shop manual is intended to support famil- following.The specific safety regulations applicable to iarized personnel in the repair of air heaters Air Top... -
Page 7: Legal Provisions For Installation
Air Top 2000 Introduction The heater must not be installed in the passenger or Heating Air System driver compartments of busses. Should the heater never- Heating air intake openings must be arranged so that theless be installed in such a compartment, the installa- under normal operating conditions exhaust fumes of the tion box must be sealed tight against the vehicle interior. -
Page 8: Corrections And Improvements
Fuel supply must not be by means of gravity or pressurization of the fuel tank. Installation Rules for Webasto Fuel Tanks for the Fuel Supply of Heaters in Vehicles In busses the installation is not permitted in the pas- senger or driver compartment. -
Page 9: General Description
Air Top 2000 General Description A malfunction in air heaters Air Top 2000 Diagnosis out- General Description puts an error code to the display of the combination or standard timer. When equipped with a control element the operating indicator flashes. In addition a heater chec- The air heater Air Top 2000 and Air Top 2000 Diagnosis kout may be performed using a personal computer (refer with serial no. -
Page 10: Heat Exchanger
Air Top 2000 General Description Heat Exchanger Control Unit / Control Circuit Board The heat exchanger dissipates the heat provided by Air Top 2000 without Diagnosis combustion to the air delivered by the combustion and The control unit/control circuit board is the central control- heating air fan. -
Page 11: Flame Sensor
Air Top 2000 General Description Potentiometer Temperature Limiter The temperature limiter protects the air heater against excessive operating temperatures. Overheat protection is activated at temperature higher than 150 °C to inter- rupt the electrical circuit of the dosing pump and switch off the heater with run-down operation. -
Page 12: Functional Description
Air Top 2000 Functional Description 3.1.3 Stabilization Functional Description Diesel Operated Heaters Functional Description Air Top 2000 With the glow plug activated the operating speed of the combustion and heating air fan is increased. After an- without Diagnosis (Fig. 301) other 20 seconds the speed of the combustion and heat- ing air fan is continuously increased within 17 3.1.1 Control Element... -
Page 13: Control Operation
In case of overheating there will be no fuel supply. A run- NOTE down like after manual switch-off will be performed. Applicable only for Air Top 2000 D Air Heaters installed After run-down the control unit is in the error lockout in vehicles for the transportation of dangerous goods mode. - Page 14 Air Top 2000 Functional Description 100% 1,3 Hz 1,0 Hz 0,8 Hz 0,6 Hz 85 102 (20) (60) (120) typical seconds Fig. 301 Functional Diagram (Air Top 2000 without Diagnosis) Start A = Control Element Control Operation B = Temperature Sensor Rated Value reached C = Glow Plug Rated Value exceeded...
-
Page 15: Functional Description Air Top 2000 Diagnosis
Air Top 2000 Functional Description Should no proper combustion develop within 120 sec- Functional Description Air Top 2000 onds (for fuel-operated within 115 seconds) the combus- Diagnosis tion and heating air fan speed is increased to full load for approx. 30 seconds (15 seconds for fuel-operated 3.2.1 Control Element heaters) with the glow plug on and the dosing pump off (no fuel delivery) with a subsequent automatic restart. -
Page 16: Heating Operation
1.1 kW. TRS Vehicles NOTE 3.2.5 Control Operation Applicable only for Air Top 2000 D Air Heaters installed in vehicles for the transportation of dangerous goods During control operation fan speed and dosing pump (TRS). -
Page 17: Switch-Off Upon Failure
Functional Description Air Top 2000 3.2.9 Switch-off upon Failure The control unit recognises failures of individual air heater components and malfunctions in the start se- quence and in normal operation. The air heater is deactivated and enters the error loc- kout mode under the following conditions: flame sensor open or short circuit temperature sensor open or short circuit... -
Page 18: Technical Data
Air Top 2000 Technical Data Electrical Components: Technical Data Control unit, combustion air fan, dosing pump, timer*, As long as no threshold values are given, the following glow plug and control element are for 12 or 24 Volts technical data are understood to include tolerances of operation. - Page 19 Air Top 2000 Troubleshooting CAUTION Troubleshooting Troubleshooting is normally limited to the isolation of defective components. The following causes for trouble are not considered and General should always be checked for to exclude them as cause for trouble: This section describes troubleshooting procedures for the Air Heater Air Top 2000 and Air Top 2000 Diagnosis.
-
Page 20: Failure Symptoms During Operation
Air Top 2000 Troubleshooting failure symptom listed, in emergencies assistance by our Failure Symptoms during Operation service technicians may be requested (Tel. 089 / 8 57 94 - 512). The following table (Fig. 502) lists the possible failure symptoms as they might occur during the functional NOTE sequence of operation. -
Page 21: Error Code Output (Air Top 2000 Diagnosis)
Air Top 2000 Troubleshooting Error Code Output (Air Top 2000 Diagnosis) When equipped with a combination or standard timer a malfunction will cause an error code output to the dis- play of the timer for indication. NOTE When equipped with a control element the error code output is indicated by flashing of the operating indica- tor/error code indication. -
Page 22: Functional Tests 6.1 General
Air Top 2000 Functional Tests CAUTION Functional Tests Set potentiometer slowly; observe end positions. Adjustment may be performed at any electrical system General voltage. This section describes the on-vehicle and off-vehicle Clockwise rotation increases the fan speed and de- testing of the air heater to check its proper operation. creases the CO contents. -
Page 23: Components Testing
Air Top 2000 Functional Tests Components Testing CAUTION During electrical testing always ensure that the control unit and the component under test are electrically discon- nected from each other. 6.3.1 Glow Plug Resistance Test During electrical testing of the glow plug using a digital multimeter, the following readings should be obtained: Glow plug 12 Volt (red) -
Page 24: Circuit Diagrams 7.1 General
Air Top 2000 Circuit Diagrams The air heater Air Top 2000 without Diagnosis may be Circuit Diagrams operated using the control element (rated value transmit- ter/switch) or with the control element and a timer. The circuit diagrams (Figs. 709 to 713) show the possible cir- General cuits 12 or 24 Volt with The air heater Air Top 2000 Diagnosis may be operated... - Page 25 Air Top 2000 Circuit Diagrams violet black brown yellow blue = Connection, Combustion and Heating Air Fan = Connection, Dosing Pump = Connection, Flame Sensor = Connection, Glow Plug = Connection, Temperature Limiter Fig. 702 Terminal Pin Assignment, Air Top 2000 without Diagnosis...
- Page 26 Air Top 2000 Circuit Diagrams ϑ ϑ ϑ Item Nomenclature Remark Wire Gauges Air Heater Air Top 2000 < 7.5 m 7.5 - 15 m Control Unit 0.75 mm 1.5 mm Flame Sensor 1.0 mm 1.5 mm 1.5 mm 2.5 mm Temperature Sensor 2.5 mm 4.0 mm...
- Page 27 Air Top 2000 Circuit Diagrams ϑ ϑ ϑ Item Nomenclature Remark Wire Gauges Air Heater Air Top 2000 < 7.5 m 7.5 - 15 m Control Unit 0.75 mm 1.5 mm Flame Sensor 1.0 mm 1.5 mm 1.5 mm 2.5 mm Temperature Sensor 2.5 mm 4.0 mm...
- Page 28 Air Top 2000 Circuit Diagrams ϑ ϑ ϑ Item Nomenclature Remark Wire Gauges Air Heater Air Top 2000 Control Unit < 7.5 m 7.5 - 15 m Flame Sensor 0.75 mm 1.5 mm 1.0 mm 1.5 mm Temperature Sensor 1.5 mm 2.5 mm Temperature Limiter 2.5 mm...
- Page 29 Air Top 2000 Circuit Diagrams ϑ ϑ ϑ Item Nomenclature Remark Air Heater Air Top 2000 Wire Gauges Control Unit < 7.5 m 7.5 - 15 m Flame Sensor 1.5 mm 0.75 mm Temperature Sensor 1.0 mm 1.5 mm 1.5 mm 2.5 mm Temperature Limiter 2.5 mm...
- Page 30 Air Top 2000 Circuit Diagrams CAUTION: ϑ ϑ Pin 4 no ground connection ϑ Item Nomenclature Remark Air Heater Air Top 2000 Control Unit Flame Sensor Temperature Sensor Temperature Limiter Glow Plug Wire Gauges Fuse 24V 10A Flat Fuse SAE J 1284 <...
- Page 31 Air Top 2000 Circuit Diagrams CAUTION: ϑ ϑ Pin 4 no ground connection ϑ Item Nomenclature Remark Air Heater Air Top 2000 Wire Gauges Control Unit < 7.5 m 7.5 - 15 m Flame Sensor 1.5 mm 0.75 mm Temperature Sensor 1.0 mm 1.5 mm 1.5 mm...
- Page 32 Air Top 2000 Circuit Diagrams ϑ ϑ ϑ ϑ Wire Gauges Item Nomenclature Remark Air Heater Air Top 2000 < 7.5 m 7.5 - 15 m 0.75 mm 1.5 mm Control Unit 1.0 mm 1.5 mm Flame Sensor 1.5 mm 2.5 mm 2.5 mm 4.0 mm...
- Page 33 Air Top 2000 Circuit Diagrams ϑ ϑ ϑ ϑ Item Nomenclature Remark Wire Gauges Air Heater Air Top 2000 < 7.5 m 7.5 - 15 m Control Unit 1.5 mm 0.75 mm 1.0 mm 1.5 mm Flame Sensor 1.5 mm 2.5 mm Temperature Sensor 2.5 mm...
- Page 34 Air Top 2000 Circuit Diagrams ϑ ϑ ϑ Item Nomenclature Remark Wire Gauges Air Heater Air Top 2000 < 7.5 m 7.5 - 15 m Control Unit 0.75 mm 1.5 mm Flame Sensor 1.0 mm 1.5 mm 1.5 mm 2.5 mm Temperature Sensor 2.5 mm 4.0 mm...
-
Page 35: Circuit Diagrams
Circuit Diagrams Air Top 2000 ϑ ϑ ϑ Item Nomenclature Remark Wire Gauges Air Heater Air Top 2000 < 7.5 m 7.5 - 15 m Control Unit 0.75 mm 1.5 mm Flame Sensor 1.0 mm 1.5 mm 1.5 mm 2.5 mm Temperature Sensor 2.5 mm 4.0 mm... - Page 36 Air Top 2000 Circuit Diagrams ϑ ϑ ϑ Item Nomenclature Remark Wire Gauges Air Heater Air Top 2000 < 7.5 m 7.5 - 15 m Control Unit 0.75 mm 1.5 mm Flame Sensor 1.0 mm 1.5 mm 1.5 mm 2.5 mm Temperature Sensor 2.5 mm 4.0 mm...
- Page 37 Circuit Diagrams Air Top 2000 ϑ ϑ ϑ Item Nomenclature Remark Wire Gauges Air Heater Air Top 2000 < 7.5 m 7.5 - 15 m Control Unit 0.75 mm 1.5 mm Flame Sensor 1.0 mm 1.5 mm 1.5 mm 2.5 mm Temperature Sensor 2.5 mm 4.0 mm...
- Page 38 Air Top 2000 Circuit Diagrams Terminal 15 Jumper Terminal 30 Terminal 58 Terminal 31 Fig. 715 Connection Diagram, Air Top 2000 Diagnosis with Combination Timer (not TRS!)
-
Page 39: General
The air heater does not require maintenance. It should Maximum loss of pressure between suction and delivery however be checked by Webasto-trained skilled person- side of the heating air duct 1.0 mbar (10 mm water nel in regular intervals, the latest before the heating sea- column). -
Page 40: Fuel Supply
Webasto fuel tap (see Fig. 802, 803 and 804) may be used. The fuel tap is to be mounted so that air or gas bubbles can escape towards the fuel tank. - Page 41 Servicing Hole Pattern Fuel Tank Tap Gasket Tank Fitting Plate Fig. 802 Webasto Fuel Tank Tap * Use fuel tank tap only on metal fuel tanks Fig. 804 Fuel Tapping from Plastic Tank (tapping via fitting plate) Plastic Tank NOTE The fitting plate must be made of sheet metal! 8.6.2.2 Fuel Lines...
-
Page 42: Dosing Pump
8.6.3 Dosing Pump If there is the probability of contaminated fuel only the Webasto filter, Order No. 487 171, may be used. Installa- The dosing pump is a combined delivery, dosing, and tion possibly vertical up to horizontal at the most shut-off system and is subject to certain installation crite- (observe direction of flow). -
Page 43: Combustion Air Supply
If a contamniated combustion air supply is expected, a combustion air filter (Ident No. 21963A) can be fitted (Air Top 2000 D only). 8.6.6 Exhaust Line Rigid pipes made of unalloyed or alloyed steel with a minimum wall thickness of 1.0 mm have to be used as... -
Page 44: Electrical Connections
Servicing Air Top 2000 8.6.8 Electrical Connections 8.6.8.3 Connection Control Element The cable loom is prefabricated to connect to the control 8.6.8.1 Connection Air Heater, Control Element element (rated value transmitter). For plug disconnection pull on terminal plug only Electrical connection is according to Circuit Diagram (Fig. - Page 45 Air Top 2000 Servicing Control Element Air Heater Dosing Pump and Anti-Vibration Mount Fuel Filter (Accessory) Fuel Tap Exhaust Muffler Fuse Fig. 814 Example of an Installation...
-
Page 46: Removal And Installation
Locate air heater with new gasket in installation position and secure with four nuts and lock washers Withdraw cover from upper housing shell according (use original Webasto nuts only). to 9.2.1.1. Tighten nuts with 6 + 1 Nm. Disconnect plug of cable loom from control unit. - Page 47 Air Top 2000 Servicing Plug Connections Control Unit Screw (2) Lock Washer (2) Temperature Limiter Arrester Groove Fig. 815 Replacement of Control Unit and Temperature Limiter (Air Top 2000 without Diagnosis)
- Page 48 Air Top 2000 Servicing Plug Connections Control Unit Screw (2) Lock Washer (2) Temperature Limiter Arrester Groove Fig. 816 Replacement of Control Unit and Temperature Limiter (Air Top 2000 Diagnosis)
-
Page 49: Installation Of New Control Units
Air Top 2000 Servicing When replacing the control unit Air Top 2000 TRS Installation of new Control Units (24 Volt) with a control unit Air Top 2000 Diagnosis TRS (24 Volt) perform modifications per 8.8.3. CAUTION When replacing the control unit the following must be ob- WARNING served: Failure to perform modifications will result in a... - Page 50 Air Top 2000 Servicing 8.8.3 Replacement of Control Unit First Operation Air Top 2000 (24 Volt) TRS After installation of the air heater the fuel supply system must be bled thoroughly. Remove control unit according to 8.7.2.1. NOTE Remove leaf spring contacts of grey and violet wire Due to low fuel consumption several switch-ons are from connector X6, contacts 4 and 6.
-
Page 51: Work On Components After Disassembly
Air Top 2000 Repair 9.1.2.1 Installation of an External Temperature Repair Sensor (Air Top 2000 Diagnosis) General General The heater Air Top 2000 regulates the desired tempera- ture best when its temperature sensor is exposed to the This section describes the repairs that may be per- air temperature of the most probable surrounding in use. -
Page 52: Disassembly And Assembly
Air Top 2000 Repair 9.1.2.2 Removal of External Temperature Sensor Arrest leaf spring contacts in empty compartments of connector X6 (contacts 4 and 6). Polarity is irrele- (Air Top 2000 without Diagnosis) vant. Connect connector X6 and fit cover. General The heater Air Top 2000 regulates the desired tempera- Perform test run and check control behaviour. - Page 53 Air Top 2000 Repair Cover, Electrical Connection Upper Housing Shell Cover, Heating Air Outlet Lower Housing Shell Cover, Heating Air Inlet Fig. 901 Removal of Housing Components/Covers...
-
Page 54: Replacement Of Control Unit
Air Top 2000 Repair 9.2.2 Replacement of Control Unit 9.2.3 Replacement of Temperature Limiter NOTE NOTE The procedure for replacement of the control unit is The procedure for replacement of the temperature limiter identical for the air heater in installed or removed condi- is identical for the air heater in installed or removed con- tion. -
Page 55: Replacement Of Combustion Air Fan
Air Top 2000 Repair NOTE 9.2.4 Replacement of Combustion Air Fan Apply Loctite to screws (1). 9.2.4.1 Removal Bring combustion air fan into assembly position and mount using screws (1). Remove air heater (see 8.7.1.1). Torque screws (1) to 4 Nm. Remove control unit (see 8.7.2.1). -
Page 56: Replacement Of Flame Sensor
Air Top 2000 Repair CAUTION 9.2.5 Replacement of Flame Sensor The glow plug has to be pulled out with utmost care and must under no circumstances be twisted (danger of 9.2.5.1 Removal breaking). After a long period of combustion operation the glow plug may be caked by fuel deposits. - Page 57 Air Top 2000 Repair Flame Sensor Spoiler Screw (4) Locking Tab Burner Insert Combustion Tube Gasket Heat Exchanger Cable Grommet Cable Grommet Glow Plug Grommet Screw Fig. 904 Disassembly of Heat Exchanger (Sheet 1 of 2)
- Page 58 Air Top 2000 Repair Detail A Starting Air Bore Detail B Twist Lock Fig. 904 Disassembly of Heat Exchanger (Sheet 2 of 2)
-
Page 59: Replacement Of Burner Insert, Combustion Tube, And Heat Exchanger
Air Top 2000 Repair 9.2.7 Replacement of Burner Insert, Combustion Tube, and Heat Exchanger 9.2.7.1 Removal Remove air heater (see 8.7.1.1). Remove control unit (see 8.7.2.1). Remove combustion air fan (see 9.2.4.1). Remove flame sensor (see 9.2.5.1). Remove glow plug (see 9.2.6.1). CAUTION When performing the following step ensure that fuel connection is not bent. -
Page 60: Packaging/Storage And Shipping
Packaging/Storage and Shipping Packaging/Storage and Shipping 10.1 General The air heater and its components shipped to Webasto Thermosysteme GmbH for inspection or repair are to be cleaned and packaged so that they are protected against damage during handling, transportation, and storage.
Need help?
Do you have a question about the Air Top 2000 D and is the answer not in the manual?
Questions and answers