
Related Manuals for AS MOTOR AS 530/4T MK


Summary of Contents for AS MOTOR AS 530/4T MK
-
Page 1: Operating Instructions
Operating Instructions Lawnmower AS 530/4T MK From serial number: 019610020001 Issued: 16 July 2010,V12.0 EN-Translation of the Original Operating Instructions... -
Page 2: Preface
Preface Intended use Please fill in all data referring to your device. The device is exclusively intended for When ordering spare parts, provide your mowing well maintained grassed lawn areas. dealer with the device and engine number. Only use attachments and cutting tools authorised by “AS-Motor Germany”. -
Page 3: Table Of Contents
Turning ............ 15 Contents Emptying the grass collection bag ..15 Preface ............2 Switching off and parking ......16 Intended use ..........2 Maintenance and cleaning ....... 17 Explanation of the symbols......4 ... -
Page 4: Explanation Of The Symbols
Explanation of the symbols Prior to any repair and maintenance work, pull off the spark plug connector. Symbols in the instructions In these operating instructions, the following symbols are used to denote special dangers. Warning. Clean the ventilation grid! These symbols denote special The cooling air of the dangers. -
Page 5: Safety Instructions
Safety instructions Use gloves and avoid skin contact with the fuel. Get informed! Fuel up outdoors only when the engine is For your safety, read these operating cool and not running. Use a filler or funnel. instructions with care. Familiarize yourself Do not spill any fuel and do not let the fuel with the control elements and the proper use get into the canalisation or ground water. -
Page 6: Use Caution During Operation
Never use the device if covers, impact Switch off the engine, wait until the blade protection flap or grass collection bag is not comes to a standstill, and pull off the spark installed. plug connector − before you clean or check the device or Do not remove, change or override any before you carry out work on the device. -
Page 7: When Work Is Completed
− Keep your hands and feet away from rotating When mowing steep slopes, meet the parts. Keep your distance to the discharge appropriate safety measures, e.g. use area when you work with the device. step irons. − Always mow in horizontal directions, Never open the impact protection flap and never up- or downwards. -
Page 8: Use Caution During Maintenance And Repair
liable for damages that were caused by our Use caution during maintenance devices if and repair − worn or damaged parts were not repaired Only carry out maintenance work as or replaced on time described in these operating instructions. − these damages were caused by improper Have an authorised service centre carry out repair. -
Page 9: Device Description
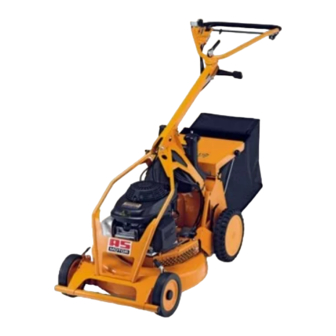
Device description Cutting height adjustment Air filter Silencer Bumper Grass collection bag Spark plug connector Impact protection flap Vario Bowden cable Tank filler spout Ventilation grid Tank ventilation Type plate Handlebar with control elements Lever for lateral adjustment of handlebar Clamping lever for height adjustment of guide bar Starter grip... -
Page 10: Control Elements
Drive off: Control elements Release the bar. Vario lever (3) With the vario lever, you can continuously adjust the speed of the device while the engine is running. MIN: = slow MAX: = fast Accelerator lever with choke (4) Blade clutch bar (1) Choke: Choke is closed (only The blade clutch bar is a protective device. -
Page 11: Assembly
Fuel valve 1: Closed 2: Open Assembly Scope of delivery The device is delivered in a carton. The scope of delivery includes: − The device. − These operating instructions. − The grass collection bag. − Tool bag with small items. Unpacking Push the button at the clamping lever and completely unscrew the clamping... -
Page 12: Inserting The Starter Rope
Inserting the starter rope On both sides of the grass collection bag: Insert screws into the eyelets of the grass collection bag, screw them in and thus secure the bracket ( 3 ) to the frame (four thread forming screws). Mounting the grass collection Press and continue to hold the blade clutch bar. -
Page 13: Transport
conditions because the lawn is susceptible to Transport sun and heat damage and will look unsightly! Switch off the engine and wait until the blade Only mow with a sharp and undamaged comes to a stop before you lift the device. It blade so that the blades of grass do not fray. -
Page 14: Checking The Engine Oil Level
Filling in the fuel: Switch off the engine and wait until the blade has come to a standstill. 1. For filling, use a canister with a filler With the adjusting lever, adjust each spout or use as funnel. wheel to the same cutting height. The 2. -
Page 15: Engaging The Blade
Engaging the blade Adjust the driving speed only when the engine is running. 1. Move the blade clutch bar all the way up and engage the latch knob. Turning 2. Press the blade clutch bar downwards to Turn the device round only where the grass the handlebar - the blade starts up. -
Page 16: Switching Off And Parking
Danger! Risk of injury caused by rotating blades. When the engine is running, never reach into the discharge channel. Emptying the grass collection bag: 1. Switch the accelerator lever to the lowest speed. 2. Disengage the blade and wait until it comes to a standstill. -
Page 17: Maintenance And Cleaning
by the warranty. Operational safety is Maintenance and cleaning endangered as well. Regular maintenance keeps your device Contact your authorised service centre for ready for use. checkup if you detect problems during maintenance. If you do not observe the maintenance notices, faults may occur that are not covered Component Action... - Page 18 Component Action Maintenance interval Before Annually and after or every each use 50 h Bowden cables Check for proper function and ease of movement. ■ ▲ Acceleration lever Check for proper function. □ ▲ Chassis and Check for rust and fissures and check the welding ■...
-
Page 19: Preparations
Cleaning the device Preparations After each use, you should clean the device thoroughly, especially the bottom side and the blade. Stuck grass or dirt affect the grass discharge and the cutting quality. For a sufficient engine Caution! Risk of injury. Guide cooling, keep the engine cover, ventilation bar can snap back. -
Page 20: Maintaining The Engine
Change the damaged or used parts 3. Remove the oil dipstick and determine especially covers, grass collection bag, the oil level by means of the marking. silencer, or fuel immediately (authorised 4. Replenish the oil if necessary. service centre). 5. Firmly screw the oil dipstick tightly back Maintaining the engine down. -
Page 21: Re-Adjusting The Drive
Re-adjusting the drive Work on the blade requires special qualifications because an unbalance test is Once the belts of the vario drive wear down, required and the torques must be observed. they start slipping. The drive of the mower does not work any more under load (e.g. Check the blade and slip clutch regularly device stops on a slope or slows down). -
Page 22: Storage
Checking the blade clutch - Pull the starter rope slowly until you get resistance (oil distribution in the Check the blade clutch for proper function by cylinder). disengaging the blade. The blade must come to a standstill from full speed within less than - Re-insert the spark plug and screw in 3 seconds. -
Page 23: Accessories
Accessories Warranty Mulching accessories E09162 The conditions of the warranty can be found on the reverse side of your warranty card. Spray paint 400 ml, colour orange E04606 Send the filled-out warranty card immediately after the purchase of your device to Operating hours counter E10740 “AS-Motor Germany”... - Page 24 Problem Possible cause Remedy Clean air filter (see also Maintenance Air filter is soiled. and cleaning). Spak plug is sooted, damaged Clean spark plug and check or incorrect electrode gap. electrode gap (see also Maintenance and cleaning). Replace spark plug if necessary.
- Page 25 Problem Possible cause Remedy Irregular noises Loose fastening elements. Authorised service centre. Silencer defective. Authorised service centre. Engine is smoking Air filter is soiled or drenched Clean or replace the air filter (see with oil. also Maintenance and cleaning). Oil level is too high. Have authorised service centre lower the oil level to the marking.
-
Page 26: Technical Data
Technical data Type AS530/4T MK Range of application (temperature) 5 – 30 °C Engine , type One cylinder four stroke engine Manufacturer Honda Type GSV 190 Cylinder capacity 189 cm Performance 3.3 kW (4.5 PS) Engine speed 2800 min See also operating instructions of engine manufacturer. -
Page 27: Declaration Of Conformity
Dec lar ation of c onfor mi t y AS-MOTOR GERMANY GmbH & Co. KG Ellwanger Straße 15 D-74424 Bühlertann www.as-motor.de Declaration of conformity We declare that the lawnmower type AS 530/4T MK with serial number starting from 019610020001 corresponds to the following guidelines: - 2006/42/EC - 2000/14/EC... - Page 28 AS-MOTOR GERMANY GmbH & Co. KG Ellwanger Straße 15 D-74424 Bühlertann www.as-motor.de Professional technology for gardens and landscapes Allmäher® Manoeuvrable meadow mower for extensive green area care. The Allmäher reliably shreds high grass, scrub, and weeds also on steep slopes and in difficult terrain. The grass cuttings are left to fertilise the ground so there is no more raking grass.
Need help?
Do you have a question about the AS 530/4T MK and is the answer not in the manual?
Questions and answers