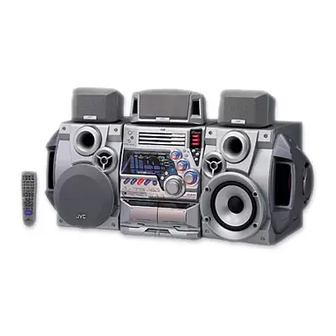
JVC CA-MXDVA9 Instructions Manual
Jvc stereo system - compact component system user manual
Hide thumbs
Also See for CA-MXDVA9:
- Instructions manual (77 pages) ,
- Instructions manual (72 pages) ,
- Service manual (73 pages)
Table of Contents
Advertisement
Quick Links
COMPACT COMPONENT SYSTEM
CA-MXDVB10 / CA-MXDVB9
CA-MXDVA9
CA-MXDVB10
CA-MXDVB9
INSTRUCTIONS
CA-MXDVA9
For Customer Use:
Enter below the Model No. and Serial
No. which are located either on the rear,
bottom or side of the cabinet. Retain this
information for future reference.
Model No.
Serial No.
GVT0057-016B
[U, UG, US, UW, UX]
Advertisement
Table of Contents

Related Manuals for JVC CA-MXDVA9


Summary of Contents for JVC CA-MXDVA9
- Page 1 COMPACT COMPONENT SYSTEM CA-MXDVB10 / CA-MXDVB9 CA-MXDVA9 CA-MXDVB10 CA-MXDVB9 INSTRUCTIONS CA-MXDVA9 For Customer Use: Enter below the Model No. and Serial No. which are located either on the rear, bottom or side of the cabinet. Retain this information for future reference.
-
Page 2: Warnings, Cautions And Others
Warnings, Cautions and Others Caution — STANDBY/ON button! Disconnect the mains plug to shut the power off completely. The STANDBY/ON button in any position does not disconnect the mains line. The power can be remote controlled. CAUTION To reduce the risk of electrical shocks, fire, etc.: 1. -
Page 3: Important For Laser Products
10 cm or more. Front view 15 cm 1 cm CA-MXDVB10 CA-MXDVB9 CA-MXDVA9 2 WARNING LABEL, PLACED INSIDE THE UNIT DANGER: Invisible laser radiation when open and interlock failed or defeated. AVOID DIRECT EXPOSURE TO BEAM. - Page 4 Introduction We would like to thank you for purchasing one of our JVC products. Before operating this unit, read this manual carefully and thoroughly to obtain the best possible performance from your unit, and retain this manual About This Manual This manual is organized as follows: •...
-
Page 5: Table Of Contents
Contents Location of the Buttons and Controls ... 3 Front Panel ... 3 Remote Control ... 5 Getting Started ... 6 Supplied Accessories ... 6 Putting the Batteries into the Remote Control ... 6 Connecting Antennas ... 6 Connecting Speakers ... 7 Connecting Other Equipment ... -
Page 6: Location Of The Buttons And Controls
Location of the Buttons and Controls Become familiar with the buttons and controls on your unit. Front Panel Front Panel – 3 –... - Page 7 Display Window See pages in the parentheses for details. Front Panel 1 Disc trays 2 STANDBY/ON button and STANDBY lamp (11, 45, 46) 3 Remote sensor 4 PRESET + / – control (15) 4 / ¢ (reverse search/forward search) control (11, 14, 20, 21, 24, 26, 34, 44 –...
-
Page 8: Remote Control
Remote Control When using the remote control, point it at the remote sensor on the front panel. Remote Control 1 FM/AM button (12, 15) Pressing this button also turns on the unit. FM MODE button* (15) 2 AUX button (12) Pressing this button also turns on the unit. -
Page 9: Getting Started
Getting Started Supplied Accessories Make sure that you have all the following items. The number in the parentheses indicates the quantity of the pieces supplied. • AM loop antenna (1) • FM antenna (1) • Remote control (1) • Batteries (2) •... -
Page 10: Connecting Speakers
AM antenna ANTENNA AM EXT AM LOOP FM 75 COAXIAL AM loop antenna (supplied) Connect the AM loop antenna to the AM LOOP terminals as illustrated. • If the AM loop antenna wire is covered with vinyl, remove the vinyl by twisting it as shown in the diagram. -
Page 11: Connecting Other Equipment
To connect a center speaker and rear speakers By connecting a center speaker and rear speakers to the SURROUND SPEAKERS jacks, you can enjoy Dolby Digital and MPEG Multichannel sound, and the DSP Surround modes. (See page 31.) SURROUND SPEAKERS REAR CENTER RIGHT... - Page 12 To connect audio equipment with an optical digital input terminal—such as digital decoder You can connect a digital decoder such as an MD recorder or a CD recorder by using an optical digital cord (not supplied). • See “About sounds output through the rear terminals” on the right.
-
Page 13: Adjusting The Voltage Selector
To connect a TV Connect your TV and this unit using the composite video cord (supplied) or an S-video cord (not supplied). • You can also use JVC’s AV COMPU LINK control system. (See page 48.) Composite S-video cord* video cord... -
Page 14: Common Operations
Common Operations Turning On or Off the Power To turn on the unit, press STANDBY/ON so that the STANDBY lamp goes off. To turn off the unit (on standby), press STANDBY/ON again so that the STANDBY lamp lights up. • A little power is always consumed even while the unit is on standby. -
Page 15: Selecting The Sources
Selecting the Sources To listen to the FM/AM broadcasts, press FM/AM. (See page 15.) To playback discs, press DVD 3¥8 (or DVD 3 on the remote control). (See pages 16 – 29.) To playback tapes, press TAPE 2 3. (See page 30.) To select the external equipment as the source, press AUX. -
Page 16: Reinforcing The Bass Sound
Reinforcing the Bass Sound You can select one of the 4 subwoofer levels. This function only affects the playback sound, but does not affect your recording. The subwoofer level can be adjusted in 4 steps— LEVEL 1, LEVEL 2, LEVEL 3, and LEVEL 4 (MAX LEVEL). -
Page 17: Creating Your Own Sound Modes -Manual Mode
Creating Your Own Sound Modes —Manual Mode You can create SEA patterns to suit your preference. These changed settings can be stored in the MANUAL 1, MANUAL 2, and MANUAL 3 modes. • There is a time limit in doing the following steps. If the setting is canceled before you finish, start from step 1 again. -
Page 18: Listening To Fm And Am Broadcasts
Listening to FM and AM Broadcasts Tuning into a Station Press FM/AM. The unit automatically turns on and tunes into the previously received station (either FM or AM). • Each time you press the button, the band alternates between FM and AM. Start searching for stations. -
Page 19: Playing Back Discs-Introduction
Playing Back Discs—Introduction Discs you can play This unit has been designed to play back discs having the marks listed below. Disc Mark Video Type (Logo) Format VIDEO NTSC Video S-Video Audio COMPACT DIGITAL AUDIO CD-R** CD-RW** • On some discs, their actual operations may be different from what is explained in this manual. -
Page 20: Disc Structure
Disc Structure A DVD disc consists of Titles, and each title may be divided into some Chapters. For example, if a DVD disc contains some movies, each movie may have its own title number, and it may be further divided into some chapters. How sounds are recorded on DVD The digital audio format used for DVD differs among discs and it is written on the package or disc itself. -
Page 21: Selecting The Audio Language Or Sound
Press CONTROL + or − to select a desired multi-angle view. • Each time you press the button, the view angle changes. 1 / 3 1 / 3 2 / 3 3 / 3 Ex.: When the disc has 3 Selecting the Audio Language or Sound For DVD, SVCD and VCD While playing a disc containing audio languages (sound... -
Page 22: Basic Disc Playback
Basic Disc Playback This unit cannot accept any disc operations while reading disc contents. Loading Discs On the unit ONLY: Press 0 for the disc tray (DVD1, DVD2, or DVD3) you want to load a disc onto. The unit automatically turns on and the disc tray comes out. - Page 23 While playing back a disc encoded with Dolby Digital, the DOLBY DIGITAL lamp on the front panel lights up. If it has multichannel signals—5.1ch, the Surround mode is automatically activated. While playing back an MPEG Multichannel disc, the Surround mode is automatically activated. •...
-
Page 24: Svcd/Vcd/Cd Playback
1:33:33 DISC TITLE CHAP. TIME BITRATE 1 2 3 4 1 : Current disc number 2 : Current title number 3 : Current chapter number 4 : Elapsed playing time of the current title 5 : Transmission rate SVCD/VCD/CD Playback •... -
Page 25: Searching For A Particular Point
Enter desired playing time by pressing the number buttons. • You can only use Time Search within a currently playing track. Ex.: To enter the time of “03:45,” press 0, 3, 4 and 5. (Always enter all 4 digits.) To cancel misentry for Time Search, press CONTROL −. -
Page 26: Menu Driven Playback
Menu-Driven Playback Menu Operations Menu-driven playback is possible while playing back a DVD with menu-driven features or a SVCD or VCD with the Playback Control (PBC) function. 7 When playing a DVD DVD discs generally have their own menus or title lists. A menu usually contains various information about the disc and playback selections. -
Page 27: Selecting Playback Modes
Selecting Playback Modes This unit cannot accept any disc operations while reading disc contents. Programming the Playing Order of the Titles and Tracks—Program Play You can arrange the order in which the titles (for DVD) and tracks (for SVCD, VCD and CD) play before you start playing. - Page 28 On the remote control: Load discs. • If the current playing source is not the DVD/SVCD/ VCD/CD player press DVD 3, then 7 before going to the next step. Press PLAY MODE. The play mode screen appears on the TV. Press CONTROL + or −...
-
Page 29: Playing At Random-Random Play
Playing at Random—Random Play The titles and tracks of all loaded discs are played at random. • When you use Random play for a SVCD or VCD with the PBC function activated, the PBC function is turned off. • Random Play cannot be used on some DVD discs. On the unit: Load discs. -
Page 30: A-B Repeat
When a DVD is a playing source. REPEAT A-B REPEAT TIME SEARCH CHAP. SEARCH REPEAT CHAPTER TITLE CHAPTER • TITLE: Current title will be repeated. • CHAPTER: Current chapter will be repeated. When a SVCD, VCD or CD is a playing source. REPEAT A-B REPEAT TIME SEARCH REPEAT Canceled... -
Page 31: Dvd/Svcd/Vcd Special Effect Playback
DVD/SVCD/VCD Special Effect Playback Still Picture/Frame-by-Frame Playback You can still a picture and advance the still picture frame by frame. Still picture On the remote control ONLY: Press 8 once during play. A still picture appears on the TV screen. Frame-by-frame playback On the remote control ONLY: Press 8 repeatedly during play to... -
Page 32: Viewing The Desired Chapters/Tracks-Digest
Viewing the Desired Chapters/Tracks—Digest You can view 9 opening scenes of chapters or tracks at a time and select desired scene from those displayed on the TV screen directly. • You cannot use this function on SVCD or VCD with the PBC function. -
Page 33: Playing Back Tapes
Playing Back Tapes You can play back type I, type II, and type IV tapes without changing any settings. Playing Back a Tape Press EJECT (0) for the deck you want to use. For Deck A Put a cassette in with the exposed part of the tape down. -
Page 34: Using Dsp Surround Mode
Using DSP Surround Mode In order to reproduce a more acoustic sound field in your listening room while playing any source, you can use following DSP Surround modes. • DSP Surround mode can be also used for a disc encoded with Dolby Digital 5.1ch or with MPEG Multichannel. -
Page 35: Recording
Recording IMPORTANT: • It may be unlawful to record or playback copyrighted material without the consent of the copyright owner. • The recording level is automatically set correctly, so it is not affected by the VOLUME, the SUBWOOFER LEVEL, the SOUND MODE, and the DSP Surround controls. Thus, during recording you can adjust the sound you are actually listening to without affecting the recording level. -
Page 36: Dubbing Tapes
Dubbing Tapes You can record from one tape to another. On the unit ONLY: Press TAPE 2 3, then 7. Put the source cassette in deck A, and a recordable cassette in deck B. • Put the cassettes in both decks so that the tapes will run in the forward (3) direction. -
Page 37: Auto Edit Recording
Auto Edit Recording By using Auto Edit Recording, you can record disc tracks to fit the tape. Auto Edit Recording makes a program by selecting disc tracks in numerical order. However, to prevent the end of the last track on the front side from being cut off, the last track is selected so as to fit on the remaining tape length. -
Page 38: Using The Microphones
Using the Microphones You can enjoy singing along (Karaoke) and microphone mixing by using two microphones. • MIC LEVEL adjustment is valid for both microphones connected to the MIC 1 and MIC 2 jacks. IMPORTANT: • Always set MIC LEVEL to MIN when connecting or disconnecting the microphone. - Page 39 If howling or squealing (feedback) occurs while using the microphone(s) Take the following actions to prevent these noises. • Adjust MIC LEVEL and VOLUME. • Avoid pointing the microphone(s) towards the speakers. • When two microphones are connected, turn off the unused microphone.
-
Page 40: Reserving Karaoke Songs -Karaoke Program Play
Reserving Karaoke Songs —Karaoke Program Play You can determine the playback order of the titles or tracks on the DVD/SVCD/VCD/CD player. You can program up to 12 steps. • You cannot use reserve function when a SVCD or VCD with the PBC function is played back. Press 7 before performing below procedure. -
Page 41: Operating The On-Screen Menu
Operating the On-Screen Menu Using the on-screen menus, you can store the initial selection for subtitle languages and audio languages (sound) for DVD playback as well as other settings. • The on-screen menu disappears if no operation is done for five minutes. -
Page 42: Changing The Initial Language Settings
Changing the Initial Language Settings On LANGUAGE menu, you can select the following initial languages. MENU LANGUAGE ENGLISH AUDIO LANGUAGE ENGLISH SUBTITLE ENGLISH ON SCREEN LANGUAGE ENGLISH PRESS • MENU LANGUAGE :Select the DVD menu language. Selectable languages—ENGLISH, SPANISH, FRENCH, CHINESE, GERMAN, ITALIAN, JAPANESE, AA –... - Page 43 More about “SPEAKER SETTING” The following example shows the ideal speaker locations for surround reproduction in your listening room. Center speaker Left front speaker 30˚ 30˚ 90˚ Left rear speaker When using front multi speaker system, refer to “Recommended Main Speakers and Subwoofers Layout” separately attached.
-
Page 44: Changing The Display Settings
7 Adjusting the center and rear speaker output levels You can adjust the speaker output level for the center speaker and rear speakers. You can adjust the output level while listening to the test tone. • Make adjustments so that the sound level of the selected speaker is set at the same level as that of the front speakers. -
Page 45: Changing The System Settings
– Select “OFF” to deactivate Resume play. Playback always starts from the beginning. • AV COMPULINK MODE : When connecting this unit to a JVC’s TV with the AV COMPULINK remote control system, select the proper setting. – Select “DVD 1” when connecting this unit to the COMPONENT VIDEO or INPUT-2 terminals on a –... -
Page 46: Using The Parental Lock
Using the Parental Lock Setting the Parental Lock Level Using this function, you can restrict playback of DVD containing violent scenes (and those not suitable for your family members). • This function is only possible for the DVDs containing such rating level information—Level 1 (most restrictive) to Level 8 (least restrictive). -
Page 47: Using The Timers
Using the Timers There are three timers available—Daily Timer, Recording Timer, and Sleep Timer. Before using the timers, you need to set the clock built in the unit. (See page 11.) Using Daily Timer With Daily Timer, you can wake to your favorite music or radio program. -
Page 48: Timer Setting
Turn 4 / ¢ to select the source to play, then press SET. • The source changes as follows: TUNER FM TUNER AM TAPE DISC– – – TUNER FM: tunes into a specified preset FM station. = Go to step 6. TUNER AM: tunes into a specified preset AM station. -
Page 49: Using Recording Timer
Using Recording Timer With Recording Timer, you can make a tape of a radio broadcast automatically. You can set the timer whether the system is on or off. How Recording Timer actually works The unit automatically turns on, tunes into the specified station, sets the volume level to “VOL MIN,”... -
Page 50: Using Sleep Timer
To turn off or on Recording Timer after its setting is done 1 Press CLOCK/TIMER repeatedly until “REC” appears on the display. 2 To turn off the Recording Timer, press CANCEL/DEMO. indicator and the REC (Recording Timer) indicator go off from the display (“OFF”... -
Page 51: Using Av Compu Link Control System
Using AV COMPU LINK Control System The AV COMPU LINK control system allows you to use JVC’s TV with simple operations. To use AV COMPU LINK control system, you need to connect this unit and a TV through the AV COMPU LINK terminals. -
Page 52: Appendix A-Maintenance
Appendix A —Maintenance To get the best performance of the unit, keep your discs, tapes, and mechanism clean. Handling discs • Remove the disc from its case by holding it at the edge while pressing the center hole lightly. • Do not touch the shiny surface of the disc, or bend the disc. -
Page 53: Appendix B-Troubleshooting
Appendix B —Troubleshooting If you are having a problem with your unit, check this list for a possible solution before calling for service. If you cannot solve the problem from the hints given here, or the unit has been physically damaged, call a qualified person, such as your dealer, for service. -
Page 54: Appendix C-Output Signals Through The Optical Digital Output Terminal
Appendix C —Output Signals Through the OPTICAL DIGITAL OUTPUT Terminal They differ according to the “DIGITAL AUDIO OUTPUT” setting. (See page 39.) DIGITAL AUDIO Playback disc DVD with 48 kHz, Linear PCM 48 kHz, Linear PCM with 96 kHz, Linear PCM 48 kHz, Linear PCM with Dolby Digital Dolby Digital bitstream... -
Page 55: Appendix E-Language Code For On-Screen Menu
Appendix E —Language Code for On-Screen Menu This code list is used when you select a language of on-screen menus. (See page 39.) Code Language Afar Abkhazian Afrikaans Ameharic Arabic Assamese Aymara Azerbaijani Bashkir Byelorussian Bulgarian Bihari Bislama Bengali, Bangla Tibetan Breton Catalan... -
Page 56: Appendix F-Country Code For Parental Lock
Appendix F —Country Code for Parental Lock This code list is used when you set a country code for parental lock. (See page 43.) Code Country Andorra United Arab Emirates Afghanistan Antigua and Barbuda Anguilla Albania Armenia Netherlands Antilles Angola Antarctica Argentina American Samoa... - Page 57 Code Country Liechtenstein Sri Lanka Liberia Lesotho Lithuania Luxembourg Latvia Libyan Arab Jamahiriya Morocco Monaco Moldova, Republic of Madagascar Marshall Islands Mali Myanmar Mongolia Macau Northern Mariana Islands Martinique Mauritania Montserrat Malta Mauritius Maldives Malawi Mexico Malaysia Mozambique Namibia New Caledonia Niger Norfolk Island Nigeria...
-
Page 58: Appendix G-Glossary
Appendix G —Glossary 4:3 Letter Box screen This is one method for displaying a wide screen picture on a conventional sized (4:3) TV. While viewing a wide screen picture, the black bars appear on the top and the bottom of the screen. 4:3 Pan-Scan screen This is one method for displaying a wide screen picture on a conventional sized (4:3) TV. -
Page 59: Specifications
10.3 kg Supplied accessories See page 6. Design and specifications are subject to change without notice. CA-MXDVA9 Output Power FRONT SUBWOOFERS: 90 W per channel, min. RMS, driven into 6 Ω at 63 Hz with no more than 10% total harmonic distortion. -
Page 60: Voltage Selector
Mains (AC) Line Instruction (not applicable for Europe, U.S.A., Canada, Australia, and U.K.) 230V 240V 127V IMPORTANT for mains (AC) line BEFORE PLUGGING IN, do check that your mains (AC) line voltage corresponds with the position of the voltage selector switch provided on the outside of this equipment and, if different, reset the voltage selector switch, to prevent from damage or risk of fire/electric shock. -
Page 61: Speaker System
INSTRUCTIONS SPEAKER SYSTEM SP-MXDVB10 Consists of SP-XDVB10, SP-WDVB10, SP-XSDVB10 and SP-XCDVB10 MANUAL DE INSTRUCCIONES: SISTEMA DE ALTAVOCES INSTRUÇÕES: SISTEMA DE ALTIFALANTES This system consists of the following systems: Este sistema se compone de los cuatro siguientes: Este equipamento compõe-se dos seguintes sistemas: MAIN SPEAKER SYSTEM : SP-XDVB10 SUBWOOFER : SP-WDVB10 SURROUND SPEAKER SYSTEM : SP-XSDVB10... - Page 62 Gratos pela aquisição dos altifalantes JVC. Antes de desfrutar este sistema, leia atentamente as instruções que o acompanham, de modo a assegurar-se da obtenção do melhor desempenho possível. Caso surjam dúvidas concernentes a este sistema, consulte o seu agente JVC. !"=gs`= !"#$ !"#$%&'() !"#...
- Page 63 MAIN SPEAKER SYSTEM : SP-XDVB10 SUBWOOFER : SP-WDVB10 MAIN SPEAKER SYSTEM : SP-XDVB10 SUBWOOFER : SP-WDVB10 SISTEMA DE ALTAVOZ PRINCIPAL : SP-XDVB10 SUBWOOFER : SP-WDVB10 SISTEMA DE ALTO-FALANTE PRINCIPAL : SP-XDVB10 SUBWOOFER : SP-WDVB10 SPEAKER FOR A/V COMBINATION SP-XDVB10 and SP-WDVB10 have a magnetically-shielded design for placement adjacent to TV’s and monitors without causing color aberrations.
- Page 64 Connection Conexión Ligaçao qO u « Main Speaker Subwoofer (Right Side) (Right Side) Altavoz principal Subwoofer (Lado derecho) (Lado derecho) Alto-falante principal Subwoofer (Lado direito) (Lado direito) (Lado esquerdo) !"# Rojo Vermelho Black Negra Preto Black Negra Preto Blue Azul Azul Amplifier output terminals Terminales de salida de amplificador...
- Page 65 CONEXIÓN • NO utilice ningún otro amplificador para operar este sistema de altavoces excepto CA-MXDVB10. • Desactive la alimentación de todo el sistema antes de conectar los altavoces al amplificador. • La capacidad máxima de potencia del altavoz principal SP-XDVB10 es de 40 W, y del Subwoofer es de 100 W.
- Page 66 !"#$%&'( • !"#$%&'"( !"#$%&'( • !"#$%&'()*+ • !" !"#$%&'( !"#$%&'()* !"#$%&'()*+, !"#$% !"#$%&'()*+$,-./01$.2345 !"#$%&'()*+,-./0 !"#$% &'(&)*+,-./0 !"#$%&'()*+,-./ !"#$%&'()*+,- !"#$%&'"()*+,-./!012 !"#$%&'() !"#$%&'()*+,- !"#$%&'()*+,-./0 !"# P= =P= !" !"#$%& !" !" × × × × !" !" !" !" !" !" US Ç_Lt ã ! ×...
- Page 67 CENTER & SURROUND SPEAKER SYSTEM CENTER SPEAKER SYSTEM : SP-XCDVB10 SURROUND SPEAKER SYSTEM : SP-XSDVB10 SISTEMA DE ALTAVOZ CENTRAL : SP-XCDVB10 SISTEMA DE ALTAVOCES PERIMÉTRICOS : SP-XSDVB10 SISTEMA DE COLUNA DE CENTRO : SP-XCDVB10 SISTEMA DE COLUNAS SURROUND : SP-XSDVB10 SPEAKER FOR A/V COMBINATION SP-XCDVB10 have a magnetically-shielded design for placement adjacent to TVs and moni- tors without causing color aberrations.
- Page 68 Amplifier Connection Conexión del amplificador Ligação do amplificador !" r C*U U UL « qO u « Center speaker Altavoz central Coluna de centro !" اﻟﺴﻤﺎﻋﺔ اﻟﻮﺳﻄﻰ Surround speakers Altavoces peromètricos Colunas surround !" اﻟﺴﻤﺎﻋﺔ اﶈﻴﻄﺔ CONNECTION A pin plug is attached to the tip of the speaker cord. If the speaker connection terminal on the amplifier to which the speaker is to be connected is a pin jack, connect the left-hand speaker’s lead to the left terminal, and the right-hand speaker’s lead to the right terminal.
- Page 69 CONEXIÓN Una clavija monopolar está fijada al extremo del cordón del altavoz. Si el terminal de conexión para altavoz en el amplificador al cual se conectará el altavoz es un jack monopolar, conecte el cable del altavoz izquierdo al terminal izquierdo, y el cable de altavoz derecho al terminal derecho.
- Page 70 !"#$%&'()'$ !"#$%&'()'*+,-. !"#$%&'()*!+ !"#$%&'"()*+,-./012345 • !"# !" • !"#$%&"'(! !"# !" • !"#$%&'()*&+,% !"#$%&'()J • !"#$%&'()*+,-.&/012345%&' !"#$%&'()*+ !"#$% !"#$%&'()*+#,-./01#.234 !"#$%&'()*+,-. !"#$ %&'()%&*+, -./0 !"#$%&'()*# !"#$%&'()*+, !"#$%&!%'()*+, -% !"#$%&'()*+(, ! "# !"# !" – UQÇ_Lt·ã !"# × × × × ! "# !"...
- Page 72 VICTOR COMPANY OF JAPAN, LIMITED EN. SP. PR. CH. AR. 0302NSMMMPJEM...
Need help?
Do you have a question about the CA-MXDVA9 and is the answer not in the manual?
Questions and answers