
Related Manuals for JVC CA-MXJD3


Summary of Contents for JVC CA-MXJD3
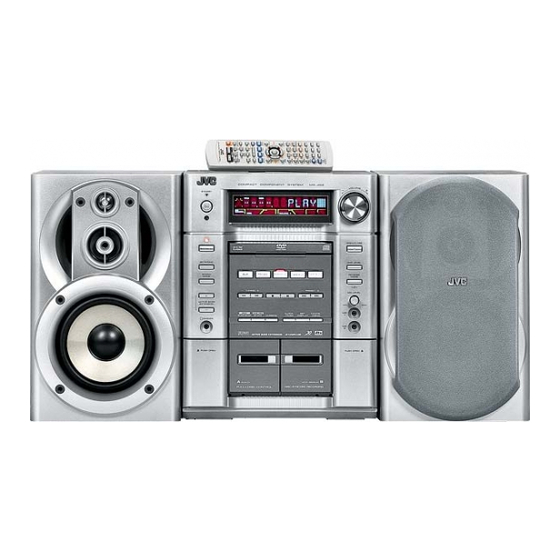
- Page 1 COMPACT COMPONENT SYSTEM MX-JD3 —Consists of CA-MXJD3 and SP-MXJD3 D I G I T A L ACTIVE BASS EXTENSION INSTRUCTIONS GVT0126-002A [UX]...
- Page 2 3. Bottom:Place on the level surface. Maintain an adequate air path for ventilation by placing on a stand with a height of 10 cm or more. FRONT VIEW SIDE VIEW 15 cm 15 cm 1 cm 1 cm 15 cm 15 cm 15 cm CA-MXJD3 CA-MXJD3 MXJD3 MXJD3 10 cm...
-
Page 3: Table Of Contents
Contents Introduction ............2 Enjoying Karaoke ..........34 Precautions ................2 Microphone Mixing............34 How to Read This Manual ..........2 Singing Along (Karaoke) ..........35 Reserving Karaoke Songs—Karaoke Program Play..36 Getting Started ............3 Timer Operations ..........37 Step 1: Unpack ..............3 Step 2: Prepare the Remote Control ........3 Setting the Timer...............37 Step 3: Hook Up ..............4 Timer Priority..............38... -
Page 4: Introduction
Introduction • If you are not going to operate the System for an extended Precautions period of time, unplug the AC power cord from the wall Installation outlet. • Install in a place which is level, dry and neither too hot nor If anything goes wrong, unplug the AC power cord and too cold—between 5°C and 35°C. -
Page 5: Getting Started
Getting Started Step : Unpack Step 1 :Unpack the package and check the accessories. After unpacking, check to be sure that you have all the following items. The number in parentheses indicates the quantity of each piece supplied. • FM antenna (1) •... -
Page 6: Step 3: Hook Up
Step : Hook Up If you need more detailed information, see page 6. Turn the power off to all components before connections. AM loop antenna (supplied) Turn it until the best reception is Illustrations of the input/output terminals below are typical obtained. - Page 7 For better FM/AM reception AM loop antenna Keep it connected. Outdoor FM Vinyl-covered wire (not supplied) antenna Extend it horizontally. (not supplied) Disconnect the supplied FM antenna, and connect to an outdoor FM antenna using a 75 Ω wire with coaxial type connector (IEC or DIN45325). FM antenna (supplied) Extend it so that you can obtain the best reception.
- Page 8 To assemble and connect the AM loop antenna To connect the speaker cords To assemble the AM loop antenna Make sure the both speakers are connected correctly and firmly. 1 Open 2 Insert 3 Close • When connecting the speaker cords, match the polarity of the speaker terminals: (+) to (+) and (–) to (–).
- Page 9 The AV COMPU LINK control system allows you to use selector on the rear of the unit and all JVC’s TV with simple operations; by starting playing back connection procedures are complete. a disc, the TV automatically turns on and changes the input mode to the appropriate position so that you can view the playback picture.
-
Page 10: Before Operating The System
Before Operating the System Audio formats Playable Disc Types INFO The System can play back the following digital audio This unit has been designed to play back the following discs: formats. • LPCM (Linear PCM) Disc Type Mark (Logo) • DIGITAL (Dolby Digital) •... -
Page 11: Parts Index
Parts Index Refer to the pages to see how to use the buttons and controls. Remote control 13, 15, 22– 25, 29, 30, 36, 43 – 45 19, 34, 36 24, 25 22, 36 23, 31, 35 26, 31 21, 35 19, 35 22, 35 15, 19, 20, 22, 23, 25, 28–... -
Page 12: About The Display Indication
About the Display Indication The indications on the display teach you a lot of things while you are operating the System. Before operating the System, be familiar with when and how the indicator illuminates on the display. TITLE GROUP CHAP. TRACK JPEG LPCM... - Page 13 1 TITLE indicator o B.S.P. indicator • Lights to indicate the title number when the source is • Lights when browsable still picture on DVD Audio is DVD Video. available (see page 22). ; Karaoke operation indicators • Lights to indicate the group title or track title when the source is an MP3/WMA disc.
-
Page 14: Daily Operations-Playback
Daily Operations —Playback ¥ Turn on the power. In this manual, the operation using the remote control The STANDBY lamp on the main unit goes off. is mainly explained; however, you can use the buttons • Without pressing (STANDBY/ON), the System and controls on the main unit if they have the same (or also turns on by pressing one of the source select similar) name and marks. -
Page 15: Listening To The Radio
Listening to the Radio INFO Main Unit ONLY To preset Stations To select the AM tuner interval spacing You can preset 30 FM and 15 AM stations. Some countries space AM stations 9 kHz apart, and other countries use 10 kHz spacing. Tune in to a station you want to preset, then enter into You can change the AM tuner intervals during the unit is the presetting mode. -
Page 16: Playing Back A Disc
Playing Back a Disc On-screen guide icons INFO • During disc playback, the following icons may appear for Before operating a disc, be familiar how a disc is recorded. a while on the TV screen: • DVD Video comprises of “Titles” which includes Appears at the beginning of a scene containing “Chapters,”... - Page 17 Remote ONLY To select an item directly For SVCD/VCD with PBC: You can select a title/chapter/track directly and start While playing a disc with PBC, “PBC” appears on the playback. display. For DVD Video, you can select a title before starting When disc menu appears on the TV screen, select an item on playback, while you can select a chapter after starting the menu.
-
Page 18: Playing Back A Tape
To change the tape running direction Playing Back a Tape INFO (deck B only) To insert a tape 3 (forward) You can play back type I tapes. 2 (reverse) • The use of C-120 or longer tape is not recommended. Push To reverse the tape automatically Main Unit... -
Page 19: Daily Operations-Sound&Other Adjustments
Daily Operations —Sound&Other Adjustments Adjusting the Volume INFO Remote Control The volume level can be adjusted in 32 steps (VOLUME MIN, VOLUME 1 – VOLUME 30, VOLUME MAX). Remote control: Main unit: SLEEP DIMMER 3/2/5/∞ Remote ENTER ONLY To drop the volume in a moment To restore the volume, press again, or SOUND adjust the volume level. -
Page 20: Selecting The Sound Modes
Enter into the SEA Control Mode. Selecting the Sound Modes • You can enter the SEA Control Mode only while the Sound Mode appears on the display. You can select one of the preset Sound Modes. TITLE Surround modes DISPLAY DANCE HALL STADIUM... -
Page 21: Selecting 3D Phonic Mode
Selecting 3D PHONIC Mode Changing the Picture Tone Remote INFO INFO ONLY While playing a disc... While showing a playback picture on the TV, you can select the preset picture tone, or adjust it and store your own 3D ACTION 3D DRAMA likeliness. -
Page 22: Changing The Display Brightness
Activate clock setting mode. GAMMA Adjust if the neutral color is bright CLOCK or dark. The brightness of dark and TIMER bright portions is maintained (–3 to +3). BRIGHTNESS Adjust if the picture is bright or • If you have already adjusted the clock before, press the dark as a whole (–8 to +8). -
Page 23: Unique Dvd/Vcd Operations
Unique DVD/VCD Operations Selecting the Sound Track Remote INFO ONLY Remote Control For DVD Video: While playing back a chapter containing audio languages, you can select the language to listen to. For DVD Audio: While playing back a track containing audio channels, you can select the audio channel to listen to. -
Page 24: Selecting The Subtitle Language
Selecting the Subtitle Language Remote Selecting a View Angle Remote ONLY ONLY For DVD Video: While playing back a chapter (of DVD While playing back a chapter (of DVD Video) containing Video) containing subtitles in different languages, you can multi-view angles, you can view the same scene from select the subtitle language to display on the TV screen. -
Page 25: Playing Back A Bonus Group On A Dvd Audio
Slow-motion playback Playing Back a Bonus Group Remote ONLY on a DVD Audio While playing... INFO Still picture playback starts. Some DVD Audios have a special group called “bonus group” whose contents are not open to the public. • To play back a bonus group, you have to enter the specific “key number”... -
Page 26: Advanced Disc Operations
Advanced Disc Operations Programming the Playing Order Remote ONLY Remote Control —Program Play INFO You can arrange the playing order of the tracks (up to 99) before you start playback. Before starting playback, activate Program Play. 10 keys PROGRAM RANDOM CANCEL PLAY MODE Canceled... -
Page 27: Playing At Random-Random Play
To skip a track: To pause: To stop: Playing at Random—Random Play Remote ONLY You can play the contents of all tracks at random. Before starting playback, activate Random Play. PROGRAM RANDOM To release, press DVD/ Canceled CD 3. TITLE Remote ONLY To check the programmed contents... -
Page 28: Playing Repeatedly
Playing Repeatedly Prohibiting Disc Ejection Remote ONLY Main Unit ONLY —Child Lock • You can also select the repeat mode using the on-screen INFO bar (see page 28). You can lock the disc tray so that no one can eject the loaded Repeat Play disc. -
Page 29: On-Screen Disc Operations
On-Screen Disc Operations About the On-screen Bar Remote control You can check the information on disc (except for MP3/ WMA/JPEG disc) and use some functions through the on- screen bar. 10 keys 1 Disc type 2 Playback information ZOOM REPEAT Indication Meanings Mbps... -
Page 30: Operations Using The On-Screen Bar
Changing the time information O perations Using the Remote ONLY You can change the time information in the on-screen bar On-screen Bar and the display window on the main unit. INFO 1 Display the on-screen bar with the pull-down menu. Basic operation procedure through the on-screen bar is as follows: TOTAL... - Page 31 Time Search 5 Finish the setting. You can move to a particular point by specifying the elapsed Pop-up window goes off. playing time from the beginning. 1 While playing (without PBC for SVCD/VCD), display the on-screen bar with the pull-down menu. •...
-
Page 32: Operations On The Control Screen
Chapter/Track Search Operations on t he CONTROL Remote ONLY You can search for the chapter (DVD Video) or track (DVD Screen Audio) number to play. INFO 1 While playing, display the on-screen bar with the pull- The CONTROL screen automatically appears on the TV down menu. - Page 33 To move the highlight bar between group list and To repeat slide-show for JPEG track list: Before starting playback... REPEAT GROUP REPEAT ALL Moves the bar to the track Canceled list. Moves the bar to the group list. GROUP Repeats the current group. Repeats all disc.
-
Page 34: Advanced Tape Operations
Advanced Tape Operations IMPORTANT Main unit It may be unlawful to record or play back copyrighted material without the consent of the copyright owner. Recording on a Tape INFO Main Unit ONLY You can use type I tapes for recording. •... -
Page 35: Dubbing Tapes
Start playing the source—“FM,” “AM,” “DVD/CD,” Synchronized Disc Recording INFO “TAPE-A” or “AUX.” Main Unit ONLY • When recording a disc, you can also use “Synchronized Disc Recording” (see the right column). You can start and stop both disc play and tape recording at the same time. -
Page 36: Enjoying Karaoke
Enjoying Karaoke IMPORTANT Remote control • Always set MIC LEVEL to MIN when connecting or disconnecting the microphone. • MIC LEVEL adjustment is valid for both microphones connected to the MIC 1 and MIC 2 jacks. DO NOT keep the microphones connected 10 keys while they are not in use. -
Page 37: Singing Along (Karaoke)
To use microphone only Singing Along (Karaoke) INFO Turn MIC LEVEL to MIN. You can enjoy singing along (Karaoke) and microphone mixing by using two microphones. The Karaoke reduces the lead vocal of any disc (except for DVD Audio) source. Turn MIC LEVEL to MIN. -
Page 38: Reserving Karaoke Songs-Karaoke Program Play
Start playback. Reserving Karaoke Songs Remote ONLY —Karaoke Program Play You can determine the playback order of the titles or tracks on the disc player. You can program up to 12 steps. Change the source to the “DVD/CD.” To check the programmed contents Activate Karaoke Program mode. -
Page 39: Timer Operations
Timer Operations Setting the Timer INFO Main unit Main Unit ONLY Using Daily Timer, you can wake up with your favorite song. On the other hand, with Recording Timer, you can make a tape of a radio broadcast automatically. • To correct a misentry during the process, press CANCEL/ DEMO. -
Page 40: Timer Priority
To turn off the Timer after its setting is done Turn off the System (on standby) if you have set the timer with the System turned on. You can turn off the timer after it has been set. • Since Daily Timer is activated at the same time everyday, you may need to cancel it on some particular days. -
Page 41: Set Up Menu Operations
Set up Menu Operations Operating Procedure Remote ONLY Remote control You can use the Set up Menus only when a disc is selected as the source and its playback is not yet started. Ex.: Selecting “STILL PICTURE” for “FILE TYPE”: 10 keys Show the set up menu. -
Page 42: Language Set Up Menu
7 PICTURE Set up Menu Repeat steps 3 to 4 to set other items on the same INFO Setup Menu. You can select the desired options concerning a picture or Repeat steps 2 to 4 to set other items on another Setup monitor screen. -
Page 43: Audio Set Up Menu
7 AUDIO Set up Menu PICTURE SOURCE INFO You can obtain optimal picture quality by selecting an You can adjust the sound settings of the System. appropriate option—picture source type (either video source or film source). AUDIO Select one of the following: DIGITAL AUDIO OUTPUT STREAM/PCM DOLBY SURROUND... -
Page 44: Others Set Up Menu
AV COMPULINK MODE You can compress the dynamic range (the difference When connecting the System to a JVC’s TV with the AV between the loudest sound and the softest sound) to enjoy a COMPU LINK remote control system, select the proper powerful sound even at a low volume level when listening to setting. -
Page 45: Restricting The Review-Parental Lock
Select “COUNTRY CODE,” then display the pop-up Restricting the Review Remote window. ONLY —Parental Lock PARENTAL LOCK COUNTRY CODE NONE SET LEVEL You can restrict playback of DVD Video containing violent _ _ _ _ PASSWORD EXIT scenes and those unsuitable for your family members. Once you have set the rating level, such violent scenes (for which SELECT TO SELECT. - Page 46 To change the setting To release Parental Lock temporarily When you set a strict rating level, some discs may not be Display the PARENTAL LOCK sub menu. played back at all. When you try to play such a disc, the •...
-
Page 47: Operating The Tv
Operating the TV Operating TV Remote control You can operate the JVC’s or other manufacturers’ TV using this remote control. Keep pressed until the following steps are complete. 10 Keys Enter the code setting mode. TV/VIDEO ENTER TV CHANNEL - / + Enter the 2-digit manufacture’s code number. -
Page 48: Additional Information
Additional Information • For MP3/WMA playback... Learning More about This System – MP3 discs are required a longer readout time than regular CDs. (It depends on the complexity of the group/file Before Operating the System (see pages 8 to 11) configuration.) Playable Disc Types: –... - Page 49 Advanced Tape Operations • The clock may gain or lose 1 to 2 minutes per month. If this (see pages 32 to 33) happens, reset the clock. Recording on a Tape: • The recording level is automatically set correctly. Thus, Unique DVD/VCD Operations (see pages 21 to 23) you can adjust the sound you are actually listening to...
-
Page 50: Maintenance
Timer Operations • Be careful not to scratch the surface of the disc when (see pages 37 to 38) placing it back in its case. Setting the Timer: • Avoid exposure to direct sunlight, temperature extremes, • If you do not specify the preset station or track number and moisture. -
Page 51: Troubleshooting
MP3/WMA or JPEG files are not played back. Troubleshooting ] The inserted disc may include both types of tracks (MP3/WMA files and JPEG files). In this case, you can If you are having a problem with your System, check this list only play back the files selected by the “FILE TYPE”... -
Page 52: Language Code List
Language Code List Javanese Slovenian Afar Georgian Samoan Abkhazian Kazakh Shona Afrikaans Greenlandic Somali Ameharic Cambodian Albanian Arabic Kannada Serbian Assamese Korean (KOR) Siswati Aymara Kashmiri Sesotho Azerbaijani Kurdish Sundanese Bashkir Kirghiz Swedish Byelorussian Latin Swahili Bulgarian Lingala Tamil Bihari Laothian Telugu Bislama... -
Page 53: Country/Area Codes List For Parental Lock
Country/Area codes list for Parental Lock √ Denmark Jordan Andorra Dominica Japan United Arab Emirates Dominican Republic Kenya Afghanistan Algeria Kyrgyzstan Antigua and Barbuda Ecuador Cambodia Anguilla Estonia Kiribati Albania Egypt Comoros Armenia Western Sahara Saint Kitts and Nevis Netherlands Antilles Eritrea Korea, Democratic People’s Angola... -
Page 54: Optical Digital Output Signals
Nepal Sweden Trinidad and Tobago Nauru Singapore Tuvalu Niue Saint Helena Taiwan New Zealand Slovenia Tanzania, United Republic of Oman Svalbard and Jan Mayen Ukraine Panama Slovakia Uganda Peru Sierra Leone United States Minor Outlying Islands French Polynesia San Marino United States Papua New Guinea Senegal... -
Page 55: Specifications
General Specifications Power requirement: AC 110 V / AC 127 V / AC 220 V / AC 230 V – AC 240 V Amplifier section (adjustable with the voltage selector), Output Power: 100 W per channel, min. RMS, driven into 50 Hz / 60 Hz 6 Ω... - Page 56 Mains (AC) Line Instruction (not applicable for Europe, U.S.A., Canada, Australia, and U.K.) VOLTAGE SELECTOR VIDEO NTSC ANTENNA RIGHT LEFT COMPONENT S-VIDEO VIDEO OUT LOOP COMPU LINK (75 ) COAXIAL CAUTION for mains (AC) line OPTICAL BEFORE PLUGGING IN, do check that your DIGITAL OUTPUT mains (AC) line voltage corresponds with the...
Need help?
Do you have a question about the CA-MXJD3 and is the answer not in the manual?
Questions and answers