Table of Contents
Advertisement
Advertisement
Table of Contents

Subscribe to Our Youtube Channel
Related Manuals for Worlde Panda


Summary of Contents for Worlde Panda
- Page 1 PANDA MIDI CONTROLLER USER’S MANUAL HANGZHOU WORLDE DIGITAL PIANO CO.,LTD...
-
Page 2: Table Of Contents
......Section 2: Basic MIDI Control From Panda line .. -
Page 3: Introduction
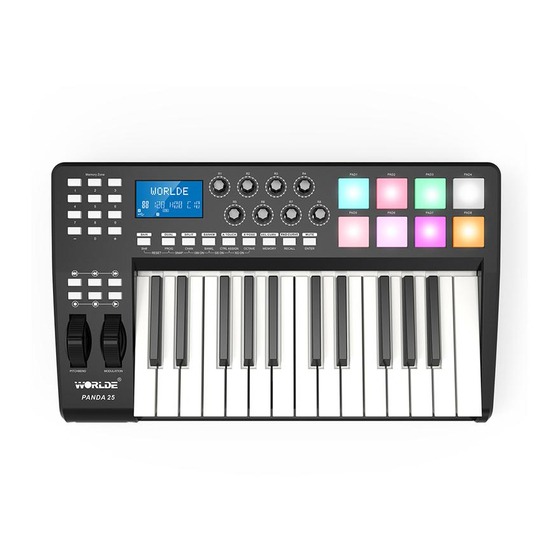
The eight fully assignable pads give you the ability to trigger samples. The eight fully assignable endless rotary encoders and sliders can be assigned as135 controllers. The versatile and easy-to-use Panda keyboard is a great controller in the studio and live on stage. What’s in the Box ? Panda keyboard <... -
Page 4: Top/Back Panel Overview
Section1: Getting Started 1.1 Panda Keyboards Overview 1.1.1 Top Panel Overview 1.1.2 Back Panel Overview 1.1.3 Control Definitions The controls are referred by name throughout this manual. Power switch LCD DISPLAY Pitch Bend wheel Slider(49/61 only ) Modulation wheel Encoders... -
Page 5: Setup
1.2 Setup If you intend to connect your Panda keyboard to a computer, please read sections 1.2 and 1.3 first. If you only intend to use your Panda keyboard to control a sound module or synthesizer using the external MIDI OUT you should skip to section 1.4. -
Page 6: Power Supply
1.5 Power Supply If you are using your Panda with a computer via its USB port, there is no need for an external power supply. Your Panda will draw its power from the computer. However, if you are intending to use your Panda without connecting to a computer’s USB port, then you will need to use an external power supply. -
Page 7: The Keyboard
Every time you press a key, a MIDI note message is sent with a velocity value between 0 and the maximum; this value specifies how hard you pressed the key. Since different people have different playing styles, your Panda offers a number of different velocity curves. You should experiment with the different velocity curves to find the curve that best suits your playing style. -
Page 8: Channel
2.3 CHANNEL Channel selection function button, selecting current MIDI channel. When this button is valid, the LCD displays the ‘Channel’ and the current channel number. The channel can be selected with +/- Button or Numeric button and confirmed by Enter button. The initial setting is 1,adjusting scale is 1~16.The LCD displays the following: 2.4 CHANGING VOICE AND VOICE BANK 2.4.1 PROGRAM Voice adjusting function button. -
Page 9: Midi Controller Messages
MIDI gear. Examples of these controllable parameters include volume, pan, expression, reverb, chorus and portamento. Each of the controls on your Panda keyboard is able to send any of the 128 standard MIDI controller messages to control such parameters. Please note that in order for these effects to work, the MIDI device you are sending to must be able to receive these messages. -
Page 10: Section 3: Advanced Settings
2.5.6 MASTER VOLUME It sends GM Master Volume message(F0 7F 7F 04 01 00 xx F7) 2.5.7 PAD SETTING Activate a pad, Press the Ctrl Assign button .The LCD display will display the currently assigned controller of the pad. The controller number 128 is for pad note. Press shift” to edit the Pad note. Enter the new pad number you want the pad to assigned with the numeric button or +/- button. -
Page 11: Other Controls
3.2 Other controls 3.2.1 MUTE MUTE ON/OFF function button. When MUTE function is ON, The LCD shows ‘MUTE ON’ no MIDI info will be sent. The LCD displays the following: 3.2.2 ASSIGN ASSIGN mode ON/OFF function button. When ASSIGN mode is ON, The LCD shows ‘ASSIGN’, default as assigning the controller number. -
Page 12: Memory And Data Call Back
3.2.5 XG Press CTRL ASSIGN and OCTAVE buttons at the same time(25)/XG ON button (49 and 61)to send GM ON message (F0 43 10 4C 00 00 7E 00 F7).LCD shows ‘XG ON’ when the message is sent. The LCD displays the following: 3.2.6 Reset Press PROGRAM and SHIFT buttons at the same time(25)/RESET button (49 and 61) to reset the system restoring to f actory setting, sending system initial setting info at the same time. -
Page 13: Control Functions
3.5.1 Pressure Control Using the pressure control, the pads give you a different type of performance option on your Panda. You can control parameters on your software in a way that would not be possible on a standard dial or slider. The pressure pads can be used to make some very interesting effects. -
Page 14: Section 4: Usage Examples
LogicTM, although there are many different sequencing applications available for your computer. In order to use the Panda with your sequencer, you need to set up the sequencer software so that the Panda is recognized as the sequencer’s MIDI input device. -
Page 15: Section 6: Troubleshooting
Section 6: Troubleshooting The Panda has been designed to give you high performance MIDI control. It has been tested under a wide range of system and operating conditions. However, there are virtually limitless numbers of operating scenarios, any of which could affect your system’s performance. -
Page 16: Section 8: Appendices
Section 8: Appendices Appendix A - MIDI IMPLEMENTATION CHART Function Transmitted Recognized Remarks Basic Default 1-16 Channel Changed 1-16 Mode Default Mode 3 Messages Altered ***** Note 0-127 Number True Voice ***** Velocity Note ON Note OFF After Key’s Touch Channel Pitch Bend Control... -
Page 17: Appendix B - Useful Midi Data Tables
Appendix B – Useful MIDI Data Tables BI-General MIDI Instruments-Program Change Numbers Piano Bass Reed Synth Effects 32 Acoustic Bass 64 Soprano Sax 96 SFX Rain 0 Acoustic Grand Piano 1 Bright Acoustic Piano 33 Fingered Bass 65 Alto Sax 97 SFX Soundtrack 2 Electric grand Piano 34 Electric Picked Bass... - Page 18 B2-Roland GS And Yamaha XG NRPN Messages NRPN NRPN Data Data CC99 CC98 CC06 CC38 08 00-7F (-64 - 0 - +63) Vibrato Rate (relative change) 09 00-7F (-64 - 0 - +63) Vibrato Depth (relative change) 0A 00-7F (-64 - 0 - +63) Vibrato Delay (relative change) 20 00-7F (-64 - 0 - +63) Filter Cutoff Freq.
-
Page 19: Appendix C - General Midi Controller Numbers (Midi Cc's)
P rogra m Chang e RPN Coarse RPN Fine NRPN Co arse NRPN Fin e Appendix D – Assignable Controller Numbers to Linear Controllers This table applies to the following controls on your Panda: Sliders < Aftertouch strip < Pitch bend wheel <... -
Page 20: Appendix F - Assignable Controller Numbers To Rotary Encoders
Appendix F – Assignable Controller Numbers to Rotary Encoders This table only applies to the Rotary encoders on your Panda 0~127 G ener al con tro ller PAD co ntr oller P itch Ben d Master Vo lume P rogra m Chang e... -
Page 21: Appendix I - Hexadecimal Conversion Chart
Hexadecimal value Decimal value Hexadecimal value Decimal value Hexadecimal value Decimal value Contact informati on: HANGZHOU WORLDE DIGITAL PIANO CO., LTD 5 Houshan Road, GujiaQiao, Wuchang Industry Park, Yuhang District, Hangzhou, Zhejiang 310023,China Tel:+86-571-88 730848 Fax:+86-571-88 730748 Email:sales@worl de.com.cn Website:www.worl de.com.cn...
Need help?
Do you have a question about the Panda and is the answer not in the manual?
Questions and answers