Table of Contents
Advertisement
Quick Links
Download this manual
See also:
Installation Manual
Advertisement
Table of Contents

Related Manuals for SMART Board Board 2000i


Summary of Contents for SMART Board Board 2000i
- Page 1 Installation Guide Rear Projection SMART Board™ 2000i Interactive Whiteboard...
- Page 2 SMART Technologies ULC. Information in this manual is subject to change without notice and does not represent a commitment on the part of SMART.
-
Page 3: Important Information
Important Information Please read this manual carefully before setting up and using the Rear Projection SMART Board™ 2000i interactive whiteboard. WARNING The projector inside the unit is a high brightness light source. Don’t look directly into the beam of light. Prevent children from looking directly into the beam. - Page 4 If you must run a cable over the floor, lay it in a flat, straight line, and secure it to the floor with tape or a cable management strip of contrasting color. • If your SMART product requires replacement parts, use parts that are specified by SMART Technologies ULC. Important Information...
-
Page 5: Table Of Contents
Starting the 2000i .......................... 17 Putting the 2000i into Standby Mode .................... 18 Turning off the 2000i ........................19 Using the SMART Board Interactive Whiteboard................20 Changing the Display Source for the Projector ................22 Adjusting the Volume ........................23 Adjusting the Height of the Interactive Whiteboard ............... - Page 6 Customer Support Online Support ..........................33 Training ............................33 Contacting SMART Technical Support ..................33 General Inquiries........................... 33 Warranty............................34 Registration ........................... 34 Index Table of Contents 99-00530-20 REV B0...
-
Page 7: About The 2000I
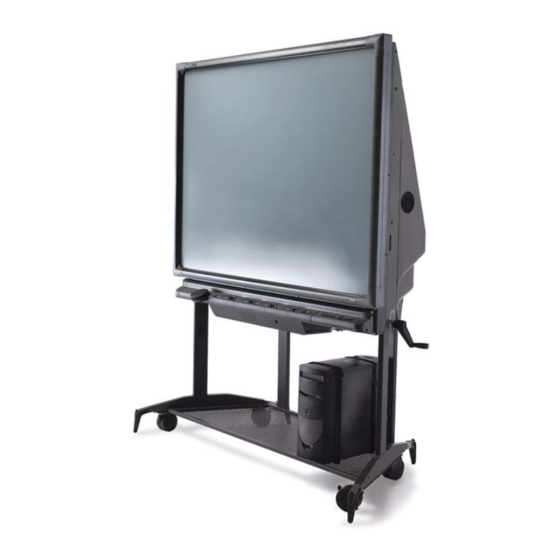
About the 2000i The 2000i is a Rear Projection SMART Board interactive whiteboard with an integrated LCD projector and a 66" (167.6 cm) diagonal interactive screen. A mirror system reflects the projected image onto the back of the interactive whiteboard screen, eliminating the shadows that can occur with a front projection system. -
Page 8: Pen Tray Features
Pen Tray Buttons Using a pen tray pen, you can write over the computer image with digital ink. You can use SMART Board software to change any of these pens to highlighters, assign a new color, or alter their width. -
Page 9: Setting Up The 2000I
Setting Up the 2000i Use this section of the manual to find out how to: • position the 2000i (this page) • install and connect the computer (page 4) • install the videoconferencing/laptop shelf (page 5) • connect a guest laptop (page 6) •... -
Page 10: Installing And Connecting A Computer
7. Remove the locking pins from either side of the 2000i. IMPORTANT You must remove the locking pins before you proceed with the installation or adjust the unit’s height. Installing and Connecting a Computer When you install the internal computer, use the bundle of cables that hangs down towards the storage tray. -
Page 11: Installing The Videoconferencing/Laptop Shelf
4. Connect the Computer 1 Serial cable to an available serial receptacle on the computer. NOTE: If the computer doesn’t have an available serial receptacle, connect the provided SMART USB adapter between the Computer 1 Serial cable and the USB receptacle on the computer. -
Page 12: Connecting A Guest Laptop
Connecting a Guest Laptop You can connect and control a laptop computer by touching the interactive screen only if you purchase and install the X-Port 20 switch option for the 2000i or install and run LinQ™ software. The X-Port 20 unit is an RS-232 serial switch that establishes a serial connection with a laptop, enabling you to both write over the displayed laptop image with a pen tray pen and control the laptop by touching the screen. - Page 13 2. Connect standard RCA audio cables (not supplied) from the VCR’s RCA Audio (or Audio OUT) outputs to the two Audio IN jacks on the rear of the 2000i. Keep the right and left channel connections correct for stereo sound. Audio IN Jacks NOTE: You can’t connect the audio cables from both a VCR and a DVD player to the connection panel at the same time.
-
Page 14: Connecting An External Monitor Or Projector
Connecting an External Monitor or Projector You can output the projector’s Computer 1 IN signal to an external monitor or projector. Connect an HD DB15 video cable (not supplied) from the Monitor OUT connector on the back of the projector to the external projector or monitor. NOTE: You can’t output the projector’s Computer 2 (DVI-I) IN signal. -
Page 15: Finalizing The Installation
• selecting the projector’s picture settings (page 10) • adjusting the projected image (page 10) • installing SMART Board software on the connected computer (page 14) • configuring the computer port (page 15) • orienting the interactive whiteboard (page 15) -
Page 16: Selecting The Projector's Picture Settings
Selecting the Projector’s Picture Settings The NEC VT595 projector has six picture settings, each optimized for a specific purpose. To obtain the best picture for the 2000i, select a picture setting of High-Bright. NOTE: The High-Bright option provides the brightest image, but it also reduces the life of the lamp. - Page 17 NOTE: When you first connect the projector, you may need to fine-tune the image. To optimize the image in RGB mode automatically, press the Auto Adjust button on the projector’s remote control. This will eliminate vertical banding, flickering, video noise, dot interference and cross talk. To adjust the projector focus 1.
- Page 18 3. While carefully observing the bottom edge of the image at the right side, use the supplied 7/16" nut driver to gently loosen or tighten the nut that’s located on the right side of the projector plate, as required. To adjust the image laterally 1.
- Page 19 To adjust the image size 1. If you’ve not done so already, remove the view port cover (page 10). 2. Crouch behind the projector and look at the projected image through the view port. 3. Using the security key from the accessory kit, gently loosen the three TORX M4 security screws that secure the projector to the projector plate.
- Page 20 4. Carefully slide the projector backward or forward to alter the image size. 5. When the image is the correct size, gently tighten the three screws that you loosened in step 3. To move the image vertically 1. Crouch down, facing the screen. Look underneath the pen tray and locate the electronics tray. You’ll see a large access hole covered with a plastic cap on the right side of the electronics tray.
-
Page 21: Installing Smart Board Software
This ensures that the interactive whiteboard is fully functional whenever you start the computer. When SMART Board tools are open, the SMART Board icon appears in the notification area (Windows computers) or in the Dock (Macintosh computers). - Page 22 Finalizing the Installation 99-00530-20 REV B0...
-
Page 23: Basic Operations
Basic Operations This section shows you how to: • start the 2000i (this page) • put the 2000i into Standby mode (page 18) • turn off the 2000i (page 19) • use the interactive whiteboard (page 20) • change the projector display source (page 22) •... -
Page 24: Putting The 2000I Into Standby Mode
To start the 2000i The following table explains how you can restore the 2000i to a fully operational state. What You See What You Should Do The screen is black and The projector is in Standby mode (with the lamp off). the Lamp On LED is Press the Lamp On button on the control panel. -
Page 25: Turning Off The 2000I
At the end of a session, log off the computer (for security) and put the 2000i into Standby mode to turn off the projector lamp and conserve the lamp’s life. To maintain normal operating conditions, make sure the projector is in Standby mode outside of normal, daily (eight hour) operation. -
Page 26: Using The Smart Board Interactive Whiteboard
Using the pen tray tools Using a pen tray pen, you can write over the computer image with digital ink. You can use SMART Board software to change any of these pens to highlighters, assign a new color, or alter their width. - Page 27 Floating Tools. LinQ software Using LinQ software, you can link the laptop to a SMART interactive product. After you establish the connection, you can use LinQ software to show the laptop’s video output on the interactive screen.
-
Page 28: Changing The Display Source For The Projector
Changing the Display Source for the Projector You can use the three source buttons on the control panel to change the video and audio input source for the projector and cabinet audio amplifier. Choose from the internal computer, a connected guest laptop or external computer (X-Port 20 switch option only) and a VCR or DVD player. -
Page 29: Adjusting The Volume
Adjusting the Volume To increase the volume, press and hold the Volume Up button on the control panel. To decrease the volume, press and hold the Volume Down button on the control panel. Volume Up Volume Down To restore the default volume level (no sound), press and hold both Volume buttons simultaneously. - Page 30 To adjust the height of the interactive whiteboard To raise the screen, turn the height-adjustment handle clockwise. The maximum height is 83" (210.8 cm). To lower the screen, turn the height-adjustment handle counterclockwise. The minimum height is 69" (175.3 cm) from the floor. Be careful not to lower the interactive whiteboard on top of the computer on the storage tray.
-
Page 31: Maintaining The 2000I
Maintaining the 2000i This section shows you how to: • clean the interactive whiteboard and other components (this page) • clean the projector (page 26) • clean the projector’s filter (page 26) • replace the projector’s lamp and filter (page 27) •... -
Page 32: Cleaning The Projector
Cleaning the Projector Clean the projector and its lens periodically. To clean the projector 1. Shut down the computer and the projector. 2. Wipe the projector’s casing with a damp cloth. If necessary, use a mild detergent. Don’t use a strong detergent or a solvent, such as alcohol or thinner. -
Page 33: Replacing The Projector Lamp And Filter
Standby mode and stays in Standby mode until you replace the lamp. CAUTION Replace the projector lamp only with the NEC VT85LP lamp (SMART part number 01-00227). These lamps are available from NEC or SMART. Don’t use any other lamps. - Page 34 4. Disconnect the 2000i from the power outlet. 5. Note the lettered and numbered positions of the two thumbscrews on the left side. 6. While a second person supports the projector, remove the two thumbscrews and carefully allow the projector to swing down. Keep the thumbscrews nearby, as you’ll need them later. Thumbscrews Filter Access Points Lamp Access...
-
Page 35: Restoring Projector Settings
To clear the lamp hour meter 1. Press the Menu button on the projector’s remote control. 2. Press the down arrow to highlight the Reset option and press the Enter button. 3. Press the down arrow to highlight the Clear Lamp Hours option and press Enter. A message appears asking for confirmation. -
Page 36: Calibrating The Cameras
Each digital camera in the interactive screen is calibrated to recognize the position of a pen tray tool or your finger on the screen’s surface and to send this information to SMART Board software. The software then interprets the information as mouse clicks or digital ink in the appropriate location. -
Page 37: Waste Electrical And Electronic Equipment Regulations
WEEE recycling agency for recycling and disposal advice. Your SMART product required the extraction and use of natural resources for its production. It may contain hazardous substances. By disposing of electrical and electronic equipment appropriately, you lower the impact of these substances upon health and the environment and reduce the pressure on natural resources. - Page 38 Waste Electrical and Electronic Equipment Regulations 99-00530-20 REV B0...
-
Page 39: Customer Support
Contacting SMART Technical Support SMART Technical Support welcomes your call. However, if you experience difficulty with your SMART product, you may want to contact your local reseller first. Your local reseller may be able to resolve the issue without delay. -
Page 40: Warranty
Warranty Product warranty is governed by the terms and conditions of SMART’s “Limited Equipment Warranty” that shipped with the SMART product at the time of purchase. Registration A User Registration card was included with your 2000i. To help us serve you, fill in and mail this card to SMART Technologies ULC or register online at www.smarttech.com/registration. -
Page 41: Index
Image Adjustment 10 Projector 26 Installing Computer Settings Computer 4 Configuring 9 Laptop Shelf 5 Recommended Settings 9 SMART Board Software 14 Configuring Videoconferencing Shelf 5 Computer Port 15 Interactive Whiteboard, see 2000i Computer Settings 9 Laptop Connecting 6 Switching to 22... - Page 42 Matching the Computer’s Resolution to the Raising 24 Projector’s Resolution 9 Setting Up the 2000i 3 Monitor Settings 9 SMART Board Interactive Whiteboard, see 2000i SMART Board Software 14 SMART Board Tools 20 Standby Mode 18 Starting the 2000i 17...
- Page 44 SMART Technologies 1207 – 11 Avenue SW, Suite 300 Calgary, AB T3C 0M5 CANADA www.smarttech.com/support www.smarttech.com/contactsupport Support +1.403.228.5940 Toll Free 1.866.518.6791 (Canada/U.S.) 99-00530-20 REV B0...
Need help?
Do you have a question about the Board 2000i and is the answer not in the manual?
Questions and answers